Introduction & Inspiration
I’m an absolute enthusiast for homemade no-churn ice cream recipes because they deliver incredibly creamy, delicious results without any special machine, and this recipe for No-Churn Coffee-Caramel Crunch Ice Cream is a true showstopper! It features a rich, coffee-infused ice cream base made with instant espresso powder, which is then loaded with luscious swirls of dulce de leche and crunchy, buttery toffee bits. It sounded like the perfect, indulgent frozen dessert for any coffee and caramel lover.
My inspiration for diving into this particular recipe came from a deep love for complex, multi-textured ice creams that you’d typically find at a gourmet scoop shop. The combination of bold coffee flavor, sweet and creamy dulce de leche, and the satisfying crunch of toffee bits seemed like a perfect trio. The fact that it could all be achieved so easily at home using the classic no-churn method was incredibly appealing.
My goal is to guide you step-by-step through making this sophisticated yet surprisingly simple ice cream. We’ll cover how to create the smooth coffee-flavored base, the technique for beautiful swirls, and how to achieve a perfectly creamy, scoopable result. It’s a fantastic recipe for a special treat or an impressive homemade dessert.
Let’s get ready to whip up some incredible coffee-caramel goodness!
Nostalgic Appeal / Comfort Food Connection
This No-Churn Coffee-Caramel Crunch Ice Cream beautifully taps into the comforting nostalgia of classic coffee ice cream while adding layers of modern indulgence. Coffee ice cream is a beloved, timeless flavor, evoking memories of classic ice cream parlors, sophisticated desserts, and that perfect, slightly bitter, and sweet combination. It’s a grown-up comfort food favorite.
This recipe takes that familiar comfort and elevates it with luscious swirls of dulce de leche (a creamy caramel) and crunchy toffee bits. These additions are reminiscent of popular “candy bar” or “swirl” style ice creams that are always a delightful and indulgent treat.
The no-churn method itself, while a modern convenience, connects to the simple joy of making homemade ice cream. It feels resourceful and satisfying to create such a creamy, luxurious dessert without special equipment.
Making and enjoying this ice cream feels like indulging in a gourmet scoop shop creation, but with the added comfort and satisfaction that comes from making something truly special in your own kitchen.
Homemade Focus (No-Churn Technique & Flavorful Swirls)
This recipe is a fantastic celebration of creating an artisanal-quality ice cream at home using the incredibly simple and effective no-churn technique. The homemade focus shines through in the creation of the rich coffee-infused base and the artful incorporation of swirls and textures.
I love recipes that demystify seemingly complex desserts. The classic no-churn base, a brilliant combination of sweetened condensed milk and freshly whipped heavy cream, is the heart of this recipe’s ease and creamy texture. Making this base yourself allows you to infuse it with high-quality instant espresso powder for a deep, authentic coffee flavor.
The homemade artistry continues with the assembly. Instead of just mixing everything together, you’re gently dotting the ice cream base with rich dulce de leche and crunchy toffee bits, then lightly swirling them through to create beautiful, distinct ribbons of caramel and pockets of crunch in every scoop. This careful, homemade layering technique is what makes the final result so visually appealing and texturally exciting.
From whipping the cream to carefully swirling in the caramel and toffee, every step emphasizes the satisfying process of creating a unique, multi-layered, and incredibly delicious homemade ice cream.
Flavor Goal
The primary flavor goal of this No-Churn Coffee-Caramel Crunch Ice Cream is a rich, indulgent, and multi-textured frozen dessert with a harmonious balance of bold coffee, sweet creamy caramel, and buttery, crunchy toffee.
The ice cream base itself should be smooth and creamy, with a prominent and authentic coffee flavor from the instant espresso powder, all balanced by the sweetness of the condensed milk.
The swirls of dulce de leche should provide ribbons of intense, milky, caramel-like sweetness and a soft, chewy texture when cold.
The toffee bits should offer a delightful, buttery, crunchy contrast to the smooth, creamy ice cream and the soft caramel swirls.
The overall effect is a sophisticated, decadent ice cream that is rich, creamy, and packed with the complementary flavors and textures of coffee, caramel, and toffee in every single bite.
Ingredient Insights
Let’s explore the key components that create this decadent no-churn ice cream:
- Sweetened condensed milk: The secret weapon for no-churn ice cream. Its high sugar content and low water content create a smooth, creamy texture by preventing the formation of large ice crystals, eliminating the need for a traditional churner.
- Instant espresso powder: Provides deep, concentrated coffee flavor that dissolves easily into the condensed milk base. Good quality espresso powder will yield the best, most robust flavor.
- Heavy cream, cold: Whipped to firm peaks, this is the other crucial no-churn component. It incorporates air, giving the ice cream its light, scoopable texture. It must be very cold to whip properly.
- Salt: A pinch of fine salt is essential for balancing the intense sweetness of the condensed milk and dulce de leche, and for enhancing the coffee and caramel flavors.
- Jarred dulce de leche: A thick, creamy, caramelized milk sauce, similar to caramel but often richer and milkier. It’s used for the soft, sweet swirls. Caramel sauce can substitute but may have a different consistency.
- Toffee bits: Provide a buttery, sweet crunch. You can use pre-made toffee bits (like Heath bits) or crush your favorite toffee bars.
The quality of the instant espresso and the dulce de leche will significantly impact the final flavor.
Essential Equipment
This no-churn recipe requires very basic tools, with an electric mixer being the most important:
- An Electric mixer (handheld or a stand mixer with the whisk attachment): Essential for whipping the heavy cream to stable, firm peaks.
- A Freezer-safe 9-by-5-by-3-inch metal loaf pan or a 2-quart baking dish, chilled: The recipe specifies a metal loaf pan. Metal chills and freezes faster and more evenly than glass, which is ideal for setting ice cream quickly. Chilling the pan beforehand is a great tip.
- Large bowls: One for the condensed milk mixture, and another (preferably chilled) for whipping the heavy cream.
- A Whisk: For combining the condensed milk and espresso powder base.
- A Rubber spatula: Essential for gently folding the whipped cream and the base together, and for creating the swirls.
- Plastic wrap: For covering the ice cream during freezing.
- Measuring cups and spoons.
A good electric mixer and a chilled metal loaf pan are your keys to success.
List of Ingredients with Measurements
Here’s the complete list of ingredients, with precise measurements:
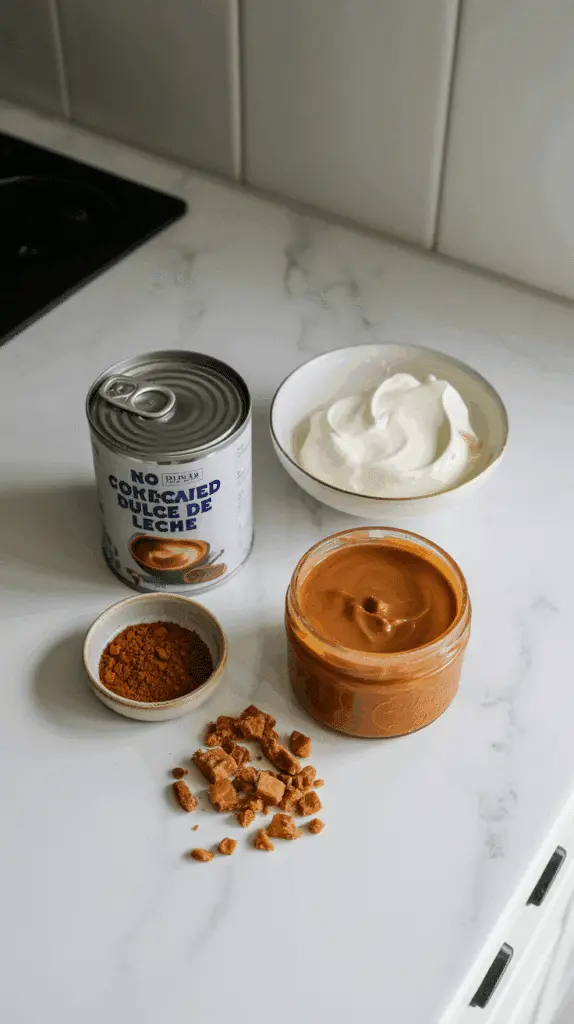
- ¾ cup sweetened condensed milk
- 2 tablespoons instant espresso powder
- 1 ½ cups plus 1 tablespoon heavy cream, divided (1 tbsp for base, 1 ½ cups for whipping)
- Pinch of fine salt
- ⅓ cup jarred dulce de leche, plus more for topping
- ⅓ cup toffee bits, divided
These quantities are perfect for a standard 9×5-inch loaf pan.
Use very cold heavy cream for the best whipping results.

Step-by-Step Instructions (Easy No-Churn Ice Cream!)
Let’s whip up this incredibly simple and decadent no-churn ice cream:
1. Prepare Your Pan and Coffee Base:
- Place a 9-by-5-by-3-inch metal loaf pan or a similar 2-quart freezer-safe baking dish in the freezer to chill thoroughly.
- In a large mixing bowl, whisk together the ¾ cup of sweetened condensed milk, 2 tablespoons of instant espresso powder, 1 tablespoon of heavy cream, and a pinch of fine salt.
- Whisk vigorously until the espresso powder is dissolved and the mixture is smooth. The recipe notes that the espresso powder may still look slightly speckled, which is perfectly fine.
2. Whip the Heavy Cream:
- In a separate large bowl (preferably chilled, with chilled beaters), pour in the remaining 1 ½ cups of cold heavy cream.
- Using an electric mixer on medium-high speed, whip the cream until it holds stiff, firm peaks. This should take about 1-2 minutes. Firm peaks mean that when you lift the beaters out of the cream, the peak stands up straight without curling over.
3. Combine the Mixtures (Folding is Key!):
- Take about half a cup of the whipped cream and gently fold it into the condensed milk and coffee mixture using a rubber spatula. This step lightens the heavy coffee base, making it easier to incorporate into the rest of the whipped cream without deflating all the air.
- Now, pour the lightened coffee mixture into the large bowl with the remaining whipped cream.
- Gently fold everything together with the rubber spatula, using large, sweeping motions from the bottom up and over the top, until the mixture is just well blended and no white streaks of cream remain. Be careful not to stir or overmix, as this will knock the air out of the whipped cream and result in a denser, icier ice cream.
4. Create the Swirls:
- Dot the prepared ice cream mixture with spoonfuls of the ⅓ cup of dulce de leche.
- Sprinkle with all but a few teaspoons of the toffee bits.
- Using a rubber spatula or a knife, gently drag it through the mixture a few times to lightly swirl the dulce de leche and toffee bits into the ice cream base. Don’t overmix, or you’ll lose the distinct swirl pattern.
5. Assemble in Pan and Freeze:
- Remove the chilled loaf pan from the freezer.
- Spoon the ice cream mixture into the chilled loaf pan. Spread it into an even layer with your spatula.
- Dot the top with a bit more dulce de leche and sprinkle with the remaining toffee bits. Drag a spatula through the top one last time to lightly swirl the toppings.
- Cover the pan tightly with plastic wrap.
- Freeze until the ice cream is firm and scoopable, at least 6 hours, or preferably overnight for the best texture.
6. Serve:
- To serve, if the ice cream is very hard straight from the freezer, let it sit at room temperature for 5-10 minutes to soften slightly for easier scooping.
- Scoop into bowls or cones and enjoy!
Gentle folding and a good swirl are the secrets to a beautiful final product!

Troubleshooting
No-churn ice cream is simple, but a few things can affect the texture:
- Problem: Ice cream is icy or has a crystalline texture, not creamy.
- Solution: The heavy cream might not have been whipped to stiff enough peaks, or the mixture was over-folded, knocking out the air that prevents large ice crystals. Ensure you use full-fat sweetened condensed milk and heavy cream. A properly cold freezer also helps it set quickly, reducing crystal formation.
- Problem: Instant espresso powder is clumpy in the finished ice cream.
- Solution: Whisk the espresso powder very thoroughly into the sweetened condensed milk and the 1 tablespoon of cream at the beginning. Sifting the powder first can also help prevent clumps.
- Problem: Ice cream is overly sweet.
- Solution: No-churn ice creams using sweetened condensed milk are inherently quite sweet. Using a strong, slightly bitter espresso powder and the pinch of salt helps to balance this. Serving smaller portions is also a good idea!
- Problem: Swirls disappeared and everything mixed together.
- Solution: Be gentle when swirling! Use a knife or spatula and make only a few sweeping “S” or figure-eight motions through the batter. Don’t stir or mix after adding the dulce de leche and toffee.
Whipping the cream to stiff peaks is the most important step for a creamy texture.
Tips and Variations
Let’s customize this decadent coffee-flavored ice cream:
- Tip: For the best results, use a high-quality instant espresso powder for a deep, robust coffee flavor.
- Variation: If you don’t have dulce de leche, a very thick, good-quality caramel sauce can be used as a substitute, though the flavor is slightly different.
- Tip: Chill your mixing bowls and mixer beaters in the freezer for 15 minutes before whipping the cream for the fastest, most stable whipped cream.
- Variation (Mix-ins!): Add other complementary mix-ins along with the toffee bits, such as mini chocolate chips, chopped toasted almonds, or crumbled chocolate cookies.
- Tip: For a stronger coffee flavor, you can increase the instant espresso powder slightly (e.g., to 2.5 or 3 tablespoons), but be aware this will also add more bitterness to balance the sweetness.
- Variation: Add other flavorings to the base, like ½ teaspoon of almond extract or a tablespoon of a coffee liqueur like Kahlúa (for adults). Alcohol will make the ice cream slightly softer. Drink with moderation.
- Variation (Chocolate Swirl): Instead of or in addition to dulce de leche, create a swirl with your favorite thick chocolate fudge sauce.
A fantastic base for creating your ultimate coffee-lover’s ice cream!
Serving and Pairing Suggestions
This No-Churn Coffee-Caramel Crunch Ice Cream is a rich and sophisticated dessert.
Serving: Serve scooped into chilled bowls or waffle cones.
Pairing & Occasions:
- Dessert: An elegant and impressive end to a dinner party.
- Affogato Style: Pour a shot of hot espresso over a scoop for an intense double-coffee experience.
- With Baked Goods: Fantastic alongside a simple shortbread cookie, a piece of biscotti, or a slice of rich chocolate cake or fudgy brownies.
- Special Treat: A perfect indulgent treat for a cozy evening or a celebration.
Its rich, complex flavors make it a memorable dessert.
Nutritional Information
This is a very rich and indulgent ice cream made with heavy cream, sweetened condensed milk, dulce de leche, and toffee. Nutritional info is highly approximate (per ½ cup serving, assuming recipe yields about 6-8 servings):
- Calories: 350-450+
- Fat: 20-30+ grams
- Saturated Fat: 12-18+ grams (High from heavy cream, condensed milk, butter in toffee)
- Cholesterol: 60-90+ mg
- Sodium: 100-200+ mg
- Total Carbs.: 35-45+ grams
- Dietary Fiber: <1 gram
- Sugars: 30-40+ grams (Very high from condensed milk, dulce de leche, toffee)
- Protein: 4-6 grams
Definitely a decadent treat, high in sugar and saturated fat. Enjoy in moderation!
PrintEasy No-Churn Coffee-Caramel Crunch Ice Cream
Make easy No-Churn Coffee-Caramel Crunch Ice Cream! This simple recipe features a creamy coffee base with rich swirls of dulce de leche and crunchy toffee bits.
Ingredients
Here’s the complete list of ingredients, with precise measurements:
- ¾ cup sweetened condensed milk
- 2 tablespoons instant espresso powder
- 1 ½ cups plus 1 tablespoon heavy cream, divided (1 tbsp for base, 1 ½ cups for whipping)
- Pinch of fine salt
- ⅓ cup jarred dulce de leche, plus more for topping
- ⅓ cup toffee bits, divided
These quantities are perfect for a standard 9×5-inch loaf pan.
Use very cold heavy cream for the best whipping results.
Instructions
Let’s whip up this incredibly simple and decadent no-churn ice cream:
1. Prepare Your Pan and Coffee Base:
- Place a 9-by-5-by-3-inch metal loaf pan or a similar 2-quart freezer-safe baking dish in the freezer to chill thoroughly.
- In a large mixing bowl, whisk together the ¾ cup of sweetened condensed milk, 2 tablespoons of instant espresso powder, 1 tablespoon of heavy cream, and a pinch of fine salt.
- Whisk vigorously until the espresso powder is dissolved and the mixture is smooth. The recipe notes that the espresso powder may still look slightly speckled, which is perfectly fine.
2. Whip the Heavy Cream:
- In a separate large bowl (preferably chilled, with chilled beaters), pour in the remaining 1 ½ cups of cold heavy cream.
- Using an electric mixer on medium-high speed, whip the cream until it holds stiff, firm peaks. This should take about 1-2 minutes. Firm peaks mean that when you lift the beaters out of the cream, the peak stands up straight without curling over.
3. Combine the Mixtures (Folding is Key!):
- Take about half a cup of the whipped cream and gently fold it into the condensed milk and coffee mixture using a rubber spatula. This step lightens the heavy coffee base, making it easier to incorporate into the rest of the whipped cream without deflating all the air.
- Now, pour the lightened coffee mixture into the large bowl with the remaining whipped cream.
- Gently fold everything together with the rubber spatula, using large, sweeping motions from the bottom up and over the top, until the mixture is just well blended and no white streaks of cream remain. Be careful not to stir or overmix, as this will knock the air out of the whipped cream and result in a denser, icier ice cream.
4. Create the Swirls:
- Dot the prepared ice cream mixture with spoonfuls of the ⅓ cup of dulce de leche.
- Sprinkle with all but a few teaspoons of the toffee bits.
- Using a rubber spatula or a knife, gently drag it through the mixture a few times to lightly swirl the dulce de leche and toffee bits into the ice cream base. Don’t overmix, or you’ll lose the distinct swirl pattern.
5. Assemble in Pan and Freeze:
- Remove the chilled loaf pan from the freezer.
- Spoon the ice cream mixture into the chilled loaf pan. Spread it into an even layer with your spatula.
- Dot the top with a bit more dulce de leche and sprinkle with the remaining toffee bits. Drag a spatula through the top one last time to lightly swirl the toppings.
- Cover the pan tightly with plastic wrap.
- Freeze until the ice cream is firm and scoopable, at least 6 hours, or preferably overnight for the best texture.
6. Serve:
- To serve, if the ice cream is very hard straight from the freezer, let it sit at room temperature for 5-10 minutes to soften slightly for easier scooping.
- Scoop into bowls or cones and enjoy!
Gentle folding and a good swirl are the secrets to a beautiful final product!
Recipe Summary and Q&A
Let’s conclude with a summary and common questions:
Recipe Summary:
No-Churn Coffee-Caramel Crunch Ice Cream is an easy frozen dessert made without an ice cream machine. A base is created by whisking sweetened condensed milk with instant espresso powder, salt, and a touch of cream. Cold heavy cream is whipped to stiff peaks, and then the coffee mixture is gently folded into the whipped cream. Luscious swirls of dulce de leche and crunchy toffee bits are folded in before the mixture is poured into a loaf pan, topped with more swirls, and frozen until firm.
Q&A:
Q: Can I make this ice cream ahead of time? A: Yes, this dessert must be made ahead to allow for freezing time. You can make it completely up to a week in advance and keep it well-covered in the freezer.
Q&A: How do I store leftover no-churn ice cream? A: Store leftovers in a shallow, airtight, freezer-safe container. Pressing a piece of plastic wrap or parchment paper directly onto the surface of the ice cream before sealing helps prevent ice crystals from forming. It’s best enjoyed within 1-2 weeks.
Q&A: Can I use brewed coffee instead of instant espresso powder? A: It’s not recommended. Brewed coffee would add too much water to the base, making the final product very icy. Instant espresso powder provides concentrated coffee flavor without adding excess liquid, which is crucial for the creamy texture of no-churn ice cream.
Q&A: What is dulce de leche and can I use regular caramel sauce? A: Dulce de leche is a thick, sweet confection made by slowly heating sweetened milk. It has a richer, milkier, and often thicker texture than standard caramel sauce (which is made from sugar and water, then often enriched with cream and butter). You can use a very thick caramel sauce, but the flavor and texture will be slightly different.
Q&A: Why does my whipped cream need to have stiff peaks? A: In no-churn ice cream, the air whipped into the heavy cream is what takes the place of the air incorporated by a traditional ice cream churner. Whipping to stiff, stable peaks ensures the ice cream has a light, airy, and scoopable texture rather than being a dense, frozen block of sweet milk.
Did Our Recipe Hit The Spot?
There are no reviews yet. Be the first one to write one.


