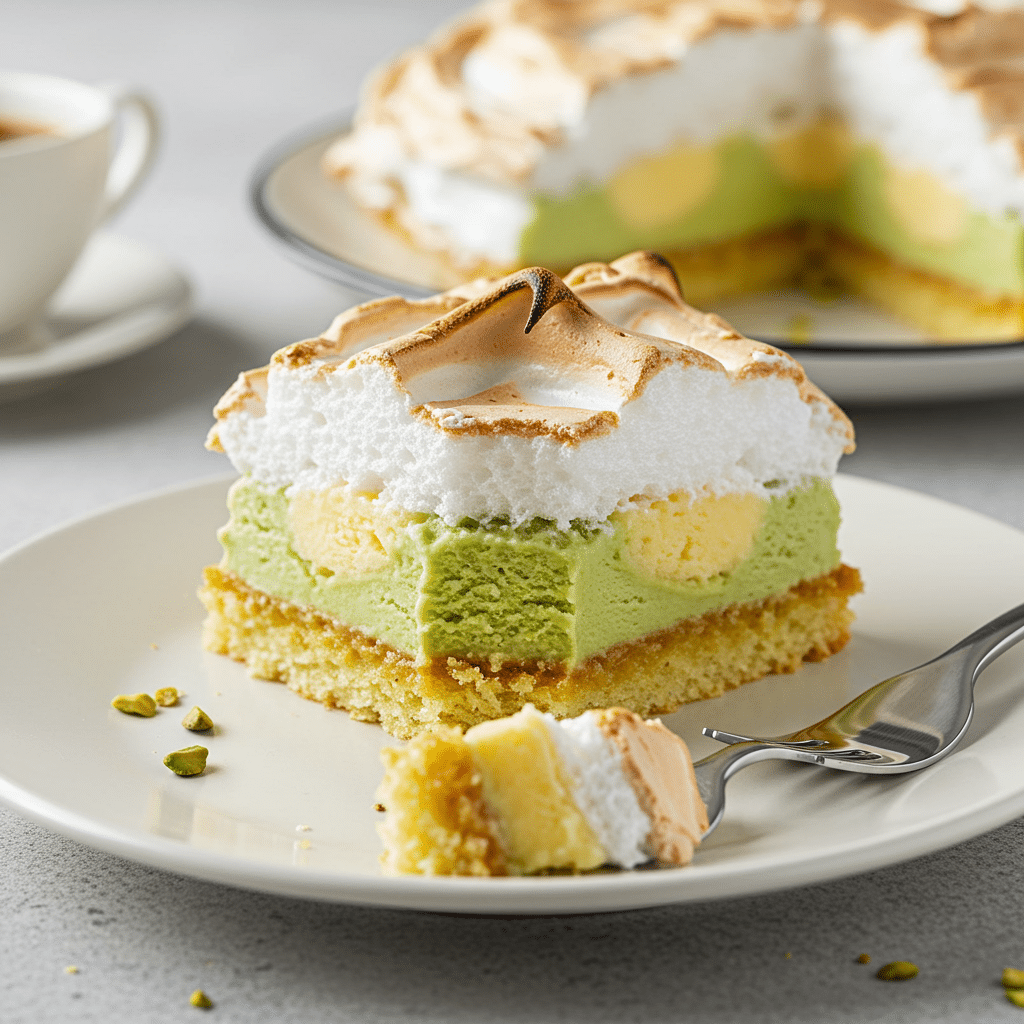
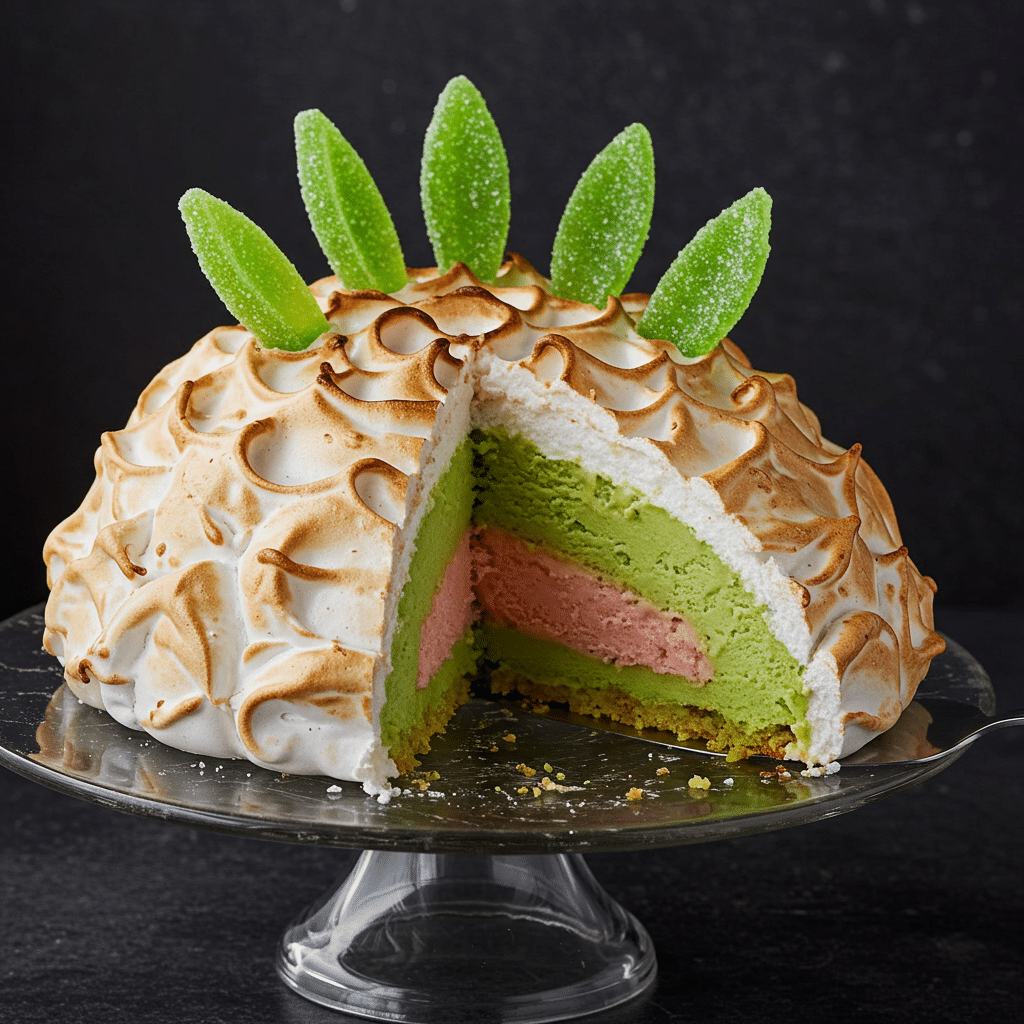
Are you ready to create a dessert so spectacular, so whimsical, and so utterly delicious that your guests will talk about it for years to come? Prepare yourself for the ultimate showstopper: the Baked Hawaii. This magnificent creation is a playful twist on a classic Baked Alaska, sculpted to look like a tropical pineapple and packed with incredible flavor.
This recipe will guide you through every step of creating your own Baked Hawaii. It’s a true culinary project, featuring a core of homemade pineapple ice cream and pistachio gelato, a pound cake base, a stable and glossy toasted honey meringue “skin,” and adorable, edible pineapple fronds made from candy melts. While it’s a multi-day process, each individual step is completely achievable. This is your master class in creating a truly unforgettable dessert.
What makes this Baked Hawaii so special is the journey of its creation and the absolute awe it inspires at the table. It’s the perfect centerpiece for a milestone birthday, a summer luau, or any celebration that calls for a true masterpiece. Let’s embark on this fun, rewarding, and delicious adventure together!
Table of Contents
Table of Contents
Your Game Plan for a Perfect Baked Hawaii
A spectacular dessert like this Baked Hawaii is best tackled over a couple of days. This project timeline breaks it down into easy, manageable stages so you can enjoy the process without feeling overwhelmed.
- Day 1 (About 1 hour active time): Focus on the frozen components. Make the pineapple ice cream base and pour it into its mold to freeze. While it freezes, create the green candy pineapple fronds. Once the first ice cream layer is firm, add the pistachio and pound cake layers and let the whole core freeze solid overnight.
- Day 2 (About 1.5 hours active time): Today is all about the meringue and final assembly. Make the honey meringue and do the initial “sculpting” of the pineapple shape. Let it freeze to firm up. Later, pipe the decorative stars all over the cake and give it another freeze. Finally, toast the meringue with a kitchen torch.
- Serving Day: Right before you present your masterpiece, gently insert the candy fronds into the top. Prepare for applause!
The Anatomy of This Dessert Masterpiece
Each component of this Baked Hawaii is chosen to contribute flavor, texture, and to the incredible visual effect.
- The Pineapple Ice Cream: We create a rich, no-churn ice cream by caramelizing crushed pineapple to concentrate its flavor, then folding it into a base of sweetened condensed milk and fresh whipped cream. This creates a creamy, tropical core.
- The Italian Honey Meringue: This isn’t a standard meringue. By whipping a hot honey-sugar syrup into egg whites, we create an Italian meringue. It’s dense, stable, glossy, safe to eat (since the eggs are cooked by the syrup), and holds its piped shape perfectly. It also toasts beautifully with a kitchen torch without weeping or collapsing. This is the secret to the “baked” element of your Baked Hawaii.
- The Candy Fronds: These whimsical green candy melt leaves are the crowning glory that completes the pineapple illusion.
Essential Ingredients for Your Baked Hawaii
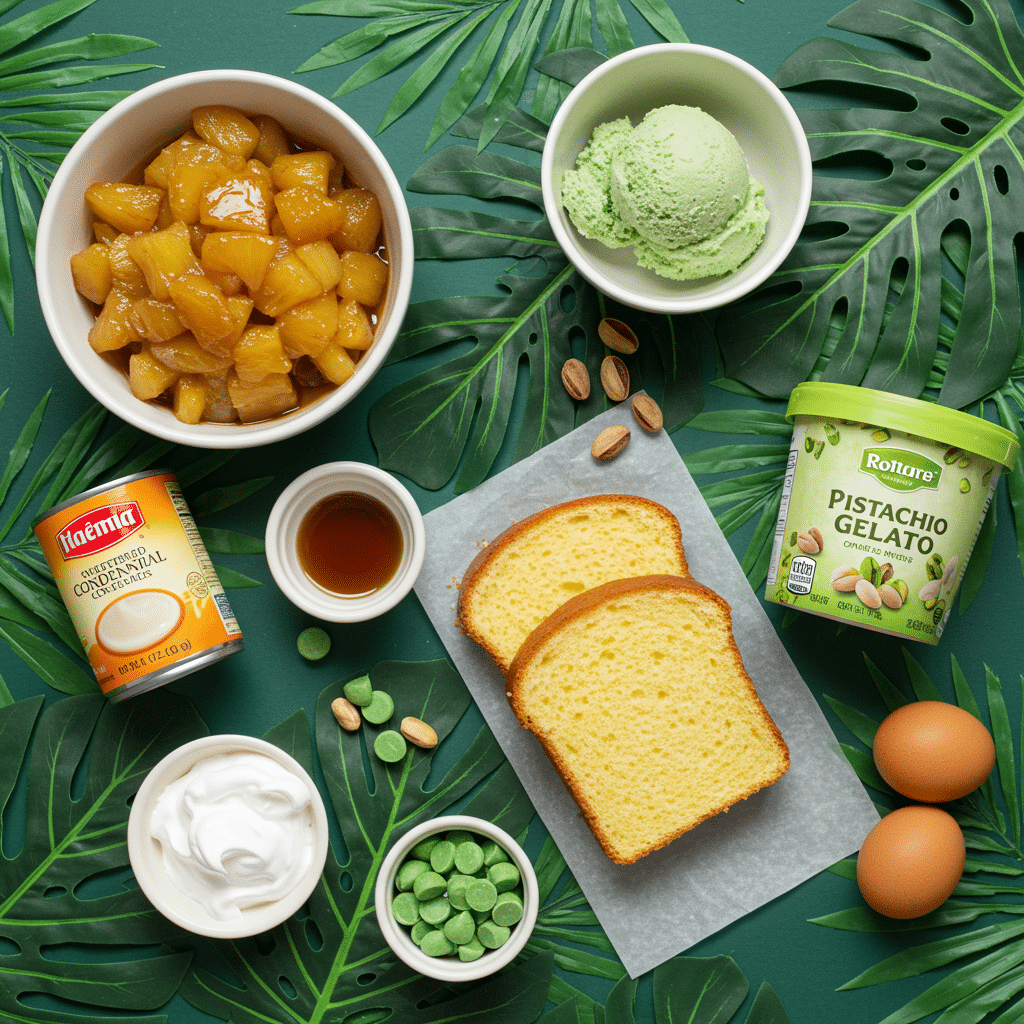
This recipe uses a combination of homemade elements and smart store-bought shortcuts.
- For the Pineapple Ice Cream & Core:
- Crushed Pineapple: Canned crushed pineapple is perfect here. We cook it down to caramelize the sugars and remove excess water.
- Sweetened Condensed Milk & Heavy Cream: The duo that creates our easy, no-churn ice cream base.
- Pistachio Gelato: A store-bought pint adds a lovely nutty flavor and beautiful green color, creating a layered effect inside the Baked Hawaii.
- Pound Cake: A store-bought loaf makes a simple and sturdy base for the cake.
- For the Italian Honey Meringue:
- Honey & Sugar: Creates the hot syrup that cooks and stabilizes the egg whites.
- Egg Whites & Cream of Tartar: The cream of tartar helps the egg whites whip up to their full potential and remain stable.
- For the Fronds:
- Green Candy Melts: These are easy to find at craft or baking supply stores. They melt smoothly and harden quickly without the need for complicated tempering.

The Ultimate Guide to Assembling Your Baked Hawaii
Follow these detailed instructions, broken down by component, for a flawless result.
Part 1: Create the Ice Cream Core (Day 1)
- Caramelize the Pineapple: Melt the butter in a large nonstick skillet over medium-high heat. Add the crushed pineapple and all its juices. Cook, stirring occasionally, until all the liquid has evaporated and the pineapple is deeply golden and caramelized, about 10-12 minutes. Transfer this to a medium bowl.
- Make the Ice Cream Base: Stir the sweetened condensed milk and salt into the caramelized pineapple. Cover the bowl and place it in the freezer for 30 minutes to chill completely.
- Whip the Cream: In a stand mixer, beat the heavy cream and vanilla until stiff peaks form.
- Fold it All Together: Stir the chilled pineapple mixture to loosen it up, then gently fold in the whipped cream until just combined. You have now made the pineapple ice cream base for your Baked Hawaii.
- Assemble the Core: Line a 1-quart plastic deli or soup container with plastic wrap, leaving a 4-inch overhang. Add about 2 cups of the pineapple ice cream, smooth the top, cover, and freeze for 3 hours until solid.
- Add Final Layers: Top the solid pineapple ice cream layer with the softened pistachio gelato, pressing it down to fill any gaps. Cut a 4 1/2-inch round from your pound cake and press it firmly onto the top of the gelato. Cover with the overhanging plastic wrap and freeze overnight until rock solid.
Part 2: Create the Meringue & Fronds (Day 1 or 2)
- Make the Candy Fronds: Melt the green candy melts with coconut oil over a pot of simmering water. Following a printed template placed under parchment paper, use a small piping bag to outline the frond shapes. Freeze for 5 minutes. Then, “flood” the outlines with the remaining melted candy. Freeze until completely hard, about 15 minutes.
- Make the Honey Meringue: In a saucepan, boil the honey, sugar, and 1/3 cup water until a candy thermometer reads 240°F. Meanwhile, whip the egg whites, cream of tartar, and salt in a stand mixer until soft peaks form.
- Stabilize the Meringue: With the mixer running on high, very carefully pour the hot syrup into the whipping egg whites in a thin, steady stream. Continue to whip until the meringue is very thick, glossy, and has cooled to room temperature, about 4-5 minutes. Transfer this stable meringue to a large piping bag.
Part 3: The Grand Assembly (Day 2)
- Unmold and Sculpt: Unmold the frozen ice cream core onto a cake stand. Use small pound cake rounds and dabs of meringue to build up a tapered shape at the top. Using an offset spatula, cover the entire core in a “belt” of meringue, sculpting it into a pineapple shape. Freeze for 2 hours.
- Pipe the Details: With the remaining meringue in a piping bag fitted with a star tip, cover the entire surface of the sculpted pineapple with concentric bands of meringue stars. Freeze for another 30 minutes.
- Toast the Meringue: Using a kitchen torch, carefully toast the meringue all over until it is golden brown in spots. Immediately return the Baked Hawaii to the freezer for at least 10 minutes.
- Final Presentation: Just before serving, use a sharp knife to cut a small slit in the top of the cake. Gently insert your hardened candy fronds. Serve your incredible Baked Hawaii immediately to thunderous applause.

The Ultimate Baked Hawaii: A Show-Stopping Dessert Project
An elaborate and visually stunning dessert, this ‘Baked Hawaii’ is a pineapple-shaped twist on the classic Baked Alaska. It features a core of homemade pineapple ice cream and pistachio gelato on a pound cake base. The entire structure is meticulously sculpted and covered in a torched honey meringue to resemble a pineapple, and finished with decorative green candy melt fronds.
- Prep Time: 1 hour 15 minutes (active time)
- Cook Time: 20 minutes
- Total Time: 11+ hours (includes over 9 hours of required freezing/chilling)
- Yield: 8-10 servings
- Category: Dessert
- Method: Caramelizing, Whipping, Freezing, Boiling Syrup, Piping, Sculpting, Torching
- Cuisine: American
- Diet: Vegetarian
Ingredients
- Pineapple Ice Cream:
- 1 tablespoon unsalted butter
- One 20-ounce can crushed pineapple
- One 14-ounce can sweetened condensed milk
- 1/8 teaspoon kosher salt
- 2 cups heavy cream
- 2 teaspoons vanilla paste or extract
- Half a 9-by-5-inch pound cake, cut into 1-inch slices
- 1 pint pistachio gelato, softened
- Honey Meringue:
- 3/4 cup honey
- 3/4 cup sugar
- 4 large egg whites, at room temperature
- 1/2 teaspoon cream of tartar
- 1/4 teaspoon kosher salt
- Fronds:
- 1 cup green candy melting wafers
- 2 tablespoons coconut oil
Instructions
- For the pineapple ice cream base: Melt butter in a large nonstick skillet over medium-high heat. Add the crushed pineapple and its juices and cook, stirring occasionally, until the liquid evaporates and the pineapple caramelizes, 10 to 12 minutes. Transfer to a bowl, stir in the condensed milk and salt, then cover and freeze for 30 minutes.
- Beat the heavy cream and vanilla with a stand mixer on high speed until stiff peaks form. Stir the chilled pineapple mixture to loosen, then fold in the whipped cream.
- Assemble the ice cream core: Use a 1-quart container to cut a 4 1/2-inch round from the pound cake for the base; wrap and set aside. Line the same container with overhanging plastic wrap. Add 2 cups of the pineapple ice cream, smooth the top, cover, and freeze until solid, about 3 hours.
- Top the frozen pineapple ice cream with the softened pistachio gelato, pressing to fill gaps. Unwrap the pound cake base and press it onto the gelato. Cover with the plastic wrap and freeze until solid, 2 to 3 hours.
- For the honey meringue: In a saucepan, boil the honey, sugar, and 1/3 cup water without stirring until a candy thermometer reads 240 degrees F.
- Meanwhile, whip the egg whites, cream of tartar, and salt in a stand mixer on high speed until soft peaks form. With the mixer running, carefully pour the hot syrup into the whites in a thin, steady stream. Continue whipping until very thick and glossy, about 5 minutes. Transfer to a large piping bag fitted with a large closed-star tip.
- Shape the pineapple: Invert the frozen ice cream core onto a cake stand. Use small dabs of meringue to ‘glue’ the base to the stand, and to stack a 2 1/2-inch and a 1-inch round of pound cake on top.
- Working quickly, pipe bands of meringue around the ice cream core and use a spatula to sculpt it into a pineapple shape, tapering at the top and bottom. Cover the cake rounds on top to form the pineapple’s crown. Freeze for 2 hours.
- For the fronds: Trace a frond shape (from the recipe’s PDF, not provided here) onto parchment paper with melted green candy wafers mixed with 1 tablespoon coconut oil. Freeze to set. Flood the outlines with the remaining candy melts (mixed with the second tablespoon of oil) and freeze until hard, about 15 minutes.
- Final decoration: Cover the surface of the frozen pineapple with piped meringue stars. Freeze for 30 minutes. Use a kitchen torch to toast the meringue, then freeze for at least 10 minutes.
- Just before serving, cut a slit in the top of the pineapple and insert the candy fronds.
Notes
- This is a complex, multi-day recipe that requires careful planning and significant freezing time.
- Special Equipment Required: Stand mixer, candy thermometer, kitchen torch, 1-quart container, piping bags with star and round tips, round cutters (2.5-inch and 1-inch), parchment paper.
- The original recipe refers to a downloadable PDF for the pineapple frond template, which is not included in this text.
- Safety Warning: Propane gas torches are highly flammable. Use only in well-ventilated areas, keep away from heat, and follow the manufacturer’s instructions for use.
Storage Information
Your finished Baked Hawaii can be stored, well-covered, in the freezer for up to 3 days. It’s a delicate creation, so ensure it is protected from being bumped into.
Fore more recipe follow my Pinterest account
Conclusion: A Masterpiece of Your Own Making
Completing this Baked Hawaii is a true culinary accomplishment. It’s a project that tests your skills but rewards you with one of the most imaginative and impressive desserts imaginable. Every layer, from the homemade pineapple ice cream to the perfectly toasted meringue and the whimsical candy fronds, comes together to create a moment of pure joy and deliciousness. Be proud of your work, and enjoy every single slice of your spectacular Baked Hawaii!
Frequently Asked Questions (FAQs)
This looks incredibly difficult. Is it for expert bakers only?
While the Baked Hawaii has many steps, none of them are individually very difficult. The key is organization and patience. By breaking the process down over two days as suggested in our game plan, it becomes a fun and manageable project for any ambitious home baker.
Why did my Italian meringue fail?
The most common issues are the sugar syrup not reaching the correct temperature (240°F is crucial for stability) or pouring the syrup into the egg whites too quickly. A slow, steady stream while the mixer is running is essential.
Can I make this without a kitchen torch?
The torched meringue is the signature finish. If you don’t have one, you can serve it untoasted—it will still be delicious! Do not attempt to brown this in an oven or broiler, as the ice cream core will melt completely.


