What if you could take all the joy and delicious components of a perfect, loaded ice cream cone and transform them into one spectacular, sliceable cake? Imagine layers of creamy ice cream, crunchy waffle cookies, gooey caramel, rich fudge, and a sprinkle of flaky sea salt, all crowned with actual ice cream cones.
This recipe for the ultimate Salted Caramel Ice Cream Cone Cake is your guide to creating a truly unforgettable, whimsical, and over-the-top dessert. It’s a magnificent, no-bake creation that deconstructs the classic ice cream parlor experience and reassembles it into an impressive cake that is perfect for birthdays and summer parties. This is more than a dessert; it’s a celebration on a platter.
What makes this recipe so special is its playful presentation and its incredible combination of textures—creamy, crunchy, gooey, and chewy all in one bite. This guide will walk you through the simple layering process to create a Salted Caramel Ice Cream Cone Cake that looks like it came from a fantasy sweet shop but is surprisingly easy to make at home.
Table of Contents
Table of Contents
The Anatomy of a Deconstructed Cone Cake
The genius of this Salted Caramel Ice Cream Cone Cake is how it incorporates every beloved element of a trip to the ice cream parlor.
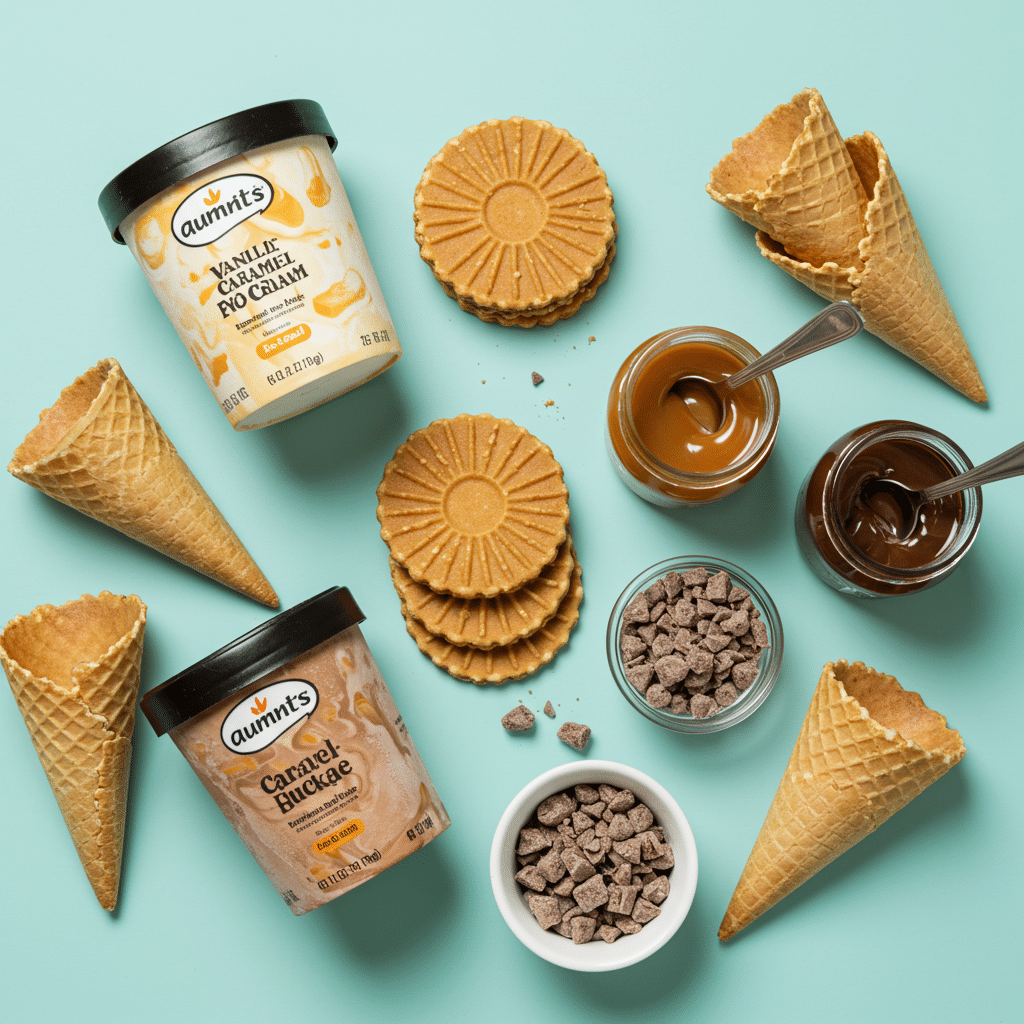
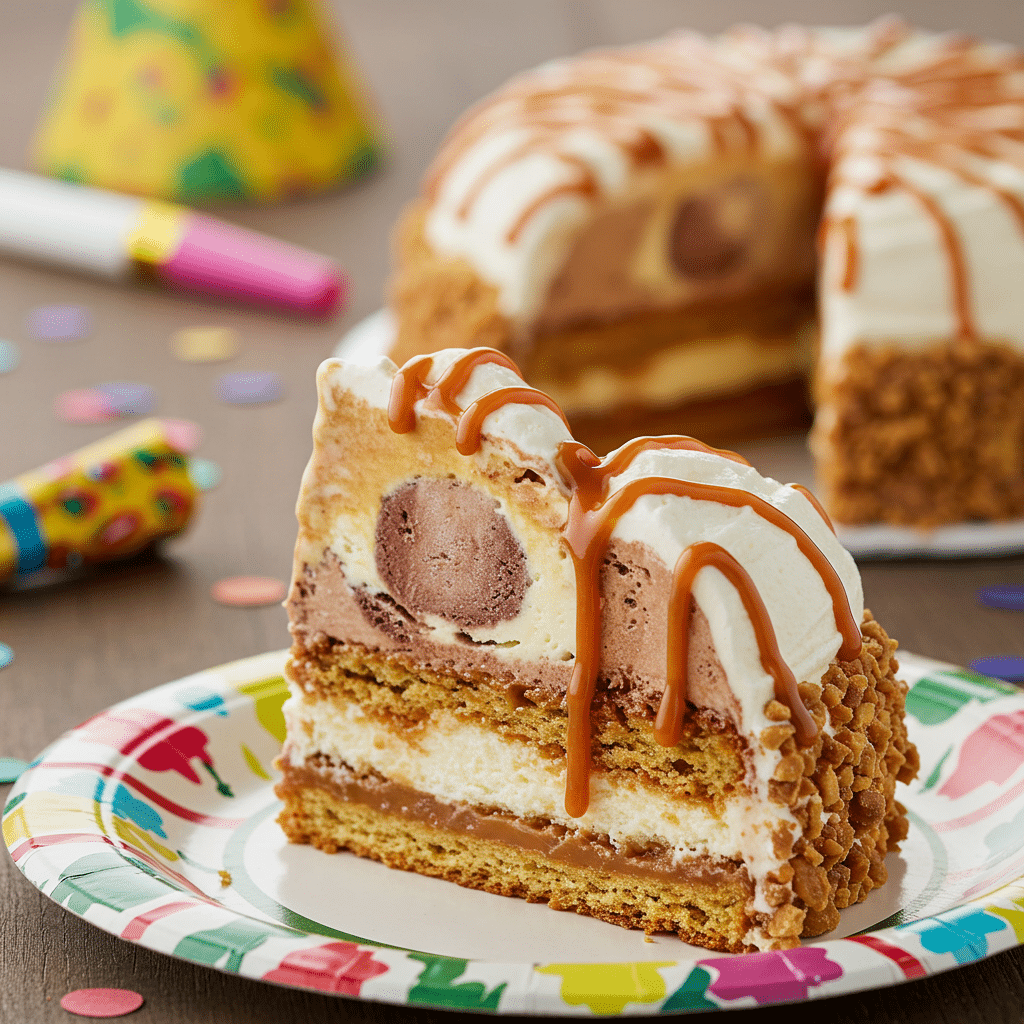
- The “Waffle Cone” Layers: Instead of a traditional cake base, we use layers of thin, crispy pizzelle cookies. These Italian waffle cookies have a flavor nearly identical to a fresh waffle cone and provide a fantastic crunchy texture that breaks up the creamy layers.
- The “Scoops”: By alternating scoops of vanilla-caramel swirl and rich chocolate ice cream, we create a beautiful marbled effect inside the cake, mimicking a double-scoop cone.
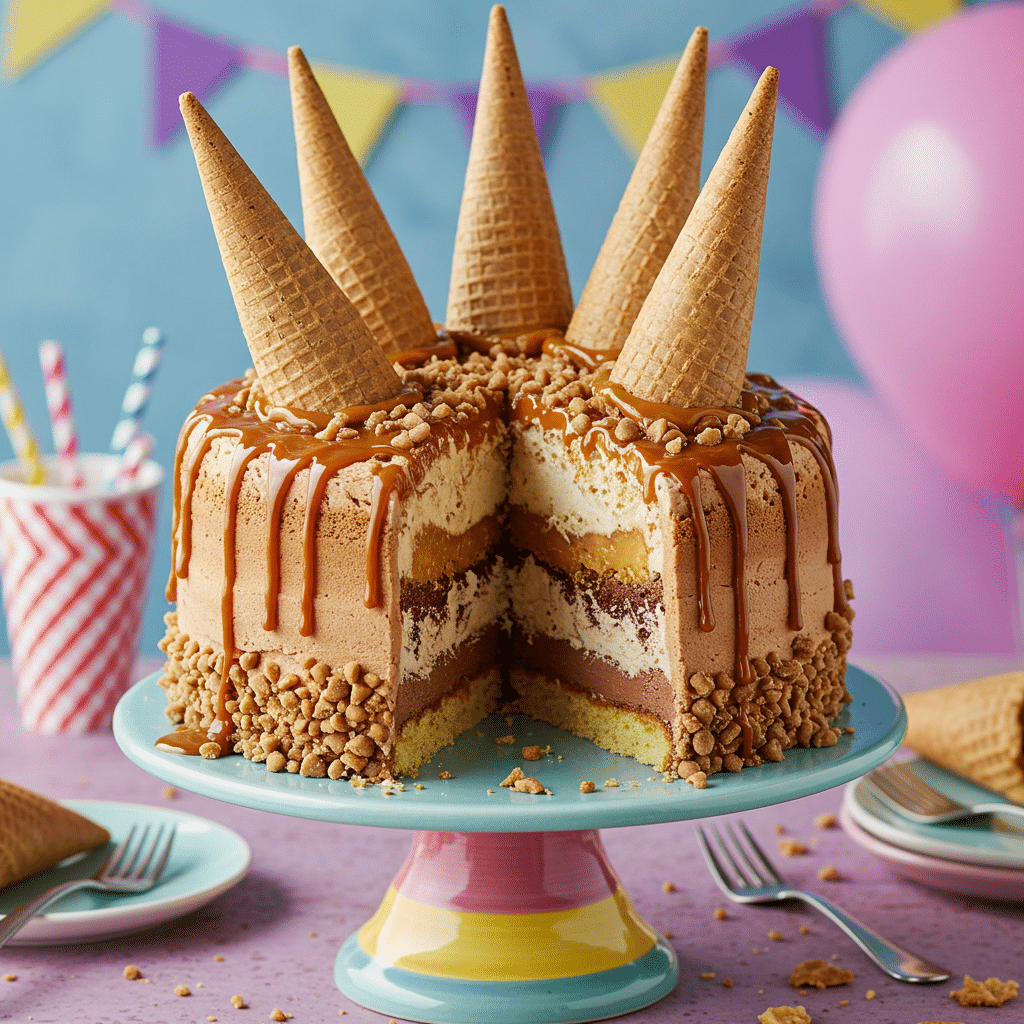
- The Sauces & Toppings: Generous drizzles of fudge, caramel (or dulce de leche), and a sprinkle of flaky sea salt provide that perfect sweet and savory balance. The toffee bit coating and the upright sugar cones complete the fun, “ice cream cone” illusion for your Salted Caramel Ice Cream Cone Cake.
The Baker’s Trick: A Parchment Collar for a Taller Cake
To build this tall and impressive Salted Caramel Ice Cream Cone Cake, we use a simple pastry chef trick: a parchment paper collar. By lining the inside ring of your springform pan with a tall strip of parchment paper, you effectively extend the height of the pan’s walls. This allows you to build thick, beautiful layers without worrying about them spilling over the side, resulting in a professional-looking dessert.
The Key Ingredients for Your Ice Cream Cake
This recipe uses simple, store-bought ingredients to create a truly spectacular result.
- Pizzelle Cookies: These thin, crispy Italian waffle cookies are the perfect stand-in for a waffle cone. Thin butter cookies can also be used.
- Vanilla-Caramel Swirl & Chocolate Ice Cream: Using two different flavors creates the beautiful marbled interior. Feel free to use your favorite brands.
- Fudge & Caramel Sauce: The essential gooey, sweet drizzles. Using a thick dulce de leche will provide an even richer caramel flavor.
- Flaky Sea Salt: This is a crucial ingredient! A high-quality flaky sea salt (like Maldon) provides a clean, salty crunch that enhances the sweetness of the caramel and chocolate. Do not substitute with fine table salt.
- Sugar Cones & Toffee Bits: These are the finishing touches that complete the whimsical “ice cream cone” look and add the final layer of crunch.

Step-by-Step Guide to Your Ice Cream Cone Cake
Patience during the freezing stages is the key to a beautiful, neatly layered cake. Have all your ingredients ready before you begin assembling.
Part 1: Assemble and Freeze the Cake
- Prepare the Pan: Cut a 24-by-6-inch strip of parchment paper. Lightly butter the inside of an 8-inch springform pan ring and press the parchment against it to create a tall collar. Lock the ring into the pan base.
- First Cookie Layer: Cover the bottom of the pan with a layer of pizzelle cookies, breaking them into smaller pieces as needed to create a solid surface. Spread 1/4 cup of the fudge sauce evenly over the cookies.
- First Ice Cream Layer: Let your ice creams soften slightly at room temperature. Drop alternating scoops of the vanilla-caramel and chocolate ice cream into the pan until the bottom is covered. Use a spatula to gently press and smooth the layer.
- First Sauce Layer: Drizzle 1/4 cup of the dulce de leche or caramel sauce over the ice cream, then sprinkle with 1/4 teaspoon of the flaky sea salt.
- Second Cookie Layer: Top with the remaining pizzelle cookies, pressing down gently to pack the ice cream and create an even surface. Spread the remaining 1/4 cup of fudge sauce over this cookie layer.
- Second Ice Cream Layer: Top with alternating scoops of the remaining vanilla-caramel and chocolate ice cream, pressing and smoothing the layer.
- Final Sauce Layer & Cones: Drizzle the top with the remaining 1/4 cup each of dulce de leche and fudge sauce. Sprinkle with the remaining 1/4 teaspoon of sea salt. Immediately arrange the 5 sugar cones, point-side up, on top of the cake.
- Freeze Until Solid: Cover the top of the Salted Caramel Ice Cream Cone Cake with plastic wrap and place it in the freezer until it is completely firm. This will take at least 6 hours, but overnight is highly recommended.
Part 2: The Finishing Touches
- Unmold the Cake: Once solid, remove the cake from the freezer. Carefully unclasp and remove the side of the springform pan, then gently peel away the parchment paper collar. Place the cake on a serving platter.
- Add the Toffee Bits: This can be a bit messy, so it’s helpful to do it over a baking sheet to catch any stray bits. Use your hands to gently press the toffee bits into the exposed sides of the cake until they are completely coated.
- Serve or Store: You can slice and serve your incredible Salted Caramel Ice Cream Cone Cake immediately, or return it to the freezer, lightly covered, for up to 2 days.

The Ultimate Salted Caramel Ice Cream Cone Cake
A tall, decadent no-bake ice cream cake built in a springform pan with a parchment collar. It features layers of pizzelle cookies, chocolate fudge sauce, and alternating scoops of vanilla-caramel swirl and chocolate ice cream. The ice cream layers are swirled with dulce de leche and flaky sea salt for a salted caramel effect. The cake is finished with inverted sugar cones on top and toffee bits pressed into the sides.
- Prep Time: 25 minutes
- Cook Time: 0 minutes
- Total Time: 6 hours 25 minutes (includes freezing time)
- Yield: 12-16 servings
- Category: Dessert
- Method: No-Bake, Layering, Freezing
- Cuisine: American
- Diet: Vegetarian
Ingredients
- Unsalted butter, softened, for the pan
- 14 pizzelle (thin Italian waffle cookies) or thin butter cookies
- 3/4 cup chocolate fudge sauce
- 1 quart vanilla-caramel swirl ice cream, slightly softened
- 1 quart chocolate ice cream, slightly softened
- 1/2 cup dulce de leche or caramel sauce
- 1/2 teaspoon flaky sea salt
- 5 sugar cones
- 1/4 cup toffee bits
Instructions
- Prepare an 8-inch springform pan by buttering the side and lining it with a 24-by-6-inch strip of parchment paper to create a collar that extends above the rim.
- Arrange half of the pizzelle cookies in the bottom of the pan, breaking them as needed to cover the surface.
- Spread 1/4 cup of fudge sauce over the cookie layer.
- Pack about half of the vanilla-caramel and chocolate ice cream into the pan, alternating scoops. Drizzle with 1/4 cup of dulce de leche and sprinkle with 1/4 teaspoon of sea salt.
- Top with the remaining pizzelle cookies, pressing gently to create an even surface. Spread another 1/4 cup of fudge sauce over this cookie layer.
- Top with scoops of the remaining vanilla-caramel and chocolate ice cream.
- Drizzle with the remaining 1/4 cup each of dulce de leche and fudge sauce. Sprinkle with the remaining 1/4 teaspoon of sea salt.
- Arrange the 5 sugar cones, point-side up, on top of the cake.
- Freeze until firm, for at least 6 hours or overnight.
- When ready to serve, remove the side of the springform pan and the parchment paper collar.
- Press the toffee bits into the side of the cake.
- Serve immediately, or cover and freeze for up to 2 days.
Notes
- A key technique for this recipe is using a parchment paper collar inside the 8-inch springform pan to build a tall cake.
- The cake can be made ahead and stored, covered, in the freezer for up to 2 days.
Storage Information
Your finished Salted Caramel Ice Cream Cone Cake will keep, well-covered, in the freezer for up to 3 days. After that, the pizzelle cookies may begin to soften slightly.
Creative “Ice Cream Parlor” Variations
Use this fun layering technique to create other amazing ice cream cake flavors!
| Flavor Variation | How to Adapt the Recipe | The Delicious Result |
|---|---|---|
| “Strawberry Crunch” Cone Cake | Use vanilla and strawberry ice cream. Use golden Oreo cookies instead of pizzelles. Use strawberry sauce instead of caramel/fudge. Top with a strawberry shortcake crumb coat instead of toffee bits. | A bright, fruity, and nostalgic version inspired by the classic ice cream bar. |
| “Mint Chocolate Chip” Cone Cake | Use mint chocolate chip and chocolate ice cream. Use chocolate pizzelles or whole Oreo cookies for the layers. Use only hot fudge sauce. Garnish the sides with chopped Andes mints. | A cool, refreshing, and deeply chocolatey cake for mint lovers. |
| “Coffee & Donuts” Cone Cake | Use coffee and vanilla ice cream. Use crushed plain cake donuts for the “cookie” layers. Use only caramel sauce. Garnish the sides with crushed Heath bars or other toffee candy. | The ultimate sweet breakfast-inspired Salted Caramel Ice Cream Cone Cake alternative. |
Fore more recipe follow my Pinterest account
Conclusion: A Party on a Platter
This Salted Caramel Ice Cream Cone Cake is pure, unadulterated fun. It’s a whimsical, creative, and over-the-top dessert that is guaranteed to be the talk of any party. Every slice is a delightful adventure of creamy, crunchy, salty, and sweet. So embrace your inner child, have fun with the process, and get ready to serve up a truly spectacular and memorable Salted Caramel Ice Cream Cone Cake.
Frequently Asked Questions (FAQs)
My cake seems soft and the layers are messy. What happened?
The key to neat layers is ensuring the ice cream is softened but not melted, and that the entire cake is frozen completely solid before unmolding and slicing. An overnight freeze is highly recommended for the best, most stable result.
What are pizzelle cookies and where can I find them?
Pizzelles are traditional Italian waffle cookies. They are very thin, crisp, and have a flavor similar to a waffle cone or a sugar cone. You can usually find them in the cookie aisle or the international foods section of most major grocery stores.
Do I have to use a springform pan?
A springform pan is highly recommended because the removable sides make it easy to unmold this delicate, tall cake without damaging it. You could try assembling it in a deep cake pan lined with a lot of plastic wrap overhang, but it will be much more difficult to remove cleanly.


