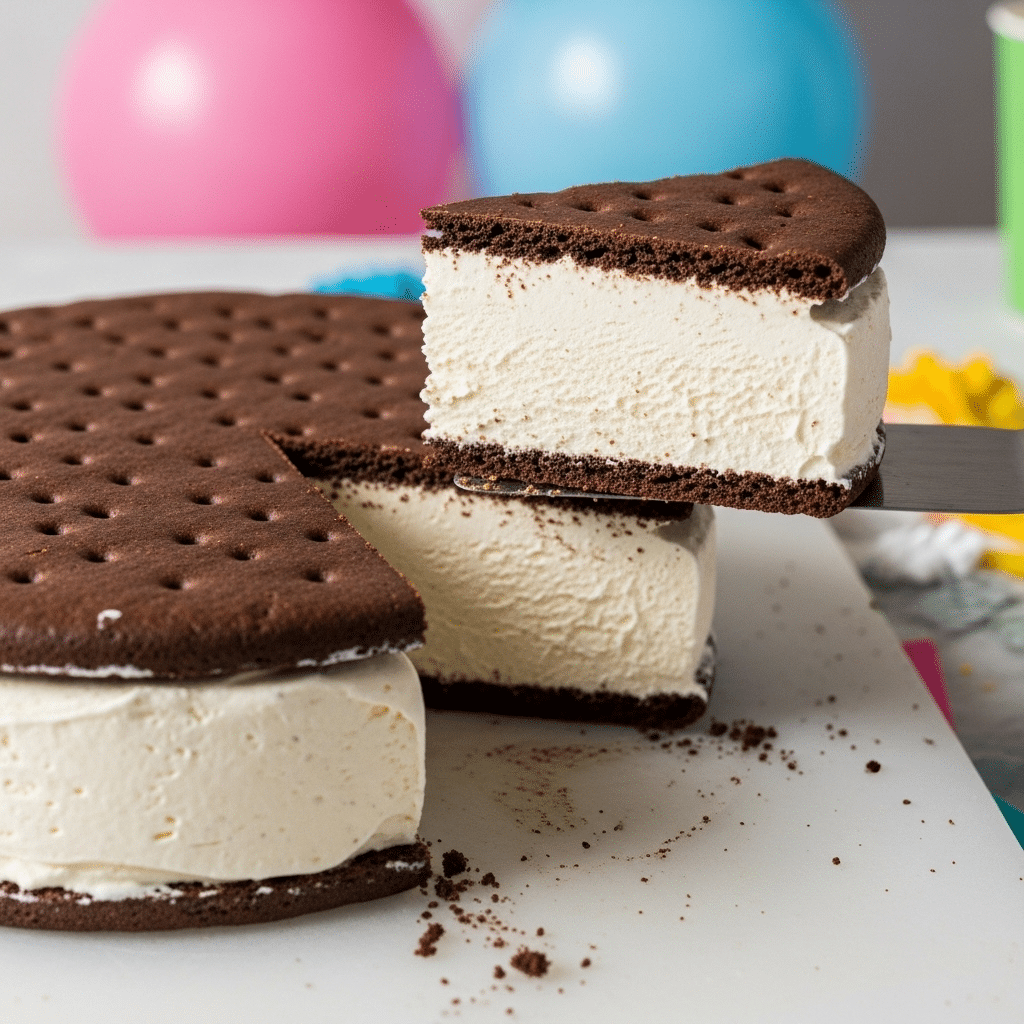
Do you remember the pure, simple joy of chasing down the ice cream truck for that iconic, rectangular chocolate-and-vanilla ice cream sandwich? That soft, chocolatey wafer, the creamy vanilla ice cream, the way it stuck to your fingers… Now, what if you could take that perfect memory and make it GIANT?
This recipe for the ultimate Giant Ice Cream Sandwich is your guide to creating a massive, sliceable, and absolutely show-stopping version of the beloved classic. This is more than a dessert; it’s an event! By using a few clever shortcuts, like a simple cake mix for the “wafers” and a brilliant hack for the ice cream block, you can create a dessert that will have every single person at your party smiling.
What makes this recipe so special is its incredible “wow” factor combined with its surprising ease of assembly. It’s the perfect centerpiece for a birthday party, a summer BBQ, or any celebration that calls for a dose of fun and nostalgia. Get ready to create the most memorable Giant Ice Cream Sandwich you’ve ever seen.
Table of Contents
Table of Contents
The Genius Hacks That Make This Recipe Easy
This impressive Giant Ice Cream Sandwich looks complicated, but it’s built on two brilliant, time-saving techniques.
- The “Cake as a Wafer” Method: The secret to that soft, chocolatey, and slightly sticky wafer is not a cookie at all—it’s a thin layer of cake! We use a standard devil’s food cake mix, add an extra egg for stability and a chewier texture, and bake it in a very thin layer on a large baking sheet. When frozen, this thin cake perfectly mimics the texture of the classic ice cream sandwich wafer.
- The “Ice Cream Block” Shortcut: Forget trying to scoop and spread ice cream into a perfect rectangle. The best trick is to use the rectangular cartons the ice cream comes in! You simply snip open the carton and slide the entire solid block of ice cream out. Placing these blocks side-by-side creates a perfect, even layer of ice cream in seconds, with no mess.
The Key Ingredients for Your Giant Ice Cream Sandwich
This recipe uses simple, easy-to-find ingredients to create a truly spectacular result.
- Devil’s Food Cake Mix: This is your shortcut to the perfect chocolate “wafers.” A standard 16-to-18-ounce box mix works perfectly. Don’t forget the ingredients listed on the box (usually oil and eggs).
- One Extra Large Egg: This is our addition to the cake mix batter. The extra egg adds protein and structure, making the thin cake layers sturdier and chewier—more like the classic wafer.
- Rectangular Cartons of Vanilla Ice Cream: The key is to use the rectangular, cardboard-style cartons of ice cream. You’ll need three 1.5-quart cartons to create the giant filling. A good-quality vanilla ice cream will provide the best, classic flavor for your Giant Ice Cream Sandwich.

Step-by-Step Guide to Your Giant Ice Cream Sandwich
This recipe is all about assembly. Follow these detailed steps for a perfect, nostalgic result.
Part 1: Make and Shape the Giant “Wafers”
- Prepare Your Pans: Preheat your oven to 350°F. Coat two large 12-by-17-inch rimmed baking sheets with cooking spray. Line each pan with parchment paper, leaving an overhang on the short sides to act as “handles.”
- Make the Cake Batter: In a large bowl, prepare the devil’s food cake mix according to the package directions, but add one extra egg to the batter.
- Spread and Bake: Divide the batter evenly between your two prepared baking sheets. Use an offset spatula to spread the batter into a very thin, even layer that covers the entire surface of each pan. Bake for 8 to 9 minutes, until the cake is set. Because it’s so thin, it bakes very quickly! Let the cakes cool completely in the pans.
- Shape the Top Wafer: This is the fun part! Measure 2 1/2 inches in from each long side of one of the cooled cakes and mark the spots with toothpicks. Use a ruler as a guide to score the cake, then trim along the lines with a long knife or pizza cutter so the cake is now 7 inches wide.
- Add the Details: Use a knife to slightly round the four corners of your trimmed cake. Then, use a standard drinking straw to punch out the iconic holes—about 4 holes across and 10 down—to make it look just like a classic Giant Ice Cream Sandwich.
- Shape the Bottom Wafer: Trim the second cake layer to the same 7-inch width, but there’s no need to punch holes in this one.
- Freeze the Wafers: Use the parchment paper handles to carefully slide both cake wafers (still on their parchment) onto a flat surface and place them in the freezer for 30 minutes. This step is crucial for making them firm and easy to handle during assembly.
Part 2: Assemble and Freeze Your Masterpiece
- Prepare the Base: Invert the bottom cake wafer (the one without holes) onto a clean baking sheet or large cutting board. Carefully peel off the parchment paper.
- Add the Ice Cream: Working quickly, use kitchen shears to snip open one of the rectangular ice cream cartons down the sides. Open the carton and slide the entire block of ice cream onto one end of the cake wafer.
- Complete the Filling: Repeat with the other two cartons of ice cream, arranging them neatly side-by-side on the cake to cover the entire surface.
- Smooth and Cover: Cover the ice cream with a large piece of plastic wrap and use your hands to gently press and smooth the ice cream blocks, filling any gaps and creating a solid, even layer. Remove the plastic wrap.
- Add the Top Wafer: Carefully lift the top cake wafer (the one with the holes) off its parchment paper and place it directly on top of the ice cream layer.
- Final Trim and Freeze: Trim any excess cake from the sides to make the edges neat and smooth. Your Giant Ice Cream Sandwich is now assembled! Freeze it for at least 2 hours, or until it is completely solid, before slicing and serving.

The Ultimate Giant Ice Cream Sandwich: A Party Showstopper
A novelty dessert recipe for creating a giant version of a classic rectangular ice cream sandwich. The ‘cookie’ wafers are made by baking a devil’s food cake mix into two thin sheets. One sheet is then trimmed and punched with holes to mimic the look of an iconic ice cream sandwich. These cake layers are used to sandwich three rectangular cartons of vanilla ice cream, creating a large, party-sized frozen treat.
- Prep Time: 1 hour 30 minutes (includes cooling and intermediate freezing)
- Cook Time: 9 minutes
- Total Time: 3 hours 39 minutes (includes final freezing time)
- Yield: 16-20 servings
- Category: Dessert
- Method: Baking, Assembling, Freezing
- Cuisine: American
- Diet: Vegetarian
Ingredients
- Cooking spray
- 1 (16-to-18-ounce) box devil’s food cake mix (plus ingredients required on the box)
- 1 large egg (in addition to eggs called for on the box)
- 3 (1.5-quart) rectangular cartons vanilla ice cream, softened
Instructions
- Preheat the oven to 350 degrees F. Coat two 12-by-17-inch rimmed baking sheets with cooking spray, then line them with parchment paper, leaving an overhang on the short sides.
- Prepare the cake mix according to the package directions, but add one extra egg.
- Divide the batter evenly between the two prepared baking sheets and spread it into a thin, even layer with an offset spatula.
- Bake until the cakes are set, about 8 to 9 minutes. Let the cakes cool completely on the baking sheets.
- To shape the top ‘wafer’, measure 2 1/2 inches in from each long side of one of the cooled cakes and trim, making the cake 7 inches wide. Round the corners with a knife.
- Punch holes in the trimmed cake using a straw to mimic a classic ice cream sandwich (about 4 holes across and 10 down).
- Trim the second cake to the same 7-inch width, but do not punch holes in it.
- Place both cakes in the freezer for 30 minutes to firm up.
- To Assemble: Invert the cake without holes onto a clean baking sheet and peel off the parchment paper.
- Snip open the ice cream cartons with kitchen shears and slide the blocks of ice cream onto the cake, arranging them side by side to cover the cake.
- Cover the ice cream with plastic wrap and press with your hands to smooth the surface and fill any gaps.
- Remove the second cake (with holes) from its parchment paper and place it on top of the ice cream layer.
- Trim any excess cake from the sides and smooth the edges of the sandwich.
- Freeze for at least 2 hours before slicing and serving.
Notes
- Using a cake mix is a shortcut for the cookie wafer layers.
- Leaving a parchment paper overhang makes it easier to lift the cooled cakes.
- Freezing the cake layers before assembly makes them easier to handle and prevents the ice cream from melting too quickly.
- Ingredient substitutions are noted as being available.
Storage Information
Wrap your finished Giant Ice Cream Sandwich tightly in plastic wrap, followed by a layer of foil. It will keep well in the freezer for up to one week.
Creative Recipe Variations
This giant sandwich method is a perfect template for other fun flavor combinations!
| Flavor Variation | How to Adapt the Recipe | The Delicious Result |
|---|---|---|
| Giant “Neapolitan” Sandwich | Use one rectangular carton each of vanilla, chocolate, and strawberry ice cream. Arrange them side-by-side to create the classic tri-color filling for your Giant Ice Cream Sandwich. | A super-sized version of another beloved, classic ice cream treat. |
| Giant “Cookies & Cream” Sandwich | Use a white or yellow cake mix for the “wafers.” For the filling, use cookies and cream ice cream. You can even add a layer of crushed chocolate sandwich cookies on top of the ice cream before adding the top wafer. | An Oreo lover’s dream in giant, shareable form. |
| Giant “Mint Chip” Sandwich | Use the classic devil’s food cake “wafers.” For the filling, use three cartons of your favorite mint chocolate chip ice cream. | A cool, refreshing, and deeply chocolatey version of the Giant Ice Cream Sandwich. |
For more recipe follow my Pinterest account
Conclusion: A Supersized Slice of Happiness
This Giant Ice Cream Sandwich is more than just a dessert—it’s pure fun. It’s a project that brings a beloved childhood memory to life in an epic, shareable way. The moment you bring this massive creation to the table is a moment of pure joy and surprise for everyone. So go ahead, embrace the nostalgia, and get ready to serve up the biggest and best ice cream sandwich anyone has ever seen.
Frequently Asked Questions (FAQs)
Why do I need to add an extra egg to the cake mix?
The extra egg adds more protein and fat to the batter. This provides more structure and makes the thin cake layer slightly denser and chewier, which helps it mimic the texture of the classic soft chocolate wafer and makes it sturdy enough to hold its shape.
My cake wafers broke when I tried to move them. What can I do?
The 30-minute freeze before assembly is key to preventing this! Freezing the thin cake layers makes them firm and much less fragile. Also, be sure to use the parchment paper overhangs as handles to support the entire wafer as you slide it off the baking sheet.
What’s the best way to slice the Giant Ice Cream Sandwich?
For the cleanest cuts, use a very large, sharp chef’s knife. Run the blade under very hot water for a few seconds, then quickly wipe it dry with a towel. The hot blade will slice cleanly through the frozen layers without much resistance.


