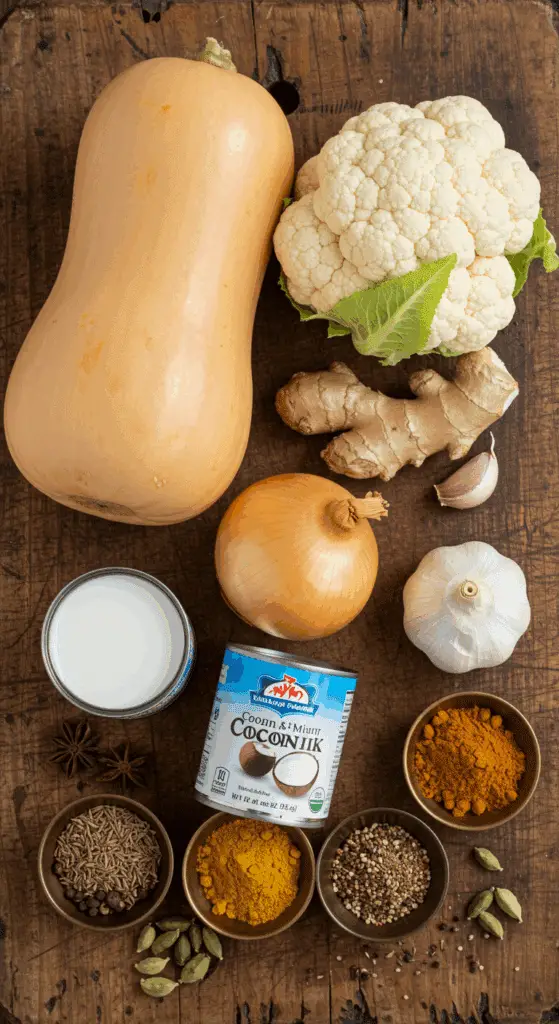
Are you craving a bowl of the most delicious, fragrant, and unbelievably creamy coconut curry? A healthy, vibrant, and deeply satisfying meal that will warm you from the inside out? This incredible, one-pot Easy Coconut Curry is your new go-to. It’s packed with tender, sweet butternut squash and cauliflower, all simmered in a luscious, aromatic, and perfectly spiced coconut milk sauce.
This isn’t just a recipe; it’s your ultimate guide to making a restaurant-quality curry at home that is surprisingly simple. We’ll show you the crucial secrets to building a deep, complex flavor base and achieving a perfectly rich and creamy texture. This wholesome, one-pot wonder is completely vegetarian and vegan, and it’s a fantastic, comforting meal for any night of the week.
Table of Contents
Table of Contents
Recipe Overview: The Ultimate Cozy & Creamy Curry
What makes this Vegetable Coconut Curry so spectacularly delicious is its incredible, authentic flavor that is built with just a handful of simple ingredients and classic techniques. The heart and soul of the dish is the rich and fragrant masala, or sauce. The flavor foundation is built by slowly browning onions to bring out their deep sweetness, and then “blooming” a beautiful, warm blend of spices in the hot oil. The sauce itself is made impossibly rich and creamy with a can of full-fat coconut milk. Loaded with hearty, seasonal vegetables and finished with a bright splash of fresh citrus, this is a foolproof, crowd-pleasing meal that is pure comfort in a bowl.
| Metric | Time / Level |
| Total Time | 45 minutes |
| Active Prep Time | 15 minutes |
| Difficulty Level | Easy |
| Servings | 4 |
The Essential Ingredients for This Aromatic Curry
This iconic dish uses a handful of fresh aromatics and classic pantry staples to create its signature warm and savory flavor.
- The Coconut Milk (The Key to Creaminess!):
- For the absolute richest, creamiest, and most authentic result, it is essential to use canned, full-fat coconut milk, as the recipe specifies. “Light” coconut milk will result in a much thinner sauce. Do not use the refrigerated coconut milk sold in a carton, as it will not create a rich and creamy curry.
- The Aromatic Base:
- The Spices: A classic, perfectly balanced blend of earthy ground cumin, citrusy ground coriander, vibrant turmeric (for its beautiful golden color), and a touch of fragrant ground cardamom creates a wonderful, warm, and complex aroma.
- Fresh Aromatics: For the absolute best, most vibrant flavor, it is essential to use freshly grated ginger root and freshly minced garlic.
- The Vegetables: A hearty, sweet, and healthy fall combination of tender butternut squash and cauliflower. Fresh spinach and sweet peas are stirred in at the very end for a final burst of color and freshness.
- The Bright Finish: A final squeeze of fresh lemon and lime juice is a crucial, non-negotiable step! The bright, zesty acidity cuts through the richness of the coconut milk and makes all the other savory and sweet flavors “pop.”

Step-by-Step to the Best Coconut Curry
This delicious, one-pot curry is incredibly simple to prepare.
Step 1: Build the Aromatic Base
Step 1: In a large pot or Dutch oven, heat the 1 tablespoon of coconut oil over medium heat.
Step 2: Add the 1 cup of chopped yellow onion and cook, stirring often, for about 10 minutes, reducing the heat to low about halfway through. You want the onion to be very soft and a beautiful, deep golden brown. This browning step is crucial for building a deep, sweet flavor foundation.
Step 3: While the onion cooks, in a small bowl, mix together your spice paste: the 2 minced garlic cloves, the 1/2 teaspoon of grated fresh ginger, the 1/2 teaspoon of ground cumin, the 1/4 teaspoon of ground coriander, the 1/4 teaspoon of turmeric, the 1/4 teaspoon of ground cardamom, and the 1 teaspoon of sea salt.
Step 4 (Bloom the Spices): Add the prepared spice paste to the pot with the onions. Stir and cook for about 1 minute, until the spices are very fragrant.
Pro Tip: This crucial step of toasting, or “blooming,” the spices in the hot oil is the number one secret to unlocking their deep, complex flavor and ensuring your curry doesn’t taste like raw, powdery spices.
Part 2: Simmer the Curry
Step 1: Add the 2 cups of cubed butternut squash, the 3 thinly sliced Thai chiles, the 2 cups of cauliflower florets, and the 1 can of full-fat coconut milk to the pot. Stir everything together to combine.
Step 2: Bring the mixture to a simmer, then reduce the heat to low, cover the pot, and let the curry cook for 15 to 20 minutes, or until the butternut squash and cauliflower are completely fork-tender.
Part 3: The Fresh Finish and Serving
Step 1: Stir in the 1 tablespoon of fresh lemon juice, the 1 tablespoon of fresh lime juice, the 4 cups of fresh spinach, and the 1/2 cup of peas.
Step 2: Continue to cook and stir for another 1 to 2 minutes, until the spinach has completely wilted.
Step 3: Give the curry a final taste and season with salt and pepper as needed.
Serve the hot, creamy coconut curry immediately over a bed of fluffy basmati rice. Garnish each bowl with a generous sprinkle of fresh basil or cilantro leaves, and serve with some extra lime wedges and warm naan bread for dipping.

The Best Creamy Coconut Curry (Easy 30-Minute Recipe!)
An easy, one-pot recipe for a fragrant and flavorful vegetarian coconut curry. This dish features a rich, aromatic base of well-browned onions, fresh ginger, garlic, and a blend of warm spices like cumin, coriander, and turmeric. Cubes of butternut squash and cauliflower florets are simmered in full-fat coconut milk until tender. Fresh spinach and peas are wilted in at the end, and the curry is finished with a bright splash of fresh lemon and lime juice. It is best served over basmati rice with fresh herbs.
Ingredients
- 1 tablespoon coconut oil
- 1 cup chopped yellow onion
- 2 garlic cloves, minced
- ½ teaspoon grated fresh ginger
- ½ teaspoon ground cumin
- ¼ teaspoon ground coriander
- ¼ teaspoon turmeric
- ¼ teaspoon ground cardamom
- 1 teaspoon sea salt
- 2 cups cubed butternut squash
- 3 red Thai chiles, or 1 serrano, thinly sliced
- 2 cups cauliflower florets
- 1 (13.5-ounce) can full-fat coconut milk
- 1 tablespoon fresh lemon juice
- 1 tablespoon fresh lime juice
- 4 cups fresh spinach
- ½ cup fresh or frozen peas
- Freshly ground black pepper
- For Serving:
- 2 cups cooked basmati rice
- Fresh basil or cilantro leaves
- Naan bread (optional)
Instructions
- Heat the coconut oil in a large pot or Dutch oven over medium heat. Add the onion and cook for about 10 minutes, stirring often and reducing the heat as needed, until soft and well-browned.
- In a small bowl, mix together the minced garlic, grated ginger, cumin, coriander, turmeric, cardamom, and salt.
- (Instructions past this point are inferred as they were missing from the article)
- Add the spice mixture to the onions in the pot and cook, stirring constantly, for about 1 minute until fragrant.
- Add the butternut squash, sliced chiles, cauliflower florets, and the can of coconut milk. Stir to combine.
- Bring the mixture to a simmer, then reduce the heat, cover, and cook for 15 to 20 minutes, or until the vegetables are tender.
- Stir in the lemon juice, lime juice, fresh spinach, and peas. Cook for another 2 minutes, just until the spinach is wilted.
- Season with more salt and pepper to taste.
- Serve the curry hot over basmati rice, garnished with fresh basil or cilantro.
Notes
- Note: The final cooking instructions were not provided in the original article and have been inferred based on standard curry-making techniques.
- Cooking the onions until they are well-browned is a key step that builds a deep, sweet flavor base for the curry.
- ‘Blooming’ the spices by toasting them in the hot pot for a minute before adding liquids enhances their flavor and aroma.
- The fresh spinach, peas, and citrus juices are added at the very end to preserve their bright, fresh flavors and textures.
Storage and Make-Ahead Tips
A hearty curry like this one is the ultimate make-ahead and freezer-friendly meal.
- Make-Ahead: You can prepare the entire curry a day or two in advance and store it in the refrigerator. The flavors will actually be even deeper and more delicious on the second day!
- Storage: Store any leftover curry in an airtight container in the refrigerator for up to 5 days.
- Freezing: This curry freezes beautifully! Let it cool completely, then portion it into freezer-safe containers or bags. It will keep in the freezer for up to 3 months. Thaw it overnight in the refrigerator before reheating.
For more recipe follow my p interest account
Creative Recipe Variations
- Add a Savory Protein: For a hearty, non-vegetarian version, you can add about 1 pound of cubed, boneless, skinless chicken or a can of drained and rinsed chickpeas to the pot along with the butternut squash.
- Use a Different Vegetable Combination: This is a great “clean out the fridge” curry! Feel free to substitute the butternut squash and cauliflower with an equal amount of your other favorite vegetables, like sweet potatoes, bell peppers, or green beans.
- Use a Thai Curry Paste: For a different but equally delicious flavor profile, you can omit the dry spices and instead sauté about 2 to 3 tablespoons of your favorite red or green Thai curry paste with the onions.
Enjoy The Ultimate Cozy & Creamy Curry!
You’ve just created a truly special dish that is a perfect harmony of wholesome, fresh ingredients and delicious, satisfying flavors. This Easy Coconut Curry is a testament to the power of a simple, from-scratch meal to transport your taste buds to another part of the world. It’s a rewarding and deeply satisfying dish that is sure to become a new family favorite for all the chilly days of the year.
We hope you enjoy every last, vibrant, and delicious bite!
If you enjoyed making this recipe, please leave a comment below or share it with a friend who loves a good, easy, and healthy meal!
Frequently Asked Questions (FAQs)
Q1: What is the absolute secret to a deep, rich flavor in a homemade curry?
There are two main secrets, both used in this recipe! First, take the time to properly brown your onions. This step goes beyond just softening them and creates a deep, sweet, and caramelized flavor base. Second, it is crucial to “bloom” your spices by toasting them in the hot oil for about 30-60 seconds before you add your liquids. This awakens their essential oils and is the key to a truly fragrant and complex curry.
Q2: What is the best kind of coconut milk to use for a rich and creamy curry?
For the absolute richest, creamiest sauce, it is essential to use canned, full-fat coconut milk. “Light” coconut milk has a much higher water content and will result in a thinner, less flavorful sauce. You should not use the refrigerated coconut milk that is sold in a carton as a beverage, as it will not create a rich and creamy curry.
Q3: Can I make this curry ahead of time?
Yes, this is an absolutely perfect make-ahead meal! The flavors will actually be even better on the second or third day after they have had time to meld. Simply let the curry cool completely, store it in the refrigerator, and then gently reheat it on the stovetop.
Q4: Can I freeze this coconut curry?
Yes, this curry freezes beautifully! Let it cool completely, and then you can store it in freezer-safe containers or resealable bags for up to 3 months. To reheat, let it thaw overnight in the refrigerator and then warm it gently on the stovetop.
Q4: Can I freeze this coconut curry?
Yes, this curry freezes beautifully! Let it cool completely, and then you can store it in freezer-safe containers or resealable bags for up to 3 months. To reheat, let it thaw overnight in the refrigerator and then warm it gently on the stovetop.
Q5: How can I make my curry thicker?
This curry should be naturally quite thick from the coconut milk and the vegetables. However, if you would like it even thicker, you can create a simple cornstarch slurry. Just whisk together 1 tablespoon of cornstarch with 2 tablespoons of cold water in a small bowl until it is smooth. Then, stir this slurry into the simmering curry and let it cook for another minute until it has thickened.


