Are you ready to create the ultimate show-stopping appetizer for your next Halloween party or fall gathering? A savory treat so cute, so cheesy, and so unbelievably delicious, it will be the talk of the town? These incredible, from-scratch “Chicken Pumpkins” are that perfect recipe! We’re talking impossibly tender and juicy buttermilk-brined chicken, stuffed with a gooey mozzarella cheese center, coated in a super crispy, cheesy cracker crust, and decorated to look just like a perfect, miniature pumpkin.
This isn’t just another fried chicken recipe; it’s a guide to your new favorite edible craft project. We’ll show you the simple but crucial secrets to the juiciest fried chicken, a foolproof cheese-stuffing trick, and how to create this stunning, three-dimensional appetizer. This is a guaranteed, crowd-pleasing hit that is perfect for any festive autumn occasion.
Table of Contents
Table of Contents
Recipe Overview: The Ultimate Fun & Festive Fall Appetizer
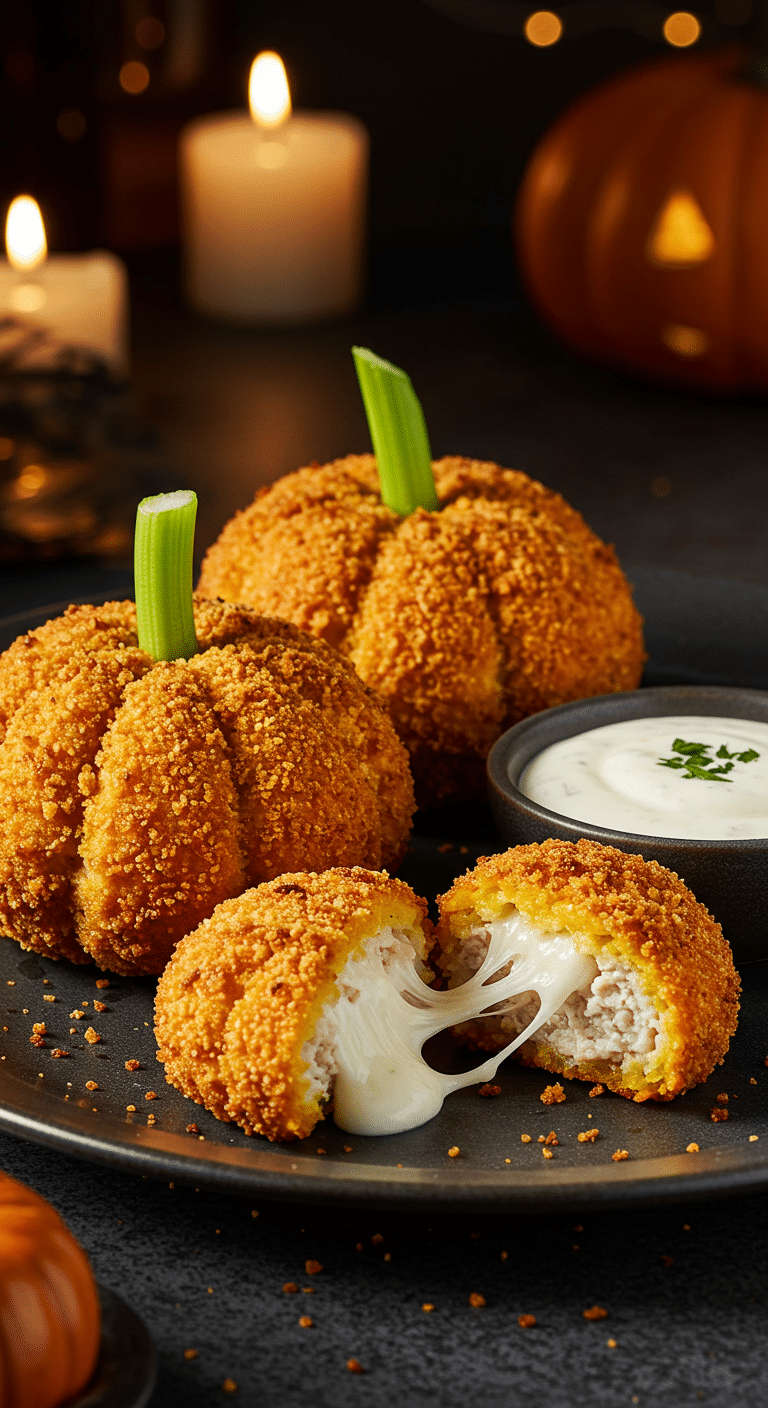
What makes these Chicken Pumpkins so spectacularly fun is their brilliant, easy-to-make design and their incredible combination of flavors and textures. This recipe is a masterpiece of festive creativity. The “pumpkins” start with tender chicken breasts, which are brined in buttermilk to make them extra juicy. They are then cleverly stuffed with a piece of a mozzarella cheese stick and rolled into a round, pumpkin-like shape. The real magic for the flavor and crunch is the coating: a super savory and crispy crust made from crushed Cheddar crackers. The chicken pumpkins are then deep-fried to a perfect golden brown and finished with a cute and realistic celery “stem.”
| Metric | Time / Level |
| Total Time | 3 hours (includes brining) |
| Active Prep Time | 30 minutes |
| Difficulty Level | Intermediate |
| Servings | 8 “pumpkins” |
The Pumpkin Patch Kitchen: The Essential Ingredients & Tools
This iconic party treat uses a handful of high-quality ingredients and one crucial technique to create its signature festive look.
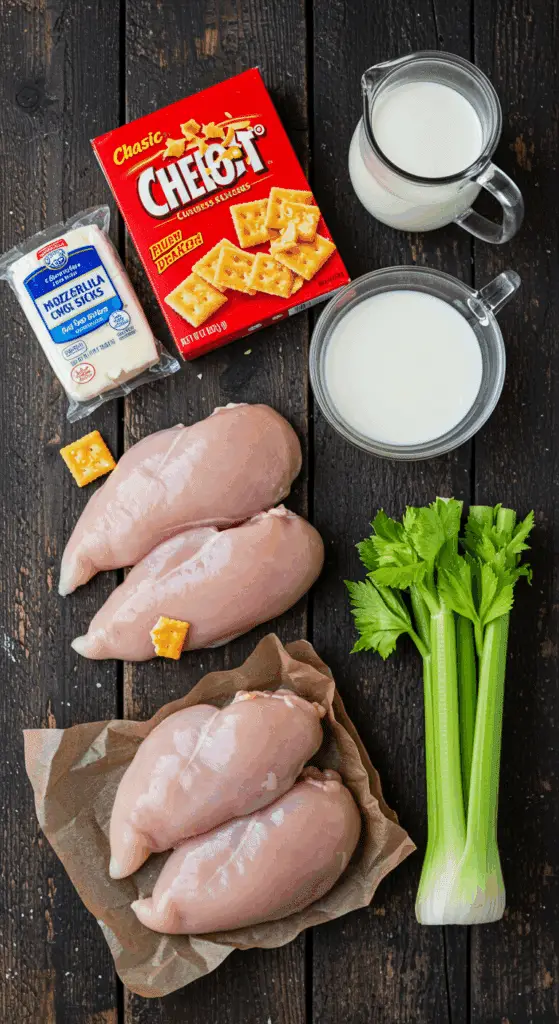
- The Juicy Chicken:
- The Buttermilk Brine: This is the number one, non-negotiable secret to unbelievably tender and juicy chicken, especially when you are frying it. The natural acidity and the enzymes in the buttermilk work as a fantastic, gentle tenderizer, breaking down the tough proteins in the chicken and guaranteeing an incredibly moist result.
- The Gooey Cheese Center:
- Mozzarella Cheese Sticks: A brilliant and easy shortcut! The secret to a perfect, gooey, melted cheese center that doesn’t completely ooze out and disappear during frying is to freeze the cheese sticks until they are solid before you stuff them into the chicken.
- The Crispy Cracker Crust:
- Cheddar Crackers: This is a fantastic and flavorful hack! Using a box of your favorite cheesy snack crackers (like Cheez-It®) for the breading is the key that provides a beautiful orange “pumpkin” color, a wonderful, savory cheese flavor, and an ultra-crispy, crunchy texture all in one easy ingredient.
- The Key Equipment:
- A Deep-Frying Thermometer: For perfect, golden-brown, and safely cooked fried chicken, a deep-frying thermometer is your non-negotiable best friend. It is the only way to ensure your oil is at the perfect temperature.
The Deep-Frying Masterclass: The Secret to Perfect, Non-Greasy Results
Deep-frying at home can seem intimidating, but it’s surprisingly easy if you follow a few simple, crucial rules.
- Use the Right Pot: A heavy-bottomed pot, like a Dutch oven, is essential. It will hold the oil’s temperature steady, which is the key to a crispy, not greasy, result.
- Monitor Your Temperature: The magic temperature for frying is 350°F (175°C). If the oil is too cool, your food will absorb a ton of oil and become greasy. If it is too hot, the crust will burn before the chicken inside has a chance to cook. A clip-on deep-frying thermometer is the only way to guarantee a perfect result.
- Don’t Overcrowd the Pot: Frying just a few pieces at a time is crucial for maintaining the oil’s temperature.

Step-by-Step to the Best Chicken Pumpkins
This fun and festive appetizer is a joy to prepare.
Part 1: Brine and Prepare the Chicken
Step 1: Cut a series of deep, crosswise slits into each of your 4 chicken breasts, being careful not to cut all the way through. Cut each chicken breast in half lengthwise to create 8 pieces.
Step 2: In a large bowl, whisk together the 3 cups of buttermilk, 2 teaspoons of salt, and 1/4 teaspoon of pepper. Add the chicken pieces to the bowl and toss to coat. Cover the bowl and refrigerate the chicken for at least 2 hours, or up to overnight.
Step 3: While the chicken is brining, cut your 4 mozzarella cheese sticks in half crosswise so that you have 8 pieces. Place them on a small plate and freeze them until they are solid, which will take about 2 hours.
Part 2: Stuff, Roll, and Coat Your Pumpkins
Step 1: In a food processor, process your 1 box of Cheddar crackers until they are finely ground. Transfer the crumbs to a large bowl. Step 2: One at a time, remove your chicken pieces from the buttermilk, letting any excess liquid drip off. Place a piece of the frozen cheese on one end of the chicken and roll it up to enclose the cheese. Secure the rolled chicken with a toothpick. Step 3: Transfer the rolled chicken to the bowl of cracker crumbs and toss it to thoroughly coat it on all sides. Shake off any excess coating and transfer the chicken “pumpkin” to a cutting board. Repeat this process with all your chicken pieces.
Part 3: Cook to Golden, Crispy Perfection
Step 1: Fill a large Dutch oven with 3 to 4 inches of vegetable oil. Heat the oil over a medium heat until a deep-frying thermometer registers 350°F. Set a wire rack on a baking sheet nearby. Step 2: Working in batches of two, carefully lower your coated chicken “pumpkins” into the hot oil using a slotted spoon. Step 3: Fry the chicken for about 4 minutes, until it is a deep golden brown, the crust is crispy, and a thermometer inserted into the center of the meat registers 160°F. Step 4: Remove the chicken from the oil and transfer it to your prepared wire rack to drain. Step 5: For the final, adorable touch, carefully insert a small, 1-inch piece of a celery stalk into the center of each of your hot chicken “pumpkins” to create the “stem.”
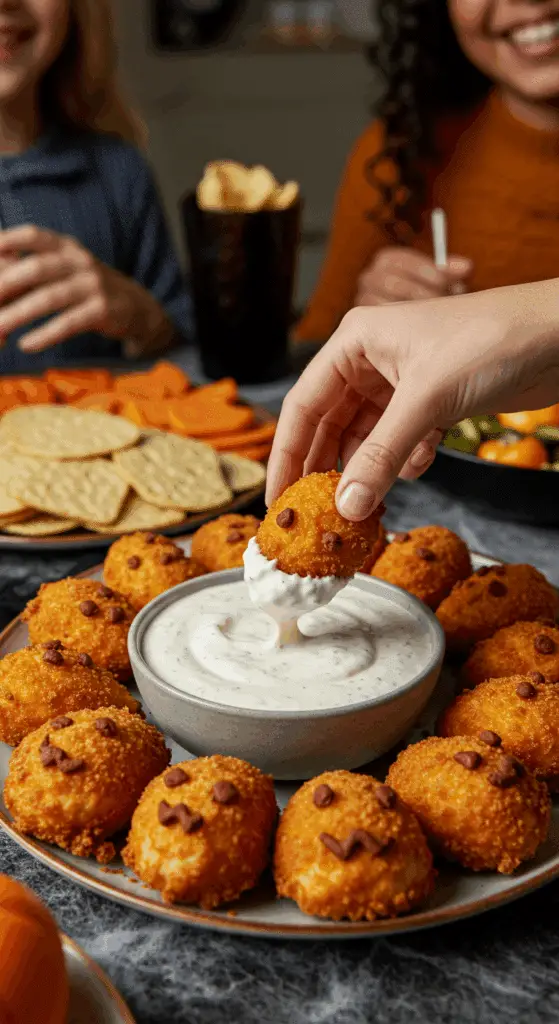
Serve your Chicken Pumpkins hot with a side of ranch sauce for dipping.

Cheesy Chicken ‘Pumpkins’ (A Fun Fall Appetizer!)
A fun and festive fall-themed recipe for ‘Chicken Pumpkins.’ This dish features pieces of buttermilk-marinated chicken breast that are coated in a savory crust made from finely ground Cheddar crackers. A piece of a frozen mozzarella cheese stick is rolled inside each piece of chicken, which is then secured with a toothpick and deep-fried until golden, crispy, and cooked through. A small piece of a celery stalk is inserted into the melted cheese center to create a ‘pumpkin stem,’ making for a perfect kid-friendly meal or party appetizer.
Ingredients
- 4 chicken breasts (about 2 pounds total)
- 3 cups buttermilk
- Kosher salt and freshly ground black pepper
- 4 mozzarella cheese sticks
- Vegetable oil, for frying
- 2 celery stalks with leaves attached
- One 14.2-ounce box Cheddar crackers (e.g., Cheez-It)
- Ranch sauce, for serving
Instructions
- Cut a series of deep crosswise slits into each chicken breast without cutting all the way through. Then, cut each chicken breast in half lengthwise to create 8 pieces total.
- In a large bowl, whisk together the buttermilk, 2 teaspoons of salt, and 1/4 teaspoon of pepper. Add the chicken, toss to coat, cover, and refrigerate for at least 2 hours or up to overnight.
- Cut each mozzarella stick in half crosswise to create 8 pieces. Freeze them for at least 2 hours, until solid.
- Prepare for Frying: Fill a large Dutch oven or heavy pot with 3 to 4 inches of vegetable oil. Heat over medium heat until a deep-frying thermometer registers 350°F. Set a wire rack on a baking sheet.
- While the oil heats, process the Cheddar crackers in a food processor until finely ground. Transfer the crumbs to a large bowl.
- Coat and Fry the Chicken: One at a time, remove a piece of chicken from the buttermilk, letting the excess drip off. Transfer it to the bowl of cracker crumbs and toss to coat thoroughly.
- Place a piece of frozen cheese on one end of the chicken and roll it up tightly to enclose the cheese. Secure the roll with a toothpick.
- Working in batches of two, carefully lower the coated chicken into the hot oil. Fry for about 4 minutes, until golden, crispy, and a thermometer inserted into the center reads 160°F.
- Remove the chicken to the prepared wire rack to drain.
- Cut eight 1-inch pieces from the skinny tops of the celery stalks to be used as ‘stems.’ Insert a celery stem into the melted cheese center of each ‘pumpkin.’
- Serve hot with ranch sauce for dipping.
Notes
- Special Equipment: A deep-frying thermometer is recommended for this recipe.
- Marinating the chicken in buttermilk is a key step that helps to tenderize the meat.
- Freezing the mozzarella sticks before stuffing the chicken prevents the cheese from melting out too quickly during frying.
- Cooking the chicken in small batches is important to maintain the oil temperature and ensure a crispy, not greasy, result.
Storage and Make-Ahead Tips
These Chicken Pumpkins are the ultimate make-ahead party appetizer!
- Make-Ahead: The absolute best way to make these ahead is to freeze the un-cooked pumpkins. You can fully assemble and coat the raw chicken pumpkins, and then freeze them solid on a baking sheet. Once they are frozen, you can transfer them to a freezer-safe, resealable bag. You can then fry them directly from frozen, just be sure to add a few extra minutes to the total cooking time.
- Storage: Store any leftover fried chicken pumpkins in an airtight container in the refrigerator for up to 3 days.
- Reheating: The best way to reheat the pumpkins and bring back their original crispy crust is in an air fryer at 375°F (190°C) for just 5-8 minutes.
For more recipe follow my pinterest account
Frequently Asked Questions (FAQs)
Q1: What is the absolute, number one secret to truly juicy and tender fried chicken?
The secret is a buttermilk brine! The natural acidity and the enzymes in the buttermilk are a fantastic, gentle tenderizer that will break down the tough proteins in the chicken and guarantee an incredibly moist and flavorful result every single time.
Q2: Can I make these chicken pumpkins ahead of time and freeze them?
Yes, this is a perfect freezer-friendly appetizer! It is best to freeze the un-cooked, fully assembled and coated chicken pumpkins. This will allow you to simply fry them fresh on the day of your party for the absolute best, crispiest, and juiciest result.
Q3: Can I make these in an air fryer or in the oven instead of deep-frying them?
Yes, absolutely! For an air fryer, preheat it to 375°F (190°C). Spray the coated chicken pumpkins generously with cooking spray and cook for about 15-20 minutes, flipping them halfway through, until they are golden brown and cooked through. For the oven, bake them on a wire rack set on a baking sheet at 400°F (200°C) for about 20-25 minutes.
Q4: How do I keep the cheese from completely melting and oozing out during frying?
The most important trick is to freeze your cheese sticks solid before you stuff them into the chicken. This ensures that the cheese will take much longer to melt, so by the time the chicken is perfectly cooked and the crust is golden brown, the cheese on the inside will be perfectly gooey and melted, but not completely liquefied.
Q5: Can I use a different kind of cracker for the coating?
Of course! This recipe would also be fantastic with finely crushed, buttery Ritz® crackers, classic saltines, or even some panko breadcrumbs mixed with a little bit of Parmesan cheese and some paprika for color.


