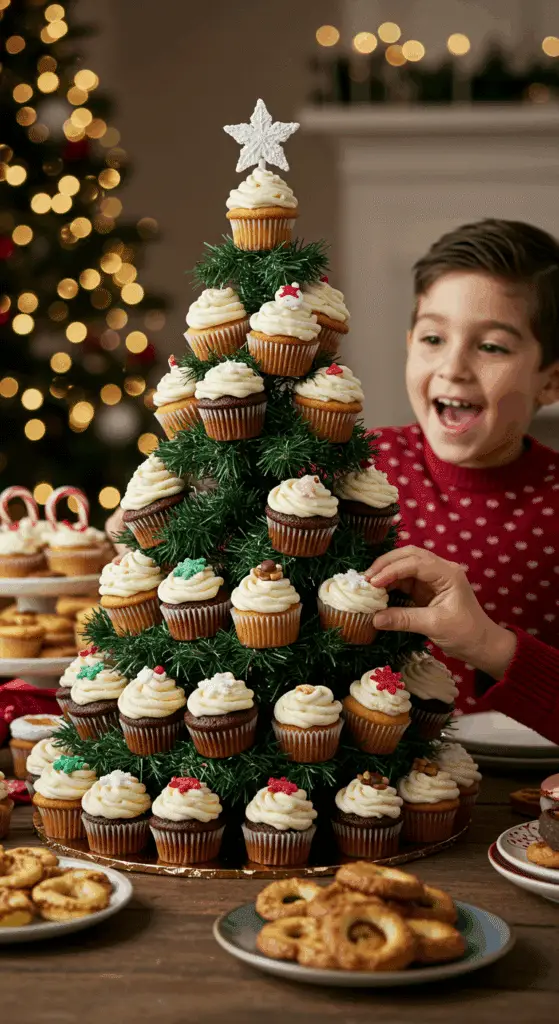
Are you searching for the ultimate edible centerpiece for your Christmas celebration? A magnificent, jaw-dropping dessert so stunning and festive, it will be the star of the show and have all your guests gasping in awe? This incredible, from-scratch-tasting Cupcake Christmas Tree is that perfect recipe! We’re talking a whole forest of moist, decadent chocolate cupcakes, frosted and decorated to look like ornaments, and then cleverly arranged on a cone to create a spectacular, three-dimensional, and completely edible Christmas tree.
This isn’t just a recipe; it’s a guide to your new favorite holiday tradition. It has all the “wow” factor of a giant, sculpted cake, but with the brilliant, family-friendly ease of a pull-apart design—no cutting required! We’ll show you the simple but brilliant secrets to creating this stunning, architectural dessert at home. This is a guaranteed, crowd-pleasing hit that is as fun to build as it is to eat, making it the perfect weekend project for the whole family.
Table of Contents
Table of Contents
Recipe Overview: The Ultimate Edible Holiday Centerpiece
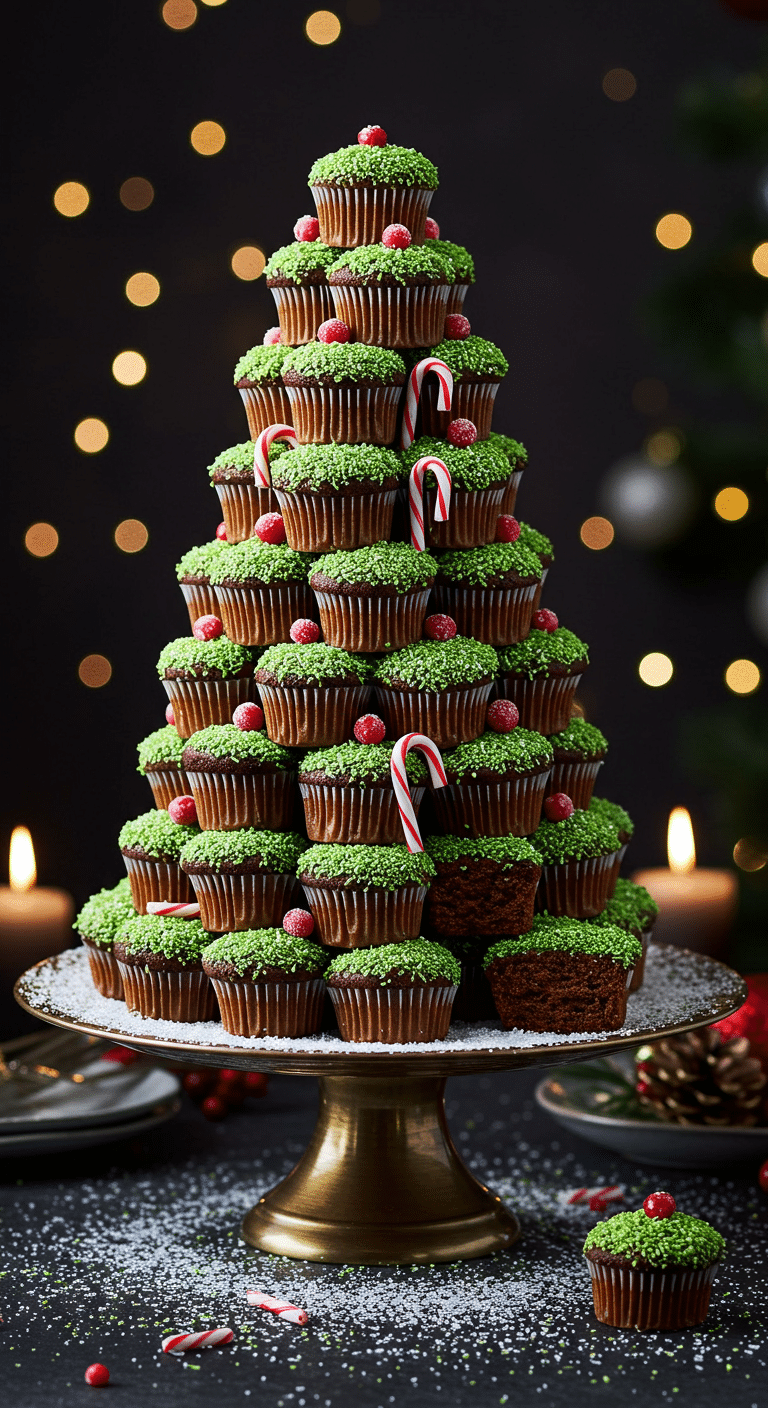
What makes this Cupcake Christmas Tree so spectacularly fun is its brilliant, sculptural design and its classic, crowd-pleasing flavor. This recipe is a masterpiece of festive creativity. The “tree” is constructed from dozens of individual, from-scratch mini chocolate cupcakes, which get their incredibly moist texture from a classic, boiling water technique. Each cupcake is frosted with a simple, fluffy American buttercream, and then dipped in festive green sprinkles to become the “ornaments” or “leaves” of our tree. The real magic, however, is in the assembly. The finished cupcakes are attached with toothpicks to a Styrofoam cone, creating the stunning, 3D Christmas tree shape. The final, festive touches are adorable candy cane decorations and beautiful, gilded cranberries.
| Metric | Time / Level |
| Total Time | 4 hours (includes cooling & chilling) |
| Active Prep Time | 1 hour 30 minutes |
| Difficulty Level | Intermediate |
| Servings | 30-40 |
Santa’s Bakeshop: The Essential Ingredients & Tools
This iconic party cake uses a handful of high-quality ingredients and one key piece of equipment to create its signature festive look.
- The Chocolate Cupcakes (The “Ornaments”!):
- The “Blooming” Cocoa Technique: This recipe uses a classic, professional baker’s secret! By adding boiling water to the batter, you are “blooming” the cocoa powder. This is the key that unlocks its deepest, most intense chocolate flavor and guarantees an incredibly moist, tender cupcake crumb.
- The Buttercream Frosting (The “Snowy Glue”!): A classic, simple, and delicious American buttercream is made from softened butter, confectioners’ sugar, and a splash of milk.1 It’s the perfect, fluffy “glue” to hold our sprinkles and to attach our decorations.
- The Key Equipment (The Tree Structure!):
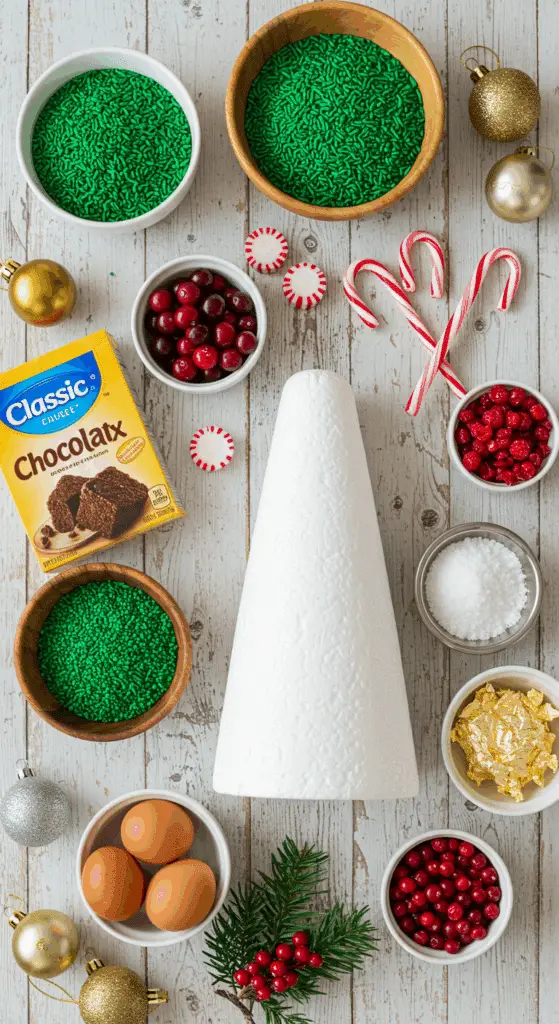
- The Styrofoam Cone: This is the secret to the impressive, 3D shape! A simple, 11-inch Styrofoam cone, which you can find at any craft store, is the perfect, sturdy, and easy-to-use base for our tree.
- Toothpicks: These are the brilliant “branches” of our tree, used to securely attach each cupcake to the cone.
The Holiday Construction Zone: The Secret to a Sturdy Tree
This recipe is all about the fun, creative construction. Here are a few simple but crucial techniques that guarantee a flawless, impressive result.
- A Sturdy Base: It is crucial to start with a sturdy base. Place your Styrofoam cone on a large, flat serving platter or a cake board before you begin to decorate.
- The Toothpick “Branches”: The secret to a full and beautiful tree is to insert your toothpicks into the cone in staggered rows. Start with a wide circle at the base, and then place the toothpicks for your next row in between the cupcakes of the row below.
- Chilling is Key: After you have frosted your cupcakes, it is essential to chill them for at least an hour. This is the non-negotiable secret that will firm up the frosting, which is the key that prevents the frosting from smearing and making a mess when you are pressing the cupcakes onto the tree.

Step-by-Step to the Best Cupcake Christmas Tree
This fun and festive project is a joy to prepare.
Part 1: Bake the Chocolate “Ornaments” (The Cupcakes)
Step 1: First, preheat your oven to 375°F (190°C). Line your mini muffin tins with paper liners (you will need about 30-40 cupcakes in total).
Step 2: In the bowl of a stand mixer, mix together the 2 cups of sugar, the 1 3/4 cups of flour, the 3/4 cup of cocoa powder, the 1 1/2 teaspoons of baking powder, the 1 1/2 teaspoons of baking soda, and the 1 teaspoon of salt.
Step 3: Add the 2 eggs and the 1 cup of whole milk and mix until well combined. Drizzle in the 1/2 cup of vegetable oil and the vanilla and almond extracts and mix.
Step 4: With the mixer running on a low speed, carefully add the 1 cup of boiling water and mix just until the batter is smooth.
Step 5: Fill your lined muffin cups about two-thirds full. Bake for about 20 minutes, until the cupcakes have risen and are firm to the touch. Let the cupcakes cool completely.
Part 2: Whip Up the Frosting and Decorate the “Ornaments”
Step 1: To make the frosting, in a stand mixer, cream your 8 tablespoons of softened butter until smooth. Add the 1 pound of confectioners’ sugar, the 1 teaspoon of vanilla, and 2 tablespoons of milk and mix until smooth. Add more milk, a little at a time, until the frosting is thick and spreadable.
Step 2: Use a flexible spatula to frost the tops of your cooled cupcakes. Refrigerate the cupcakes for at least 1 hour before you begin to assemble the tree.
Step 3: Spread a thick layer of your green sprinkles out on a plate. Dip the tops of your chilled cupcakes into the sprinkles to coat them completely.
Part 3: The Art of Building Your Christmas Tree
Step 1: Starting about one inch up from the bottom of your Styrofoam cone, stick toothpicks into the cone, about 1 1/2 inches apart, to create a circle all around the cone. Leave the toothpicks sticking out at least 1 inch. Place the cone on a large serving platter.
Step 2: Create the bottom row of your tree by carefully spearing the bottom of one of your sprinkle-coated cupcakes onto one of the toothpicks, with the frosted top facing out.
Step 3: One inch above the tops of your first row, place another, staggered row of toothpicks. Continue this process of spearing your cupcakes onto the toothpicks to create your beautiful, full tree, ending with a single cupcake on the very top.
Step 4: For the final, festive touches, tie your curling ribbon around the candy canes and stick them into the Styrofoam between the cupcakes. Use a little extra frosting to “glue” your gilded cranberries onto the tree.

Cupcake Christmas Tree (A Showstopper Recipe!)
An elaborate and festive recipe for a ‘Cupcake Christmas Tree,’ a perfect showstopper centerpiece for a holiday party. This edible decoration is constructed from dozens of from-scratch, chocolate mini cupcakes that are frosted with a simple buttercream and coated in green sprinkles. The cupcakes are then arranged on an 11-inch styrofoam cone using toothpicks to create the shape of a Christmas tree. The finished tree is decorated with candy canes, cranberries coated in gold leaf, and ribbon for a stunning holiday presentation.
Ingredients
- For the Cupcakes:
- 2 cups sugar
- 1 3/4 cups all-purpose flour
- 3/4 cup cocoa powder
- 1 1/2 teaspoons baking powder
- 1 1/2 teaspoons baking soda
- 1 teaspoon salt
- 2 large eggs
- 1 cup whole milk
- 1/2 cup vegetable oil
- 1 teaspoon pure vanilla extract
- 1 teaspoon almond extract
- 1 cup boiling water
- For the Buttercream Frosting:
- 8 tablespoons (1 stick) unsalted butter, softened
- 1 pound confectioners’ sugar
- 1 teaspoon pure vanilla extract
- 2 to 4 tablespoons whole milk
- For Assembly and Decoration:
- Paper mini cupcake liners
- Green sprinkles or jimmies
- 1 small 11-inch styrofoam cone
- 30 to 40 toothpicks
- 10 small candy canes
- 1/2 cup fresh cranberries
- Edible gold leaf
- Gold and red curling ribbon
- Granulated sugar, for ‘snow’
Instructions
- Make the Cupcakes: Preheat the oven to 375°F. Line mini muffin tins.
- In a mixer, combine the sugar, flour, cocoa powder, baking powder, baking soda, and salt. Add the eggs, milk, oil, and extracts and mix until combined. With the mixer on low, add the boiling water and mix until smooth.
- Fill the lined muffin cups about 2/3 full and bake for about 20 minutes, until a toothpick comes out clean. Let the cupcakes cool completely.
- Make the Frosting: In a mixer, cream the softened butter. Add the confectioners’ sugar, vanilla, and 2 tablespoons of milk and mix until smooth, adding more milk as needed until the frosting is thick and spreadable.
- Assemble the Tree: Frost the tops of the cooled cupcakes and refrigerate for at least 1 hour to set.
- Spread the green sprinkles on a plate and dip the tops of the frosted cupcakes in the sprinkles to coat them.
- Starting 1 inch from the bottom of the styrofoam cone, insert toothpicks 1 1/2 inches apart in a circle around the cone.
- Spear the bottom of a cupcake onto one of the toothpicks, with the frosted side facing out. Continue to create the bottom ring of cupcakes.
- Insert another row of toothpicks 1 inch above the first, staggering them. Continue adding rows of cupcakes, working your way up the cone to form a tree shape, ending with a single cupcake on top.
- Decorate the finished tree by inserting candy canes and gilded cranberries (cranberries rolled in gold leaf) into the styrofoam. Pour sugar on the serving platter around the base to create ‘snow.’
Notes
- Special Equipment: This project requires an 11-inch styrofoam cone, 30-40 toothpicks, and mini muffin tins.
- This is a showstopper, edible centerpiece that requires significant assembly time. It’s a great project for a holiday party.
- Refrigerating the frosted cupcakes for at least an hour is a crucial step that helps them to firm up, making them much easier to handle during assembly.
- The number of cupcakes needed will depend on the exact size of your cone.
Storage and Make-Ahead Tips
- Make-Ahead: This is the perfect make-ahead holiday centerpiece! You can bake the cupcakes up to 2 days in advance and store them in an airtight container at room temperature. The frosting can also be made a day in advance and stored in the refrigerator.
- Storage: For the best and freshest result, it is a great idea to assemble the tree on the day of your party.
For more recipe follow my pinterest account
Frequently Asked Questions (FAQs)
Q1: What is the absolute, number one secret to a cupcake tree that doesn’t fall apart?
The secret is a sturdy base and a good connection. Using a solid Styrofoam cone and inserting your toothpicks at a slight upward angle are the keys that will ensure your cupcakes stay securely in place.
Q2: Can I make this with a boxed cake mix?
Yes, absolutely! For an even easier shortcut, you can absolutely use your favorite brand of a boxed chocolate cake mix to make your mini cupcakes. You will likely need about two boxes to get enough cupcakes.
Q3: How do guests eat this?
That’s the best part! It’s a pull-apart cake, so there is no need for a knife or a plate. Your guests can simply and easily pull their own, individual cupcake right off the tree.
Q4: How do I make the “gilded” cranberries?
It’s surprisingly easy! You will need a small sheet of edible gold leaf, which you can find at most craft stores or online. Simply and gently roll your fresh cranberries on the sheet of gold leaf until they are roughly and beautifully coated.
Q5: What if I can’t find a Styrofoam cone?
If you can’t find a Styrofoam cone, you can create your own DIY version by rolling a large piece of a sturdy poster board into a cone shape, securing it with tape or staples, and then covering the entire cone in aluminum foil.


