Looking for the ultimate spooky, fun, and secretly simple treat for your next Halloween celebration? A festive snack that is a little bit healthier but just as delicious and satisfying as a pile of candy? This incredible, from-scratch Apple Spider Web Pops recipe is the perfect magical creation! We’re talking a crisp, tart, and juicy slice of a Granny Smith apple, dipped in a rich chocolate shell and decorated with a creepy, crawly, and completely edible spiderweb.
This isn’t just a recipe; it’s a guide to your new favorite Halloween project. We’ll show you the simple but crucial secrets to a flawless, glossy chocolate coating and the easy, kid-friendly craft of creating a perfect spiderweb design. This is a show-stopping, no-fuss treat that is as fun to make as it is to eat, making it a guaranteed hit for any ghoulish gathering.
Table of Contents
Table of Contents
Recipe Overview: The Ultimate Spooky & Healthy-ish Halloween Treat
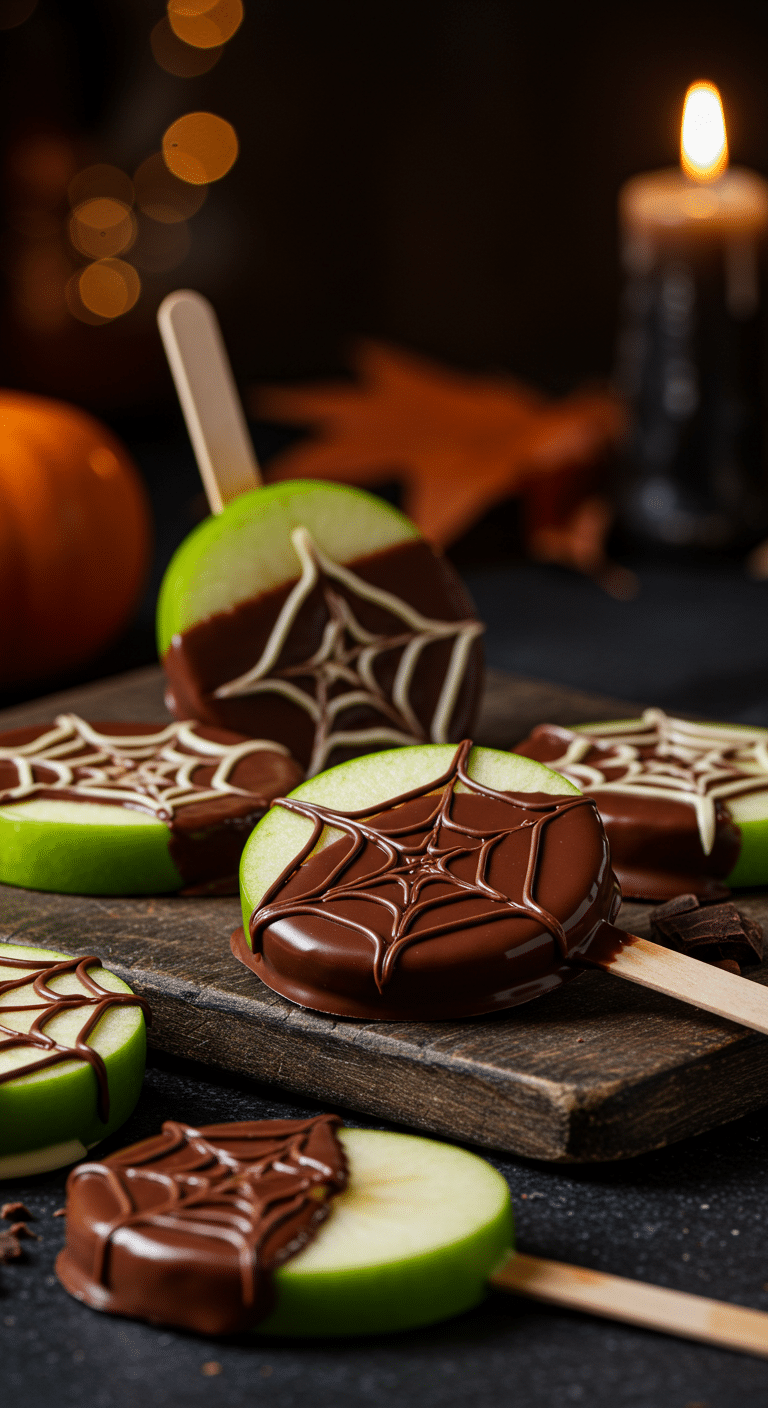
What makes these Apple Spider Web Pops so spectacularly fun is their brilliant, spooky design and their classic, crowd-pleasing flavor. This recipe is a masterpiece of festive simplicity. The “pops” are thick, sturdy slices of a crisp Granny Smith apple, which are then dipped in a smooth and glossy shell of either rich bittersweet chocolate or creamy white chocolate. The real magic, however, is in the decoration. Using the opposite color of chocolate, a simple but brilliant technique of piping concentric circles and then dragging a toothpick through them creates the most incredible and realistic spiderweb.
| Metric | Time / Level |
| Total Time | 1 hour |
| Active Prep Time | 30 minutes |
| Difficulty Level | Easy |
| Servings | 8 pops |
The Witch’s Workshop: The Essential Ingredients & Tools
This iconic party treat uses a handful of simple, high-quality ingredients to create its signature spooky look.
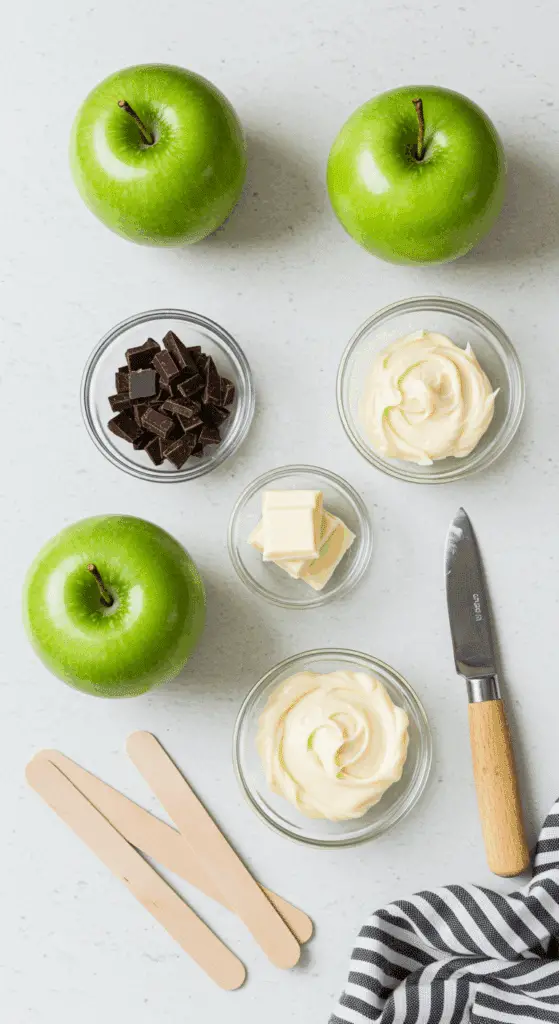
- The Apples (The Perfect Canvas!):
- The key to a perfect apple pop is the contrast between the sweet chocolate and the apple itself. It is essential to use a firm, crisp, and tart apple variety. A classic, bright green Granny Smith, as the recipe suggests, is the number one choice for its intense tartness and crisp texture. A Honeycrisp or a Pink Lady would also be fantastic.
- The Chocolate Coating:
- Bittersweet & White Chocolate: Using both a high-quality bittersweet and a white chocolate is the secret to the beautiful, high-contrast, black-and-white spiderwebs.
- Coconut Oil: This is a brilliant and simple trick! Adding a small amount of coconut oil to your melting chocolate is the secret that will give it a wonderfully smooth, fluid consistency that is perfect for dipping, and it will also help the chocolate to set up with a beautiful, glossy shine (just like a “magic shell”!).
- The Key Equipment:
- Ice-Pop Sticks: A few wooden ice-pop sticks or sturdy lollipop sticks are essential for turning your apple slices into fun and easy-to-eat “pops.”
- Piping Bags: For the most control and the neatest results, it is highly recommended to use disposable piping bags or simple zip-top bags with a tiny corner snipped off to create your spiderwebs.

Step-by-Step to the Best Apple Spiderweb Pops
This fun and festive project is incredibly simple to prepare.
Step 1: Prepare the Apple Slices and Melt the Chocolates
Step 1: First, line a large baking sheet with parchment paper or a silicone baking mat.
Step 2: Prepare your apples. Wash your 2 large Granny Smith apples very well and then dry them completely and totally.
Pro Tip: This is a crucial step! Any moisture on the surface of the apple will prevent the melted chocolate from sticking properly.
Step 3: Carefully cut the apples lengthwise (from the stem to the bottom) into 4 thick, sturdy slices each. Remove any visible seeds. Poke a small hole in the bottom of each slice with one of your wooden ice-pop sticks and then push the stick about halfway into the apple slice.
Step 4: In a medium, microwave-safe bowl, combine your 4 ounces of chopped bittersweet chocolate and 1 teaspoon of the coconut oil. Microwave at 50 percent power in 30-second increments, stirring in between each one, until the chocolate is melted and smooth.
Step 5: In a separate, medium, microwave-safe bowl, repeat this process with your 4 ounces of chopped white chocolate and the remaining 1 teaspoon of coconut oil.
Part 2: Dip the Apples and Create Your Spiderwebs
Step 1: Dip half of your apple slices (4 pops) completely in the bittersweet chocolate, allowing any excess to drip back into the bowl. Place them on your prepared baking sheet.
Step 2: Dip the remaining 4 apple slices in the white chocolate and place them on the prepared baking sheet.
Step 3: Let the coated apples sit at room temperature for about 10 to 15 minutes. This allows the chocolate to thicken slightly, which is the key that will prevent your spiderweb design from sinking and bleeding.
Step 4 (The Fun Part!): Transfer your leftover dark and white chocolate to two separate, small, resealable plastic bags and snip a very small corner off each of the bags.
Step 5: On your white chocolate-dipped apples, pipe 3 to 4 concentric circles with the dark chocolate. On your dark chocolate-dipped apples, pipe your concentric circles with the white chocolate.
Step 6: Now, use a toothpick or a thin skewer to gently drag a line from the center circle all the way out to the edge of the apple. Wipe your toothpick clean and repeat this process every inch or so, all the way around the apple, to create the classic, spooky “spiderweb” effect.
Step 7: Refrigerate the finished apple pops until the chocolate has completely hardened, which will take about 15 to 20 minutes.
Storage and Make-Ahead Tips
These Apple Spider Web Pops are the perfect make-ahead party treat!
- Make-Ahead: You can make these festive pops up to 24 hours in advance.
- Storage: Store the finished apple pops in a single layer in an airtight container in the refrigerator. The cold will help the chocolate to stay firm and the apple to stay crisp.

Apple Spiderweb Pops (The Perfect Halloween Treat!)
An easy and festive recipe for ‘Apple Spider Web Pops,’ a perfect no-bake treat for Halloween. This kid-friendly project involves dipping thick slices of Granny Smith apple on sticks into melted bittersweet and white chocolate. A spooky spiderweb design is then created on each pop by piping concentric circles of the contrasting chocolate color and dragging a toothpick from the center outwards. The finished pops are chilled until the chocolate is firm.
Ingredients
- 2 large Granny Smith apples, stemmed
- 4 ounces chopped bittersweet chocolate
- 4 ounces chopped white chocolate
- 2 teaspoons coconut oil
- 8 wooden ice-pop sticks
Instructions
- Special Equipment: You will need 8 wooden ice-pop sticks and a toothpick.
- Line a baking sheet with parchment paper. Cut each apple lengthwise into 4 thick slices. Cut a thin slice off the rounded back of the two end pieces so they lay flat. Insert an ice-pop stick halfway into the bottom of each apple slice.
- In two separate microwave-safe bowls, melt the bittersweet chocolate with 1 teaspoon of coconut oil, and the white chocolate with the other teaspoon of coconut oil. Microwave in 30-second increments, stirring in between, until smooth.
- Dip half of the apple slices completely in the bittersweet chocolate and the other half in the white chocolate, letting the excess drip off. Place them on the prepared baking sheet. Let them sit at room temperature for 10 to 15 minutes for the chocolate to thicken slightly.
- Transfer the leftover dark and white chocolates to two separate small resealable plastic bags and snip a small corner off each.
- Pipe 3 to 4 concentric circles of dark chocolate onto the white chocolate-dipped apples. Repeat with the white chocolate on the dark chocolate-dipped apples.
- Working quickly, drag a toothpick through the circles, starting from the center and pulling outwards to the edge to create a spider web design.
- Refrigerate the pops for 15 to 20 minutes, until the chocolate has hardened completely.
Notes
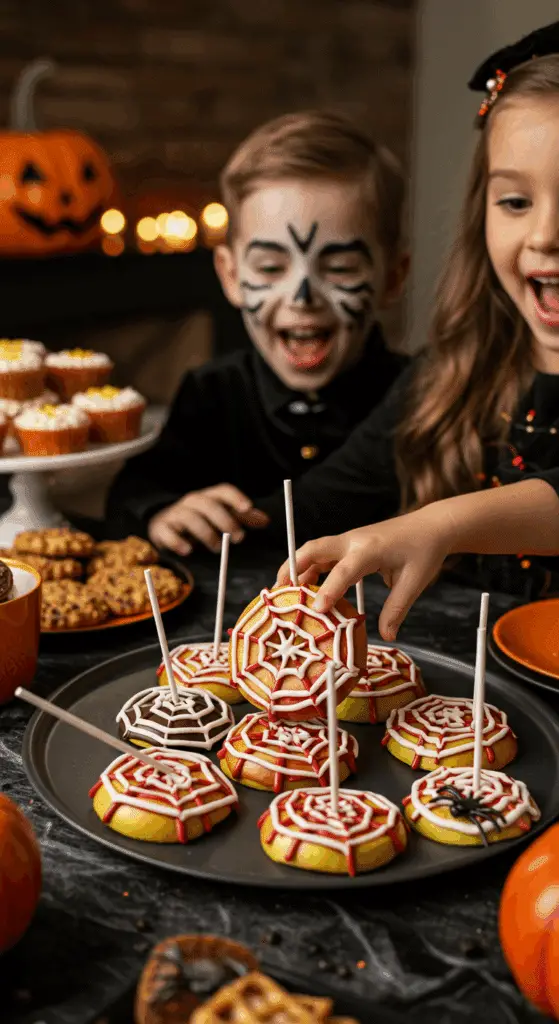
- This is a fun, creative, and mostly no-bake treat that is perfect for a Halloween party or a festive family activity.
- Adding a small amount of coconut oil to the chocolate helps it to melt smoothly and creates a better consistency for dipping.
- The spiderweb design is a simple but effective decorating technique that is easy for all ages to create.
Creative Recipe Variations (“Make it Your Own Potion!”)
- Add a Creepy Crawly Spider: For an even spookier and more fun look, you can create a simple, edible spider to place on top of your web! Simply use a small dot of the melted chocolate to “glue” a brown or black M&M® or a chocolate-covered raisin to the center of the web for the “body,” and then use your piping bag to pipe on eight little “legs.”
- Use a Different Spooky Color: For a fun and vibrant twist, you can use a high-quality, oil-based food coloring or a colored candy melt to create a spooky, orange, green, or purple base for your spiderwebs.
- Add Some Spooky Sprinkles: For an extra layer of fun and crunch, you can sprinkle your freshly dipped apples with your favorite Halloween-themed sprinkles or some finely chopped nuts before the chocolate has a chance to set.
For more recipe follow my pinterest account
Enjoy Your Ultimate Spooky & Sweet Halloween Treat!
You’ve just created a truly special treat that is a perfect harmony of fun, classic ingredients and delicious, satisfying flavors. These classic “Apple Spider Web Pops” are a testament to the power of a simple, creative idea to become an instant party favorite and a treasured holiday tradition. It’s a rewarding and deeply satisfying recipe that is sure to make your Halloween party a memorable one.
We hope you enjoy every last, perfect, and delicious bite!
If you enjoyed making this recipe, please leave a comment below or share it with a friend who loves an easy and impressive meal!
Frequently Asked Questions (FAQs)
Q1: What is the absolute, number one secret to getting the chocolate to stick to my apples?
The secret is to use very, very dry apples. Most store-bought apples have a natural or a man-made wax coating on their skin. Be sure to wash your apples well under warm water and then to dry them completely with a clean kitchen towel. Any wax or moisture on the surface of the apple is the number one culprit that will cause your beautiful chocolate coating to slide right off.
Q2: What is the best and easiest way to make a perfect spiderweb design with the chocolate?
The secret is to use a contrasting color and a toothpick or a skewer. By piping a spiral of a white chocolate over your dark chocolate base, and then dragging a toothpick through it from the center to the edge, you are creating the classic, beautiful web effect that you see in professional bakeries and cafes. Be sure to wipe your toothpick clean after each drag for the cleanest lines.
Q3: Can I make these Halloween apple pops ahead of time for a party?
Yes, these are a perfect make-ahead party treat! You can prepare them completely and store them in an airtight container in the refrigerator for up to 24 hours before your party.
Q4: How do I keep my apple slices from turning brown before I dip them?
The key is to work quickly! However, if you would like to prep your apple slices a little bit ahead of time, you can place them in a bowl of cold water with a generous squeeze of fresh lemon juice. The acid in the lemon juice is a natural antioxidant that will significantly slow down the browning process. Just be sure to pat them completely and totally dry before you dip them in the chocolate.
Q5: Can I use regular chocolate chips instead of the chopped chocolate?
It is generally not recommended. Most chocolate chips contain stabilizers (like soy lecithin) that are designed to help them hold their shape when they are baked. These stabilizers can prevent the chocolate from melting into a smooth, fluid consistency that is needed for creating a thin, even shell.


