Are you ready to create one of the most legendary, most dramatic, and most unbelievably delicious desserts in the entire French pastry canon? The classic Apple Tarte Tatin is a true masterpiece of simple ingredients transformed by technique, resulting in a show-stopping, upside-down tart with a deep, dark caramel and a flaky, buttery crust.
Legend has it that this famous dessert was created by a happy accident in the 1880s by the Tatin sisters at their hotel in the French countryside. This is your ultimate, foolproof guide to recreating that delicious mistake at home. We’ll walk you through the simple secrets to a perfect, from-scratch pastry, a rich and deeply caramelized apple filling, and the thrilling final “flip” that makes this dessert so iconic. Get ready to bake a true showstopper.
Table of Contents
Table of Contents
Recipe Overview: The Ultimate French Classic
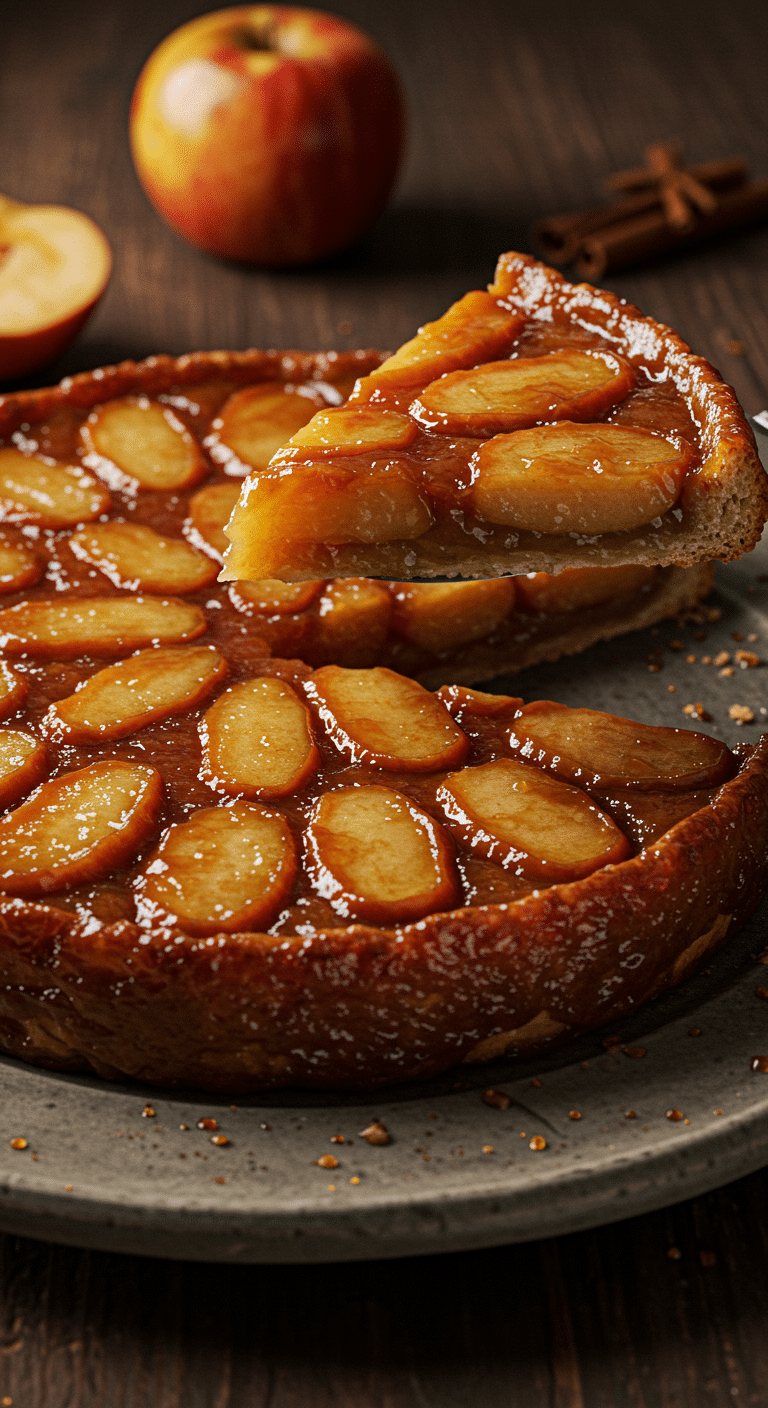
What makes a Tarte Tatin so spectacular is its unique, upside-down construction and its incredible depth of flavor. Unlike a traditional pie, the apples are first cooked in a buttery, rich caramel at the bottom of an oven-safe skillet. The pastry is then placed on top and baked. The grand finale is the dramatic inversion of the hot tart onto a platter, revealing a beautiful, glossy, caramelized apple topping. It is a stunning and sophisticated dessert that is perfect for any special occasion.
| Metric | Time / Level |
| Total Time | 2 hours 30 minutes (includes chilling) |
| Active Prep Time | 45 minutes |
| Difficulty Level | Intermediate |
| Servings | 8 |
The Essential Ingredients for This Elegant Tart
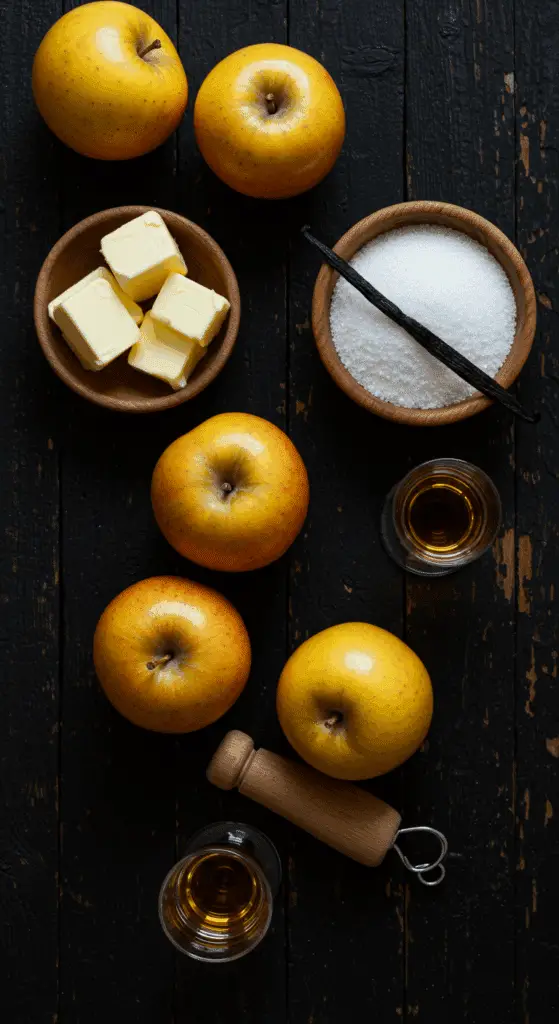
This recipe uses a handful of simple, high-quality ingredients to create a truly spectacular result.
- The All-Butter Pastry (Pâte Sablée): A rich, tender, and slightly sweet shortcrust pastry that is the perfect, buttery complement to the rich caramel.
- Cold Unsalted Butter: The absolute key to a flaky, tender crust. It is crucial that your butter is very cold and cut into small pieces.
- Lemon Zest: A touch of fresh lemon zest in the pastry adds a wonderful, bright, and fragrant note that beautifully complements the apples.
- The Caramel Apple Filling:
- The Apples: For a Tarte Tatin, you must use a firm baking apple that will hold its shape during the long cooking process and not turn into mush. A mix of a firm-sweet apple (like Golden Delicious or Honeycrisp) and a firm-tart apple (like Granny Smith or Braeburn) is a fantastic choice.
- The Caramel: This is a classic “wet caramel,” made by cooking sugar, apple cider, and lemon juice directly in the pan until it reaches a beautiful, deep amber color.
- A Real Vanilla Bean: Scraping the seeds from a real vanilla bean will give your caramel a much more intense, aromatic, and complex vanilla flavor than extract alone.
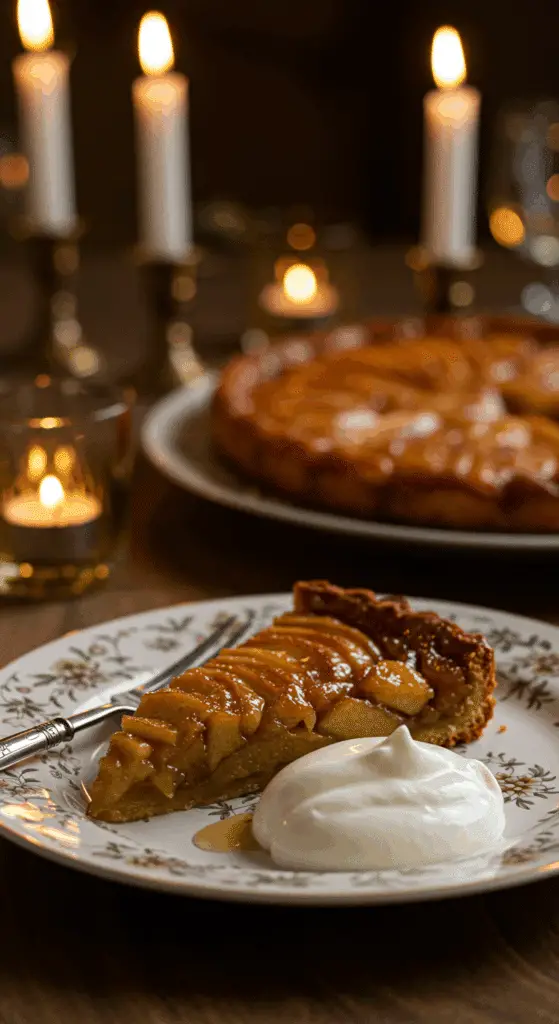
- The Garnish (Sweetened Mascarpone): The perfect, cool, and creamy counterpoint to the warm, rich tart. Mascarpone is a rich, soft Italian cream cheese with a subtle sweetness. A dollop of crème fraîche is also a classic, wonderful choice.

Step-by-Step to a Perfect Tarte Tatin
Making this elegant dessert is a rewarding process. Follow these detailed steps for a flawless result.
Part 1: The Tender All-Butter Pastry
Step 1: In the bowl of a food processor, add the 1 cup of all-purpose flour, the 1/4 cup of sugar, the pinch of salt, and the lemon zest. Pulse a few times to combine.
Step 2: Add the 1 stick of cold, cubed butter and pulse until the mixture resembles coarse cornmeal with some pea-sized pieces of butter remaining.
Step 3: Add the 1 egg yolk and 1 to 2 tablespoons of the ice water. Pulse the machine just a few times, until the mixture begins to come together into a ball. If it seems too dry, you can add another tablespoon of water.
Step 4: Turn the dough out onto a clean, lightly floured work surface. Knead it just once or twice to bring it into a smooth ball. Form the dough into a flattened disc, wrap it tightly in plastic wrap, and refrigerate for at least 1 hour.
Part 2: The Deep, Rich Caramel and Apple Base
Step 1: While the dough is chilling, prepare the filling. In a 10-inch, ovenproof, nonstick (or well-seasoned cast-iron) skillet, place the 1 cup of sugar, the 1/4 cup of apple cider, the 1/2 of a lemon, juiced, and the scraped vanilla bean seeds. Stir to combine.
Step 2 (Make the Caramel): Place the skillet over high heat and bring the mixture to a boil. If you see sugar crystals forming on the sides of the pan, you can use a pastry brush dipped in water to brush them down. Cook the mixture, swirling the pan gently, for 6 to 8 minutes, until the mixture turns a beautiful, deep amber color, like an old copper penny.
Step 3: Immediately remove the pan from the heat and carefully stir in the 1 stick of butter, a few pats at a time. Be very careful, as the mixture will bubble up vigorously.
Step 4: Once all the butter has been incorporated, begin to arrange the quartered apples in the hot caramel, with the rounded side facing down. Try to arrange them in a neat, tightly packed, concentric circle pattern. Remember, this bottom will be your beautiful top!
Step 5: Return the pan to the burner and cook the apples over medium heat for 20 minutes. This step is crucial for softening the apples and allowing their juices to meld with the caramel.
Part 3: Assembling and Baking Your Tart
Step 1: Preheat your oven to 425°F (220°C).
Step 2: Retrieve your chilled pastry from the refrigerator. On a lightly floured surface, roll the dough out to an even circle that is about 11 to 12 inches in diameter.
Step 3: Carefully place the rolled-out pastry on top of the cooked apples in the skillet. Use a spoon or a small knife to gently tuck the edges of the pastry in, down around the edges of the pan.
Step 4: Bake in the preheated oven for about 20 to 25 minutes, or until the pastry is a deep golden brown, crisp, and puffed.
Part 4: The Grand Finale – The Inversion
Let the tart cool in the pan for about 10 to 15 minutes. This allows the molten caramel to set up slightly.
Place a large, flat serving platter (that is larger than the skillet) upside down on top of the pastry.
Now for the dramatic moment! Wearing sturdy oven mitts, and with confidence, quickly and carefully flip the platter and the skillet over in one smooth motion. Let the tart fall gently out of the pan and onto the platter. If any of the apples have stuck to the pan, you can simply use a small spatula to lift them off and place them back on the tart.
Slice the warm tart into wedges and serve with a generous dollop of the sweetened mascarpone cheese.

The Best Classic Apple Tarte Tatin (A Foolproof Guide!)
A classic French Apple Tarte Tatin, which is a famous upside-down apple tart. The recipe begins by making a rich caramel sauce directly in an ovenproof skillet with sugar and apple cider. Peeled, cored, and quartered baking apples are then arranged in the skillet and cooked on the stovetop in the caramel. A simple, homemade, all-butter pastry dough is placed over the apples, and the entire tart is baked until the crust is golden brown. After a brief rest, the tart is carefully inverted onto a serving platter, revealing the beautifully caramelized apples on top.
- Prep Time: 25 minutes
- Cook Time: 50 minutes
- Total Time: 2 hours 30 minutes (includes chilling and cooling time)
- Yield: 6-8 servings
- Category: Dessert
- Method: Baking, Caramelizing
- Cuisine: French
- Diet: Vegetarian
Ingredients
- For the Crust:
- 1 stick (8 tablespoons) butter, cut into pea-size pieces
- 1 cup all-purpose flour, plus extra for rolling
- 1/4 cup sugar
- Pinch of salt
- 1 lemon, zested
- 1 egg yolk
- 2 to 3 tablespoons ice water
- For the Filling:
- 1 cup sugar
- 1/4 cup apple cider
- 1/2 lemon, juiced
- 1 vanilla bean, seeds scraped
- 1 stick (8 tablespoons) butter, cut into pats
- 6 apples (e.g., Golden Delicious, Granny Smith), peeled, cored and quartered
- For Garnish:
- Mascarpone cheese mixed with 2 tablespoons sugar
Instructions
- Make the Crust: In a food processor, combine the butter, flour, sugar, salt, and lemon zest. Pulse until the mixture resembles coarse meal. Add the egg yolk and 1 to 2 tablespoons of water and pulse until the dough comes together. Form into a smooth ball, wrap in plastic, and refrigerate for at least 1 hour.
- Preheat the oven to 425°F.
- Make the Filling: In a 10-inch nonstick ovenproof pan over high heat, combine the sugar, apple cider, lemon juice, and vanilla bean seeds. Bring the mixture to a boil and cook for about 7-8 minutes, swirling the pan occasionally, until it becomes a deep amber-colored caramel.
- Remove the pan from the heat and carefully stir in the butter, two pats at a time, until incorporated.
- Arrange the apple quarters, rounded side down, in concentric circles in the caramel.
- Return the pan to the burner and cook over medium heat for 20 minutes to soften the apples. Remove from heat.
- Assemble and Bake: On a floured surface, roll the chilled pastry out to an 11 to 12-inch circle. Place the pastry on top of the apples in the pan and tuck the edges in around the sides.
- Bake in the preheated oven for 20 to 25 minutes, or until the dough is golden brown and crispy.
- Let the tart cool in the pan for 10 to 15 minutes.
- Place a serving platter upside down on top of the pan and carefully flip them over to release the tart.
- Serve slices with a dollop of sweetened mascarpone.
Notes
- An ovenproof skillet is essential for this recipe, as the caramel and apples are cooked on the stovetop and then baked in the same pan.
- Be very careful when making the caramel and adding the butter, as the mixture will be extremely hot and can bubble up.
- Arranging the apples neatly is important, as the bottom of the pan becomes the top of the finished tart.
- Letting the tart cool for 10-15 minutes before flipping is a crucial step that allows the caramel to set slightly so it doesn’t run everywhere.
Storage and Make-Ahead Tips
A Tarte Tatin is at its absolute, undeniable best when it is served warm, within an hour or two of being made, so the caramel is soft and the crust is crisp.
- Make-Ahead: The best way to prep ahead for a dinner party is to make the pastry dough completely. You can store the raw, wrapped disc of dough in the refrigerator for up to 3 days. This will save you a significant amount of time on the day of serving.
- Storage: Store any leftovers, uncovered, in the refrigerator for up to 2 days.
- Reheating: To bring back some of the crispiness of the crust, you can gently reheat the tart or individual slices in a 350°F oven for about 5-10 minutes.
For more recipe follow my Pinterest account
Creative Recipe Variations
The classic Tatin method is a wonderful base for other delicious fruit desserts.
- Classic Pear Tarte Tatin: For an equally classic and sophisticated version, you can substitute the apples with firm, ripe Bosc or Anjou pears.
- Add a Warm Spice Element: For a more American-style flavor, you can add a whole cinnamon stick or a star anise to the caramel as it cooks. Just be sure to remove the whole spice before you arrange the apples.
- Use a Shortcut Puff Pastry Crust: If you are very short on time, you can use a high-quality, all-butter, store-bought puff pastry instead of the homemade crust. Simply cut a circle to fit your pan and proceed with the recipe. The result will be a lighter, flakier, but equally delicious version.
Enjoy a Legendary French Classic!
You’ve just created a truly special, show-stopping dessert that is the very definition of rustic French elegance. This classic Apple Tarte Tatin is a perfect harmony of a flaky pastry, deeply caramelized fruit, and a rich, buttery sauce. It’s a rewarding and impressive project that proves that a few simple, high-quality ingredients, transformed by technique, can create something truly extraordinary.
We hope you enjoy every last, perfect, and delicious bite!
If you enjoyed making this recipe, please leave a comment below or share it with a friend who is ready to tackle a French classic!
Frequently Asked Questions (FAQs)
Q1: What is a Tarte Tatin?
A Tarte Tatin is a famous French “upside-down” tart in which the fruit (most classically, apples) is caramelized in butter and sugar in the pan before the pastry is placed on top and the whole thing is baked. After baking, the tart is inverted onto a plate to serve, revealing the beautiful, glossy, caramelized fruit topping.
Q2: What is the absolute best kind of pan to use for a Tarte Tatin?
The most important thing is that your pan is oven-safe. The classic and best choice is a well-seasoned, 10-inch cast-iron skillet. Cast iron heats very evenly, which is perfect for making the caramel, and it can go seamlessly from the stovetop to the hot oven. A high-quality, oven-safe, nonstick skillet also works very well.
Q3: My caramel turned dark and bitter. What went wrong?
A burnt, bitter caramel is usually the result of it cooking for too long. Making caramel is a process you must watch carefully. The moment the sugar syrup turns a beautiful, deep amber color (like an old copper penny), you should immediately remove it from the heat and proceed with the recipe. It can go from perfect to burnt in a matter of seconds.
Q4: How do I flip the hot tart without it falling apart or making a huge mess?
Confidence is key! The 10-15 minute cooling period is crucial, as it allows the molten hot caramel to set up just slightly. When you are ready to flip, place your large serving platter firmly on top of the skillet. Grip both the platter and the skillet handles very firmly with sturdy oven mitts, and then, in one quick, confident, and decisive motion, flip the entire thing over. Don’t do it slowly!
Q5: What are the best apples to use for a Tarte Tatin?
You must use a very firm baking apple that will hold its shape beautifully during the long cooking process in the hot caramel. Softer apples, like a McIntosh, will turn into mush. The absolute best choices are Golden Delicious, Granny Smith, Honeycrisp, and Braeburn


