There are few desserts as dramatic, magical, and impressive as a classic Baked Alaska. With its hidden core of frozen ice cream and its beautiful crown of toasted meringue, it’s the original showstopper—a dessert that seems to defy the laws of physics. It’s the kind of masterpiece that creates a hush at the dinner table when it’s presented.
This recipe will demystify the process and guide you through creating a stunning, modern version with a nostalgic “Creamsicle” flavor profile. We layer creamy vanilla ice cream and bright orange sherbet over a sturdy pound cake base, all encased in a fluffy, sweet meringue that’s toasted to golden-brown perfection. While it looks incredibly impressive, this guide breaks it down into simple, manageable steps. Making this Baked Alaska is a fun project that will make any occasion feel truly special.
What makes this recipe so fantastic is its approachable loaf shape and its beloved flavor combination. This isn’t just a dessert; it’s a memorable experience. Get ready to master the art of the classic Baked Alaska.
Table of Contents
Table of Contents
The Science and History of the Baked Alaska
How can you put an ice cream cake into a 500°F oven without it melting into a puddle? The secret is the science of insulation. The meringue that covers the cake is made of thousands of tiny air bubbles trapped in a protein structure. This foam acts as a powerful thermal blanket. For the few short minutes the Baked Alaska is in the oven, the intense heat toasts the outside of the meringue “igloo” but cannot penetrate the airy layer to reach the frozen core.
This amazing dessert was famously popularized in 1867 at Delmonico’s, a legendary New York restaurant, by chef Charles Ranhofer. He created it to celebrate the United States’ recent purchase of the territory of Alaska, giving the “frozen-hot” dessert its iconic name.
Your Game Plan for a Flawless Baked Alaska
A showstopper like this is best assembled over a couple of days, or with at least 4-5 hours of freezing time. This simple timeline makes the process stress-free.
- Day 1 (or Morning): Focus on building the frozen core. Assemble the layers of ice cream, sherbet, and pound cake in the loaf pan. Allow this to freeze for a minimum of 3 hours, but preferably overnight, until it’s rock solid.
- Serving Day: Just before you plan to serve, make the meringue, cover the frozen cake, and give it the final, dramatic browning. This final step takes less than 10 minutes.
The Key Ingredients for Your Classic Dessert
The beauty of this Baked Alaska lies in its simple yet delicious components.
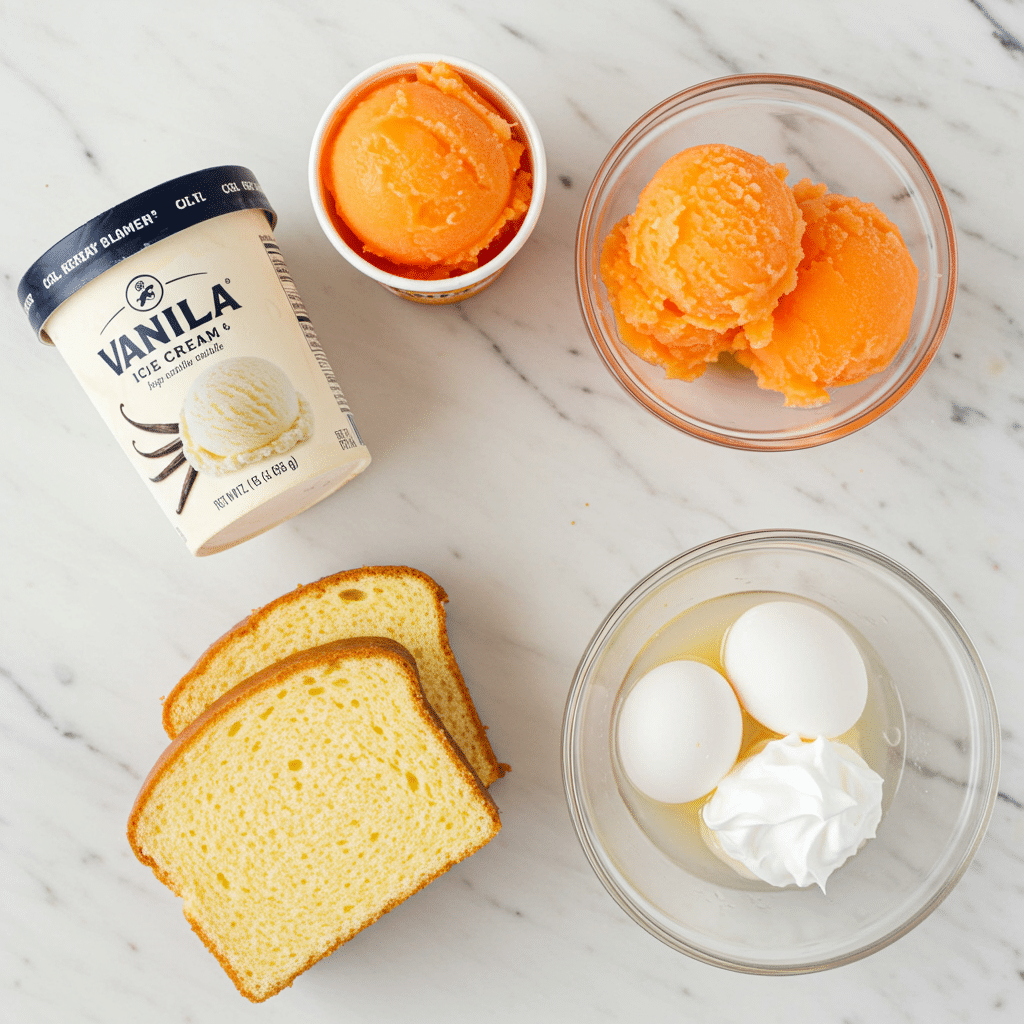
- Vanilla Ice Cream & Orange Sherbet: This classic “Creamsicle” combination is pure nostalgia. The creamy vanilla perfectly balances the bright, tangy orange sherbet. Using good-quality brands will make a noticeable difference in the final flavor.
- Pound Cake: Store-bought pound cake is the perfect shortcut. Its dense, buttery texture provides a sturdy base that won’t get soggy from the ice cream and sherbet layers.
- The French Meringue: This is the magic shell of your Baked Alaska. It’s a simple, classic meringue made from whipping egg whites and sugar until they are stiff and glossy. Room temperature egg whites are essential for achieving the best volume. The pinch of lemon juice (or cream of tartar) helps to stabilize the egg whites.

Step-by-Step Guide to Your Baked Alaska
Follow these detailed instructions, broken down by component, for a perfect result.
Part 1: Assemble and Freeze the Ice Cream Core
- Prepare Your Pan: Line a 9-by-5-inch loaf pan with plastic wrap, making sure to leave a generous overhang on the sides. These overhangs will be your “handles” for easy removal later.
- First Ice Cream Layer: Let your pint of vanilla ice cream soften slightly at room temperature for about 15-20 minutes until it’s easily spreadable. Spread it in an even layer in the bottom of your prepared pan. Place the pan in the freezer for 1 hour, or until the layer is firm to the touch.
- The Sherbet Layer: While the first layer freezes, let your pint of orange sherbet soften slightly. Once the vanilla layer is firm, spread the softened sherbet evenly on top. Return the pan to the freezer for another hour until firm.
- The Cake Layer: Arrange the pound cake slices on top of the firm sherbet layer, creating a solid, flat base. This will be the bottom of your finished Baked Alaska.
- Final Freeze: Cover the pan with plastic wrap and freeze until the entire loaf is rock solid. This will take at least 1 more hour, but 3-4 hours or overnight is even better for a sturdy, easy-to-handle cake.
Part 2: The Meringue and Final Toasting
- Make the Meringue: In a large, impeccably clean bowl, use an electric mixer to beat the 4 room-temperature egg whites and the 1/2 teaspoon of lemon juice at medium-high speed until they become frothy, about 2 minutes.
- Add the Sugar: With the mixer speed on high, gradually add the 1/3 cup of sugar, about a tablespoon at a time. Continue to beat until the meringue holds stiff, glossy peaks and the sugar has completely dissolved (you shouldn’t feel any grit when you rub a little between your fingers). This will take about 5 more minutes.
- Unmold and Frost: Line a baking sheet with parchment paper. Invert your frozen ice cream loaf onto the center of the baking sheet and peel off the plastic wrap. Working quickly, use a spatula to cover the entire loaf—top and sides—with the meringue. Use the back of a spoon to create beautiful, dramatic swirls and peaks all over.
- Final Freeze (Optional but Recommended): For the most stable Baked Alaska, place the meringue-covered cake back in the freezer for at least 3 hours or up to 2 days. This freezes the meringue shell, making it even more resilient during the browning stage.
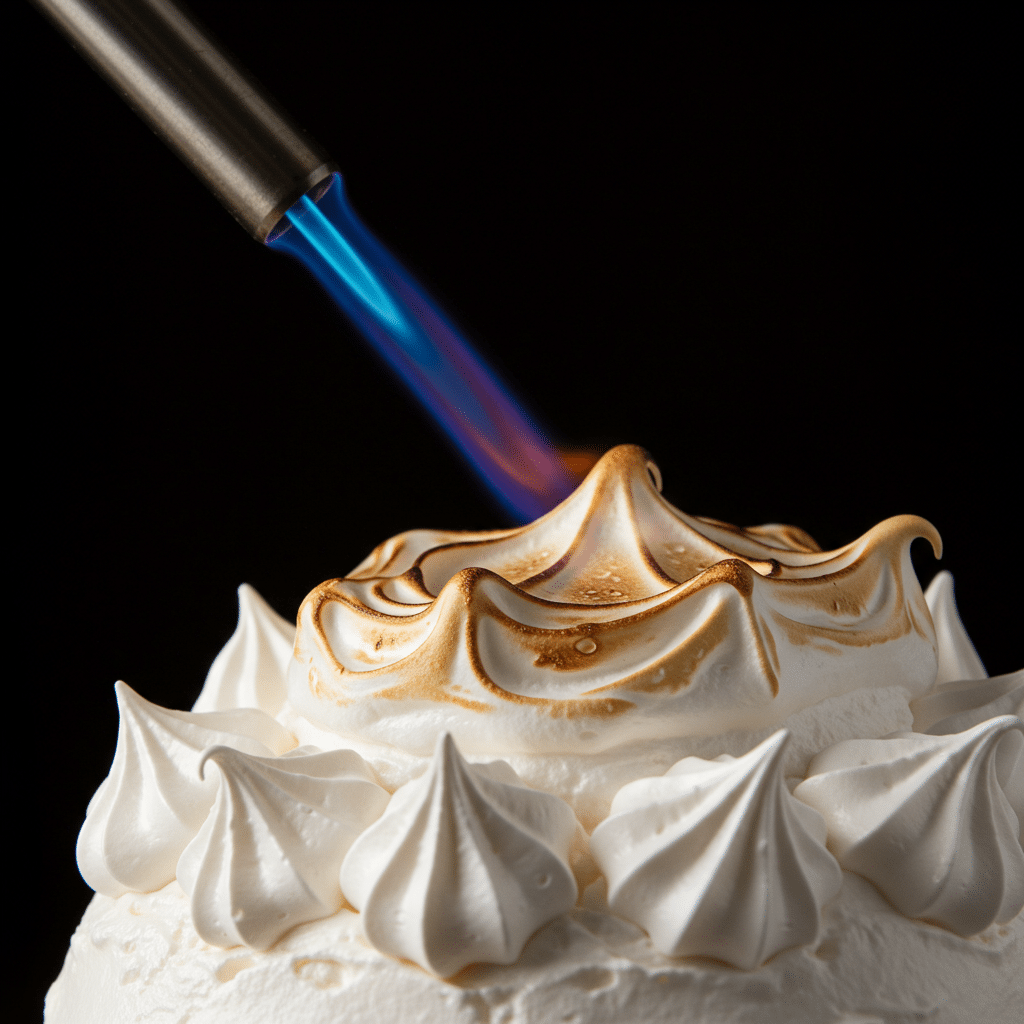
- Brown the Meringue: Just before serving, preheat your oven to 500°F. Place the frozen Baked Alaska on the middle rack and bake for 3 to 5 minutes, watching it constantly, until the peaks of the meringue are a beautiful golden brown. Alternatively, use a kitchen torch to toast the meringue all over.
- Serve Immediately: Use two large spatulas to carefully transfer your magnificent Baked Alaska to a serving platter. Slice into thick wedges and serve immediately.

The Classic Baked Alaska: A Show-Stopping Dessert Made Easy
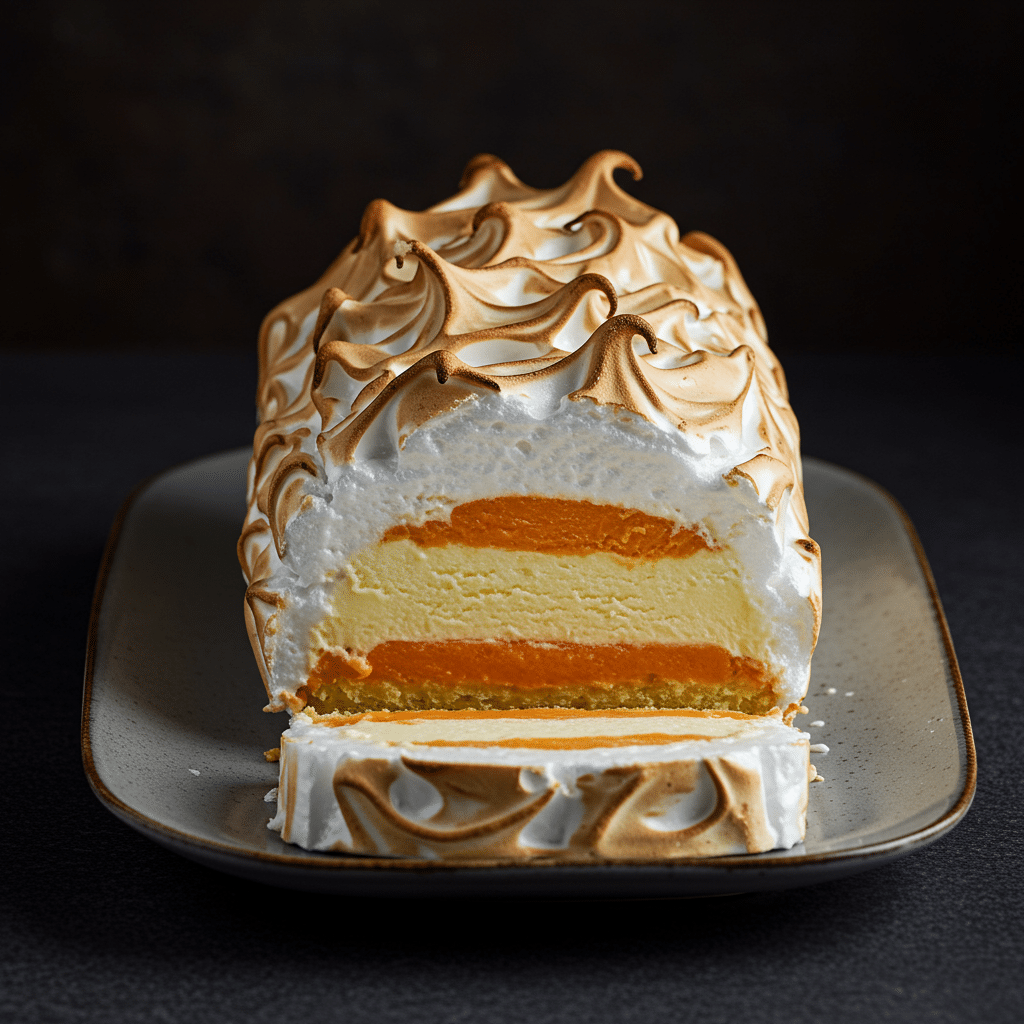
A classic Baked Alaska recipe made in a loaf pan for easy assembly. This dessert features distinct layers of vanilla ice cream and orange sherbet, built upon a base of pound cake slices. The entire frozen loaf is then covered in a fluffy meringue and quickly baked in a very hot oven to brown the peaks, creating a delightful contrast of cold, creamy, and warm, toasted textures.
- Prep Time: 15 minutes (active time)
- Cook Time: 3 minutes
- Total Time: 3 hours 20 minutes (includes freezing time)
- Yield: 6-8 servings
- Category: Dessert
- Method: Layering, Freezing, Baking
- Cuisine: American
- Diet: Vegetarian
Ingredients
- 1 pint vanilla ice cream, softened
- 1 pint orange sherbet, softened
- Pound cake, cut into slices
- 4 large egg whites
- 1/2 teaspoon lemon juice
- 1/3 cup sugar
Instructions
- Line a loaf pan with plastic wrap.
- Spread 1 pint of softened vanilla ice cream into the pan and freeze until hard, about 1 hour.
- Spread 1 pint of softened orange sherbet over the frozen vanilla ice cream layer and freeze for another hour.
- Top the sherbet with a layer of pound cake slices. Freeze for at least one more hour until completely firm.
- Preheat the oven to 500 degrees F.
- In a mixer, beat 4 egg whites and 1/2 teaspoon of lemon juice until frothy.
- Gradually beat in 1/3 cup of sugar until the meringue is stiff and glossy.
- Invert the frozen ice cream loaf onto an oven-safe baking sheet and remove the plastic wrap.
- Completely cover the ice cream and cake with the meringue, creating decorative peaks.
- Bake for 3 minutes, or until the meringue is browned in spots. Serve immediately.
Notes
- Ensure each layer is frozen solid before adding the next to maintain distinct layers.
- Work quickly when covering the frozen cake with meringue to prevent melting.
Storage Information
A Baked Alaska is truly a dessert meant for the moment. It is at its absolute best when served immediately after the meringue is toasted. Leftovers can be stored loosely covered in the freezer, but the meringue will soften and lose its delightful texture contrast.
Creative Recipe Variations
This loaf-pan method is perfect for creating other delicious Baked Alaska flavor combinations.
| Flavor Variation | How to Adapt the Recipe | The Delicious Result |
|---|---|---|
| Classic Neapolitan Baked Alaska | Use layers of chocolate and strawberry ice cream instead of vanilla and orange sherbet. Use either pound cake or chocolate cake for the base. | The three iconic flavors come together in one spectacular showstopper dessert. |
| “Black Forest” Baked Alaska | Use layers of chocolate ice cream and cherry sorbet. Use a chocolate pound cake or brownie layer for the base. | A rich, decadent, and impressive version inspired by the classic German cake. |
| Mint Chocolate Chip Baked Alaska | Use layers of mint chocolate chip ice cream and dark chocolate ice cream. Use a chocolate cake or crushed Oreo layer for the base. | A cool, refreshing, and deeply chocolatey take on the classic Baked Alaska. |
For more recipe follow my Pinterest account
Conclusion: The Ultimate Dessert Spectacle
Creating a Baked Alaska is one of a home baker’s most rewarding accomplishments. It’s a magical dessert that combines classic techniques with a touch of kitchen science to produce a truly unforgettable experience. The moment you pull that beautiful, golden-brown creation from the oven and slice into it to reveal the perfectly frozen layers inside is a moment of pure triumph. Enjoy the process, and take a well-deserved bow for mastering the legendary Baked Alaska.
Frequently Asked Questions (FAQs)
My ice cream started to melt in the oven! What did I do wrong?
This can happen for two reasons. First, the ice cream core might not have been frozen completely solid. It needs to be rock-hard. Second, the meringue layer might have had gaps or thin spots. It’s crucial to ensure the entire ice cream loaf is completely sealed in a thick layer of meringue to protect it.
Why won’t my egg whites whip into stiff peaks?
This is almost always caused by a small amount of fat or grease. Make sure your mixing bowl and beaters are perfectly clean and dry. Even a tiny speck of egg yolk in your egg whites can prevent them from whipping up properly.
Can I make this Baked Alaska without a kitchen torch or a 500°F oven?
The high-heat browning is what makes a Baked Alaska what it is. If you don’t have a torch and are uncomfortable using such a high oven temperature, you can serve the dessert with the meringue untoasted. It will have the flavor of a marshmallow fluff frosting, which is still delicious, but it won’t be a true Baked Alaska.


