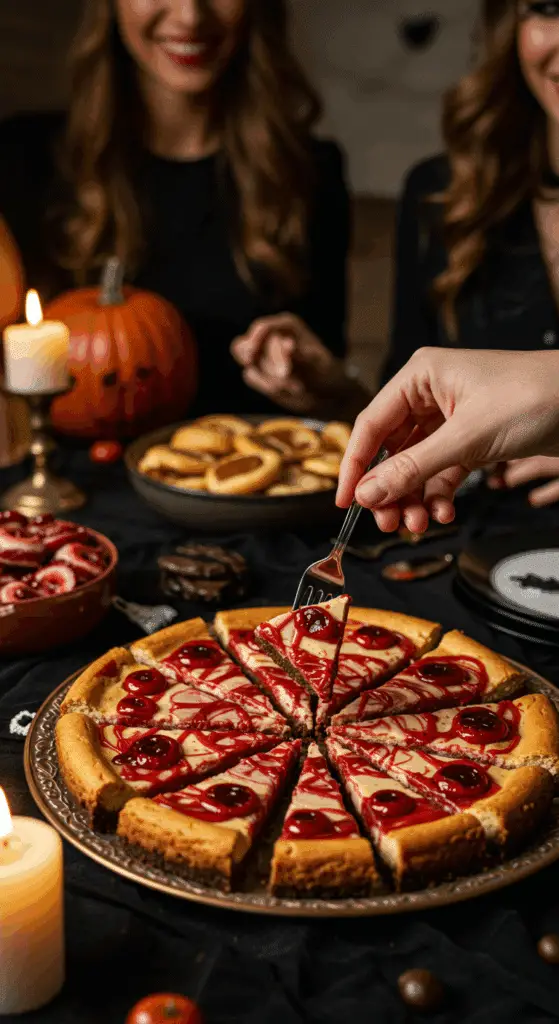
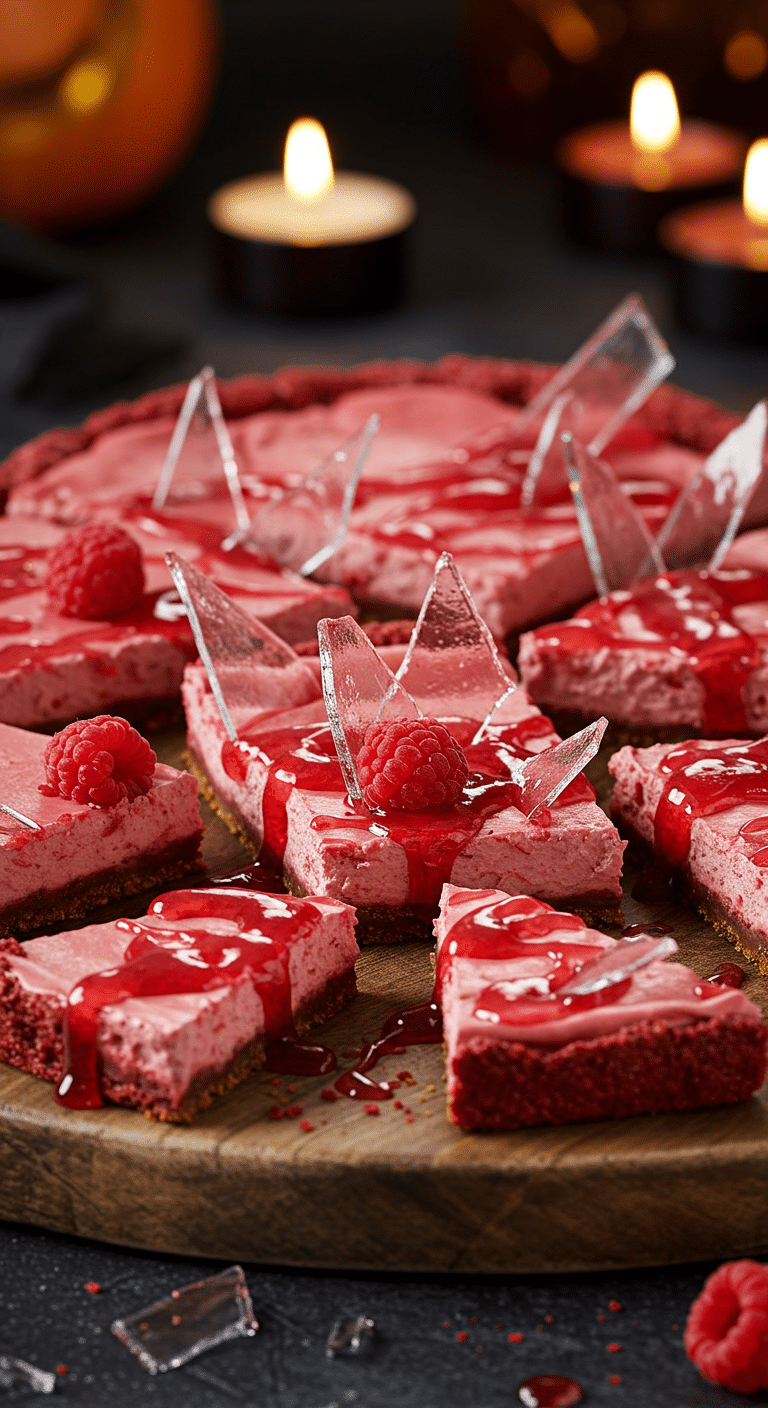
Ready to create the most gloriously gruesome, spectacularly spooky, and unbelievably delicious dessert for your next Halloween party? A show-stopping centerpiece that will have your guests gasping in delight (and a little bit of delicious horror!)? This incredible, from-scratch-tasting “Bloody” Cheesecake Bar with “Broken Glass” Caramel is the ultimate festive creation! We’re talking a rich, creamy, no-bake cheesecake on a “bloody” red cookie crust, decorated with terrifyingly realistic (and completely edible!) shards of sugar glass and a gruesome drizzle of raspberry blood.
This isn’t just a recipe; it’s a guide to your new show-stopping, festive tradition. We’ll show you the simple but crucial secrets to a flawless, from-scratch no-bake cheesecake and the fascinating art of making your own crystal-clear “broken glass” candy. This is a guaranteed, crowd-pleasing hit that is as fun to make as it is to eat.
Table of Contents
Table of Contents
Recipe Overview: The Ultimate Gory & Gruesome Halloween Treat
What makes these Halloween Cheesecake Bars so spectacularly fun is their brilliant, spooky design and their delicious, multi-layered flavor and texture. This recipe is a masterpiece of festive creativity. The base is a simple and chewy sugar cookie crust, made extra spooky with a vibrant, “bloody” red hue. This is topped with a rich, creamy, and tangy no-bake cheesecake filling. The real magic, however, is in the decorations. We’ll show you how to make a beautiful, crystal-clear “broken glass” hard candy from scratch. The finished cheesecake is cut into jagged shards and then decorated with the edible glass and a final, gory drizzle of a homemade, “bloody” raspberry sauce.
| Metric | Time / Level |
| Total Time | 8 hours (includes chilling) |
| Active Prep Time | 1 hour |
| Difficulty Level | Intermediate |
| Servings | 12-16 bars |
The Mad Scientist’s Laboratory: The Essential Ingredients & Tools
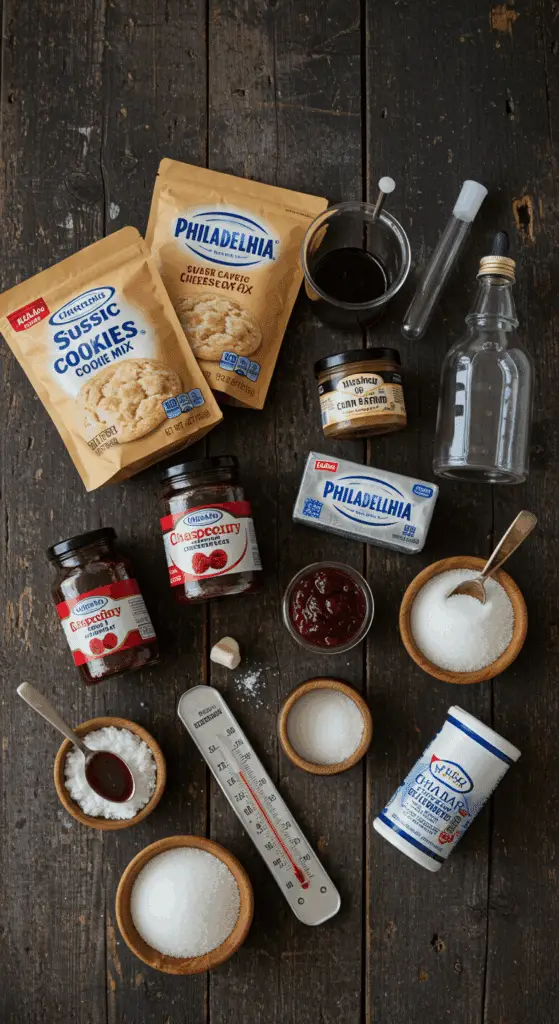
This iconic party treat uses a handful of smart shortcuts and a few key techniques to create its signature spooky look.
- The “Bloody” Cookie Crust:
- Sugar Cookie Mix: Using two pouches of your favorite store-bought sugar cookie mix is a fantastic shortcut that creates a perfect, chewy, and delicious crust with minimal effort.
- Red Gel Food Coloring: For the most vibrant, intense “bloody” red color without adding any extra liquid to your cookie dough, it is essential to use a concentrated gel food coloring.
- The No-Bake Cheesecake Filling:
- Cream Cheese: It is absolutely essential to use blocks of full-fat cream cheese that are at room temperature. This is the number one secret to a perfectly smooth, creamy, and completely lump-free cheesecake filling.
- The “Broken Glass” Caramel:
- Sugar & Light Corn Syrup: This is the foundation of our hard candy. The sugar provides the sweetness, and the light corn syrup is a crucial “secret” ingredient that works as an interfering agent to prevent the sugar from crystallizing, which is the key to a perfectly smooth and clear “glass.”
- The Key Equipment:
- A Candy Thermometer: For a truly foolproof and stress-free candy-making experience, a candy thermometer is a highly recommended and non-negotiable tool. It is the only way to know for sure when your sugar syrup has reached the perfect “hard crack” stage.
- A Silicone Baking Mat: This is the absolute best, non-stick surface for pouring out your hot sugar syrup. It will allow you to peel off the cooled “glass” easily and without any breakage.

Step-by-Step to the Best Bloody Cheesecake Bars
This fun and festive project is a joy to prepare.
Part 1: Bake the “Bloody” Cookie Crust
Step 1: First, preheat your oven to 375°F (190°C). Line a baking sheet with parchment paper, leaving an overhang on the sides to use as handles later.
Step 2: In a large mixing bowl, prepare your two pouches of sugar cookie mix according to the package instructions. Stir in the 2 tablespoons of red gel food coloring until you have a vibrant, “bloody” red dough.
Step 3: Press the dough into an even layer in your prepared baking sheet. Bake for about 20 minutes, until the edges are crispy. Let the crust cool completely.
Part 2: Make the No-Bake Cheesecake and Assemble
Step 1: While the crust is cooling, prepare your cheesecake layer. In the bowl of a stand mixer, whip the 6 blocks of room temperature cream cheese on a medium speed until it is light and fluffy. Add the 1/2 cup of confectioners’ sugar, the 1/4 cup of honey, the 1 teaspoon of vanilla extract, and the 1/2 teaspoon of salt. Whip on a high speed for 1 more minute. Step 2: Spread the cheesecake mixture evenly over your cooled cookie layer. Use an offset spatula to make the top of the cheesecake as smooth as possible. Step 3: Firmly tap the baking sheet against your counter several times to remove any air bubbles. Place the baking sheet in the refrigerator to chill until the cheesecake is completely firm, which will take at least 6 hours.
Part 3: The Art of “Broken Glass” Caramel
Step 1: Line a separate baking sheet with a silicone mat. Step 2: Attach your candy thermometer to a heavy-bottomed pot. Pour the 1 1/2 cups of granulated sugar, the 1/4 cup of light corn syrup, and 3/4 cup of water into the pot. Place the pot over a medium heat and cook, stirring occasionally, until the sugar has dissolved. Step 3: Bring the mixture to a simmer and let it cook, without stirring, until the mixture reaches 300°F on your candy thermometer. This is the “hard crack” stage and will take about 40 minutes. Step 4: Immediately and carefully pour the hot caramel onto your prepared, silicone-lined baking sheet. Let the caramel cool and set completely, which will take about 20 minutes. Step 5: Once it is hard, you can break the caramel into sharp, jagged pieces to resemble shards of broken glass.
Part 4: The Final, Gory Touches
Step 1: To make the “blood” sauce, simply heat your 13-ounce jar of raspberry preserves in a small saucepan over a medium heat until it has melted into a thin syrup. Strain the syrup through a fine-mesh sieve to remove any seeds. Step 2: Lift your chilled cheesecake out of the baking sheet. Cut the bars into jagged, triangular “shards.” Step 3: Arrange the cheesecake bars on a serving platter. Decorate each bar by carefully sticking a few pieces of your “Broken Glass” Caramel into the top. Step 4: For the final, gruesome touch, drizzle everything with your “Raspberry Blood Sauce.”

‘Bloody’ Cheesecake Bars with Edible Glass (The Ultimate Halloween Dessert!)
An elaborate and gory Halloween-themed dessert, these ‘Bloody Cheesecake Bars’ feature a baked, bright-red sugar cookie crust. The crust is topped with a rich, no-bake cream cheese and honey filling. After chilling until firm, the dessert is cut into jagged triangles and decorated with two key elements: shards of homemade, clear ‘broken glass’ hard caramel and a ‘bloody’ sauce made from strained raspberry preserves. The combination creates a spooky and delicious party treat.
Ingredients
- For the Cheesecake Bars:
- Two 17.5-ounce pouches sugar cookie mix (plus required ingredients like butter and eggs)
- 2 tablespoons red gel food coloring
- Six 8-ounce blocks (3 pounds) cream cheese, at room temperature
- 1/2 cup confectioners’ sugar
- 1/4 cup honey
- 1 teaspoon vanilla extract
- 1/2 teaspoon fine salt
- For the Broken Glass Caramel:
- 1 1/2 cups granulated sugar
- 1/4 cup light corn syrup
- For the Raspberry Blood Sauce:
- One 13-ounce jar raspberry preserves
Instructions
- Make the Crust: Preheat the oven to 375°F. Line a baking sheet with parchment paper, leaving an overhang. Prepare the sugar cookie mixes according to package instructions, stirring in the red food coloring to create a bright red dough. Press the dough into an even layer in the prepared pan and bake for about 20 minutes. Let it cool completely.
- Make the Cheesecake Layer: In a stand mixer, whip the cream cheese on medium speed until light and fluffy. Add the confectioners’ sugar, honey, vanilla, and salt, and whip on high speed for 1 more minute. Spread this cheesecake mixture smoothly over the cooled cookie crust. Refrigerate for at least 6 hours, until firm.
- Make the Broken Glass Caramel: While the cheesecake chills, line a baking sheet with a silicone mat. In a heavy-bottomed pot, combine the granulated sugar, corn syrup, and 3/4 cup of water. Cook over medium heat, stirring, until the sugar dissolves. Bring to a simmer and cook, without stirring, until the mixture reaches 300°F on a candy thermometer (about 40 minutes). Immediately pour the caramel onto the prepared mat and let it cool for about 20 minutes until set. Break the caramel into shards.
- Make the Raspberry Blood Sauce: Heat the raspberry preserves in a small saucepan until melted into a thin syrup. Strain through a fine-mesh sieve, discarding the solids.
- Assemble: Lift the chilled cheesecake from the pan. Cut the bars into jagged triangles. Decorate the bars with pieces of the ‘broken glass’ caramel and drizzle with the ‘raspberry blood’ sauce.
Notes
- Special Equipment: The recipe requires a silicone baking mat and a candy thermometer for the ‘broken glass’ caramel.
- This is a multi-component, make-ahead dessert perfect for a party, as the cheesecake layer needs at least 6 hours to chill and set.
- Making the ‘broken glass’ caramel requires cooking sugar to a high temperature, which should be done with caution.
- The article references a ‘Cook’s Note’ that is not provided in the text.
Storage and Make-Ahead Tips
This is the ultimate make-ahead party dessert!
- Make-Ahead: You can prepare and fully assemble the entire cheesecake base (the crust and the cheesecake layer) up to 3 days in advance. Simply keep it well-covered in the refrigerator. The broken glass caramel and the raspberry blood sauce can also be made several days in advance and stored in airtight containers at room temperature.
- Storage: Store the finished, decorated cheesecake bars in an airtight container in the refrigerator for up to 5 days.
For more recipe follow my pinterest account
Frequently Asked Questions (FAQs)
Q1: What is the absolute, number one secret to perfect, crystal-clear “broken glass” candy?
The secret is to use a candy thermometer and to be patient. It is absolutely crucial that you let your sugar syrup cook, undisturbed, until it reaches the “hard crack” stage (300°F to 310°F). This is the temperature at which almost all the water has evaporated, which is the key that will allow your candy to cool into a hard, brittle, and perfectly glass-like sheet.
Q2: Is working with hot sugar syrup dangerous?
Hot, melted sugar is extremely hot (hotter than boiling water!) and can cause serious burns, so it is important to be careful. The most important safety tip is to never leave your pot unattended. Also, be sure to use a heavy-bottomed pot that is large enough to prevent the mixture from bubbling over.
Q3: Can I make this Halloween cheesecake ahead of time?
Yes, this is a perfect make-ahead centerpiece! In fact, it must be made ahead, as it needs at least 6 hours to chill and set. You can make the entire cheesecake base a few days in advance, and then do the fun, final decorating with the “glass” and the “blood” just before your party.
Q4: What is the best way to get beautiful, clean cuts on a cheesecake bar?
The secret is a hot, clean knife. Fill a tall glass with hot water. For each cut, dip a long, sharp knife into the hot water and then wipe the blade completely dry with a clean kitchen towel. The hot, dry blade will glide through the cold cheesecake, creating a perfectly smooth and clean cut every single time.
Q5: Can I make this recipe without a stand mixer?
? Of course! You can easily make the no-bake cheesecake filling in a large bowl with a good electric hand mixer.


