For the true pie connoisseur, there is simply no substitute for the rich, savory, and completely unparalleled flavor of a from-scratch, all-butter pie crust. While it can be a bit more delicate to work with, mastering this classic is the absolute key to creating a truly spectacular, bakery-worthy pie. This is your ultimate guide to a perfect, flaky, and unbelievably delicious all-butter crust, complete with a few secret, professional techniques that make it completely foolproof.
This isn’t just another pie dough recipe; it’s a complete masterclass in the science of perfect, all-butter pastry. We’ll show you why a unique, two-stage method for adding the butter is the secret to a crust that is both wonderfully tender and beautifully flaky. Get ready to bake the most flavorful and impressive pies of your life.
Table of Contents
Table of Contents
Recipe Overview: The Ultimate Guide for the Flavor Purist
What makes this the “perfect” all-butter pie crust is its incredible, rich flavor and its wonderfully flaky-yet-tender texture. This recipe uses a brilliant, professional, two-stage butter method in a food processor. This technique is the secret to creating a dough that is both incredibly tender (like a shortbread) and has all the beautiful, flaky layers you dream of. It’s a foolproof guide to mastering what many bakers consider the absolute gold standard of pie dough.
| Metric | Time / Level |
| Total Time | 1 hour 45 minutes (includes chilling) |
| Active Prep Time | 15 minutes |
| Difficulty Level | Easy |
| Servings | One 9-inch single-crust pie |
The Essential Ingredients for the Best Crust
The science of a perfect pie crust lies in a few simple ingredients and, most importantly, their temperature.
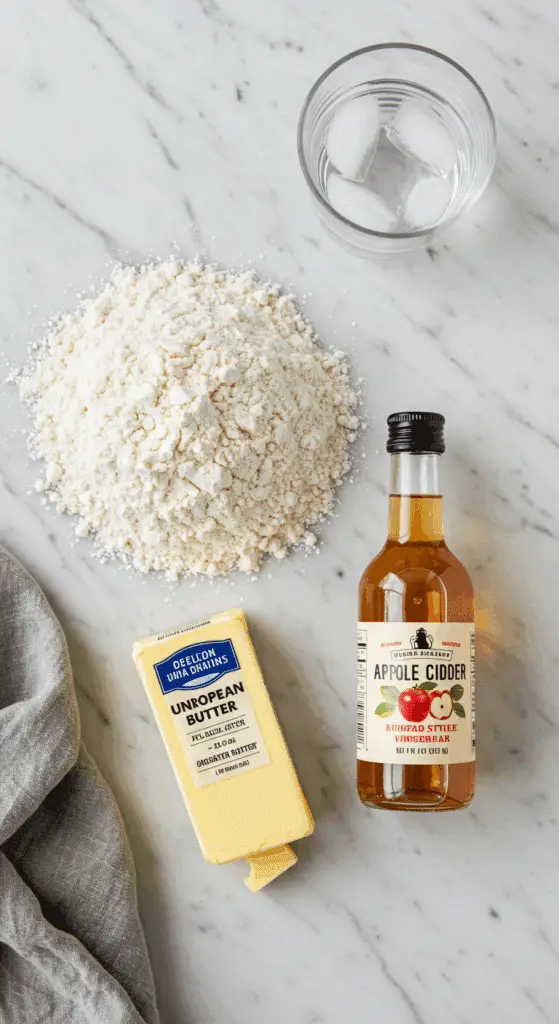
- All-Purpose Flour: The structural foundation of our crust.
- Cold Unsalted Butter: This is the star of the show. For a pie crust, there is no substitute for the rich, complex, and savory flavor of real butter. It is absolutely crucial that your butter is very cold and cut into small pieces.
- The “Tenderizers” (Vinegar & Ice Water):
- Apple Cider Vinegar or White Vinegar: This is a classic baker’s secret! A few teaspoons of vinegar is added to the dough to help inhibit the development of gluten. This is the key to creating a crust that is wonderfully tender and less prone to becoming tough.
- Ice Water: It is absolutely essential that the water you use is ice-cold. This keeps the small pieces of butter in the dough solid, which is the secret to creating those coveted flaky layers.
The #1 Rule of Pie Making: Keep Everything COLD!
The entire secret to a flaky pie crust lies in keeping the butter as cold as possible. The goal is to have small, pea-sized pieces of solid butter suspended throughout the flour. When that cold dough hits the hot oven, the pieces of butter melt and create steam. This steam pushes the layers of dough apart, creating all those beautiful, separate, flaky layers. An all-butter crust is especially sensitive to temperature, so chilling is key!

Step-by-Step to the Perfect All-Butter Crust
This recipe uses a food processor for a quick and easy method that keeps your ingredients perfectly cold.
Step 1: The Two-Stage Butter Method
Step 1: In the bowl of a food processor, pulse the 1 3/4 cups of all-purpose flour, the 1/2 teaspoon of salt, and the 2 tablespoons of sugar to combine.
Step 2 (The Secret to Tenderness): Add about one-third of your cold, diced butter to the food processor. Process this until the butter is completely incorporated and has disappeared into the flour. This professional technique, called sablage, coats the flour particles in fat, which is the secret to a super tender, almost shortbread-like texture.
Step 3 (The Secret to Flakiness): Add the remaining two-thirds of the cold butter to the food processor. Pulse the machine just 5 or 6 times, until the butter is broken down into coarse, pea-sized pieces. These larger pieces of butter are what will create the beautiful, flaky layers.
Step 2: Hydrate and Form the Dough
Step 1: Add the 4 teaspoons of apple cider vinegar to the food processor. While pulsing the machine quickly a few times, add the 1/3 cup of ice water.
Step 2: Squeeze a small amount of the dough between your fingers. It should just hold its shape. If it is still very crumbly, you can quickly pulse in a little more ice water, one tablespoonful at a time.
Pro Tip: Be very careful not to overwork or over-process the dough after the water has been added! This is the key to a tender, not tough, crust.
Step 3: Turn the crumbly dough out onto a large piece of plastic wrap. Use the plastic wrap to help you press and flatten the dough into a thin, round disc. Wrap the disc tightly.
Step 3: The Essential Chilling Periods
Step 1: Refrigerate the dough for at least 1 hour.
Pro Tip: Do not skip this chilling step! This allows the gluten in the flour to relax (which prevents a tough crust), the butter to re-solidify (which creates flakiness), and the flour to fully hydrate.
Step 2: On a lightly floured surface, roll your chilled dough out into an 11- to 12-inch round, about 1/8-inch thick. Carefully center the dough over your 9-inch pie plate.
Step 3: Fold in the overhanging edges and crimp them as desired. Refrigerate the formed pie shell for at least 30 more minutes before you fill and bake it according to your pie recipe.

The Perfect All-Butter Pie Crust (For the Best Flavor!)
A classic recipe for a flaky, all-butter pie crust that is made quickly and easily in a food processor. The dough is made by pulsing cold, diced butter into a flour and sugar mixture, then bringing it together with ice water and a touch of vinegar, which helps to create a tender crust. The dough requires two chilling periods—once after mixing and again after being fitted into the pie plate—to ensure a flaky result when baked.
- Prep Time: 10 minutes
- Cook Time: 0 minutes
- Total Time: 1 hour 40 minutes (includes chilling time)
- Yield: One 9-inch single crust
- Category: Pastry
- Method: Food Processing, Chilling
- Cuisine: American
- Diet: Vegetarian
Ingredients
- 1 3/4 cups all-purpose flour, plus more for dusting
- 1/2 teaspoon salt
- 2 tablespoons sugar
- 12 tablespoons (1 1/2 sticks) unsalted butter, diced and chilled
- 4 teaspoons apple cider vinegar or white vinegar
- 1/3 cup ice water
Instructions
- In a food processor, pulse the flour, salt, and sugar to combine.
- Add about one-third of the chilled, diced butter and process until it is fully combined.
- Add the remaining butter and pulse 5 or 6 more times, until the mixture resembles coarse crumbs with some pea-sized pieces of butter remaining.
- Add the vinegar. While pulsing quickly, add 1/3 cup of ice water. Squeeze some of the dough between your fingers; if it is still crumbly, pulse in more ice water by the tablespoonful until it just holds its shape. Do not overwork the dough.
- Turn the dough out onto a large piece of plastic wrap, press it into a thin round disk, and wrap tightly. Refrigerate for at least 1 hour.
- On a lightly floured surface, roll out the chilled dough into an 11-to-12-inch round, about 1/8-inch thick.
- Carefully transfer the dough to a 9-inch pie plate. Fold the edges under and crimp as desired.
- Refrigerate the lined pie plate for at least 30 minutes before filling and baking according to your pie recipe.
Notes
- The key to a flaky pie crust is using very cold ingredients (butter and ice water) and handling the dough as little as possible to prevent the butter from melting.
- Chilling the dough after mixing and again after lining the pie pan is an essential step that allows the gluten to relax and the fat to firm up, resulting in a more tender and flaky crust.
- This recipe makes enough dough for one 9-inch single crust pie.
Storage and Make-Ahead Tips
Pie dough is the ultimate make-ahead baking component, perfect for getting a head start on holiday preparations.
- Refrigerating: You can store the raw, wrapped disc of pie dough in the refrigerator for up to 3 days.
- Freezing (Best Method!): For longer storage, you can freeze the dough. Tightly wrap the disc in a double layer of plastic wrap and then place it in a freezer-safe bag. The dough will keep beautifully in the freezer for up to 3 months. Thaw it overnight in the refrigerator before you plan to roll it out.
For more recipe follow my Pinterest account
Creative Recipe Variations
This versatile, all-purpose pie crust is a wonderful base for both sweet and savory pies.
- Savory Herb & Cheese Crust: For a savory pie, like a chicken pot pie or a quiche, you can omit the sugar and add 1/2 cup of finely grated Parmesan cheese and 1 to 2 tablespoons of finely chopped fresh herbs (like thyme, rosemary, or sage) to the flour mixture at the very beginning.
- Sweet Spiced Crust: For a classic holiday dessert pie, like a pumpkin or an apple pie, you can add 1/2 to 1 teaspoon of ground cinnamon to the flour along with the sugar.
- Make it By Hand: If you don’t have a food processor, you can easily make this dough by hand. Simply place your dry ingredients in a large bowl. Add the cold fats and use a pastry blender or your fingertips to quickly cut the fat into the flour, following the same two-stage method described above.
Enjoy Your Baking Masterpiece!
You’ve just learned the simple but crucial secrets to mastering a truly perfect, foundational recipe. This classic, foolproof, all-butter pie crust is a testament to the idea that simple, well-executed techniques can transform basic ingredients into something truly spectacular. This is a skill that will serve you for a lifetime of delicious, homemade pies.
We hope you enjoy this recipe and all the wonderful creations you make with it!
If you enjoyed making this recipe, please leave a comment below or share it with a friend who is ready to master the perfect pie crust!
Frequently Asked Questions (FAQs)
Q1: What is the real difference between an all-butter crust and one made with shortening or lard?
The main difference is flavor versus texture. Butter provides an unmatched, rich, complex, and savory flavor. Shortening and lard have a higher melting point and a different crystal structure, which makes them easier to work with and creates a crust that is exceptionally flaky and tender. This recipe, and many professional recipes, often use a combination to get the best of both worlds, but a pure, all-butter crust is prized by purists for its superior taste.
Q2: Why is my all-butter crust so difficult to roll out, and why does it tear?
An all-butter crust is more delicate than one made with shortening because butter has a lower melting point. If your dough is cracking and tearing, it is likely too cold. Let it sit at room temperature for just 5 to 10 minutes to soften slightly. If it becomes too soft and sticky, it is too warm. Simply place it back in the refrigerator for 15-20 minutes to firm up again.
Q3: What does the vinegar in a pie crust actually do?
A small amount of acid, like the apple cider vinegar in this recipe, is a classic baker’s trick that helps to inhibit gluten development. This is what makes a pie crust tender and flaky, rather than tough and chewy.
Q4: Can I use this recipe to make a double-crust pie?
This recipe is portioned to make a generous single-crust pie. To make a standard 9-inch double-crust pie, you would want to double the entire recipe to ensure you have enough dough for both a bottom crust and a generous top crust or lattice.
Q5: What is the “two-stage” butter method, and why is it used here?
This is a fantastic professional technique for a crust that is both tender and flaky. By fully processing the first third of the butter into the flour, you are coating the flour particles with fat. This is a technique called sablage, and it’s the secret to a short and tender crust. By then pulsing in the remaining two-thirds of the butter into larger, pea-sized pieces, you are creating the classic fat pockets that will produce steam and create beautiful, flaky layers.It’s the best of both worlds!


