Introduction & Inspiration
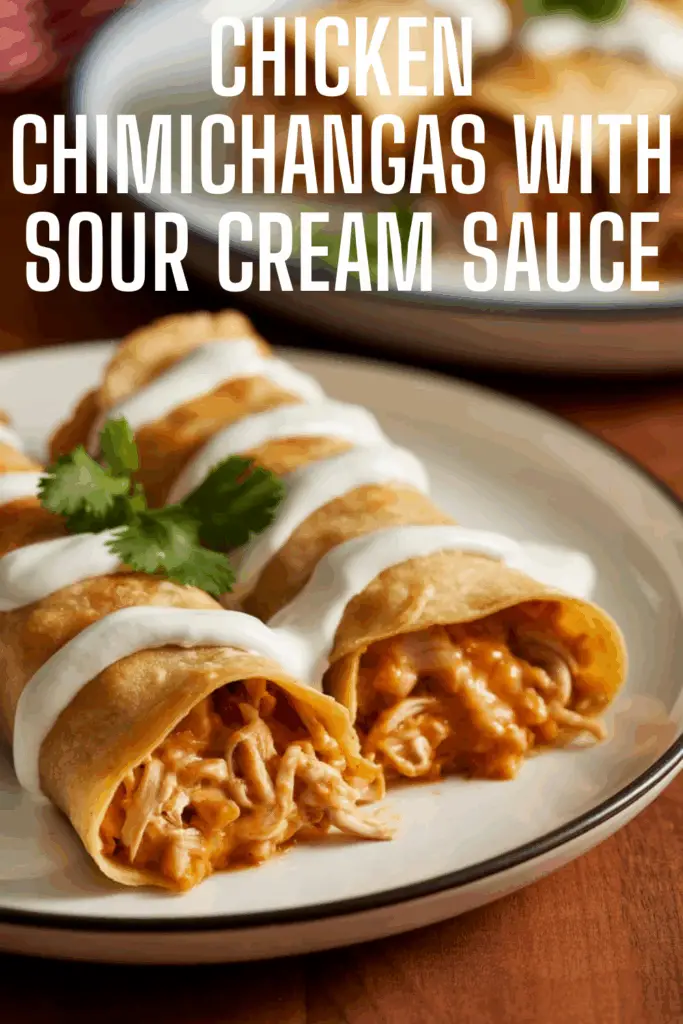
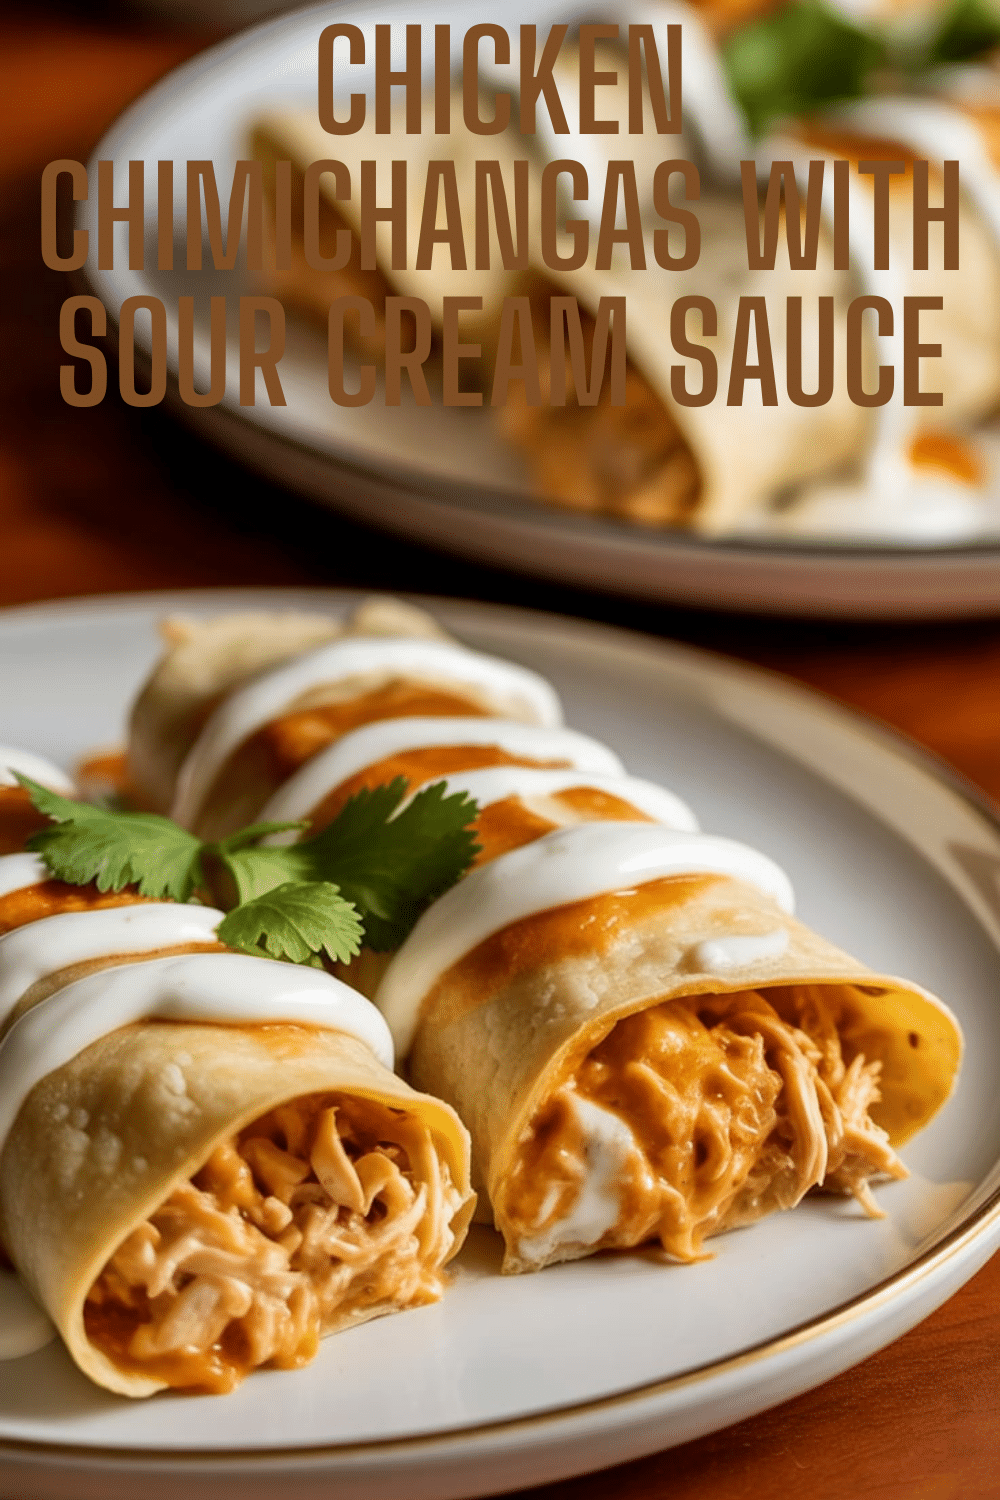
There are few Tex-Mex dishes as delightfully indulgent and satisfying as a perfectly crispy, golden chimichanga, especially when it’s filled with flavorful shredded chicken and cheese, then topped with a luscious, creamy sauce! This recipe for Chicken Chimichangas with Sour Cream Sauce immediately caught my attention. It promises that classic deep-fried burrito experience, complete with a homemade chicken filling simmered in spices and green chilies, and a unique, tangy sour cream sauce also featuring green chilies. It sounded like the ultimate comfort food adventure!
My inspiration for diving into this recipe came from wanting to recreate that authentic, restaurant-style chimichanga at home. While it involves a few steps – poaching and shredding the chicken, making a roux-based sauce, assembling, and deep-frying – the promise of that crispy exterior giving way to a savory, cheesy interior was too tempting to resist.
My goal is to guide you step-by-step through making these impressive chimichangas. We’ll cover crafting the flavorful chicken filling, whipping up the unique sour cream sauce, and achieving that perfect golden-brown, crispy finish. This is a dish that’s fantastic for a special weekend meal or when you’re craving some serious Tex-Mex indulgence.
Let’s get ready to roll and fry some amazing chimichangas!
Nostalgic Appeal / Comfort Food Connection
Chicken Chimichangas are a beloved staple of Tex-Mex and Southwestern American cuisine, holding a special nostalgic appeal for many. They evoke memories of favorite local Mexican restaurants, festive dinners out, and the satisfying indulgence of a crispy, deep-fried burrito packed with savory fillings and often smothered in sauce and cheese. It’s pure comfort food with a fun, slightly rebellious edge (it’s fried, after all!).
This recipe, with its seasoned shredded chicken, melty Monterey Jack cheese, and a homemade sour cream sauce infused with green chilies, taps directly into that comforting familiarity. The aroma of the chicken simmering with spices and the sizzle of the chimichangas frying are incredibly inviting.
The act of carefully folding and securing the tortillas into neat packages before frying is reminiscent of traditional culinary crafts. While deep frying at home might seem like a special occasion activity, the delicious, crispy result is a classic comfort food reward.
Making and enjoying these chimichangas feels like treating yourself to an authentic restaurant favorite, created with homemade care and bursting with familiar, satisfying Tex-Mex flavors.
Homemade Focus (Flavorful Filling & Signature Sauce)
This Chicken Chimichanga recipe is a wonderful example of building deep, homemade flavor through distinct, from-scratch components, even when some ingredients are convenience items like canned green chilies. The focus is on creating a uniquely seasoned chicken filling and a signature creamy sour cream sauce, then employing the classic deep-frying technique for that unmistakable chimichanga texture.
I love recipes that guide you through building layers of taste. Poaching the chicken breasts in water seasoned with chili powder, cumin, and other spices, then simmering them with onion, garlic, and green chilies until the liquid reduces, creates an incredibly flavorful and moist shredded chicken filling. This homemade filling is far superior to simply using pre-cooked, unseasoned chicken.
Making the sour cream sauce from scratch is another key homemade element. It starts with a simple butter-flour roux, thickened with water and a chicken bouillon cube for savory depth, then enriched with sour cream and more green chilies. This creamy, tangy, slightly spicy sauce is the perfect accompaniment to the crispy chimichangas.
From simmering the flavorful chicken to whipping up the unique sauce and carefully frying the assembled chimichangas, every step contributes to a truly special, restaurant-quality homemade meal.
Flavor Goal
The primary flavor goal of these Chicken Chimichangas with Sour Cream Sauce is a delightful explosion of textures and savory, spicy, tangy, and creamy flavors. It aims for a crispy, golden-brown tortilla exterior giving way to a juicy, well-seasoned shredded chicken and melted cheese filling, all complemented by a rich, tangy sour cream and green chili sauce.
The chicken filling, simmered with chili powder, cumin, garlic, onion, and green chilies, provides a savory, slightly spicy, and aromatic core.
The Monterey Jack cheese melts inside the chimichanga, adding gooey, mild, creamy richness.
The flour tortilla becomes wonderfully crisp and golden when deep-fried.
The sour cream sauce offers a cool, creamy, tangy counterpoint, with added flavor from the chicken bouillon and green chilies, balancing the richness of the fried chimichanga and the spice of the filling.
The overall effect is a multi-layered, multi-textured dish that is savory, spicy (adjustable), tangy, cheesy, creamy, and incredibly satisfying – a true Tex-Mex indulgence.
Ingredient Insights
Let’s explore the key components for these flavorful chimichangas:
Chicken Filling:
- Skinless, boneless chicken breast halves: Poached and shredded for a tender filling.
- Water: For poaching liquid.
- Spices (Chili powder, Salt, Ground cumin, Ground black pepper, Garlic powder, Onion powder, Cayenne pepper): Creates a flavorful poaching liquid and seasons the chicken.
- Chopped green chilies (canned), divided: Adds mild heat and classic Southwestern flavor to both the chicken filling and the sour cream sauce.
- Diced onion & Minced garlic: Aromatics that cook down with the chicken.
Sour Cream Sauce:
- Butter & All-purpose flour: Form the roux to thicken the sauce.
- Water & Chicken bouillon cube: Create a savory liquid base for the sauce. Chicken broth could substitute for water + bouillon.
- Sour cream: Provides the creamy, tangy base for the sauce. Full-fat recommended.
- Reserved green chilies: Adds flavor to the sauce.
- Salt and pepper: To season the sauce.
Assembly & Frying:
- Oil for frying: A neutral oil with a high smoke point is needed (canola, vegetable, peanut).
- Flour tortillas (8-inch): The wrapper. Need to be pliable for rolling.
- Shredded Monterey Jack cheese: A good melting cheese with mild flavor. Pepper Jack or cheddar could substitute.
- Wooden toothpicks: To secure the chimichangas for frying.
Using chicken thighs instead of breasts for the filling could result in even juicier meat.
Essential Equipment
This recipe requires tools for poaching, sauce-making, assembly, and deep-frying:
- A Large saucepan or Dutch oven: For poaching the chicken and reducing the liquid.
- A Small saucepan: For making the sour cream sauce.
- A Deep-fryer OR a Large, heavy-bottomed deep pot (like a Dutch oven): Essential for safely deep-frying the chimichangas.
- A Kitchen thermometer: Crucial for maintaining the correct oil temperature (375°F/190°C) for frying.
- Two forks: For shredding the cooked chicken.
- Shallow dish or plate (optional): For assembly line.
- Tongs or a Spider/Slotted spoon: For safely adding and removing chimichangas from hot oil.
- Wire rack set over a baking sheet lined with paper towels: For draining the fried chimichangas.
- Wooden toothpicks.
- Measuring cups and spoons.
- A whisk.
A thermometer for the oil is highly recommended for best frying results.
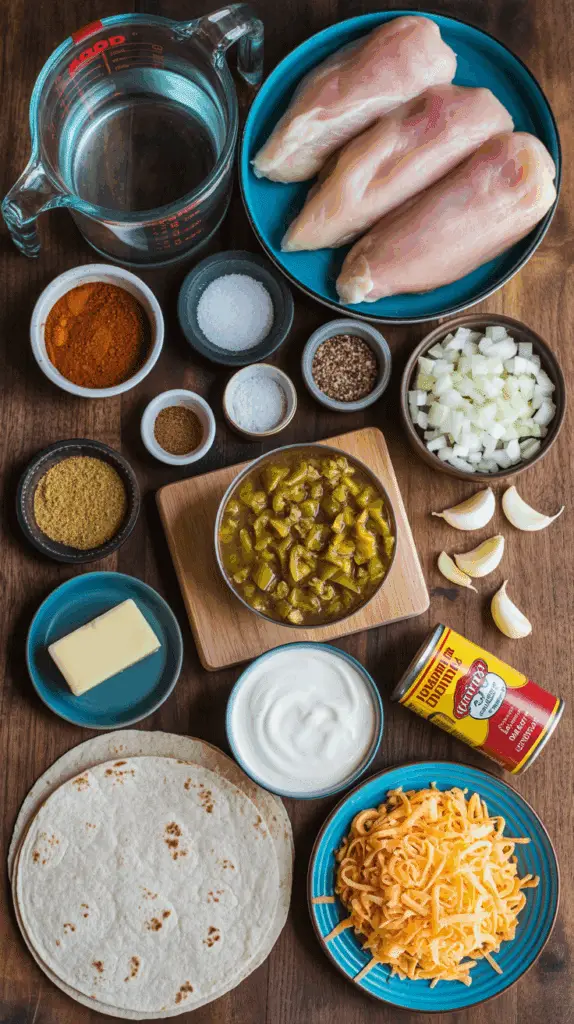
List of Ingredients with Measurements
Here’s the complete list of ingredients, with precise measurements:
Chicken Filling:
- 2 large skinless, boneless chicken breast halves (about 1-1.5 lbs total)
- 3 cups water
- 1 tablespoon chili powder
- ½ teaspoon salt
- ½ teaspoon ground cumin
- ¼ teaspoon ground black pepper
- ¼ teaspoon garlic powder
- ¼ teaspoon onion powder
- ⅛ teaspoon cayenne pepper
- 1 (7 ounce) can chopped green chilies, divided (4 oz for filling, 3 oz for sauce)
- ½ cup diced onion
- 3 large cloves garlic, minced
Sour Cream Sauce:
- 2 tablespoons butter
- 2 tablespoons all-purpose flour
- 1 cup water
- 1 cube chicken bouillon
- ½ cup sour cream
- Salt and pepper to taste
- (Reserved 3 ounces of chopped green chilies from above)
For Assembly & Frying:
- Oil for frying (about 4-6 cups depending on pot size)
- 8 (8 inch) flour tortillas
- 8 ounces (2 cups) shredded Monterey Jack cheese
These quantities yield 8 chimichangas.
Have onion diced, garlic minced, and green chilies divided before starting.

Step-by-Step Instructions (Building & Frying Your Chimichangas!)
Let’s create these delicious chimichangas stage by stage:
1. Prepare the Chicken Filling:
- Place the chicken breast halves into a large saucepan. Pour in the 3 cups of water.
- Season the water with chili powder, ½ teaspoon salt, ground cumin, ¼ teaspoon black pepper, garlic powder, onion powder, and cayenne pepper. Stir briefly.
- Bring the mixture to a simmer over high heat. Once simmering, reduce the heat to medium-low, cover, and simmer gently for 15 minutes.
- After 15 minutes, stir in 4 ounces (about half the can) of the chopped green chilies, the diced onion, and the minced garlic.
- Continue simmering, uncovered, until the cooking liquid has reduced significantly to about 1 cup (this concentrates the flavor), and the chicken is very tender. This may take another 20-30 minutes or more.
- Remove the cooked chicken breasts from the saucepan and place them on a cutting board. Reserve the remaining 3 ounces of green chilies for the sauce.
- Using two forks, shred the chicken. Return the shredded chicken to the onion and reduced liquid mixture in the saucepan. Stir well to combine. Keep warm or set aside.
2. Make the Sour Cream Sauce:
- In a small saucepan, melt the butter over medium heat.
- Stir in the flour with a whisk and cook for 1 minute, stirring constantly, to make a light roux.
- Gradually whisk in the 1 cup of water until smooth. Add the chicken bouillon cube.
- Continue cooking and whisking until the sauce has thickened and the bouillon cube has completely dissolved, about 4 minutes.
- Remove the saucepan from the heat. Whisk in the reserved 3 ounces of chopped green chilies and the sour cream until smooth.
- Season the sauce to taste with salt and pepper. Keep warm over very low heat, or set aside and rewarm gently if needed. Do not let it boil after adding sour cream.
3. Heat Oil for Frying:
- Pour oil into a deep-fryer or a large, heavy-bottomed deep pot to a depth of at least 2-3 inches.
- Heat the oil over medium-high heat until it reaches 375°F (190°C) on a kitchen thermometer. Adjust heat as needed to maintain this temperature.
4. Assemble the Chimichangas:
- Lay one flour tortilla flat on your work surface.
- Spoon about 1/3 cup of the prepared shredded chicken filling in a line halfway between the bottom edge and the center of the tortilla. Flatten the filling into a rough rectangle shape with the back of a spoon.
- Sprinkle about 1 ounce (or ¼ cup) of the shredded Monterey Jack cheese over the chicken filling.
- Fold: Fold the bottom edge of the tortilla snugly up and over the filling. Then, fold in the left and right sides (like an envelope). Tightly roll the chimichanga up from the bottom to the top edge, forming a secure, compact cylinder.
- Secure the final flap and the ends with wooden toothpicks. Repeat with the remaining tortillas, chicken filling, and cheese.
5. Fry the Chimichangas:
- Once the oil is at 375°F (190°C), carefully place 1 or 2 assembled chimichangas into the hot oil, seam-side down first if possible (though toothpicks should hold). Do not overcrowd the pot.
- Fry for about 1 minute per side, or until they are beautifully crisp and golden brown on all sides. They cook very quickly!
- Using tongs or a spider/slotted spoon, carefully remove the fried chimichangas from the oil.
6. Drain and Serve:
- Drain the chimichangas on a wire rack set over a baking sheet lined with paper towels.
- Carefully remove the toothpicks before serving.
- Serve the hot, crispy chimichangas immediately, generously topped with the warm Sour Cream Sauce. Garnish with fresh parsley or cilantro if desired.
Proper oil temperature and secure rolling are key for frying!

Troubleshooting
Deep frying and assembling burritos can have challenges:
- Problem: Chimichangas unravel or leak filling during frying.
- Solution: Roll tortillas tightly and securely. Use enough toothpicks (usually 2-3 per chimichanga) to keep the flap and ends sealed. Don’t overfill the tortillas. Ensure oil is hot enough so they fry quickly and seal.
- Problem: Chimichangas are greasy or soggy.
- Solution: Oil temperature was likely too low, causing them to absorb too much oil. Ensure oil is consistently at 375°F (190°C). Don’t overcrowd the fryer. Drain them well on a wire rack after frying.
- Problem: Chimichangas are too dark/burnt on outside but filling isn’t hot.
- Solution: Oil temperature was too high. Reduce heat slightly to maintain 375°F. Ensure chicken filling was warm before assembling.
- Problem: Sour cream sauce is lumpy or curdled.
- Solution: For roux: Whisk flour into melted butter smoothly. Add water gradually while whisking constantly. For sour cream: Add it off heat or over very, very low heat, and stir gently until just combined. Do not let it boil.
Maintaining proper oil temperature is crucial for crispy, non-greasy results.
Tips and Variations
Let’s customize these delicious chimichangas:
- Tip: Use fresh, pliable flour tortillas. If they seem a bit stiff, warm them slightly (microwave for 10-15 seconds) before filling and rolling to make them more flexible.
- Variation: Use ground beef or shredded beef (like barbacoa or leftover pot roast) instead of chicken for the filling. Adjust seasonings accordingly.
- Tip: For extra flavor, add a tablespoon of adobo sauce (from canned chipotle peppers) to the chicken filling.
- Variation (Baked/Air-Fried for Lighter): Instead of deep-frying, spray the assembled chimichangas generously with cooking oil and bake at 400-425°F (200-220°C) for 15-20 minutes, flipping halfway, until golden and crispy. Or, use an air fryer (likely around 375-400°F for 10-15 minutes, flipping). Texture will be different but still delicious.
- Tip: Ensure Monterey Jack cheese is shredded for best melting inside the chimichanga.
- Variation: Add other ingredients to the chicken filling, like drained black beans or corn.
- Variation: Use different cheeses like cheddar, pepper jack, or a Mexican blend.
A great base recipe for many flavorful variations!
Serving and Pairing Suggestions
Chicken Chimichangas with Sour Cream Sauce are a hearty and satisfying main course.
Serving: Serve hot and crispy, generously topped with the warm sour cream sauce.
Classic Tex-Mex Sides & Toppings:
- Rice: Mexican rice or cilantro-lime rice.
- Beans: Refried beans or black beans.
- Guacamole: A scoop on the side or on top.
- Salsa or Pico de Gallo: For extra freshness and spice.
- Shredded Lettuce & Diced Tomatoes: To serve alongside or on top for freshness.
- Beverage: Mexican lager beer, margaritas, or agua frescas. Drink alcohol with moderation.
Perfect for a fun, indulgent dinner night!
Nutritional Information
This dish involves deep-fried tortillas, cheese, and a creamy sauce, making it quite indulgent. Nutritional info is approximate (per chimichanga, assuming 8):
- Calories: 500-700+
- Fat: 30-45+ grams (Significant amount from frying oil, cheese, sour cream, butter)
- Saturated Fat: 10-18+ grams
- Cholesterol: 80-120+ mg
- Sodium: 800-1200+ mg (Depends heavily on seasoning, bouillon, canned goods)
- Total Carbs.: 35-50 grams (Primarily from tortilla and flour in sauce)
- Dietary Fiber: 2-4 grams
- Sugars: 3-6 grams
- Protein: 25-35+ grams
A high-protein meal, but also very significant in fat (especially saturated) and sodium due to the preparation method and ingredients. Baking or air-frying can reduce fat content considerably.
PrintChicken Chimichangas with Sour Cream Sauce
Make delicious homemade Chicken Chimichangas! Features seasoned shredded chicken and cheese, fried golden, and topped with a creamy green chili sour cream sauce.
Ingredients
Here’s the complete list of ingredients, with precise measurements:
Chicken Filling:
- 2 large skinless, boneless chicken breast halves (about 1-1.5 lbs total)
- 3 cups water
- 1 tablespoon chili powder
- ½ teaspoon salt
- ½ teaspoon ground cumin
- ¼ teaspoon ground black pepper
- ¼ teaspoon garlic powder
- ¼ teaspoon onion powder
- ⅛ teaspoon cayenne pepper
- 1 (7 ounce) can chopped green chilies, divided (4 oz for filling, 3 oz for sauce)
- ½ cup diced onion
- 3 large cloves garlic, minced
Sour Cream Sauce:
- 2 tablespoons butter
- 2 tablespoons all-purpose flour
- 1 cup water
- 1 cube chicken bouillon
- ½ cup sour cream
- Salt and pepper to taste
- (Reserved 3 ounces of chopped green chilies from above)
For Assembly & Frying:
- Oil for frying (about 4-6 cups depending on pot size)
- 8 (8 inch) flour tortillas
- 8 ounces (2 cups) shredded Monterey Jack cheese
These quantities yield 8 chimichangas.
Have onion diced, garlic minced, and green chilies divided before starting
Instructions
Let’s create these delicious chimichangas stage by stage:
1. Prepare the Chicken Filling:
- Place the chicken breast halves into a large saucepan. Pour in the 3 cups of water.
- Season the water with chili powder, ½ teaspoon salt, ground cumin, ¼ teaspoon black pepper, garlic powder, onion powder, and cayenne pepper. Stir briefly.
- Bring the mixture to a simmer over high heat. Once simmering, reduce the heat to medium-low, cover, and simmer gently for 15 minutes.
- After 15 minutes, stir in 4 ounces (about half the can) of the chopped green chilies, the diced onion, and the minced garlic.
- Continue simmering, uncovered, until the cooking liquid has reduced significantly to about 1 cup (this concentrates the flavor), and the chicken is very tender. This may take another 20-30 minutes or more.
- Remove the cooked chicken breasts from the saucepan and place them on a cutting board. Reserve the remaining 3 ounces of green chilies for the sauce.
- Using two forks, shred the chicken. Return the shredded chicken to the onion and reduced liquid mixture in the saucepan. Stir well to combine. Keep warm or set aside.
2. Make the Sour Cream Sauce:
- In a small saucepan, melt the butter over medium heat.
- Stir in the flour with a whisk and cook for 1 minute, stirring constantly, to make a light roux.
- Gradually whisk in the 1 cup of water until smooth. Add the chicken bouillon cube.
- Continue cooking and whisking until the sauce has thickened and the bouillon cube has completely dissolved, about 4 minutes.
- Remove the saucepan from the heat. Whisk in the reserved 3 ounces of chopped green chilies and the sour cream until smooth.
- Season the sauce to taste with salt and pepper. Keep warm over very low heat, or set aside and rewarm gently if needed. Do not let it boil after adding sour cream.
3. Heat Oil for Frying:
- Pour oil into a deep-fryer or a large, heavy-bottomed deep pot to a depth of at least 2-3 inches.
- Heat the oil over medium-high heat until it reaches 375°F (190°C) on a kitchen thermometer. Adjust heat as needed to maintain this temperature.
4. Assemble the Chimichangas:
- Lay one flour tortilla flat on your work surface.
- Spoon about 1/3 cup of the prepared shredded chicken filling in a line halfway between the bottom edge and the center of the tortilla. Flatten the filling into a rough rectangle shape with the back of a spoon.
- Sprinkle about 1 ounce (or ¼ cup) of the shredded Monterey Jack cheese over the chicken filling.
- Fold: Fold the bottom edge of the tortilla snugly up and over the filling. Then, fold in the left and right sides (like an envelope). Tightly roll the chimichanga up from the bottom to the top edge, forming a secure, compact cylinder.
- Secure the final flap and the ends with wooden toothpicks. Repeat with the remaining tortillas, chicken filling, and cheese.
5. Fry the Chimichangas:
- Once the oil is at 375°F (190°C), carefully place 1 or 2 assembled chimichangas into the hot oil, seam-side down first if possible (though toothpicks should hold). Do not overcrowd the pot.
- Fry for about 1 minute per side, or until they are beautifully crisp and golden brown on all sides. They cook very quickly!
- Using tongs or a spider/slotted spoon, carefully remove the fried chimichangas from the oil.
6. Drain and Serve:
- Drain the chimichangas on a wire rack set over a baking sheet lined with paper towels.
- Carefully remove the toothpicks before serving.
- Serve the hot, crispy chimichangas immediately, generously topped with the warm Sour Cream Sauce. Garnish with fresh parsley or cilantro if desired.
Proper oil temperature and secure rolling are key for frying
Recipe Summary and Q&A
Let’s conclude with a summary and common questions:
Recipe Summary:
Chicken Chimichangas with Sour Cream Sauce feature a flavorful filling of shredded chicken (poached in seasoned broth with onion, garlic, and green chilies) and Monterey Jack cheese, wrapped tightly in flour tortillas and secured with toothpicks. The assembled chimichangas are deep-fried until golden brown and crispy. They are served hot, topped with a homemade creamy sour cream sauce also flavored with green chilies.
Q&A:
Q: Can I make components ahead of time? A: Yes. The chicken filling can be made up to 2 days ahead and refrigerated. The sour cream sauce can also be made a day ahead and refrigerated (reheat gently). Assemble and fry the chimichangas just before serving for best results.
Q: How do I store leftover chimichangas? A: Store leftover fried chimichangas (unsauced if possible) in an airtight container in the refrigerator for up to 2 days. They will lose their crispness.
Q: How do I reheat leftover chimichangas? A: The best way to try and restore some crispness is to reheat them in an oven at 375°F (190°C) for 10-15 minutes, or in an air fryer. Microwaving will make them soft. Reheat sauce separately.
Q: Can I bake these instead of frying? A: Yes, for a lighter version. Assemble as directed, spray the outsides generously with cooking oil, and bake on a baking sheet at 400-425°F (200-220°C) for about 15-20 minutes, flipping halfway, until golden and crispy. The texture will be different from deep-fried.
Q: What’s the best oil for frying? A: A neutral oil with a high smoke point, such as canola, vegetable, peanut, or corn oil. Maintain a consistent temperature of 375°F (190°C).
Did Our Recipe Hit The Spot?
There are no reviews yet. Be the first one to write one.


