Introduction & Inspiration
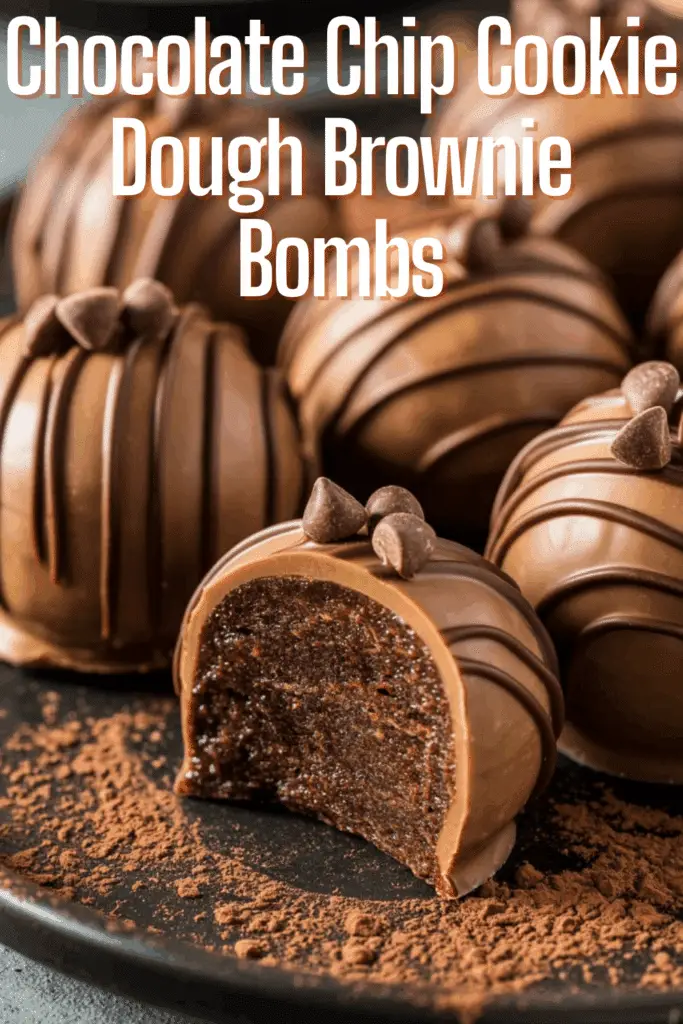
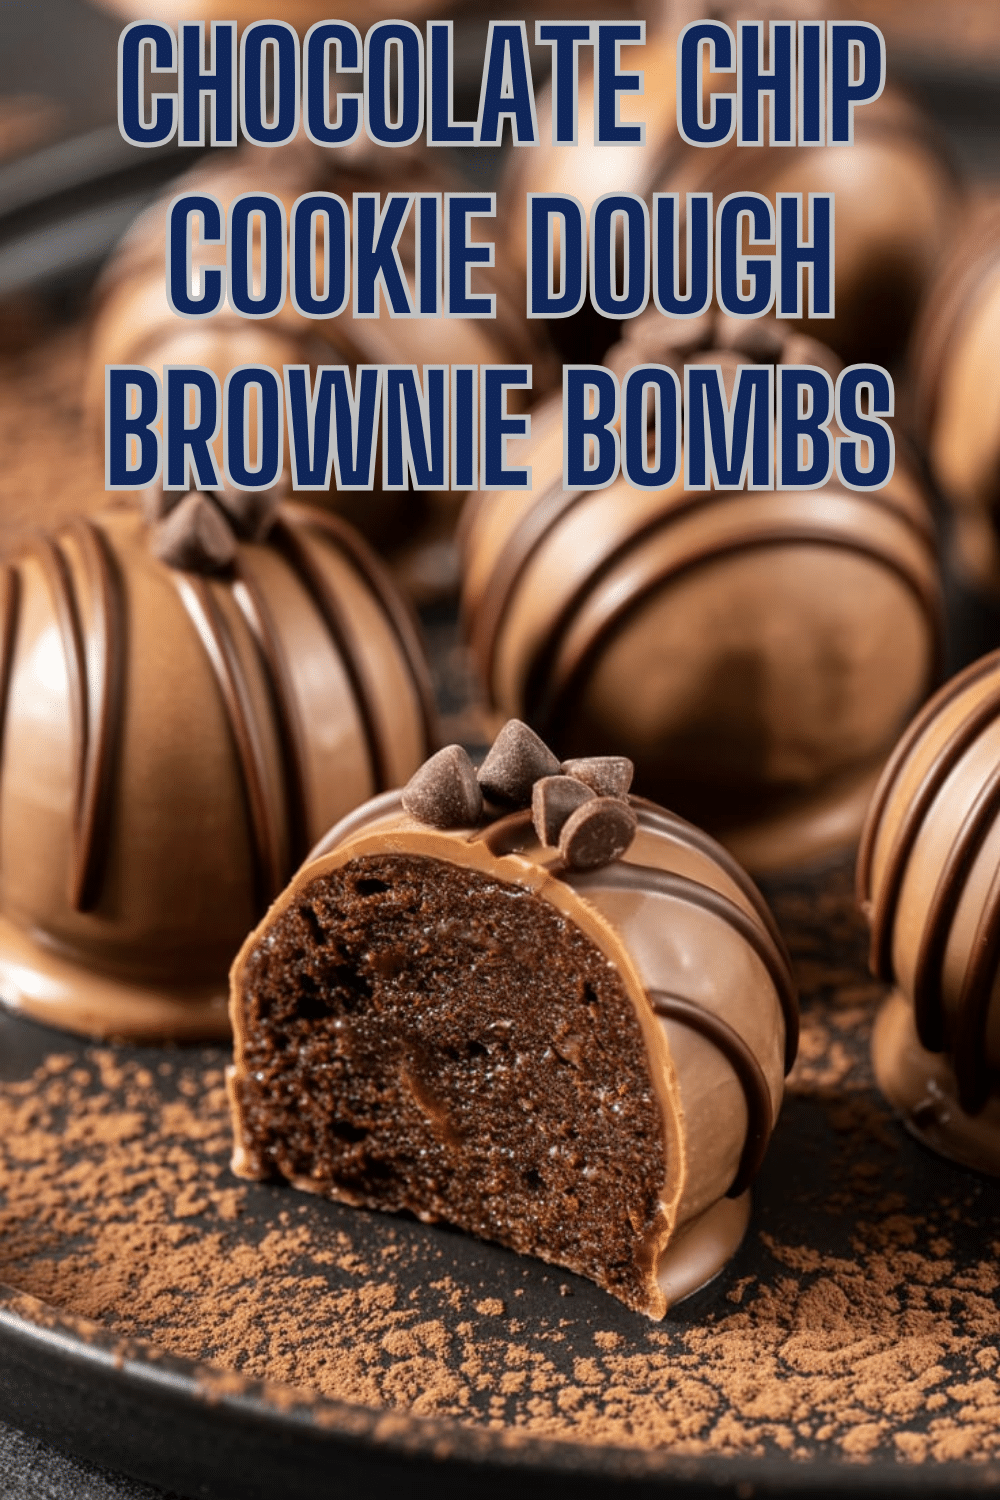
Prepare yourself for some serious dessert decadence! I came across this recipe for Chocolate Chip Cookie Dough Brownie Bombs, and my jaw just about hit the floor. Imagine this: a fudgy brownie square wrapped around a ball of safe-to-eat chocolate chip cookie dough, all dipped in a smooth chocolate coating. It’s literally three of my favorite treats rolled into one incredible bite!
My inspiration came from wanting a truly over-the-top, fun, and impressive treat that would be perfect for parties, gifting, or just satisfying a major sweet craving. Combining the comforting chewiness of brownies, the irresistible allure of cookie dough, and the satisfying snap of a chocolate shell sounded like the ultimate dessert fantasy made real.
My goal is to guide you through creating these amazing “bombs” of deliciousness. While there are a few components involved (baking brownies, making edible cookie dough, dipping), the recipe cleverly uses a brownie mix shortcut, and the assembly process is actually quite fun. We’ll also ensure our cookie dough is safe for consumption!
Let’s get ready to assemble these show-stopping brownie bombs!
Nostalgic Appeal / Comfort Food Connection
These Chocolate Chip Cookie Dough Brownie Bombs are a trifecta of nostalgic comfort food flavors. Brownies themselves are a quintessential homemade treat, loved for their fudgy texture and deep chocolate taste, often associated with bake sales and childhood comforts. The allure of raw chocolate chip cookie dough is undeniable – that sweet, buttery, slightly gritty taste is a forbidden pleasure for many!
Chocolate-covered candies or truffles also carry a sense of indulgence and nostalgic charm, reminiscent of boxed chocolates or special occasion treats. This recipe essentially creates a giant, multi-layered truffle with familiar, beloved components at its core.
Combining brownies, cookie dough, and a chocolate coating feels like the ultimate comfort food mashup – taking familiar favorites and layering them into an exciting new format.
Making and eating these feels like pure, unadulterated fun and indulgence, tapping into multiple layers of sweet treat nostalgia.
Homemade Focus (Edible Dough & Fun Assembly)
While this recipe cleverly utilizes a boxed brownie mix as a convenient shortcut, the real homemade magic lies in creating the safe-to-eat cookie dough filling and the fun, hands-on assembly process. You’re crafting the signature components and bringing them together in a unique way.
I especially appreciate the focus on creating an edible cookie dough filling. By omitting eggs (as this recipe does) and, crucially, heat-treating the flour (a step we’ll add for safety), you can enjoy that classic cookie dough flavor without the risks associated with raw ingredients. Making this component yourself ensures it’s both delicious and safe.
The assembly process – rolling cookie dough balls, wrapping them in brownie pieces, and dipping them in melted chocolate – is a truly homemade endeavor. It requires a bit of patience but is a fun, tactile process that results in a unique, handcrafted treat.
From preparing the edible dough to dipping the final bombs, the process emphasizes creating something special and indulgent right in your own kitchen, even when starting with a simple brownie base.
Flavor Goal
The primary flavor goal of these Chocolate Chip Cookie Dough Brownie Bombs is an explosion of textures and classic sweet flavors in one decadent bite. It aims for a fudgy brownie exterior encasing a sweet, buttery, chocolate-chip-studded cookie dough center, all coated in a smooth, snapping chocolate shell.
The brownie layer provides a soft, fudgy, deep chocolate taste and texture.
The edible cookie dough filling offers the familiar sweet, buttery, slightly brown-sugar-and-vanilla flavor of raw dough, studded with mini chocolate chips.
The chocolate candy melt coating provides a smooth, sweet chocolate shell with a satisfying snap when bitten into.
Optional sprinkles add a pop of color and extra crunch. The overall effect is intensely sweet, chocolatey, and multi-textured – pure indulgence!
Ingredient Insights
Let’s explore the components of these decadent bombs:
Brownie Base:
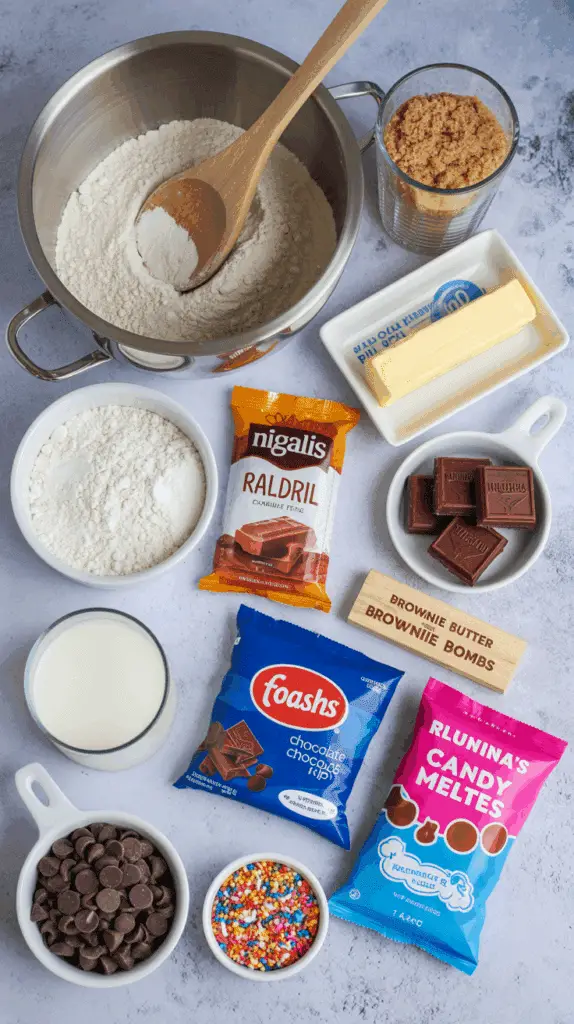
- Brownie mix (1 box), prepared: The convenient base. Use a fudgy style brownie mix for the best texture to wrap around the dough. Bake and cool completely.
Cookie Dough Filling:
- Unsalted butter, softened: Provides richness and flavor, creamed with sugars.
- Brown sugar & Granulated sugar: Create the classic sweet cookie dough flavor. Brown sugar adds moisture.
- Milk: Adds necessary moisture to bind the egg-free dough.
- Vanilla extract: Essential flavor.
- All-purpose flour: Provides structure. Crucial Safety Note: Raw flour can contain harmful bacteria. It must be heat-treated before being used in edible cookie dough. See instructions step/tips for how to do this (baking or microwaving).
- Mini chocolate chips: Provide chocolate bursts throughout the dough. Mini size works well in small dough balls.
Coating:
- Chocolate candy melts: Specifically designed for melting smoothly and setting firmly with a nice sheen. Easier to work with than regular chocolate chips for dipping. Milk, dark, or semi-sweet varieties work.
- Sprinkles (optional): For decoration.
Heat-treating the flour is essential for safety! Candy melts are recommended for easy coating.
Essential Equipment
You’ll need tools for baking brownies, mixing dough, and dipping:
- A baking pan (size per brownie mix instructions, often 8×8 or 9×9): For baking the brownie base.
- Parchment paper: Recommended for lining the brownie pan. Also needed for placing dipped bombs.
- Mixing bowls (large for cookie dough, microwave-safe for coating).
- An electric mixer (handheld or stand mixer): Recommended for creaming butter/sugars for the cookie dough.
- A rubber spatula or spoon: For mixing cookie dough and stirring melted coating.
- Microwave or double boiler: For melting the candy melts.
- Forks or dipping tools: For dipping the bombs into the melted coating.
- Baking sheet: Lined with parchment or wax paper, for placing the dipped bombs to set.
- Measuring cups and spoons.
Standard baking and candy-making tools suffice.

List of Ingredients with Measurements
Here’s the complete list of ingredients, with precise measurements:
Brownie Base:
- 1 box of brownie mix (standard size, ~18 oz), plus ingredients called for on box (usually eggs, oil, water)
Cookie Dough Filling:
- ½ cup (1 stick / 113g) unsalted butter, softened
- ½ cup packed brown sugar
- ¼ cup granulated sugar
- 2 tablespoons milk
- 1 teaspoon vanilla extract
- 1¼ cups all-purpose flour (MUST be heat-treated – see instructions/tips)
- 1 cup mini chocolate chips
Coating:
- 2 cups (about 12 oz) chocolate candy melts
- Sprinkles (optional)
These quantities yield a good number of decadent brownie bombs.
Remember to heat-treat the flour before making the cookie dough!
Step-by-Step Instructions (Assembly Fun!)
Let’s build these amazing treats step-by-step:
1. Bake and Cool Brownies:
- Prepare and bake the brownie mix according to the package instructions in the specified pan size (e.g., 8×8 or 9×9).
- Allow the brownies to cool completely. Once cooled, cut the brownies into small, uniform squares (e.g., 1-inch to 1.5-inch squares).
2. Heat-Treat the Flour (CRUCIAL SAFETY STEP):
- Spread the 1¼ cups of all-purpose flour onto a baking sheet. Bake in a preheated 350°F (175°C) oven for 5-7 minutes, or until its temperature reaches 165°F (74°C) on an instant-read thermometer. Alternatively, microwave the flour in a microwave-safe bowl in 30-second intervals, stirring between each, until it reaches 165°F. Let the flour cool completely before using. This step kills potential bacteria in raw flour.
3. Make the Edible Cookie Dough Filling:
- In a large mixing bowl, cream together the softened butter, brown sugar, and granulated sugar with an electric mixer until light and fluffy.
- Beat in the milk and vanilla extract until combined.
- Gradually stir in the cooled, heat-treated flour until fully incorporated. The dough will be thick.
- Fold in the mini chocolate chips.
4. Form Cookie Dough Balls:
- Roll the edible cookie dough mixture into small balls, about 1 tablespoon each. Place them on a plate or small tray.
5. Assemble the Brownie Bombs:
- Take one cooled brownie square and flatten it slightly in your palm.
- Place one cookie dough ball in the center of the flattened brownie.
- Carefully wrap the edges of the brownie up and around the cookie dough ball, pressing gently to fully enclose the dough ball within the brownie. Roll gently between your palms to smooth the outside. Repeat with remaining brownie squares and cookie dough balls. Place the assembled bombs on a parchment-lined plate or tray. Chill briefly (15-20 mins) if they seem soft, for easier dipping.
6. Melt Coating:
- Place the chocolate candy melts in a microwave-safe bowl. Microwave on medium power (or 50%) in 30-second intervals, stirring well between each interval, until fully melted and smooth. Be careful not to overheat. (Alternatively, use a double boiler).
7. Dip the Brownie Bombs:
- Using forks or candy dipping tools, dip each assembled brownie bomb into the melted chocolate candy coating, ensuring it’s fully covered. Tap off any excess coating gently against the side of the bowl.
- Place the dipped brownie bomb onto a baking sheet lined with parchment paper or wax paper.
8. Decorate and Set:
- If using sprinkles, add them immediately onto the wet chocolate coating before it sets.
- Repeat dipping and decorating for all brownie bombs.
- Place the baking sheet in the refrigerator until the chocolate coating is completely firm and set, about 30 minutes to 1 hour.
Store chilled until ready to enjoy!

Troubleshooting
Assembling these treats can have a few tricky spots:
- Problem: Brownies are too crumbly to wrap around cookie dough.
- Solution: Ensure you used a fudgy brownie mix, not a cakey one. Don’t overbake the brownies. If they are still crumbly, you might need to gently press them together more firmly around the dough ball, or slightly warm them with your hands to make them more pliable.
- Problem: Cookie dough is too soft/sticky to roll into balls.
- Solution: Chill the cookie dough mixture in the refrigerator for 15-30 minutes until it firms up enough to handle easily.
- Problem: Brownie bombs fall apart during dipping.
- Solution: Ensure the brownie is pressed firmly around the cookie dough. Chill the assembled bombs briefly before dipping to help them hold their shape. Handle gently during dipping.
- Problem: Chocolate coating is too thick or seizes.
- Solution: For thick coating, stir in 1/2 to 1 teaspoon of vegetable shortening or coconut oil after melting to thin it slightly. For seized (grainy/hard) chocolate, ensure no water contacted it and avoid overheating; it’s hard to recover fully. Use candy melts for easier handling than chocolate chips.
Chilling components can make assembly easier.
Tips and Variations
Let’s customize these decadent bombs:
- Tip: Use a fudgy brownie mix for the best pliable texture for wrapping.
- Variation: Use different types of cookie dough filling, like peanut butter cookie dough (ensure flour is heat-treated) or sugar cookie dough.
- Tip: Mini chocolate chips work best in the cookie dough filling for better distribution in small balls.
- Variation: Use different coatings like white chocolate candy melts, peanut butter melts, or dark chocolate melts. Add colorful sprinkles to match an occasion.
- Tip: Work relatively quickly when wrapping the brownies around the dough so the brownies don’t dry out or crumble too much.
- Variation: Add chopped nuts (like pecans or walnuts) or crushed pretzels to the cookie dough filling for extra texture.
- Variation: Drizzle a contrasting color of melted candy melts over the set chocolate coating for decoration.
Get creative with flavors and decorations!
Serving and Pairing Suggestions
These Chocolate Chip Cookie Dough Brownie Bombs are rich, indulgent treats.
Serving: Serve chilled or at cool room temperature.
Occasions & Pairing:
- Perfect for parties, bake sales, holiday treat platters, or as impressive homemade gifts.
- Delicious with a cold glass of milk.
- Great alongside coffee or tea for an afternoon indulgence.
- Serve on a dessert platter with other bite-sized treats.
Their rich nature means one or two bombs are often perfectly satisfying!
Nutritional Information
These are extremely indulgent treats combining brownie, cookie dough, and chocolate coating. Nutritional info is highly approximate and depends heavily on brownie mix used, candy melt type, and size of bombs:
- Calories: 150-250+ per bomb
- Fat: 8-15+ grams
- Saturated Fat: 4-8+ grams
- Cholesterol: 15-30+ mg
- Sodium: 80-150+ mg
- Total Carbs.: 20-35+ grams
- Dietary Fiber: 1-2 grams
- Sugars: 15-25+ grams
- Protein: 1-3 grams
Definitely a rich dessert treat, high in sugar and fat. Enjoy mindfully!
PrintChocolate Chip Cookie Dough Brownie Bombs
Make decadent Chocolate Chip Cookie Dough Brownie Bombs! Fudgy brownies wrapped around edible cookie dough, dipped in chocolate
Ingredients
Here’s the complete list of ingredients, with precise measurements:
Brownie Base:
- 1 box of brownie mix (standard size, ~18 oz), plus ingredients called for on box (usually eggs, oil, water)
Cookie Dough Filling:
- ½ cup (1 stick / 113g) unsalted butter, softened
- ½ cup packed brown sugar
- ¼ cup granulated sugar
- 2 tablespoons milk
- 1 teaspoon vanilla extract
- 1¼ cups all-purpose flour (MUST be heat-treated – see instructions/tips)
- 1 cup mini chocolate chips
Coating:
- 2 cups (about 12 oz) chocolate candy melts
- Sprinkles (optional)
These quantities yield a good number of decadent brownie bombs.
Remember to heat-treat the flour before making the cookie dough
Instructions
Let’s build these amazing treats step-by-step:
1. Bake and Cool Brownies:
- Prepare and bake the brownie mix according to the package instructions in the specified pan size (e.g., 8×8 or 9×9).
- Allow the brownies to cool completely. Once cooled, cut the brownies into small, uniform squares (e.g., 1-inch to 1.5-inch squares).
2. Heat-Treat the Flour (CRUCIAL SAFETY STEP):
- Spread the 1¼ cups of all-purpose flour onto a baking sheet. Bake in a preheated 350°F (175°C) oven for 5-7 minutes, or until its temperature reaches 165°F (74°C) on an instant-read thermometer. Alternatively, microwave the flour in a microwave-safe bowl in 30-second intervals, stirring between each, until it reaches 165°F. Let the flour cool completely before using. This step kills potential bacteria in raw flour.
3. Make the Edible Cookie Dough Filling:
- In a large mixing bowl, cream together the softened butter, brown sugar, and granulated sugar with an electric mixer until light and fluffy.
- Beat in the milk and vanilla extract until combined.
- Gradually stir in the cooled, heat-treated flour until fully incorporated. The dough will be thick.
- Fold in the mini chocolate chips.
4. Form Cookie Dough Balls:
- Roll the edible cookie dough mixture into small balls, about 1 tablespoon each. Place them on a plate or small tray.
5. Assemble the Brownie Bombs:
- Take one cooled brownie square and flatten it slightly in your palm.
- Place one cookie dough ball in the center of the flattened brownie.
- Carefully wrap the edges of the brownie up and around the cookie dough ball, pressing gently to fully enclose the dough ball within the brownie. Roll gently between your palms to smooth the outside. Repeat with remaining brownie squares and cookie dough balls. Place the assembled bombs on a parchment-lined plate or tray. Chill briefly (15-20 mins) if they seem soft, for easier dipping.
6. Melt Coating:
- Place the chocolate candy melts in a microwave-safe bowl. Microwave on medium power (or 50%) in 30-second intervals, stirring well between each interval, until fully melted and smooth. Be careful not to overheat. (Alternatively, use a double boiler).
7. Dip the Brownie Bombs:
- Using forks or candy dipping tools, dip each assembled brownie bomb into the melted chocolate candy coating, ensuring it’s fully covered. Tap off any excess coating gently against the side of the bowl.
- Place the dipped brownie bomb onto a baking sheet lined with parchment paper or wax paper.
8. Decorate and Set:
- If using sprinkles, add them immediately onto the wet chocolate coating before it sets.
- Repeat dipping and decorating for all brownie bombs.
- Place the baking sheet in the refrigerator until the chocolate coating is completely firm and set, about 30 minutes to 1 hour.
Store chilled until ready to enjoy
Recipe Summary and Q&A
Let’s conclude with a summary and common questions:
Recipe Summary:
Chocolate Chip Cookie Dough Brownie Bombs are decadent no-bake treats. Baked brownie squares are flattened and wrapped around balls of safe-to-eat (eggless, heat-treated flour) chocolate chip cookie dough. The assembled “bombs” are then dipped in melted chocolate candy coating, optionally decorated with sprinkles, and chilled until set.
Q&A:
Q: Is the cookie dough safe to eat raw? A: The cookie dough in this recipe is eggless. However, raw flour carries a risk of bacteria. It is highly recommended to heat-treat the flour (bake or microwave until it reaches 165°F/74°C) before using it in the edible cookie dough to ensure safety.
Q: Can I make these ahead of time? A: Yes! Assemble them completely and store them in the refrigerator. They are great made a day or two in advance.
Q: How do I store the finished Brownie Bombs? A: Store in an airtight container in the refrigerator for up to a week. Layer with wax paper if stacking.
Q: Can I freeze these? A: Yes, they freeze well. Store in an airtight, freezer-safe container, layered with wax paper, for up to 2-3 months. Thaw in the refrigerator or enjoy slightly frozen.
Q: Can I use regular chocolate chips instead of candy melts for the coating? A: You can, but melting chocolate chips smoothly for dipping can be trickier. You’ll likely need to add 1-2 teaspoons of shortening or coconut oil to the melted chocolate chips to achieve a thinner, smoother coating consistency. Candy melts are designed for easy melting and setting
Did Our Recipe Hit The Spot?
There are no reviews yet. Be the first one to write one.


