Introduction & Inspiration
I am an absolute believer in the power of simple, no-bake treats, especially when they involve the timeless and irresistible combination of peanut butter and chocolate! This recipe for Frozen Peanut Butter Bites immediately caught my eye with its promise of a rich, creamy peanut butter center, partially dipped in smooth semi-sweet chocolate, and served chilled. It sounded like the perfect, easy-to-make homemade candy, reminiscent of a classic peanut butter cup but with an elegant, homemade touch.
My inspiration for exploring this recipe comes from a deep love for that perfect salty-sweet flavor pairing and the desire for a simple confection that doesn’t require any baking. These bites are incredibly straightforward – you mix, roll, chill, melt, and dip. They seem perfect for holiday treat platters, homemade gifts, or just for having a delicious little indulgence stashed away in the fridge or freezer.
My goal is to guide you step-by-step through making these delightful peanut butter bites. We’ll cover creating the smooth peanut butter filling, the importance of chilling, and the technique for getting that perfect chocolatey dip. Get ready to create some incredibly easy and delicious homemade candy!
Let’s get ready to make these amazing no-bake peanut butter treats!
Nostalgic Appeal / Comfort Food Connection
These Frozen Peanut Butter Bites are pure comfort and nostalgia, tapping into one of the most beloved flavor combinations in the American sweet-treat lexicon. The taste of peanut butter and chocolate together is iconic, evoking memories of popular candy cups, buckeye candies, and countless other childhood favorites. It’s a flavor pairing that feels both incredibly indulgent and wonderfully familiar.
This recipe, with its simple, from-scratch peanut butter center and rich semi-sweet chocolate coating, is particularly reminiscent of homemade holiday candies. Many families have traditions of making similar no-bake treats like buckeyes or peanut butter balls to share during special occasions.
The act of rolling the peanut butter mixture into balls and dipping them in melted chocolate is a fun, satisfying, hands-on kitchen activity. It connects us to the simple joy of creating confections at home.
Making and enjoying these Frozen Peanut butter Bites feels like savoring a timeless, comforting classic – a simple yet decadent treat that always brings a smile.
Homemade Focus (Simple Mixing, Classic Candy Making)
This recipe for Frozen Peanut Butter Bites is a wonderful example of classic homemade candy making at its easiest and most rewarding. You’re creating a delicious confection from scratch using just a few simple pantry staples and basic kitchen techniques.
I love recipes that empower anyone to become a candy maker, and this one is perfect for that. The homemade peanut butter center is created by simply beating together creamy peanut butter with confectioners’ sugar and vanilla until it’s stiff enough to roll. This process gives you a smooth, flavorful filling that’s far superior to many pre-made candy centers.
Melting chocolate properly (using a double boiler method as suggested) and then carefully dipping the chilled peanut butter balls is another key homemade technique. This allows you to create a beautiful, smooth chocolate coating. The final decorative swirl with a fork adds a charming, artisanal touch.
From rolling each peanut butter ball to carefully dipping it in chocolate, every step emphasizes the satisfying process and delicious results of creating a classic confection in your own kitchen.
Flavor Goal
The primary flavor goal of these Frozen Peanut Butter Bites is a perfect harmony of a sweet, slightly salty, and intensely peanut-buttery center with a rich, smooth, semi-sweet chocolate coating. It aims for a balanced, decadent candy experience where the two main flavors complement each other beautifully.
The peanut butter filling, made with creamy peanut butter, confectioners’ sugar, and vanilla, should be smooth, dense, and packed with classic peanut butter flavor, balanced perfectly between sweet and salty.
The semi-sweet chocolate coating provides a rich, slightly bittersweet chocolate flavor that cuts through the sweetness of the filling. When set, it should have a pleasant snap that gives way to the softer peanut butter center.
Serving them chilled or frozen enhances the texture, making the peanut butter center firm and fudgy and the chocolate shell crisp. The overall effect is a rich, satisfying, perfectly balanced peanut butter and chocolate bite.
Ingredient Insights
Let’s explore the simple yet crucial ingredients for these no-bake treats:
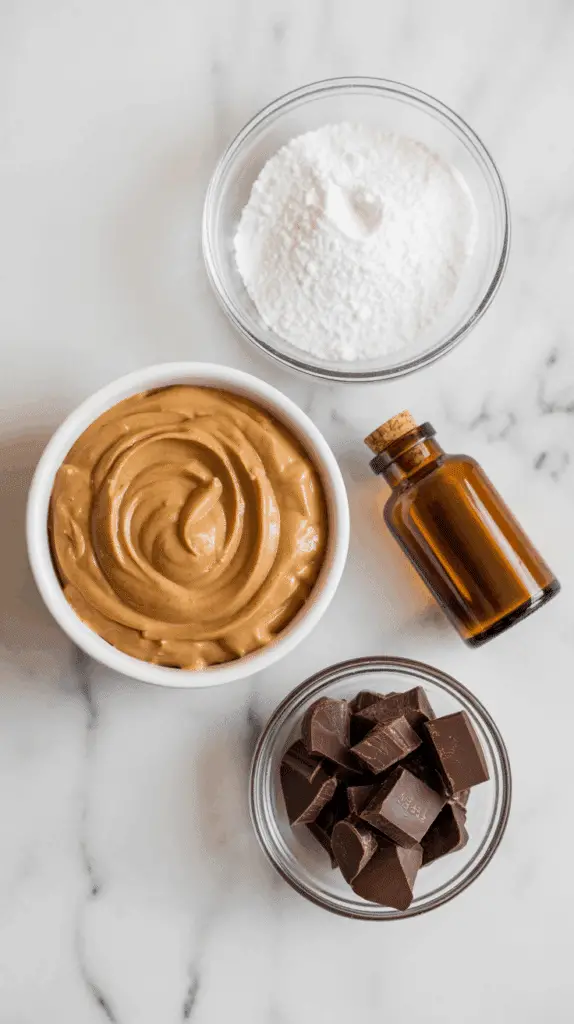
- Creamy peanut butter: The star of the show! The recipe specifies a full 18-ounce jar. A standard commercial creamy peanut butter (like Jif or Skippy) is generally recommended for no-bake candies as it has stabilizers that help the mixture come together smoothly and consistently.
- Confectioners’ sugar (powdered sugar): Provides sweetness and is the key ingredient for stiffening the peanut butter into a firm, rollable dough.
- Vanilla extract: Adds a touch of warm, aromatic flavor that enhances the peanut butter and chocolate.
- Semi-sweet chocolate, chopped: Provides the rich chocolate coating. Using chopped chocolate from a bar often results in a smoother melt than using chips (which can contain stabilizers). Choose a good quality semi-sweet chocolate (45-60% cacao) for a classic flavor balance.
- Waxed paper or Parchment paper: Essential for placing the balls on to chill and for placing the dipped bites on to set, preventing them from sticking.
Using a standard commercial peanut butter is often key for the texture of the filling.
Essential Equipment
This no-bake candy recipe requires basic kitchen tools:
- An Electric mixer (handheld or stand mixer): As suggested in the recipe, this is the easiest way to beat the peanut butter and confectioners’ sugar together until smooth and stiff. It can be done by hand with a sturdy spoon and some effort.
- A Baking sheet or large tray: To hold the peanut butter balls for chilling and freezing.
- Waxed paper or Parchment paper: To line the baking sheet.
- A small saucepan and a heatproof bowl that fits over it (for a double boiler): For gently and safely melting the chocolate. Alternatively, a microwave-safe bowl for melting chocolate in the microwave.
- Two forks: The classic, best tools for dipping the balls in chocolate and allowing excess to drip off.
- Measuring cups and spoons.
An electric mixer and a double boiler setup are very helpful for this recipe.
List of Ingredients with Measurements
Here’s the complete list of ingredients, with precise measurements:
- 1 (18-ounce) jar creamy peanut butter
- 2 1/2 cups confectioners’ sugar (powdered sugar)
- 1 teaspoon vanilla extract
- 8 ounces semi-sweet chocolate, chopped
- (Waxed paper or parchment paper)
These quantities yield approximately 20 (1-inch) peanut butter bites.
Have your baking sheet lined and ready before you start rolling.

Step-by-Step Instructions (Easy Homemade Peanut Butter Candy!)
Let’s create these delicious Frozen Peanut Butter Bites:
1. Make the Peanut Butter Filling:
- In a large mixing bowl, add the creamy peanut butter and the confectioners’ sugar.
- Using an electric mixer on medium speed (or a sturdy spoon and some elbow grease), beat the peanut butter and confectioners’ sugar together until the mixture is smooth, well combined, and becomes stiff enough to hold its shape.
- Beat in the 1 teaspoon of vanilla extract until just combined.
2. Shape and Freeze the Peanut Butter Balls:
- Line a baking sheet or large tray with waxed paper or parchment paper.
- Shape the peanut butter mixture into approximately 20 (1-inch) balls, rolling them between your palms.
- Place the shaped peanut butter balls on the prepared waxed paper-lined sheet tray.
- Place the entire tray in the freezer for at least 1 hour. This chilling step is crucial – it makes the balls firm so they don’t fall apart when dipped in the warm melted chocolate.
3. Melt the Chocolate:
- About 10 minutes before the peanut butter balls are done chilling, melt the chocolate.
- Add the chopped semi-sweet chocolate to a small, heatproof bowl.
- Create a double boiler by setting the heatproof bowl over a small saucepan filled with an inch or two of gently simmering (not boiling) water. Ensure the bottom of the bowl does not touch the water.
- Stir the chocolate occasionally until it has melted and is completely smooth.
- Once melted, carefully remove the bowl of chocolate from the heat.
4. Dip the Peanut Butter Balls:
- Remove the chilled, firm peanut butter balls from the freezer.
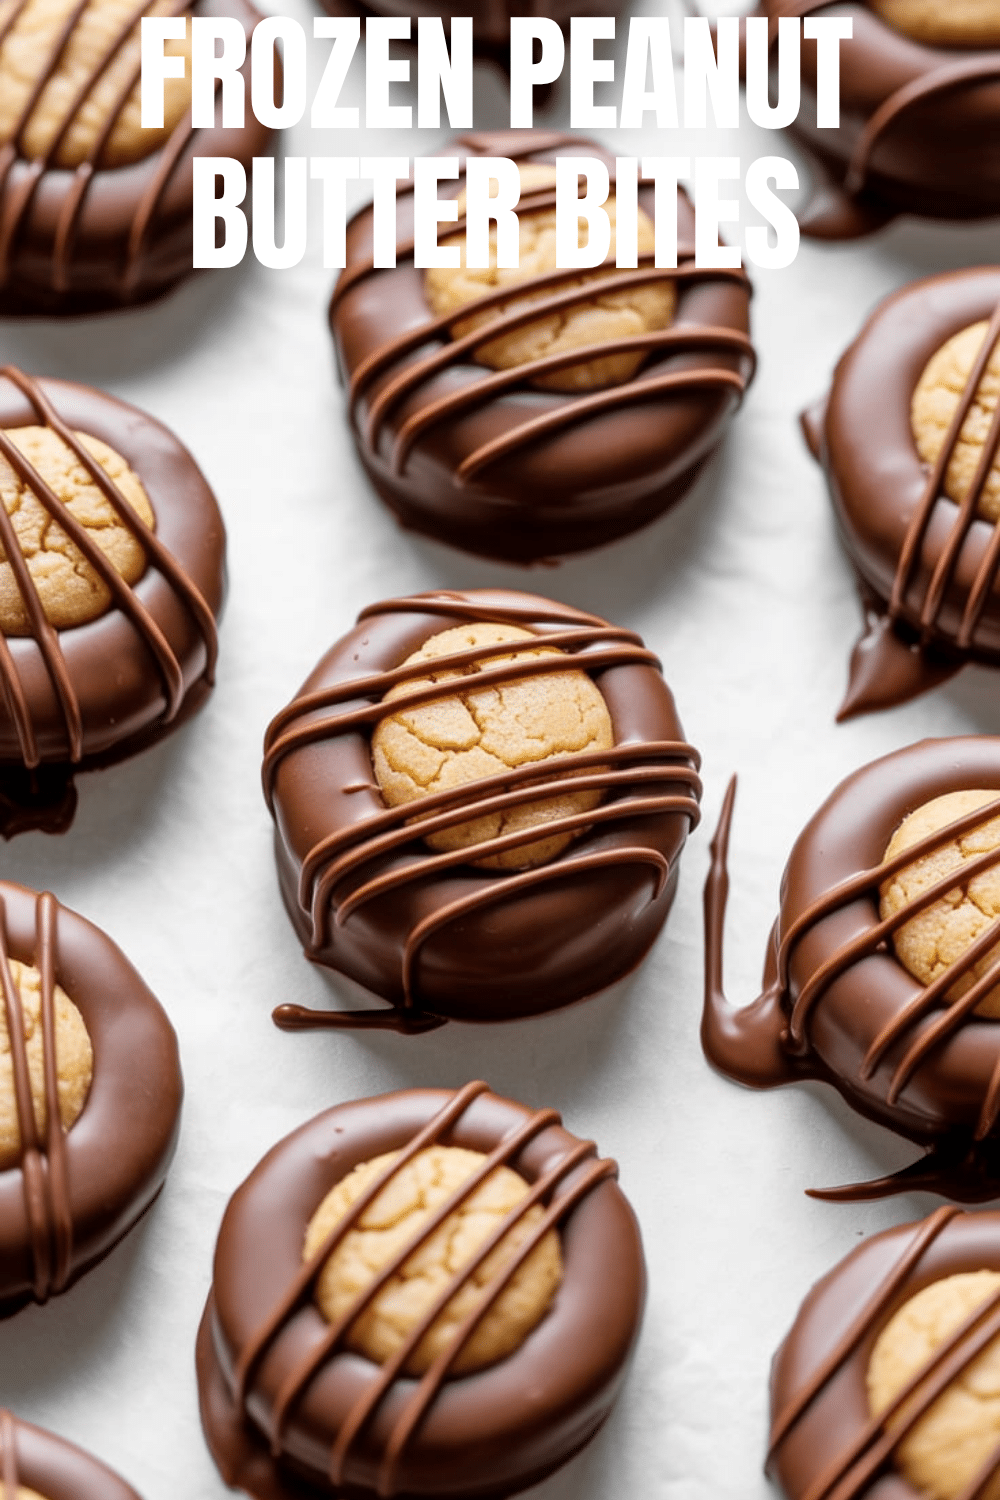
- Using two forks, carefully dip one peanut butter ball at a time, half way into the melted chocolate.
- Lift the half-dipped ball out of the chocolate with one fork, and use the other fork to help slide it off and back onto the waxed paper-lined sheet tray. Let any excess chocolate drip off back into the bowl before placing it on the tray. Repeat with all the peanut butter balls.
5. Decorate and Set:
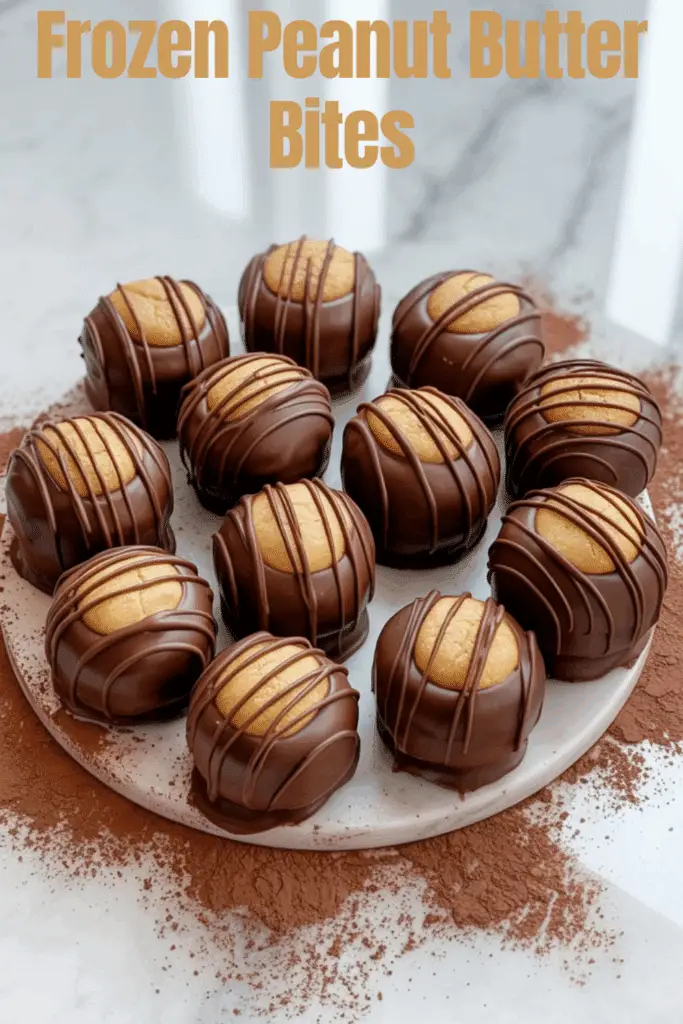
- After dipping, you can use a fork to take a little of the remaining melted chocolate and artfully swirl or drizzle some decorative lines across the top of each bite.
- Place the tray of finished peanut butter bites in the refrigerator for about 30 minutes. This allows the chocolate to set completely and the peanut butter center to solidify to the perfect fudgy, chilled consistency.
6. Store and Serve:
- Once the chocolate is fully set, your Frozen Peanut Butter Bites are ready to enjoy!
- Store them in an airtight container in the refrigerator or freezer.
Chilling the peanut butter balls thoroughly before dipping is the secret to success!

Troubleshooting
Making dipped candies can have a few sticky situations:
- Problem: Peanut butter mixture is too soft or sticky to roll into balls.
- Solution: It may need a little more confectioners’ sugar to stiffen up. Add more, a tablespoon at a time, mixing well after each addition, until it’s a firm, play-doh like consistency. Using a standard commercial peanut butter helps with consistency.
- Problem: Peanut butter balls melted or fell apart when dipped in chocolate.
- Solution: The peanut butter balls were not chilled long enough or were not cold enough. They need to be very firm (frozen for at least 1 hour is best) to withstand the warmth of the melted chocolate. Also, ensure the melted chocolate has cooled slightly and is not scalding hot.
- Problem: Chocolate coating is too thick or seized (became grainy/hard).
- Solution (Too Thick): You can stir a tiny amount (1/2 teaspoon) of neutral oil or coconut oil into the melted chocolate to make it a bit more fluid for dipping.
- Solution (Seized): This is usually caused by a tiny bit of water or steam getting into the chocolate. Be very careful with your double boiler setup. Unfortunately, seized chocolate is difficult to salvage for dipping.
- Problem: Dipping is messy and the chocolate coating is not smooth.
- Solution: Using the two-fork method is key. Use one fork to lower and lift the ball, and the other to help guide and scrape it off onto the waxed paper. This keeps your fingers clean and the coating neater.
Proper chilling before dipping is the most important step!
Tips and Variations
Let’s customize these classic peanut butter and chocolate treats:
- Tip: For a slightly different texture in the filling, you can add about ½ cup of crispy rice cereal or quick-cooking oats to the peanut butter mixture.
- Variation: Use different types of chocolate for dipping, such as milk chocolate, dark chocolate (70% or higher), or even white chocolate. You can also do a double dip – first in one chocolate, let it set, then drizzle with another.
- Tip: For easier shaping of the peanut butter balls, you can use a small cookie scoop to portion the mixture before rolling.
- Variation: After dipping the balls in chocolate, while the chocolate is still wet, sprinkle them with toppings like flaky sea salt (for a fantastic sweet and salty kick), finely chopped peanuts, or colorful sprinkles.
- Tip: If you don’t have a double boiler, you can melt the chocolate carefully in the microwave. Place the chopped chocolate in a microwave-safe bowl and heat in 20-30 second intervals at 50% power, stirring well between each interval, until smooth.
- Variation: Substitute other nut or seed butters like almond butter or sunflower seed butter for the peanut butter. The consistency may vary, so you might need to adjust the amount of confectioners’ sugar.
- Variation (Full Buckeye Style): Instead of a half-dip, insert a toothpick into each peanut butter ball, dip it almost completely into the chocolate (leaving a small circle at the top where the toothpick is), let excess drip off, then place on waxed paper and remove the toothpick.
A wonderfully adaptable recipe for homemade candy!
Serving and Pairing Suggestions
Frozen Peanut Butter Bites are a rich, decadent treat perfect for many occasions.
Serving: Serve chilled, directly from the refrigerator or freezer.
Occasions & Pairing:
- Holiday Treat Platters: An absolute must-have for Christmas, Easter, or any holiday cookie/candy tray.
- Homemade Gifts: Package them in a pretty box or tin for a lovely and delicious homemade gift.
- Dessert: A perfect two-bite dessert after a meal.
- With Coffee or Milk: The classic pairing for a sweet treat.
- Parties: Easy to make ahead and serve to a crowd.
Their rich flavor means a little goes a long way!
Nutritional Information
This is a very indulgent candy made from peanut butter, sugar, and chocolate. Nutritional info is highly approximate (per bite, assuming 20 bites):
- Calories: 180-250+
- Fat: 12-18+ grams
- Saturated Fat: 4-8+ grams (from peanut butter and chocolate)
- Cholesterol: <5 mg
- Sodium: 50-100+ mg
- Total Carbs.: 15-22+ grams
- Dietary Fiber: 1-2 grams
- Sugars: 12-20+ grams (Very high from confectioners’ sugar)
- Protein: 4-6 grams
Definitely a sweet indulgence, high in sugar and fat.
PrintEasy Frozen Peanut Butter Bites (A No-Bake Treat!)
Make easy, no-bake Frozen Peanut Butter Bites! This classic recipe features a creamy peanut butter center dipped in rich semi-sweet chocolate.
Ingredients
Here’s the complete list of ingredients, with precise measurements:
- 1 (18-ounce) jar creamy peanut butter
- 2 1/2 cups confectioners’ sugar (powdered sugar)
- 1 teaspoon vanilla extract
- 8 ounces semi-sweet chocolate, chopped
- (Waxed paper or parchment paper)
These quantities yield approximately 20 (1-inch) peanut butter bites.
Have your baking sheet lined and ready before you start rolling.
Instructions
Let’s create these delicious Frozen Peanut Butter Bites:
1. Make the Peanut Butter Filling:
- In a large mixing bowl, add the creamy peanut butter and the confectioners’ sugar.
- Using an electric mixer on medium speed (or a sturdy spoon and some elbow grease), beat the peanut butter and confectioners’ sugar together until the mixture is smooth, well combined, and becomes stiff enough to hold its shape.
- Beat in the 1 teaspoon of vanilla extract until just combined.
2. Shape and Freeze the Peanut Butter Balls:
- Line a baking sheet or large tray with waxed paper or parchment paper.
- Shape the peanut butter mixture into approximately 20 (1-inch) balls, rolling them between your palms.
- Place the shaped peanut butter balls on the prepared waxed paper-lined sheet tray.
- Place the entire tray in the freezer for at least 1 hour. This chilling step is crucial – it makes the balls firm so they don’t fall apart when dipped in the warm melted chocolate.
3. Melt the Chocolate:
- About 10 minutes before the peanut butter balls are done chilling, melt the chocolate.
- Add the chopped semi-sweet chocolate to a small, heatproof bowl.
- Create a double boiler by setting the heatproof bowl over a small saucepan filled with an inch or two of gently simmering (not boiling) water. Ensure the bottom of the bowl does not touch the water.
- Stir the chocolate occasionally until it has melted and is completely smooth.
- Once melted, carefully remove the bowl of chocolate from the heat.
4. Dip the Peanut Butter Balls:
- Remove the chilled, firm peanut butter balls from the freezer.
- Using two forks, carefully dip one peanut butter ball at a time, half way into the melted chocolate.
- Lift the half-dipped ball out of the chocolate with one fork, and use the other fork to help slide it off and back onto the waxed paper-lined sheet tray. Let any excess chocolate drip off back into the bowl before placing it on the tray. Repeat with all the peanut butter balls.
5. Decorate and Set:
- After dipping, you can use a fork to take a little of the remaining melted chocolate and artfully swirl or drizzle some decorative lines across the top of each bite.
- Place the tray of finished peanut butter bites in the refrigerator for about 30 minutes. This allows the chocolate to set completely and the peanut butter center to solidify to the perfect fudgy, chilled consistency.
6. Store and Serve:
- Once the chocolate is fully set, your Frozen Peanut Butter Bites are ready to enjoy!
- Store them in an airtight container in the refrigerator or freezer.
Chilling the peanut butter balls thoroughly before dipping is the secret to success!
Recipe Summary and Q&A
Let’s conclude with a summary and common questions:
Recipe Summary:
Frozen Peanut Butter Bites are a no-bake candy featuring a rich, creamy center made from peanut butter, confectioners’ sugar, and vanilla extract. This mixture is shaped into balls and frozen until firm. The chilled peanut butter balls are then partially dipped in melted semi-sweet chocolate, decorated with a chocolate swirl, and refrigerated until the chocolate is fully set.
Q&A:
Q: Can I make these ahead of time? A: Yes, they are a perfect make-ahead treat! You can make them completely and store them in the refrigerator or freezer for several weeks.
Q&A: How do I store these Peanut Butter Bites? A: Store them in an airtight container, layered with wax paper to prevent sticking, in the refrigerator for up to 2-3 weeks, or in the freezer for up to 2-3 months.
Q&A: Can I use natural peanut butter for this recipe? A: Standard commercial creamy peanut butter is generally recommended because its added stabilizers create a more consistent, less oily dough. Natural peanut butter (which can separate) may result in a softer or oilier mixture that is harder to work with and might not set up as firmly. If you use natural peanut butter, ensure it is extremely well-stirred.
Q&A: Do I have to freeze the peanut butter balls before dipping? A: Yes, this step is highly recommended and almost essential. Freezing the balls makes them very firm, which prevents them from melting, becoming misshapen, or falling apart when you dip them into the warm, melted chocolate.
Q&A: What’s the best way to melt chocolate so it doesn’t burn? A: The double boiler method described in the recipe (a heatproof bowl set over a saucepan of gently simmering water) is the safest way, as it uses indirect heat. If using a microwave, always use a lower power setting (like 50%) and heat in short intervals (20-30 seconds), stirring well in between, to prevent scorching.
Did Our Recipe Hit The Spot?
There are no reviews yet. Be the first one to write one.


