Introduction & Inspiration
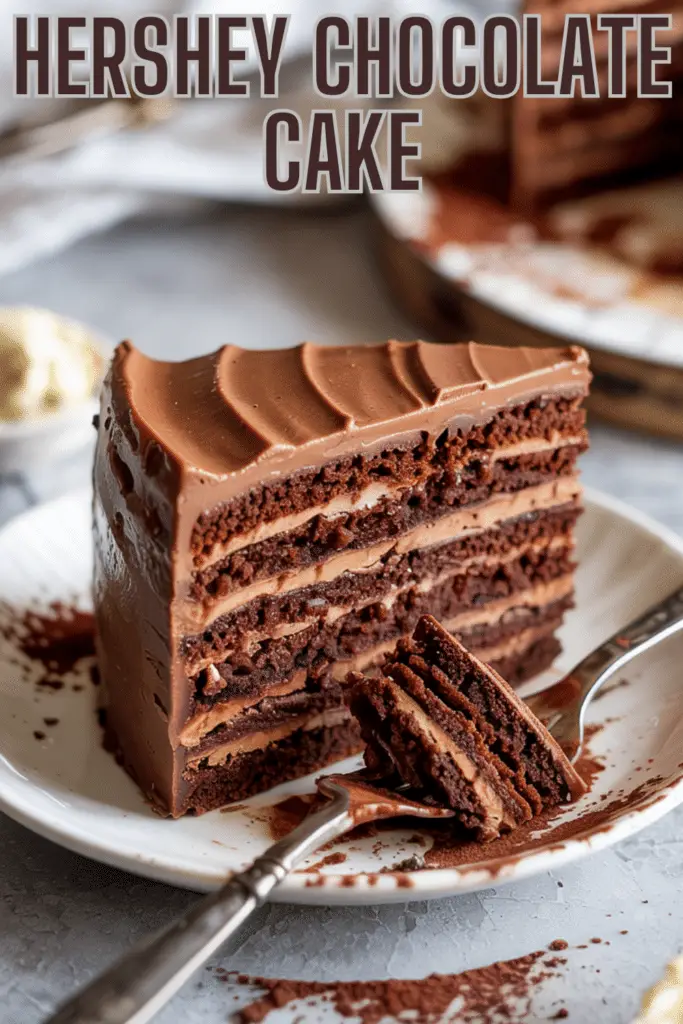
There are countless chocolate cake recipes out there, but some just stand the test of time. Hershey’s classic chocolate cake, often found right on the cocoa container, is one of those iconic recipes for me. This version, promising a deep chocolate flavor, an incredibly moist crumb (thanks to a secret ingredient!), and a simple yet delicious chocolate frosting, immediately brought back fond memories and inspired me to bake it again.
My inspiration comes from the reliability and comforting familiarity of this particular chocolate cake. It’s the kind of cake many of us grew up with – perhaps showing up at birthday parties, potlucks, or family gatherings. It’s unpretentious, deeply chocolatey, and always satisfying.
My goal was to explore and share this quintessential American chocolate cake recipe, highlighting what makes it so special – particularly its moist texture derived from using oil and boiling water (or coffee!). It’s a recipe that consistently delivers delicious results, even for beginner bakers.
Let’s bake this timeless classic together!
Nostalgic Appeal
This Hershey Chocolate Cake is practically dripping with nostalgia. For generations of American home bakers, the recipe printed on the side of the Hershey’s cocoa tin was the go-to chocolate cake. Seeing this recipe instantly transports me back to childhood birthdays and simple, delicious homemade celebrations.
The deep, dark color and the intense, straightforward chocolate flavor are incredibly familiar and comforting. It’s not overly complex, just pure, satisfying chocolate goodness, often paired with a simple, equally chocolatey frosting.
The unique thinness of the batter, resulting from adding boiling water or coffee at the end, is a characteristic feature many remember. It feels slightly unconventional but yields that signature super-moist crumb that makes this cake so memorable.
Baking this cake feels like connecting with a piece of American culinary history. It’s a simple pleasure, a taste of home, and a reminder of countless shared moments around a slice of delicious chocolate cake.
Homemade Focus
Despite its simplicity and origins on a product label, this Hershey Chocolate Cake truly embodies the spirit of homemade baking. You’re taking basic pantry staples – flour, sugar, cocoa, leavenings, eggs, milk, oil – and transforming them into a wonderfully moist and flavorful cake from scratch.
I appreciate how straightforward this recipe is. There are no complicated techniques, just simple mixing steps. Whisking the dry ingredients, combining the wet, then mixing them together before stirring in the hot liquid – it’s an easy process that yields fantastic results.
The frosting, too, while simple (using melted butter, cocoa, powdered sugar, and milk), is made from scratch, allowing you to control the sweetness and achieve a rich, fudgy texture that complements the cake perfectly.
Making this cake feels like participating in a shared tradition of home baking. It’s proof that delicious, crowd-pleasing desserts don’t need to be overly complex, and the satisfaction comes from creating something wonderful with basic ingredients and simple methods.
Flavor Goal
The primary flavor goal of this Hershey Chocolate Cake is pure, unadulterated, deep chocolate flavor with an exceptionally moist and tender crumb. It aims for a classic American chocolate cake taste – rich, satisfying, and perfectly sweet, complemented by a fudgy chocolate frosting.
The use of unsweetened cocoa powder provides the foundational chocolate flavor. Adding boiling water or hot coffee at the end not only creates a moist cake but also helps to “bloom” the cocoa powder, intensifying its flavor.
The combination of baking soda and baking powder, along with buttermilk, ensures a good rise and a tender texture. The oil guarantees moisture that lasts for days.
The frosting continues the chocolate theme with melted butter and cocoa powder, creating a rich, fudgy, slightly glossy topping that’s sweet but balanced by the cocoa.
The overall effect is a deeply chocolatey, incredibly moist, and utterly satisfying cake – a true classic for a reason.
Ingredient Insights
Let’s explore the roles of these classic ingredients:
Chocolate Cake:
- Granulated sugar: Sweetness and moisture.
- All-purpose flour: Structure.
- Unsweetened cocoa powder: The core chocolate flavor. Using Hershey’s cocoa is traditional, but any natural unsweetened cocoa works.
- Baking powder & Baking soda: Leavening agents for rise and tenderness.
- Salt: Balances sweetness and enhances chocolate flavor.
- Large eggs (room temperature): Binding, structure, richness.
- Buttermilk (room temperature): Adds moisture, tenderness, and a slight tang that complements chocolate.
- Oil (vegetable or canola): Provides superior moisture compared to butter alone in this type of cake.
- Vanilla extract: Enhances chocolate flavor.
- Boiling water or hot coffee: Crucial for blooming the cocoa powder (intensifying flavor) and creating an exceptionally moist crumb. Coffee deepens the chocolate flavor further.
Chocolate Frosting:
- Melted butter: Provides richness and flavor. Using melted butter is specific to this classic frosting recipe.
- Unsweetened cocoa powder: Chocolate flavor.
- Powdered sugar: Sweetness and structure.
- Milk: Adjusts consistency.
- Vanilla extract: Flavor enhancement.
Using room temperature eggs and buttermilk helps the batter emulsify properly.
Essential Equipment
You’ll need standard baking tools for this classic cake:
- Two 8-inch round baking pans: The recipe specifies this size. You could potentially use 9-inch pans, but baking time might be slightly shorter.
- Parchment paper rounds: Essential for easy cake release.
- Non-stick cooking spray:
- Large bowls (at least two): For dry ingredients and for mixing the batter.
- Whisk: For combining dry ingredients and wet ingredients.
- Rubber spatula:
- Cooling rack:
- Bowl and mixer (handheld or stand mixer): For the frosting.
- Measuring cups and spoons.
Nothing too specialized is required!
List of Ingredients with Measurements
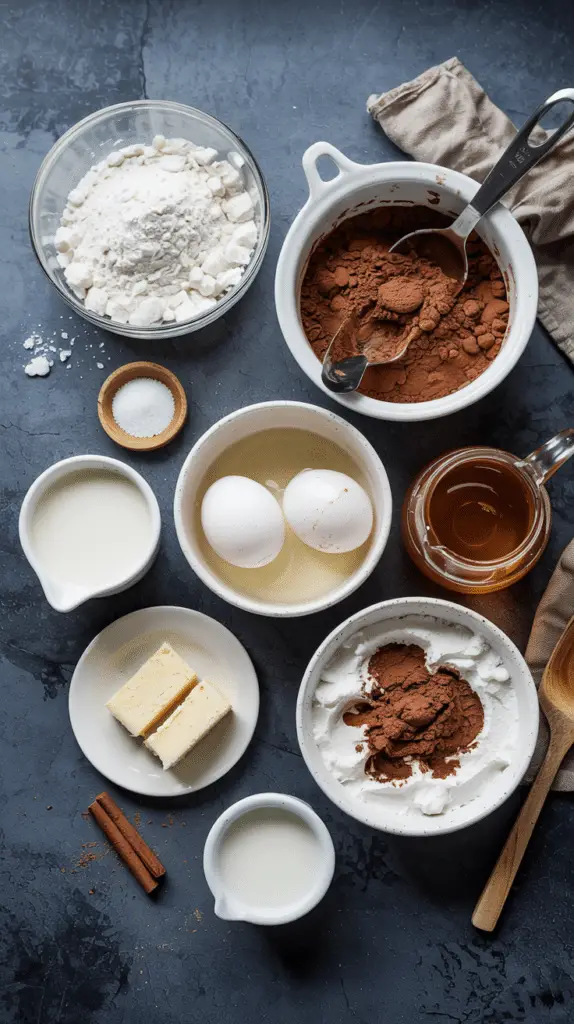
Here’s the complete list of ingredients, with precise measurements:
Chocolate Cake:
- 2 cups granulated sugar (400g)
- 1 ¾ cup + 2 Tablespoons all-purpose flour (235g)
- 3/4 cup unsweetened cocoa powder (64g)
- 1 1/2 teaspoons baking powder
- 1 1/2 teaspoons baking soda
- 1 teaspoon salt
- 2 large eggs, room temperature*
- 1 cup buttermilk* (227g)
- 1/2 cup oil (99g), (vegetable or canola oil)
- 2 teaspoons vanilla extract
- 1 cup boiling water (237g), or hot coffee
Chocolate Frosting:
- 1/2 cup melted butter (113g)
- 2/3 cup unsweetened cocoa powder (57g)
- 3 cups powdered sugar (360g)
- 1/3 cup milk (83g)
- 1 teaspoon vanilla extract
These are the classic Hershey’s recipe quantities.
Ensure eggs and buttermilk are at room temperature before starting.

Step-by-Step Instructions
Let’s bake this iconic cake:
Make the Cake:
- Preheat and Prep Pans: Preheat oven to 350°F (180°C). Line two 8-inch round baking pans with parchment paper rounds, then spray lightly with non-stick cooking spray. Set aside.
- Combine Dry Ingredients: Stir together sugar, flour, cocoa powder, baking powder, baking soda, and salt in a large bowl. A whisk works well here.
- Combine Wet Ingredients: In a separate medium bowl (or directly add to the dry as the recipe suggests, though separate is safer for combining), whisk together the room temperature eggs, buttermilk, oil, and vanilla extract.
- Combine Wet and Dry: Add the wet ingredients to the dry ingredients and mix (using a mixer on low or by hand with a whisk) until well combined.
- Add Hot Liquid: Carefully stir in the boiling water (or hot coffee). The batter will be very thin – this is correct!
- Bake: Pour the thin batter evenly into the prepared pans. Bake for 30 to 35 minutes, or until a toothpick inserted into the center of the cake comes out clean.
- Cool: Let the cakes cool in the pans on a wire rack for about 10-15 minutes before inverting them onto the rack to cool completely. Remove the parchment paper.
Make the Frosting:
- Combine Butter and Cocoa: In a large bowl, combine the melted butter and cocoa powder. Whisk until smooth.
- Alternate Sugar and Milk: Gradually add the powdered sugar alternately with the milk, beating with an electric mixer (or vigorously by hand) after each addition until smooth.
- Add Vanilla and Finish: Beat in the vanilla extract. Continue mixing for several minutes until the frosting is smooth and fluffy. If it’s too thick, add a tiny bit more milk; if too thin, add more sifted powdered sugar.
Assemble the Cake:
- First Layer: Place one cooled cake layer on a serving tray or cake stand.
- Frost Middle: Spread a generous amount of frosting evenly over the top of the first layer.
- Second Layer: Carefully place the second cake layer on top.
- Frost Exterior: Frost the top and sides of the cake with the remaining frosting. Swirls or smooth finishes both look great!
- Serve: Cut and serve.
It’s a satisfyingly simple process for such a delicious cake!

Troubleshooting
Even classic recipes can sometimes pose questions:
- Problem: My batter is extremely thin! Is that right?
- Solution: Yes! The addition of boiling water or coffee makes this batter very thin compared to typical cake batters. This is normal and contributes to the cake’s moistness. Pour it carefully into the pans.
- Problem: My cake is dry.
- Solution: Avoid overbaking. Check with a toothpick starting at 30 minutes. Ensure accurate flour measurement (spoon and level or weigh). The oil, buttermilk, and hot liquid are designed to make this cake very moist.
- Problem: My frosting is grainy.
- Solution: Make sure the powdered sugar was sifted if it was lumpy. Ensure the melted butter wasn’t too hot when combined with the cocoa. Beat the frosting for several minutes at the end to ensure everything is smooth.
- Problem: My cake layers stuck to the pan.
- Solution: Ensure pans were greased and lined with parchment paper rounds, and that the parchment was also greased. Let the cakes cool in the pans for 10-15 minutes before inverting.
Trust the process, especially the thin batter!
Tips and Variations
While this is a classic, you can still add personal touches:
- Tip: Using hot brewed coffee instead of boiling water deepens the chocolate flavor without making it taste like coffee. Highly recommended!
- Variation: Add 1/2 to 1 teaspoon of instant espresso powder to the dry ingredients for an even more intense chocolate flavor boost.
- Tip: Ensure eggs and buttermilk are at room temperature for a smoother, better-emulsified batter.
- Variation: Fill the cake with a different frosting or filling – raspberry jam, salted caramel, or even a simple whipped cream would be delicious contrasts.
- Tip: For richer frosting, use whole milk or even half-and-half instead of low-fat milk.
- Variation: Fold 1 cup of chocolate chips into the cake batter before baking for extra chocolate pockets.
It’s a great base recipe for experimentation.
Serving and Pairing Suggestions
This Hershey Chocolate Cake is a crowd-pleasing classic, perfect for many occasions.
Serving: Serve slices at room temperature.
Pairing:
- It’s the quintessential birthday cake, potluck favorite, or simple weeknight dessert.
- A tall glass of cold milk is the absolute classic pairing.
- A scoop of vanilla bean ice cream alongside a slice is heavenly.
- Coffee or espresso also complements the deep chocolate flavor perfectly.
It’s simple, satisfying, and universally loved.
Nutritional Information
This is a classic, rich chocolate cake. Nutritional information is approximate and depends on slice size. A slice (assuming 12 slices per cake) might contain:
- Calories: 400-550+
- Fat: 20-30+ grams
- Saturated Fat: 8-15 grams
- Cholesterol: 40-70 mg
- Sodium: 300-500 mg
- Total Carbs.: 55-70+ grams
- Dietary Fiber: 2-4 grams
- Sugars: 40-55+ grams
- Protein: 4-6 grams
This is an indulgent cake, perfect for celebrations and enjoyed in moderation.
PrintHershey Chocolate Cake
Bake the classic Hershey Chocolate Cake! This recipe yields an incredibly moist, deeply chocolatey cake with a simple fudgy frosting. Perfect for birthdays!
Ingredients
Here’s the complete list of ingredients, with precise measurements:
Chocolate Cake:
- 2 cups granulated sugar (400g)
- 1 ¾ cup + 2 Tablespoons all-purpose flour (235g)
- 3/4 cup unsweetened cocoa powder (64g)
- 1 1/2 teaspoons baking powder
- 1 1/2 teaspoons baking soda
- 1 teaspoon salt
- 2 large eggs, room temperature*
- 1 cup buttermilk* (227g)
- 1/2 cup oil (99g), (vegetable or canola oil)
- 2 teaspoons vanilla extract
- 1 cup boiling water (237g), or hot coffee
Chocolate Frosting:
- 1/2 cup melted butter (113g)
- 2/3 cup unsweetened cocoa powder (57g)
- 3 cups powdered sugar (360g)
- 1/3 cup milk (83g)
- 1 teaspoon vanilla extract
These are the classic Hershey’s recipe quantities.
Ensure eggs and buttermilk are at room temperature before starting.
Instructions
Let’s bake this iconic cake:
Make the Cake:
- Preheat and Prep Pans: Preheat oven to 350°F (180°C). Line two 8-inch round baking pans with parchment paper rounds, then spray lightly with non-stick cooking spray. Set aside.
- Combine Dry Ingredients: Stir together sugar, flour, cocoa powder, baking powder, baking soda, and salt in a large bowl. A whisk works well here.
- Combine Wet Ingredients: In a separate medium bowl (or directly add to the dry as the recipe suggests, though separate is safer for combining), whisk together the room temperature eggs, buttermilk, oil, and vanilla extract.
- Combine Wet and Dry: Add the wet ingredients to the dry ingredients and mix (using a mixer on low or by hand with a whisk) until well combined.
- Add Hot Liquid: Carefully stir in the boiling water (or hot coffee). The batter will be very thin – this is correct!
- Bake: Pour the thin batter evenly into the prepared pans. Bake for 30 to 35 minutes, or until a toothpick inserted into the center of the cake comes out clean.
- Cool: Let the cakes cool in the pans on a wire rack for about 10-15 minutes before inverting them onto the rack to cool completely. Remove the parchment paper.
Make the Frosting:
- Combine Butter and Cocoa: In a large bowl, combine the melted butter and cocoa powder. Whisk until smooth.
- Alternate Sugar and Milk: Gradually add the powdered sugar alternately with the milk, beating with an electric mixer (or vigorously by hand) after each addition until smooth.
- Add Vanilla and Finish: Beat in the vanilla extract. Continue mixing for several minutes until the frosting is smooth and fluffy. If it’s too thick, add a tiny bit more milk; if too thin, add more sifted powdered sugar.
Assemble the Cake:
- First Layer: Place one cooled cake layer on a serving tray or cake stand.
- Frost Middle: Spread a generous amount of frosting evenly over the top of the first layer.
- Second Layer: Carefully place the second cake layer on top.
- Frost Exterior: Frost the top and sides of the cake with the remaining frosting. Swirls or smooth finishes both look great!
- Serve: Cut and serve.
It’s a satisfyingly simple process for such a delicious cake!
Recipe Summary and Q&A
Let’s wrap up with a quick recap and common questions:
Recipe Summary:
Hershey’s “Perfectly Chocolate” Chocolate Cake is a classic American layer cake known for its deep chocolate flavor and incredibly moist crumb, achieved using oil and boiling water/coffee in the batter. It’s typically paired with a simple, fudgy chocolate frosting made with melted butter and cocoa powder.
Q&A:
Q: Can I make this cake ahead of time? A: Yes. Bake the layers up to 2 days ahead (cool, wrap well, store at room temp) or freeze for up to 3 months. Make the frosting up to a week ahead (refrigerate, bring to room temp and re-whip). Assemble the cake up to 1 day before serving (store covered).
Q: How should I store the finished cake? A: Store covered at room temperature for 3-4 days. Due to the oil, it stays moist longer than many butter-based cakes. Refrigeration can dry it out.
Q: Can I use a different size pan? A: Yes. For 9-inch round pans, baking time might be slightly shorter (start checking around 28-30 minutes). For a 9×13 inch pan, bake for 35-40 minutes. For cupcakes, fill liners 2/3 full and bake for 18-22 minutes.
Q: I don’t have buttermilk. What can I use instead? A: Make a substitute: Place 1 tablespoon of white vinegar or lemon juice in a liquid measuring cup, then add milk (any kind) to reach the 1 cup line. Stir and let sit for 5 minutes before using.
Q: Is it possible to use butter instead of oil? A: Yes, but the cake will not be as moist.
I hope this detailed guide helps you bake and enjoy the classic Hershey Chocolate Cake! It’s a reliable, delicious, and beloved recipe for a reason. Happy baking!
Did Our Recipe Hit The Spot?
There are no reviews yet. Be the first one to write one.

