Are you ready to discover the modern, game-changing secret to a perfectly creamy, dense, and absolutely crack-free cheesecake every single time? Your Instant Pot is the answer! This incredible Instant Pot Pumpkin Cheesecake recipe will show you how to use your pressure cooker to create the most flawless, velvety, and delicious cheesecake you’ve ever made, all while freeing up precious oven space for the main course.
This isn’t just a recipe; it’s your ultimate guide to mastering the art of the perfect cheesecake. We’ll show you how to create a rich, warmly spiced pumpkin custard filling and a crunchy, spicy gingersnap crust. The magic of the Instant Pot’s steamy, gentle cooking environment ensures a result that is impossibly smooth and completely resistant to cracks. This is the foolproof method that will make you a dessert legend this holiday season.
Table of Contents
Table of Contents
Recipe Overview: The Ultimate Holiday Dessert Hack
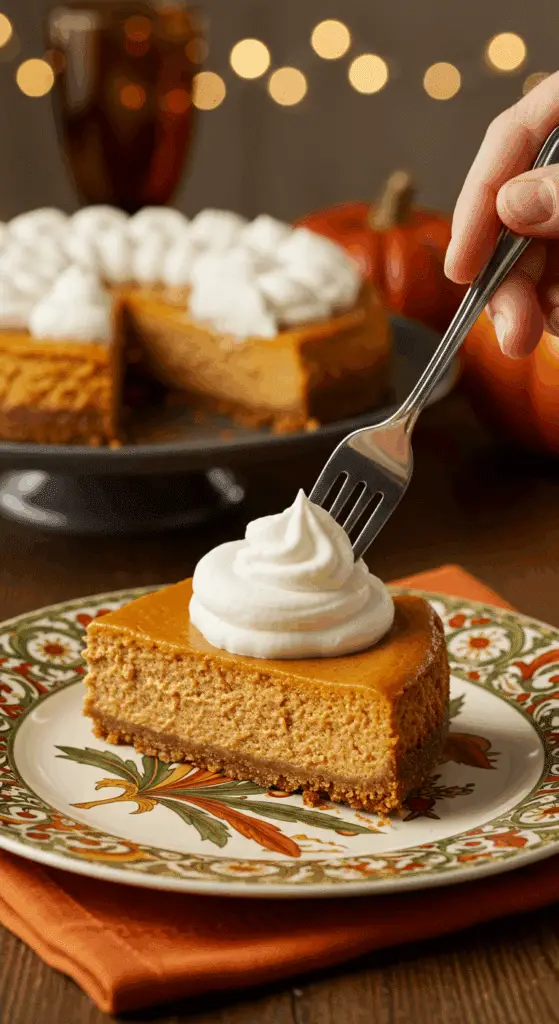
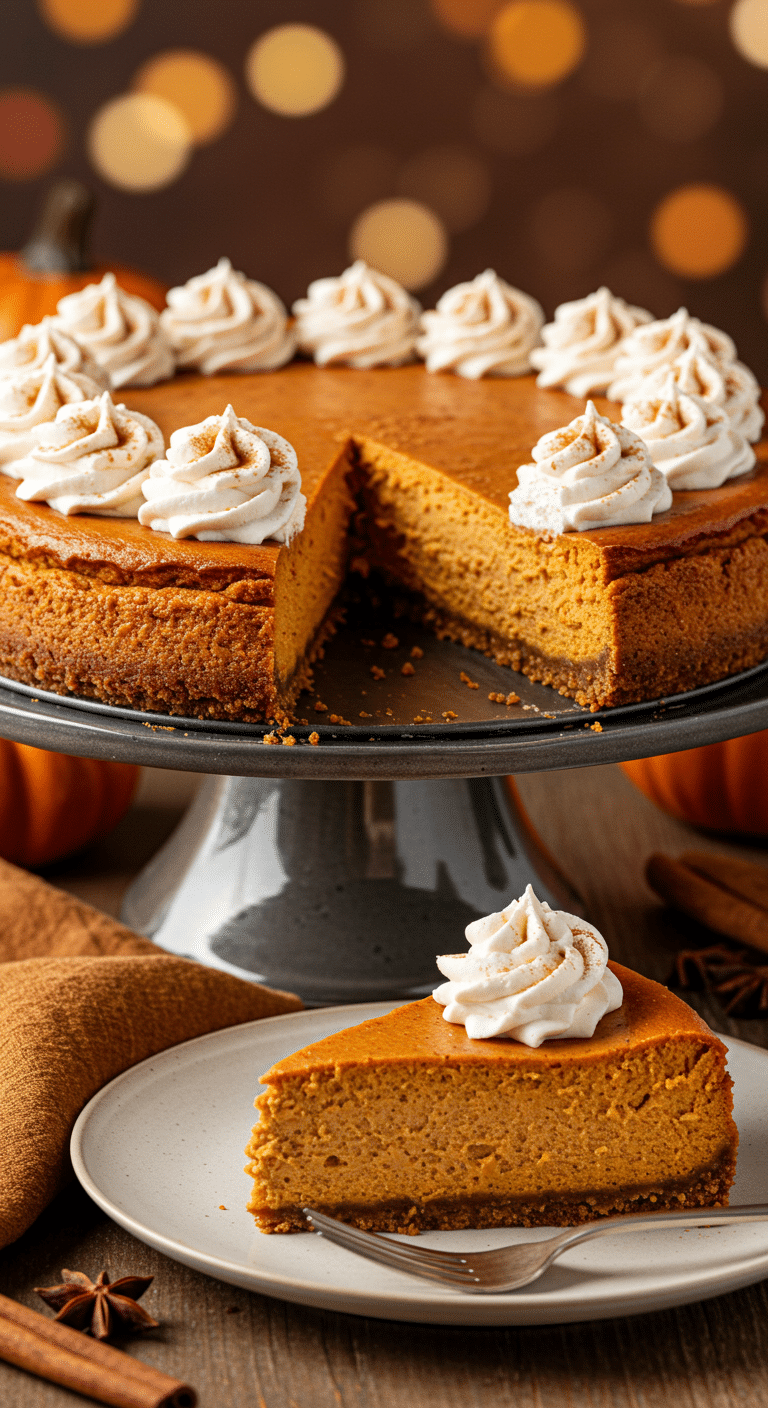
What makes this Instant Pot Pumpkin Cheesecake so spectacular is the unbelievably creamy and flawless result achieved with the pressure cooker. The gentle, even, and moist heat of the Instant Pot is the perfect environment for baking a delicate custard like a cheesecake, virtually eliminating the risk of cracks, dryness, or a rubbery texture. Paired with a classic, cozy pumpkin spice flavor and a delicious gingersnap crust, this is the ultimate make-ahead dessert for a stress-free and impressive Thanksgiving or Christmas.
| Metric | Time / Level |
| Total Time | 10 hours (includes chilling) |
| Active Prep Time | 25 minutes |
| Difficulty Level | Intermediate |
| Servings | 8-10 |
The Essential Ingredients for a Perfect Cheesecake
This recipe uses a handful of classic, high-quality ingredients to create its signature festive flavor.
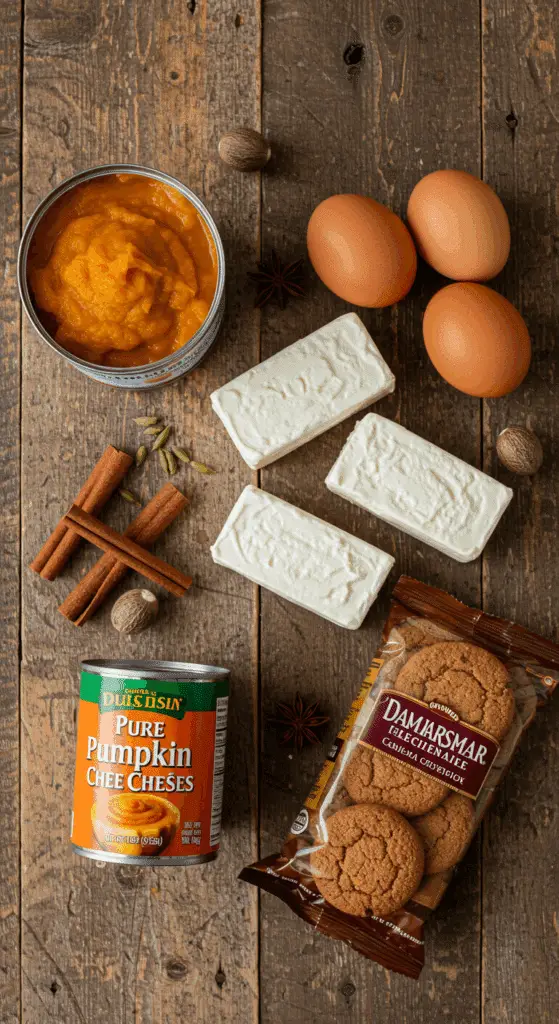
- The Gingersnap Crust: A fantastic, flavorful upgrade to a standard graham cracker crust. The warm, spicy notes of gingersnap cookies are the perfect complement to the creamy pumpkin filling.
- The Pumpkin Cheesecake Filling: This is the rich, creamy, and spiced heart of our dessert.
- Room Temperature Ingredients: This is the single most important secret to a smooth, lump-free cheesecake batter. Your full-fat, block-style cream cheese and your large eggs must all be at room temperature before you begin mixing.
- Pure Pumpkin Purée: It is absolutely essential to use 100% pure pumpkin purée, not pumpkin pie filling (which is pre-sweetened and spiced). This gives you complete control over the flavor and results in a true, authentic pumpkin taste.
- Warm Spices: A classic, cozy blend of cinnamon and freshly grated nutmeg provides the perfect, warm “pumpkin spice” flavor.
- The Topping: A simple and elegant finish of homemade whipped cream and a sprinkle of cinnamon sugar.
- Essential Equipment: You will need a 6- or 8-quart Instant Pot® and a 7-inch springform pan that fits comfortably inside.

Step-by-Step to a Flawless Instant Pot Cheesecake
Making a cheesecake in the Instant Pot is a rewarding and surprisingly simple process. Follow these detailed steps for a perfect, crack-free result.
Part 1: Make the Gingersnap Crust
Step 1: In the bowl of a food processor or a blender, add the 24 gingersnap cookies and a pinch of salt. Pulse until the cookies are broken down into fine crumbs.
Step 2: Add the 4 tablespoons of melted and cooled butter and pulse until the mixture is completely combined and has the texture of wet sand.
Step 3: Firmly press this crumb mixture into the bottom and about 1 inch up the sides of your 7-inch springform pan. Use the flat bottom of a measuring cup to get a nice, compact, and even crust.
Step 4: Place the crust in the freezer to set up and chill while you make the filling.
Step 2: Create the Silky-Smooth Pumpkin Cheesecake Filling
Step 1: Wipe out the bowl of your food processor. Add the 24 ounces of room temperature cream cheese, the 1 cup of canned pure pumpkin purée, the 2 teaspoons of pure vanilla extract, the 1/4 teaspoon of ground nutmeg, the 3 large room temperature eggs, the 3/4 cup of the sugar, and the 1 teaspoon of the cinnamon.
Step 2: Process until the mixture is completely smooth, opening the lid and scraping down the sides of the bowl with a spatula as needed.
Pro Tip: Be careful not to over-process the batter. You want to mix only until it is perfectly smooth and just combined. Over-mixing can incorporate too much air, which can affect the final texture.
Step 3: Pour the finished filling over the frozen crust in the springform pan and smooth the top.
Part 3: Prepare the Pan and Pressure Cook to Perfection
Step 1: Prepare your foil sling. Tear off a long piece of heavy-duty aluminum foil (about 2 feet long) and fold it lengthwise into a long, sturdy strip about 3 inches wide. This will be used to safely lower and lift the pan out of the hot Instant Pot.
Step 2: Tear off another piece of aluminum foil and wrap it around the outside of the springform pan to protect it.
Step 3: Pour 2 cups of water into the bottom of your 6- or 8-quart Instant Pot® and insert the machine’s trivet. Place the springform pan in the center of your foil sling, and then use the ends of the sling to carefully lower the pan onto the trivet inside the pot. Fold down the ends of the foil sling so they fit inside the pot but do not touch the cheesecake.
Step 4: Follow the manufacturer’s guide for locking the lid and preparing to cook. Set the Instant Pot to pressure cook on high for 35 minutes.
Step 4: The Slow Release and Final Chill (Do Not Rush!)
Step 1: After the 35-minute pressure-cook cycle is complete, turn off the “Keep Warm” setting and let the steam release naturally for 25 minutes.
Pro Tip: This slow, natural pressure release is the absolute key to a perfect, crack-free cheesecake. It allows the cheesecake to cool down very slowly and gently inside the warm, steamy environment of the pot, which prevents the sudden temperature change that causes cracks.
Step 2: After 25 minutes, carefully follow the manufacturer’s guide for a quick release of any remaining steam.
Step 3: Being careful of any hot steam, unlock and remove the lid. Carefully use the foil sling to lift the pan out of the Instant Pot and set it on a cooling rack.
Step 4: Remove the foil from around the pan. You may notice a little bit of moisture on top of the cheesecake; you can use a paper towel to gently blot it off. Use a small, thin knife to loosen the sides of the cheesecake from the pan.
Step 5 (The Final, Crucial Chill!): Let the cheesecake cool at room temperature for about 1 hour. Then, cover it with plastic wrap and place it in the refrigerator to chill and set completely for at least 4 hours, but preferably overnight.

The Best Creamy & Perfect No-Crack Instant Pot Pumpkin Cheesecake
A creamy, crack-free pumpkin cheesecake conveniently made in an Instant Pot. This recipe features a spicy and crisp gingersnap cookie crust and a smooth, rich filling of cream cheese, pumpkin puree, and warm spices. The cheesecake is pressure-cooked in a springform pan placed on a trivet inside the pot, which creates a moist environment for a perfect texture. After a long chill to set completely, the cheesecake is topped with whipped cream and a sprinkle of cinnamon sugar.
- Prep Time: 25 minutes
- Cook Time: 1 hour 15 minutes (includes pressure building/release)
- Total Time: 6 hours 40 minutes (includes cooling and chilling)
- Yield: 8-10 servings
- Category: Dessert
- Method: Pressure Cooking
- Cuisine: American
- Diet: Vegetarian
Ingredients
- For the Crust:
- 24 gingersnap cookies (about 5.7 ounces)
- Pinch of kosher salt
- 4 tablespoons unsalted butter, melted
- For the Cheesecake Filling:
- 24 ounces (three 8-ounce packages) cream cheese, at room temperature
- 1 cup canned pure pumpkin puree
- 2 teaspoons pure vanilla extract
- 1/4 teaspoon ground nutmeg
- 3 large eggs, at room temperature
- 1 cup sugar
- 1 1/2 teaspoons ground cinnamon
- For the Topping:
- 1 cup whipped cream
- 1/4 cup sugar
- 1/2 teaspoon cinnamon
Instructions
- Make the Crust: In a food processor, pulse the gingersnap cookies and a pinch of salt into fine crumbs. Add the melted butter and pulse until combined. Press the crumb mixture firmly into the bottom and 1 inch up the sides of a 7-inch springform pan. Place the crust in the freezer while you make the filling.
- Make the Filling: Wipe out the food processor bowl. Add the cream cheese, pumpkin puree, vanilla, nutmeg, 3/4 cup of the sugar, and 1 teaspoon of the cinnamon. Process until completely smooth, scraping down the sides as needed. Pour the mixture over the chilled crust.
- Prepare for Pressure Cooking: Wrap the outside of the springform pan in a large piece of aluminum foil. Create a foil sling by folding a long piece of foil into a sturdy strip.
- Pour 2 cups of water into the bottom of a 6- or 8-quart Instant Pot® and insert the trivet. Place the cheesecake on the foil sling and use it to lower the pan onto the trivet.
- Follow the manufacturer’s guide for locking the lid. Set to pressure cook on high for 35 minutes.
- When the cycle is complete, turn off the heat and let the pressure release naturally for 25 minutes. After that, perform a manual release for any remaining steam.
- Cool and Chill: Carefully remove the lid. Use the foil sling to lift out the pan. Remove the foil from around the pan and blot any moisture from the top of the cheesecake with a paper towel.
- Run a knife around the edge of the cheesecake and let it cool to room temperature on a wire rack, for about 1 hour.
- Cover with plastic wrap and refrigerate for at least 4 hours, or up to overnight, until completely set.
- Serve: Once chilled, remove the outer ring of the springform pan. Spread the whipped cream over the top. Whisk together the remaining 1/4 cup sugar and 1/2 teaspoon cinnamon and dust it over the cheesecake before slicing.
Notes
- Special Equipment: A 6- or 8-quart Instant Pot® and a 7-inch springform pan are required for this recipe.
- A foil sling is a simple but effective tool for safely lowering and lifting the hot pan from the Instant Pot.
- The slow, natural pressure release and subsequent cooling periods are crucial for the cheesecake’s texture and to prevent cracking.
- Using room temperature cream cheese and eggs is key for a smooth, lump-free filling.
Storage and Make-Ahead Tips
Cheesecake is the absolute perfect make-ahead dessert for a stress-free holiday or party.
- Make-Ahead: This cheesecake is actually better when made a day or two in advance! You can bake the entire cheesecake completely up to 3 days ahead of time. Let it cool and chill completely, and then keep it, covered, in the refrigerator. Wait to add the whipped cream topping until just before serving.
- Storage: Store any leftover cheesecake, covered, in the refrigerator for up to a week.
- Freezing: You can freeze the whole cheesecake or individual slices. Let it cool and chill completely first. Wrap it very well in a double layer of plastic wrap and then a layer of aluminum foil. It will keep in the freezer for up to 3 months. Thaw it overnight in the refrigerator.
For more recipe follow my Pinterest account
Creative Recipe Variations
This stunning pumpkin cheesecake is a wonderful base for your own delicious and creative twists.
- Add a Decadent Salted Caramel Drizzle: Instead of the cinnamon-sugar topping, this pumpkin cheesecake is absolutely incredible when topped with a generous drizzle of homemade or store-bought salted caramel sauce.
- Use a Different Classic Crust: If you’re not a fan of gingersnaps, this pumpkin cheesecake is also delicious with a classic graham cracker crust, a crust made from crushed shortbread cookies, or even chocolate wafer cookies for a delicious chocolate-pumpkin combination.
- Add a Bourbon or Rum Kick: For a delicious, sophisticated, grown-up version, you can add 2 tablespoons of your favorite bourbon or dark rum to the cheesecake filling along with the vanilla extract. The warm notes of the spirit are fantastic with the pumpkin and spices.
Enjoy Your Flawless Holiday Cheesecake!
You’ve just created a truly special, show-stopping dessert that is the very definition of an autumn indulgence. This Instant Pot Pumpkin Cheesecake is a perfect symphony of creamy, spicy, and tangy flavors that is guaranteed to be the star of any holiday table. It’s a rewarding baking project that will make you feel like a true pastry chef.
We hope you enjoy every last, perfect, rich, and creamy bite!
If you enjoyed making this recipe, please leave a comment below or share it with a friend who is ready to master homemade cheesecake!
Frequently Asked Questions (FAQs)
Q1: Why is making a cheesecake in the Instant Pot so much better?
The Instant Pot creates a perfectly steamy, humid, and evenly heated environment, which is the ideal condition for baking a delicate custard like a cheesecake. This gentle, moist heat is what prevents the cheesecake from drying out, puffing up too much, or cracking as it cools. The slow, natural pressure release is a foolproof method for cooling the cheesecake down gradually, which is the other main secret to a flawless, crack-free top.
Q2: Do I absolutely need a 7-inch springform pan for this recipe?
Yes, a 7-inch springform pan is the perfect size to fit inside a standard 6- or 8-quart Instant Pot, and its removable sides are essential for releasing the delicate cheesecake without having to flip it over. You can also use a 7-inch “push pan” with a removable bottom.
Q3: My cheesecake still cracked. What did I do wrong?
The two most common culprits for a cracked cheesecake are over-mixing the batter (which incorporates too much air) and cooling it down too quickly. Be sure to mix your ingredients on a low speed only until they are just combined, and always follow the long, natural pressure release step, as this is the most important part of the process.
Q4: Can I make this pumpkin cheesecake in the oven instead of an Instant Pot?
Yes, you can. You would need to use a classic water bath method. Tightly wrap your 9-inch springform pan in a double layer of heavy-duty foil. Place it inside a larger roasting pan. Pour the filling into the crust. Fill the roasting pan with about an inch of hot water. Bake at 325°F for about 1 hour and 20 minutes, until the center is just set with a slight jiggle. Then, cool it down slowly as the recipe directs.
Q5: Do my ingredients really all need to be at room temperature?
Yes, this is non-negotiable for a smooth cheesecake! If your cream cheese is cold, it will not blend smoothly and you will have small, unpleasant lumps in your final cheesecake. Cold eggs can also cause the cream cheese to seize up. To quickly bring your ingredients to room temperature, you can place the wrapped cream cheese and the eggs in a bowl of warm (not hot) tap water for about 10-15 minutes.


