Introduction & Inspiration
I’m a huge fan of refreshing, citrusy desserts, especially during the warmer months. This Lemon Icebox Pie, with its promise of a tangy, creamy, and intensely lemony filling and a classic graham cracker crust, immediately caught my attention! It seemed like the perfect dessert for a summer gathering, a potluck, or simply a delightful treat to enjoy on a hot day.
My inspiration came from a love of lemon desserts and a desire to create a pie that was both easy to make and incredibly flavorful. I envisioned a pie that would be both refreshing and satisfying, with a perfect balance of sweet and tart flavors. The “icebox” nature of the pie (meaning it’s chilled rather than baked for a long time) was a major plus.
My goal was to explore a recipe that required minimal baking (just the crust!) and used readily available ingredients, yet still delivered a truly delicious and impressive result. This Lemon Icebox Pie seemed to fit the bill perfectly: a simple graham cracker crust, a creamy lemon filling made with condensed milk, and a straightforward preparation process.
It seems to be a perfect recipe for summer.
Nostalgic Appeal
Lemon Icebox Pie taps into several nostalgic elements, making it a comforting and appealing dessert. Icebox pies, in general, are often associated with vintage recipes, summer gatherings, and no-fuss desserts that require minimal baking.
The use of a graham cracker crust is a nostalgic element for many, evoking memories of classic pies, cheesecakes, and childhood treats.
The bright, refreshing lemon flavor is reminiscent of lemonade, lemon bars, and other classic summer desserts, evoking memories of warm days and sunny picnics.
And the overall presentation of the pie, with its creamy filling and simple graham cracker crust, is reminiscent of classic diner desserts and home-style baking, evoking a sense of comfort and familiarity.
Homemade Focus
This Lemon Icebox Pie recipe strikes a perfect balance between convenience and homemade goodness. While it utilizes a pre-made graham cracker crust element (although you could certainly make your own!), the filling is entirely made from scratch, emphasizing the fresh flavors and simple techniques of home baking.
I appreciate recipes that allow for a hands-on approach, even with a few shortcuts, and this one certainly does. You’re whisking together the filling ingredients, creating a luscious, creamy, and intensely lemony mixture from scratch.
The use of fresh lemon juice and zest is a key element that elevates this pie and ensures a vibrant and authentic lemon flavor.
And the act of assembling the pie, pressing the crust into the pan, pouring in the filling, and baking it briefly to set the filling, creates a beautiful and delicious dessert that feels truly homemade.
Flavor Goal
The primary flavor goal of this Lemon Icebox Pie is a bright, refreshing, and intensely lemony flavor, balanced by the sweetness of the condensed milk and the buttery, slightly salty graham cracker crust. It’s a pie that’s designed to be both tangy and sweet, with a creamy, smooth filling and a contrasting crunchy crust.
The graham cracker crust, made with graham cracker crumbs, sugar, and melted butter, provides a buttery, slightly sweet, and subtly salty base that complements the creamy lemon filling.
The filling, made with sweetened condensed milk, fresh lemon juice, egg yolks, and lemon zest, delivers that signature tangy, sweet, and intensely lemony flavor that’s characteristic of a lemon icebox pie.
The egg yolks add richness and help the filling set up beautifully.
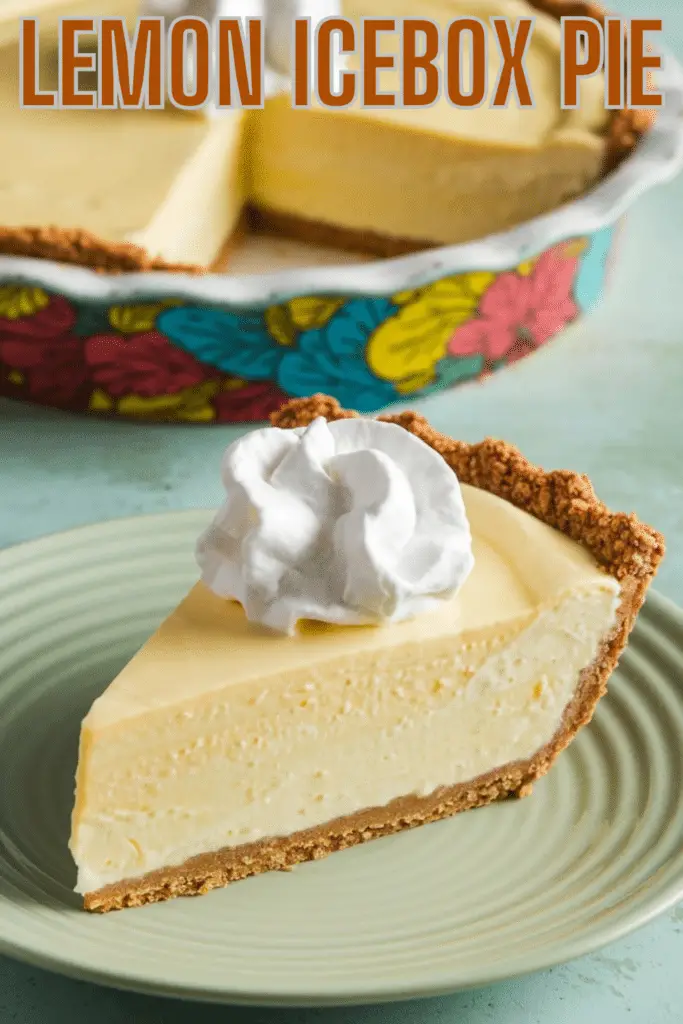
The optional whipped cream topping, made with heavy cream, powdered sugar, and vanilla extract, adds a light, airy, and subtly sweet finish that balances the tartness of the lemon filling.
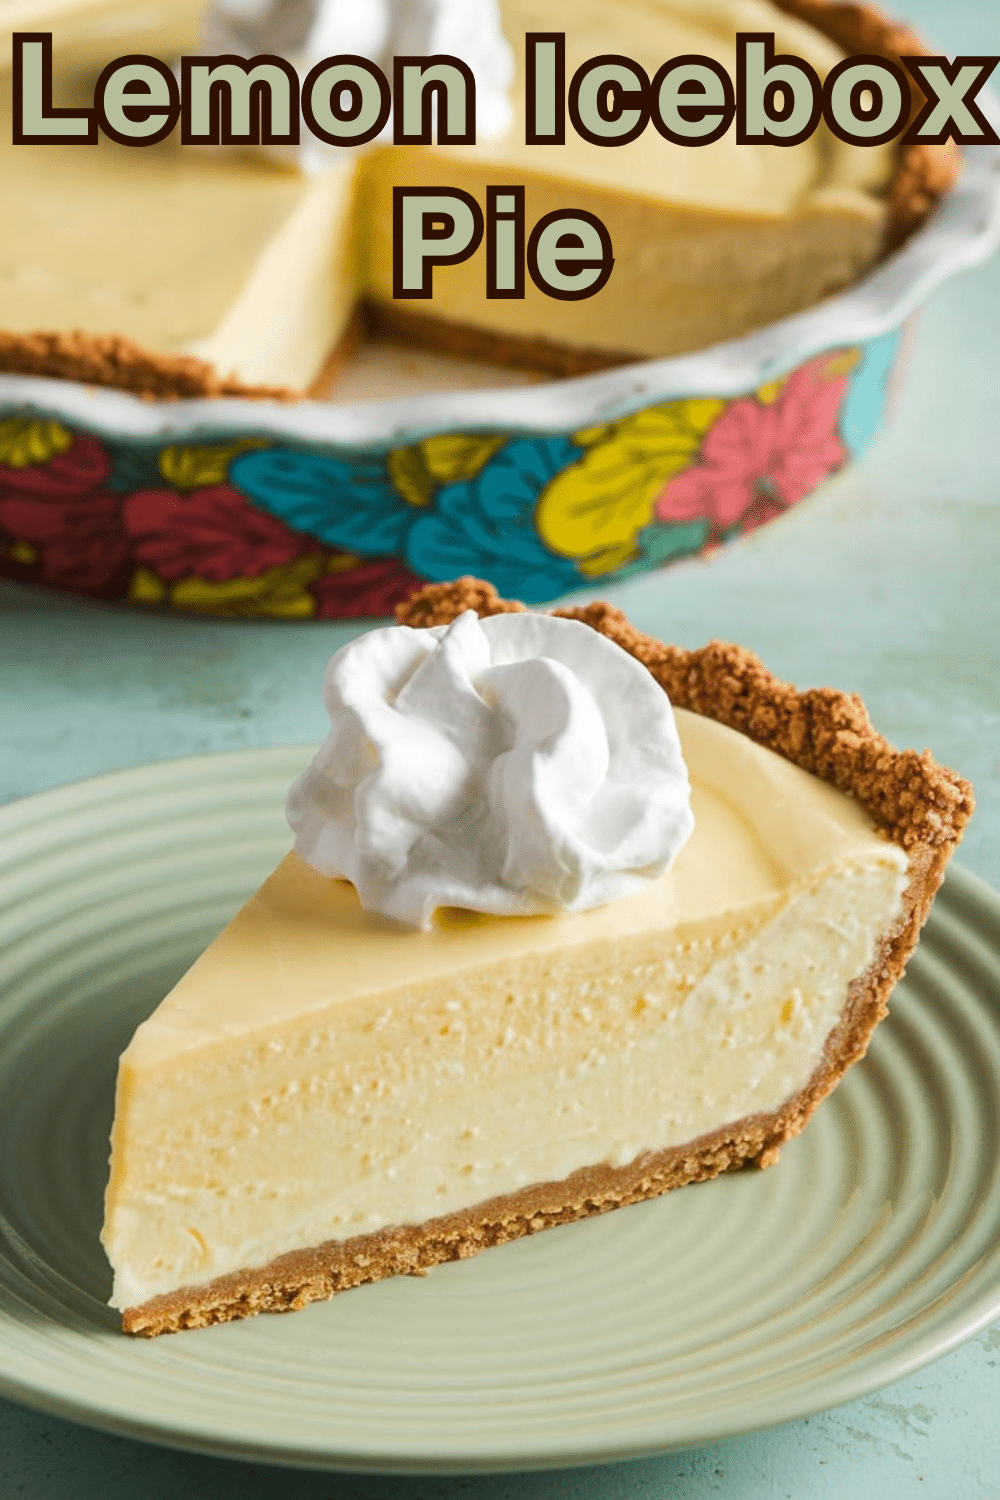
The overall effect is a pie that’s both refreshing and satisfying, with a perfect balance of sweet, tart, and creamy flavors.
Ingredient Insights
Let’s examine the ingredients and their roles.
For the Crust:
Graham cracker crumbs:
Granulated sugar:
Salted butter, melted:
For the Filling:
Sweetened condensed milk: This is a key ingredient, providing sweetness and creaminess to the filling.
Fresh lemon juice (from about 6 lemons): This is the star of the show, delivering that bright, tangy, and refreshing lemon flavor.
Large egg yolks: These add richness and help the filling set up.
Lemon zest: This enhances the lemon flavor, adding an extra layer of citrusy aroma and taste.
Heavy cream: This is whipped with powdered sugar and vanilla to create the light and airy topping.
Powdered sugar: This adds sweetness to the whipped cream topping.
Vanilla extract: This enhances the flavor.
This is a simple list.
Essential Equipment
Here are the essentials:
A 9-inch pie plate: This is the standard size for this pie.
A medium bowl (at least two): One for mixing the crust ingredients, and one for whisking together the filling.
A whisk:
Measuring cups and spoons. A mixer.
It’s a simple list.
List of Ingredients with Measurements
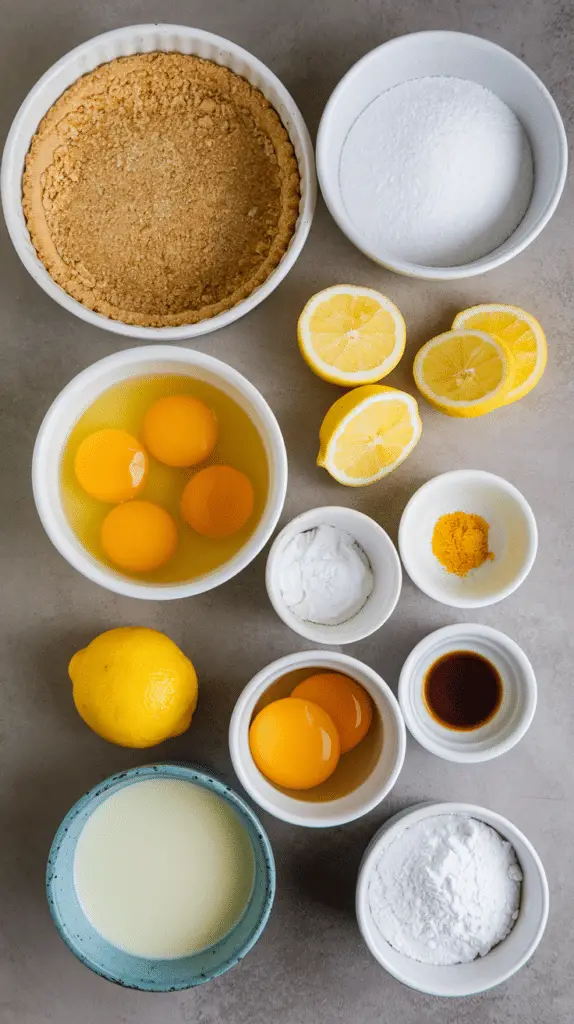
Here’s the complete list of ingredients, with precise measurements:
For the Crust:
- 1 1/2 cups graham cracker crumbs
- 2 Tbsp. granulated sugar
- 7 Tbsp. salted butter, melted
For the Filling:
- 2 14-oz. cans sweetened condensed milk
- 1 cup fresh lemon juice (from about 6 lemons)
- 5 large egg yolks
- 1 Tbsp. lemon zest
- 1 cup heavy cream
- 2 Tbsp. powdered sugar
- 1/2 tsp vanilla extract
These are perfect quantities.
Get all your ingredients ready before you start.

Step-by-Step Instructions
Let’s break down the process into easy-to-follow steps.
1. Make the Crust:
- Preheat the oven to 350°F (175°C).
- Combine the cracker crumbs, sugar, and melted butter in a medium bowl. Mix with a fork until the crumbs are well coated and stick together when pinched.
- Press the mixture into the bottom and up the sides of a 9-inch pie plate.
- Bake until set, about 10 minutes.
- Set aside to cool slightly, about 10 minutes.
2. Make the Filling:
- Whisk together the condensed milk, lemon juice, egg yolks, and lemon zest in a medium bowl until combined.
- Pour the filling into the pre-baked and slightly cooled crust.
3. Bake the Pie:
- Bake until the center is set but still slightly jiggly, about 15 minutes.
4. Cool and Chill:
- Let cool for 30 minutes, then refrigerate until chilled, about 2 hours. This chilling time is essential for allowing the filling to set completely.
5. Make the Topping (Before Serving):
- Beat the heavy cream, powdered sugar, and vanilla in a large bowl with a mixer on medium speed until soft peaks form.
6. Assemble and Serve: Dollop the whipped cream on the center of the pie and serve.
These instructions are clear and easy to do.

Troubleshooting
Let’s address some potential issues, and how to solve them:
Problem: My graham cracker crust is crumbly. Solution: Make sure you used enough melted butter and pressed the crust firmly into the pie plate. You can also add a tablespoon or two of extra melted butter if needed.
Problem: My filling is too runny. Solution: Make sure you baked the pie long enough. The center should be set but still slightly jiggly. Chilling the pie thoroughly is also crucial for allowing the filling to set completely.
Problem: My filling is too tart. Solution: You can add a little more powdered sugar to the filling to balance the tartness.
Problem: My whipped cream isn’t forming soft peaks. Solution: Make sure your heavy cream is very cold. You can also chill the bowl and beaters for a few minutes before whipping.
These are simple solutions.
Tips and Variations
Here some tips.
Tip: For the best lemon flavor, use freshly squeezed lemon juice and freshly grated lemon zest.
Variation: Use a different type of cookie for the crust, such as vanilla wafers or gingersnaps.
Tip: If you don’t have a 9-inch pie plate, you can use a different size, but you may need to adjust the baking time slightly.
Variation: Add a layer of fresh berries, such as raspberries or blueberries, to the top of the pie before adding the whipped cream.
Tip: For a smoother filling, make sure your cream cheese is at room temperature before mixing it with the other ingredients.
Variation: Instead of whipped cream, you can top the pie with a meringue topping.
This recipe offers different options.
Serving and Pairing Suggestions
This Lemon Icebox Pie is a refreshing and delicious dessert that’s perfect for any occasion.
Serving: Serve the pie chilled, straight from the refrigerator.
Pairing:
- It’s perfect for spring and summer gatherings, potlucks, barbecues, or any time you want a light and refreshing dessert.
- Serve it with a dollop of whipped cream, extra lemon slices, or fresh berries.
- Pair it with a cup of coffee, tea, or a glass of lemonade.
It’s a perfect dessert for a warm day.
Nutritional Information
Nutritional information is approximate due to variations in specific ingredients and serving sizes. A slice of pie (assuming the pie is cut into 8-10 slices) may contain:
- Calories: 400-500 (depending on crust and whipped cream amounts)
- Fat: 25-35 grams
- Saturated Fat: 15-20 grams
- Cholesterol: 100-150 mg
- Sodium: 200-300mg
- Total Carbs.: 40-50 grams
- Dietary Fiber: 1-2 grams
- Sugars: 30-40 grams
- Protein: 6-8 grams
This Lemon Icebox Pie is a rich and decadent dessert and should be enjoyed in moderation.
PrintLemon Icebox Pie
I hope this comprehensive guide has inspired you to make your own Lemon Icebox Pie! It’s a refreshing, delicious, and relatively easy dessert that’s perfect for any occasion.
Ingredients
Here’s the complete list of ingredients, with precise measurements:
For the Crust:
- 1 1/2 cups graham cracker crumbs
- 2 Tbsp. granulated sugar
- 7 Tbsp. salted butter, melted
For the Filling:
- 2 14-oz. cans sweetened condensed milk
- 1 cup fresh lemon juice (from about 6 lemons)
- 5 large egg yolks
- 1 Tbsp. lemon zest
- 1 cup heavy cream
- 2 Tbsp. powdered sugar
- 1/2 tsp vanilla extract
These are perfect quantities.
Get all your ingredients ready before you start.
Instructions
Let’s break down the process into easy-to-follow steps.
1. Make the Crust:
- Preheat the oven to 350°F (175°C).
- Combine the cracker crumbs, sugar, and melted butter in a medium bowl. Mix with a fork until the crumbs are well coated and stick together when pinched.
- Press the mixture into the bottom and up the sides of a 9-inch pie plate.
- Bake until set, about 10 minutes.
- Set aside to cool slightly, about 10 minutes.
2. Make the Filling:
- Whisk together the condensed milk, lemon juice, egg yolks, and lemon zest in a medium bowl until combined.
- Pour the filling into the pre-baked and slightly cooled crust.
3. Bake the Pie:
- Bake until the center is set but still slightly jiggly, about 15 minutes.
4. Cool and Chill:
- Let cool for 30 minutes, then refrigerate until chilled, about 2 hours. This chilling time is essential for allowing the filling to set completely.
5. Make the Topping (Before Serving):
- Beat the heavy cream, powdered sugar, and vanilla in a large bowl with a mixer on medium speed until soft peaks form.
6. Assemble and Serve: Dollop the whipped cream on the center of the pie and serve.
These instructions are clear and easy to do.
Recipe Summary and Q&A
Let’s conclude with a summary and some frequently asked questions:
Recipe Summary:
Lemon Icebox Pie features a graham cracker crust made with crushed graham crackers, sugar, and melted butter, and a creamy, no-bake lemon filling made with sweetened condensed milk, fresh lemon juice, egg yolks, and lemon zest. The pie is baked briefly to set the filling, then chilled thoroughly and topped with homemade whipped cream before serving.
Q&A:
Q: Can I make this pie ahead of time? A: Yes! In fact, it’s recommended to make it at least a few hours in advance, or even a day ahead, to allow the filling to set completely.
Q: How long will the pie keep in the refrigerator? A: It will keep for up to 3-4 days in the refrigerator, covered tightly.
Q: Can I freeze this pie? A: I don’t recommend freezing the fully assembled pie, as the texture of the filling and whipped cream may change upon thawing. However, you can freeze the crust separately.
Q: I don’t have key limes. Can I use regular limes? A: The recipe uses regular lemons, not key limes.
Q: Can I made it gluten free? A: Yes, by using gluten free graham crackers.
Did Our Recipe Hit The Spot?
There are no reviews yet. Be the first one to write one.


