Ready to create the most jaw-dropping, ghoulishly gorgeous, and spectacularly spooky centerpiece for your Halloween party? A dessert so dramatic and interactive, it will have all your guests screaming with delight? This incredible, show-stopping “Melting” Strawberry Shortcake Skull Cake is the ultimate festive creation! We’re talking a beautiful, white chocolate skull, sitting atop a classic strawberry shortcake, that “melts” away when you pour a hot, “bloody” strawberry sauce over the top, revealing a gory surprise of fresh strawberries inside.
This isn’t just a recipe; it’s a guide to an unforgettable Halloween experience. It looks like a masterpiece of confectionery magic, but we’ll show you the simple but brilliant secrets to creating this stunning dessert at home. This is a guaranteed, crowd-pleasing hit that is as fun to reveal as it is to eat!
Table of Contents
Table of Contents
Recipe Overview: The Ultimate Spooky & Interactive Halloween Dessert
What makes this Skull Cake so spectacularly fun is its brilliant, interactive “melting” reveal and its classic, crowd-pleasing flavor. This recipe is a masterpiece of festive creativity. The cake itself is a classic, from-scratch strawberry shortcake, with layers of a moist and tender vanilla cake, fresh macerated strawberries, and fluffy whipped cream. The real magic, however, is the centerpiece. A beautiful, hollow white chocolate skull is filled with more fresh strawberries and placed on top of the cake. The final, show-stopping moment comes when you pour over a hot, vibrant, and “bloody” red strawberry sauce, which dramatically melts the skull to reveal the gory surprise inside.
| Metric | Time / Level |
| Total Time | 4 hours (includes cooling & chilling) |
| Active Prep Time | 1 hour |
| Difficulty Level | Intermediate |
| Servings | 12-16 slices |
The Mad Scientist’s Laboratory: The Essential Ingredients & Tools
This iconic party cake uses a handful of high-quality ingredients and a few key techniques to create its signature spooky look.
- The White Chocolate Skull:
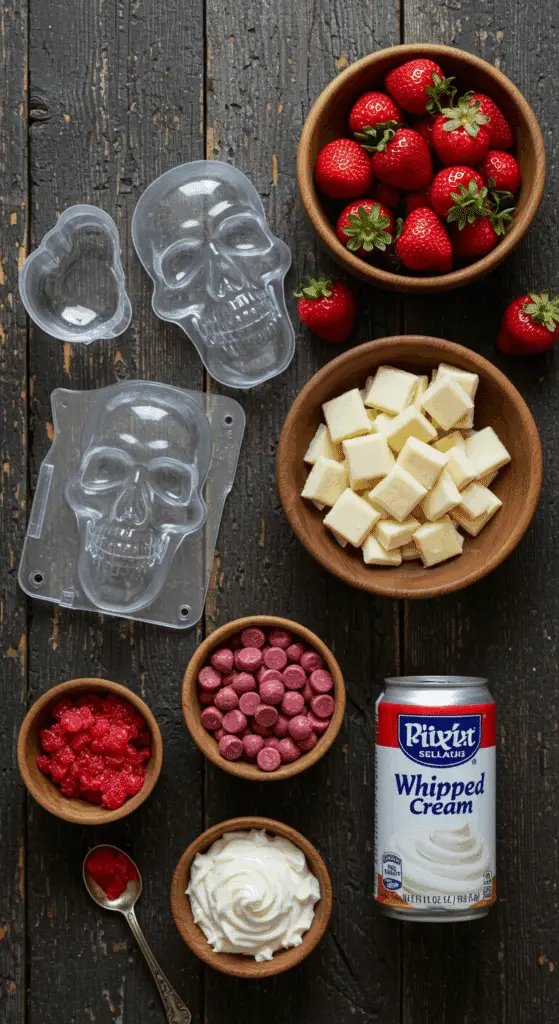
- White Chocolate or Candy Melts: The secret to a sturdy yet meltable skull shell. For the easiest, most foolproof result, it is highly recommended to use white candy melts (or candy wafers), which are designed to melt smoothly and set up hard with no tempering required.
- The Key Equipment: A 2-piece, plastic or silicone skull mold is the essential tool for this recipe.
- The Classic Strawberry Shortcake:
- The Cake: A classic, from-scratch vanilla butter cake, made extra moist and tender with the addition of sour cream.
- The Filling: The unbeatable, classic combination of fresh strawberries (which are macerated in sugar to create their own delicious syrup) and a simple, homemade sweetened whipped cream.
- The “Melting” Sauce:
- The “Blood”: A simple but delicious, from-scratch strawberry sauce is made extra vibrant and gory with the addition of a few red candy melts. This is the key to the beautiful, opaque, and blood-red color.
The Dark Arts of Dessert Construction: The Secret to the Dramatic “Melting” Reveal
The number one, non-negotiable secret to the show-stopping finale of this cake is simple temperature science.
- A Thin, Even Shell: The key to a skull that melts dramatically is to ensure your white chocolate shell is not too thick. A thin, even coating is what you’re looking for.
- A HOT Sauce: Your “bloody” strawberry sauce must be hot when you pour it over the skull. The heat from the sauce is the magic that will instantly begin to melt the thin, white chocolate shell, creating the incredible, gory reveal.

Step-by-Step to the Best “Melting” Skull Cake
This fun and festive project is a joy to prepare.
Part 1: Craft Your Strawberry-Stuffed White Chocolate Skull
Step 1: In a microwave-safe bowl, melt your 4 ounces of white chocolate wafers and 1 tablespoon of coconut oil in 30-second intervals until smooth.
Step 2: Pour the melted chocolate into the front and back cavities of your skull mold. Use a small brush or your finger to swirl the chocolate around until the molds are completely coated. Freeze the molds for about 5 minutes until the chocolate is set.
Step 3: Brush the molds with a second layer of the melted chocolate and freeze again for 5 minutes.
Step 4: Carefully unmold the two skull halves. Fill one half with your 4 ounces of sliced strawberries. Use a little more of your melted chocolate as “glue” to carefully attach the two skull halves together. Refrigerate the finished skull until you are ready to assemble the cake.
Part 2: Bake the Cake and Prepare the Fillings
Step 1: Preheat your oven to 350°F (175°C). Prepare a 6-inch round cake pan. In a large bowl, make your vanilla cake batter according to the recipe instructions. Bake for 35 to 40 minutes, until a toothpick inserted into the center comes out clean. Let the cake cool completely. Step 2: While the cake is cooling, toss your 8 ounces of sliced strawberries with the 2 teaspoons of granulated sugar in a medium bowl. Let this sit for at least 30 minutes to allow the strawberries to release their juices.
Part 3: Assemble the Cake and Prepare for the Grand Finale
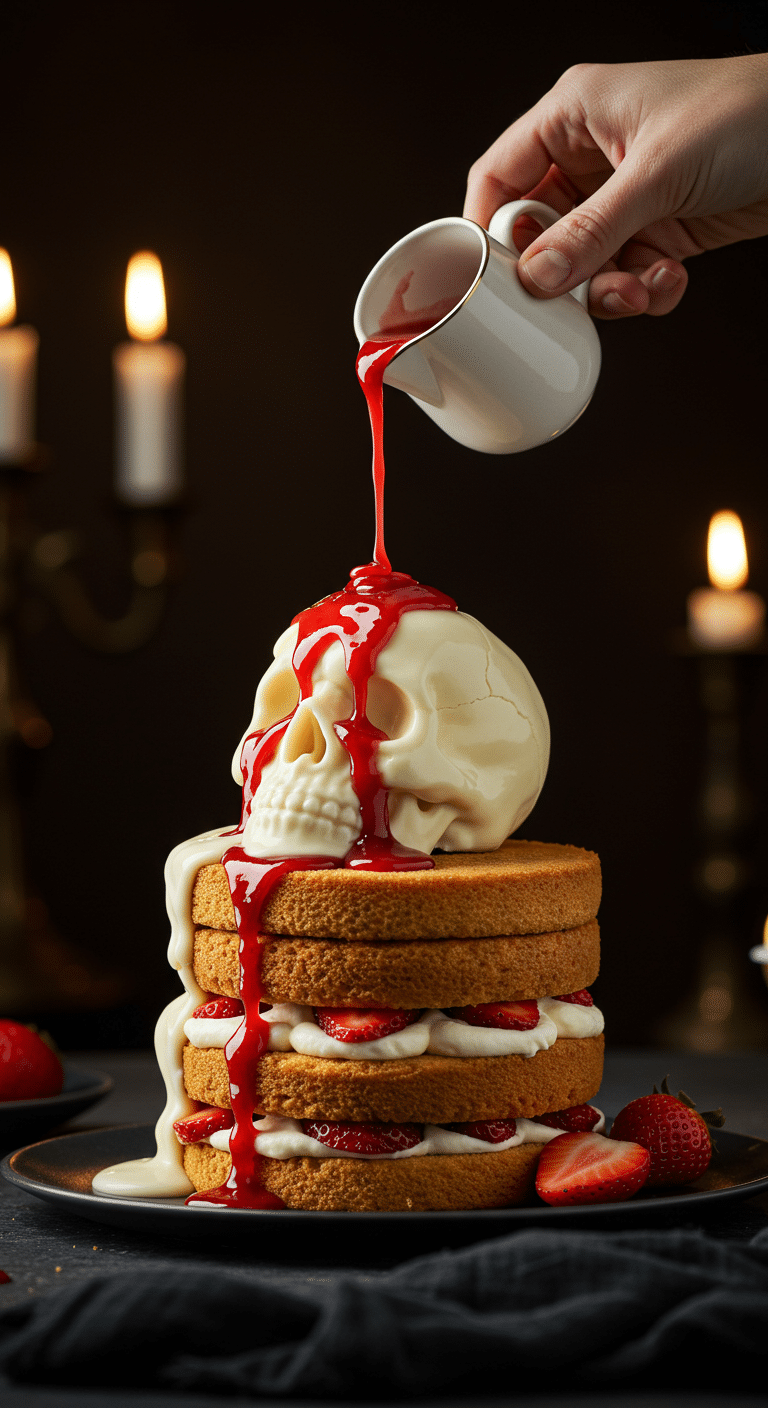
Step 1: Cut your cooled cake into 3 even layers. Place the bottom layer on your cake stand and top it with half of your macerated strawberries and about 3/4 cup of your whipped cream. Repeat with the next layer, and then top with the final cake layer and the remaining whipped cream. Step 2: Position your chilled, white chocolate skull in the center of the whipped cream on top of the cake. Step 3: To make the “melting” sauce, in a small saucepan, cook your 8 ounces of finely chopped strawberries and 2 tablespoons of granulated sugar over a medium heat for 10 to 15 minutes, until the strawberries have broken down. Strain the mixture through a fine-mesh sieve and return the liquid to the saucepan. Add the 1/2 cup of heavy cream and the 3 ounces of red candy melts and heat, whisking constantly, until the sauce is melted and hot.
Part 4: The Gory Reveal!
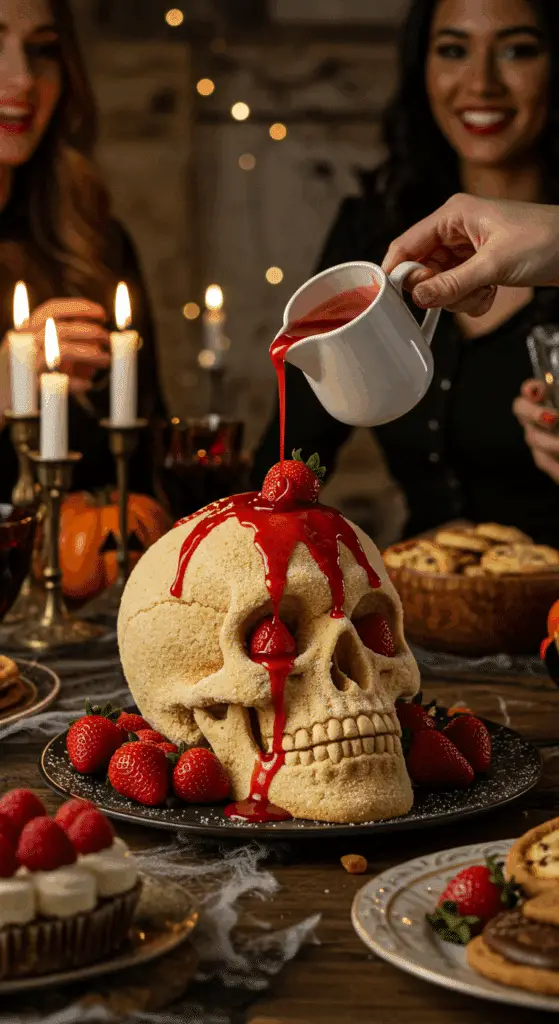
When you are ready to serve, bring your beautiful cake to the table. For the most dramatic effect, slowly and theatrically pour the hot, red strawberry sauce over the very center of the white chocolate skull and watch as it melts away to reveal the bloody strawberry “brains” inside!

‘Melting’ Skull Cake (A Spooky Halloween Showstopper!)
An elaborate and dramatic Halloween-themed strawberry shortcake, designed to look like a melting skull. The dessert features a from-scratch, three-layer vanilla butter cake that is filled with layers of macerated fresh strawberries and sweetened whipped cream. The showstopper is a hollow, white chocolate skull, made using a special mold, which is also filled with sliced strawberries and placed on top of the cake. For a gory, theatrical presentation, a hot, red-colored strawberry and white chocolate sauce is poured over the skull at the table, causing it to melt and reveal the ‘bloody’ strawberry brains inside.
Ingredients
- For the Chocolate Skull:
- 4 ounces white chocolate melting wafers
- 1 tablespoon unrefined coconut oil
- 4 ounces strawberries, sliced
- For the Cake and Filling:
- Nonstick cooking spray
- 1 1/2 cups all-purpose flour
- 2 teaspoons baking powder
- 1/2 teaspoon baking soda
- 1/2 teaspoon kosher salt
- 8 tablespoons (1 stick) unsalted butter, at room temperature
- 1 cup confectioners’ sugar
- 1 teaspoon pure vanilla extract
- 1 large egg, at room temperature
- 1/2 cup sour cream
- 8 ounces strawberries, sliced
- 2 teaspoons granulated sugar
- 2 cups sweetened whipped cream
- For the Strawberry Sauce:
- 8 ounces strawberries, finely chopped
- 2 tablespoons granulated sugar
- 1 1/2 teaspoons lemon juice
- 1 1/2 teaspoons pure vanilla extract
- 1/2 cup heavy cream
- 3 ounces red candy melting wafers
Instructions
- Make the Chocolate Skull: Melt the white chocolate and coconut oil. Pour the mixture into a 2-part plastic skull mold, coating the inside completely. Freeze for 5 minutes, add a second coat, and freeze for another 5 minutes. Fill one half of the set skull with sliced strawberries. Use the remaining melted chocolate to ‘glue’ the two skull halves together. Refrigerate.
- Make the Cake: Preheat the oven to 350°F. Grease and line a 6-inch round cake pan. Mix the dry ingredients (flour, baking powder, soda, salt). In a separate bowl, beat the butter and confectioners’ sugar until fluffy. Beat in the vanilla and egg. Alternately add the dry ingredients and the sour cream. Pour the batter into the pan and bake for 35 to 40 minutes. Let it cool completely.
- Make the Sauce and Filling: Toss 8 ounces of sliced strawberries with 2 teaspoons of granulated sugar and let them sit for 30 minutes to release their juices. For the sauce, cook 8 ounces of chopped strawberries and 2 tablespoons of sugar until thickened. Strain the mixture, then return the liquid to the saucepan. Add the heavy cream and red candy melts, and whisk over medium heat until smooth and hot.
- Assemble the Cake: Cut the cooled cake into 3 layers. Place the bottom layer on a cake stand, top with half of the macerated strawberries and 3/4 cup of whipped cream. Repeat with the second layer. Top with the final cake layer and the remaining whipped cream.
- Place the chilled chocolate skull in the center of the cake.
- To serve, pour the hot, red strawberry sauce over the center of the chocolate skull to melt it and reveal the strawberry ‘brains.’
Notes
- Special Equipment: A medium 2-piece plastic skull mold is essential for the signature decoration.
- This is a showstopper dessert with a theatrical serving element, perfect for a Halloween party.
- The hot strawberry sauce melting the white chocolate skull is a key part of the ‘lava cake’ presentation.
- The article references a ‘Cook’s Note’ that is not provided in the text.
Storage and Make-Ahead Tips
- Make-Ahead: For a super-fast and impressive party day, you can get a head start by preparing all your components in advance. The cake layers can be baked, the skull can be made, and the strawberry sauce can be prepared up to 2 days ahead of time. Store everything in separate, airtight containers in the refrigerator.
- Storage: Store the finished, assembled cake (before the final sauce pour) in the refrigerator for up to 24 hours.
For more recipe follow my pinterest account
Frequently Asked Questions (FAQs)
Q1: What is the absolute, number one secret to the “melting” effect? The secret is temperature contrast!
The white chocolate skull must be very cold and firm, straight from the refrigerator, and the red strawberry sauce must be hot, straight from the saucepan. The hot liquid is the key that will instantly begin to melt the thin, cold chocolate shell.
Q2: Can I make this Halloween cake ahead of time for a party?
Yes, this is a perfect make-ahead cake! You can bake the cake layers and make all the other components a day or two in advance. For the freshest and most impressive result, it is a great idea to assemble the cake and perform the final, hot sauce pour on the day of your party, right in front of your guests for the most drama!
Q3: Can I make this with a boxed cake mix?
Of course! For an even easier shortcut, you can absolutely use your favorite brand of a boxed white or yellow cake mix for the cake layers.
Q4: What can I use if I don’t have a skull mold?
If you don’t have a skull mold, you can use any other fun, 2-piece, hollow chocolate mold you can find! A hollow chocolate pumpkin or even a simple, large sphere would also be fantastic.
Q5: What is the best way to melt chocolate so that it doesn’t burn or seize up?
The most foolproof method is to use a double boiler, or a simple heatproof bowl set over a saucepan of gently simmering water. If you are using the microwave, it is crucial to use a lower power setting (like 50%) and to microwave in very short, 30-second intervals, stirring well in between each one.


