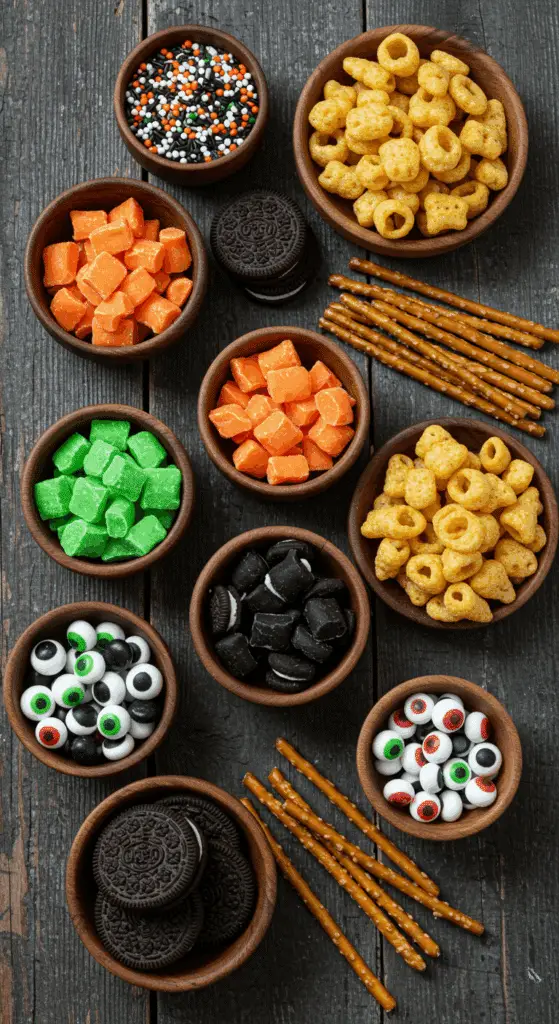
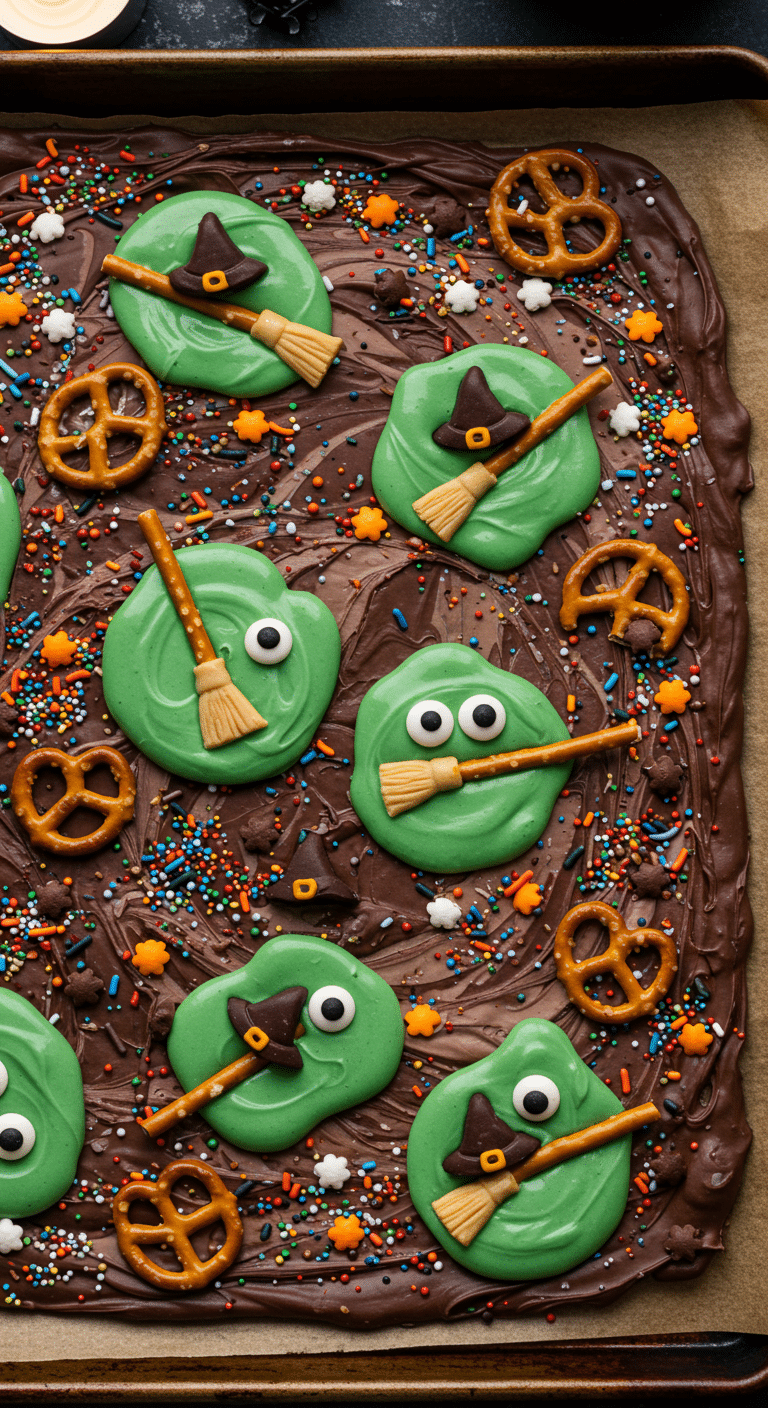
Ready to conjure up the most magical, impressive, and ghoulishly gorgeous treat for your next Halloween celebration? A candy so creative and fun, it’s a spooky work of art that will have everyone cackling with delight? This incredible, from-scratch Melting Witches Bark is the ultimate festive creation! We’re talking a rich, colorful candy bark that sets the scene for a poor, unfortunate witch who has melted into a gooey green puddle, leaving behind only her pointy hat, her magic broom, and her googly eyes.
This isn’t just a recipe; it’s a guide to your new favorite Halloween project. We’ll show you how to use a few simple, store-bought treats and a bit of candy-making magic to create a show-stopping, edible centerpiece. This is a guaranteed, crowd-pleasing hit that is as fun to make as it is to eat, making it the perfect activity to do with your little monsters.
Table of Contents
Table of Contents
Recipe Overview: The Ultimate Spooky & Fun Halloween Candy
What makes this Melting Witches Bark so spectacularly fun is its incredible, detailed presentation and its classic, sweet and crunchy flavor. This recipe is a masterpiece of edible storytelling. The “ground” is a spooky, swirled base of brown and black candy melts. The star of the show is the “melting witch” scene created on top: a vibrant, gooey “puddle” of green candy melts is the final resting place for a pointy witch hat (made from a cookie and a Bugle!), a tiny witch broom (made from a pretzel and a sour candy belt), and two spooky candy eyeballs. The entire creation is then showered with festive Halloween sprinkles for a final, magical touch.
| Metric | Time / Level |
| Total Time | 1 hour 45 minutes (includes setting) |
| Active Prep Time | 45 minutes |
| Difficulty Level | Easy |
| Servings | 12-16 servings |
The Witch’s Cauldron: The Essential Ingredients & Tools
This iconic party treat uses a handful of smart shortcuts and a few key pieces of equipment to create its signature spooky look.
- The Candy Melts (The Magic Potion!):
- Candy Melts: This is the key to an incredibly easy and impressive treat! Candy melts (or candy wafers) are a type of confectionary coating that is specifically designed to melt beautifully and to set up with a hard, shiny finish with no complicated “tempering” required. You’ll need a variety of festive, Halloween colors: green, orange, black, and brown.
- The Homemade Decorations:
- The Witch Hats: This is a brilliant and simple trick! A classic, fudge-covered chocolate sandwich cookie makes the perfect, round brim, while a cone-shaped corn snack, like a Bugle®, is dipped in melted orange candy to create the perfect, pointy cone.
- The Witch Brooms: Another fun and easy craft! A simple pretzel stick is the handle, and the bristles are made by carefully fringing a colorful, sour candy belt with a pair of kitchen shears.
- The Key Equipment: A large, rimmed baking sheet and a silicone baking mat or parchment paper are essential for this project.

Step-by-Step to the Best Melting Witches Bark
This fun and festive project is a joy to prepare.
Part 1: Craft Your Spooky Accessories (The Brooms & Hats)
To Make the Witch Brooms: Use sharp kitchen shears to make thin, vertical cuts along one side of a sour candy belt, leaving a 1/4-inch strip at the top uncut to create a “fringe.” Wrap this uncut strip tightly around the tip of a pretzel stick and press it gently to adhere. Fan out the fringe, and repeat to make 8 brooms.
To Make the Witch Hats: Step 1: In a small, oven-safe ramekin, gently melt your 4 ounces of orange candy wafers in a 250°F oven for 3 to 4 minutes. Stir until smooth, and then stir in the 1 teaspoon of coconut oil. Let it cool for a few minutes. Step 2: Dip each of your 8 cone-shaped corn snacks into the melted orange candy, using two skewers to turn and coat it completely. Step 3: Place the coated cone on a plate and immediately sprinkle it liberally with the black sanding sugar. Step 4: Carefully place the coated cone, pointed-side up, onto the center of one of your 8 fudge-covered cookies. Repeat to make 8 hats, and let them set completely.
Part 2: Create the “Melting” Scene and Assemble
Step 1: Preheat your oven to 250°F. Line a large baking sheet with a silicone baking mat or parchment paper. Step 2: Divide your 8 ounces of green candy wafers into 8 even mounds around the prepared baking sheet, spacing them evenly apart. Step 3: Break 4 of your black candy wafers in half, and place one half on top of each of the green mounds. Step 4: In a medium bowl, combine your 12 ounces of brown candy wafers and the remaining black wafers. Scatter this mix all around the sides of the green mounds to create a rough rectangle. Step 5: Bake for 3 to 4 minutes, until the wafers are glossy and have just begun to melt. Step 6: Working quickly, use a small offset spatula to smooth and spread the green wafers into rough, round “puddles.” Then, wipe your spatula clean and spread the black and brown wafers out and around the green circles to create the “ground.” Step 7 (The Fun Part!): Immediately, while the candy is still wet, place one of your prepared witch hats slightly off-center on each of the green circles. Place two candy eyeballs below each hat to create the “face,” and lay one of your prepared broomsticks to the side. Step 8: Scatter your Halloween sprinkles all over the brown and black “ground.” Arrange your mini candy pumpkins on top, if you are using them. Step 9: Set the entire baking sheet aside at room temperature until the bark is completely solid, which will take about 1 hour.
Once the bark is firm, you can break it apart into individual pieces and serve.

Melting Witches Halloween Bark (An Easy & Fun Recipe!)
An elaborate and creative recipe for a Halloween-themed candy bark designed to look like ‘Melting Witches.’ This festive, no-bake (mostly) treat features a dark background of melted brown and black candy wafers. Green candy melt ‘puddles’ are swirled on top, each one representing a melted witch. Each ‘witch’ is decorated with a homemade edible hat (made from a fudge-covered cookie and a candy-coated corn snack), a broomstick (made from a pretzel and a sour candy belt), and two candy eyeballs. The entire bark is then adorned with Halloween sprinkles for a fun and spooky party centerpiece.
Ingredients
- For the Decorations:
- Eight 1-inch strips sour candy belts
- 8 pretzel sticks
- 4 ounces orange candy melting wafers
- 1 teaspoon refined coconut oil
- 8 fudge-covered chocolate sandwich cookies
- 8 cone-shaped corn snacks
- Coarse black sanding sugar
- 16 candy eyeballs
- Halloween sprinkles
- 8 mini candy pumpkins (optional)
- For the Bark Base:
- 8 ounces green candy melting wafers
- 4 ounces black candy melting wafers
- 12 ounces brown candy melting wafers
Instructions
- Preheat the oven to 250°F. Line a baking sheet with a silicone mat or parchment paper.
- Make the Brooms: Use kitchen shears to cut thin vertical strips into the sour candy belts to create a fringe. Wrap the uncut edge of each candy fringe around the tip of a pretzel stick to create 8 brooms.
- Make the Hats: Melt the orange candy wafers with the coconut oil in the oven or microwave. Dip each cone-shaped corn snack into the melted orange candy to coat it, then sprinkle with black sanding sugar. Place each coated cone onto a fudge-covered cookie to create 8 witch hats. Let them set for about 15 minutes.
- Make the Bark: On the prepared baking sheet, create 8 evenly spaced mounds of the green candy wafers. Place a half-piece of a black candy wafer on each green mound. Scatter the brown and remaining black candy wafers all around the green mounds.
- Bake for 3 to 4 minutes, until the wafers are glossy and beginning to melt.
- Immediately use an offset spatula to swirl the green mounds into rough circles (‘puddles’). Then, swirl the surrounding brown and black wafers to create the bark’s background.
- Assemble the Witches: While the bark is still melted, place one witch hat slightly off-center on each green ‘puddle.’ Place two candy eyeballs below each hat. Lay a prepared broomstick next to each ‘witch.’
- Scatter Halloween sprinkles and optional candy pumpkins over the bark.
- Let the bark sit at room temperature for about 1 hour, until completely solid. Break it into pieces to serve.
Notes
- This is a multi-component edible craft project that is perfect as a showstopper for a Halloween party.
- The recipe cleverly uses a low-temperature oven to gently melt the candy wafers directly on the baking sheet, making it easy to swirl and decorate.
- All the decorative elements—the brooms, hats, and the witches themselves—are assembled while the candy bark base is still warm and melted.
Storage and Make-Ahead Tips
This Melting Witches Bark is the ultimate make-ahead party treat!
- Make-Ahead: You can prepare the entire slab of bark up to 1 week in advance.
- Storage: Store the finished bark (either whole or broken into pieces) in an airtight container at room temperature in a cool, dry place.
For more recipe follow my pinterest account
Frequently Asked Questions (FAQs)
Q1: What is the absolute, number one secret to melting candy melts smoothly so they don’t get thick or seize up?
The secret is to use low, gentle heat and to avoid any contact with water. The low-temperature oven method in this recipe is fantastic and very gentle. If you are using a microwave, it is crucial to use a lower power setting (like 50%) and to microwave in very short, 30-second intervals, stirring well in between each one.
Q2: Can I make this Halloween bark ahead of time for a party?
Yes, absolutely! This is a perfect make-ahead treat. You can prepare the entire recipe up to a week in advance and keep it stored in an airtight container at room temperature. For the most dramatic presentation, it is a great idea to present the entire, unbroken slab of bark on a platter and let your guests break off their own pieces.
Q3: Can I use regular chocolate instead of candy melts?
You can, but it is much more challenging. For the best result with real chocolate, it would need to be tempered, which is a more advanced process of heating and cooling it to specific temperatures to ensure it sets up hard and shiny. Candy melts are a fantastic shortcut that will give you a perfect, sturdy, and shiny result with no tempering required.
Q4: Can I make a simpler version of the witch hats?
Of course! For a super-fast and easy alternative, you can create a simple witch hat by simply “gluing” a single Hershey’s Kiss® to the top of the fudge-covered cookie with a little bit of melted chocolate.
Q5: What is the best way to break up the finished bark?
Once the bark is completely firm, you can simply use your hands to snap it into large, rustic pieces. If you would like more uniform pieces, you can place the entire slab on a cutting board and use a large, sharp chef’s knife to carefully cut it.


