Introduction & Inspiration
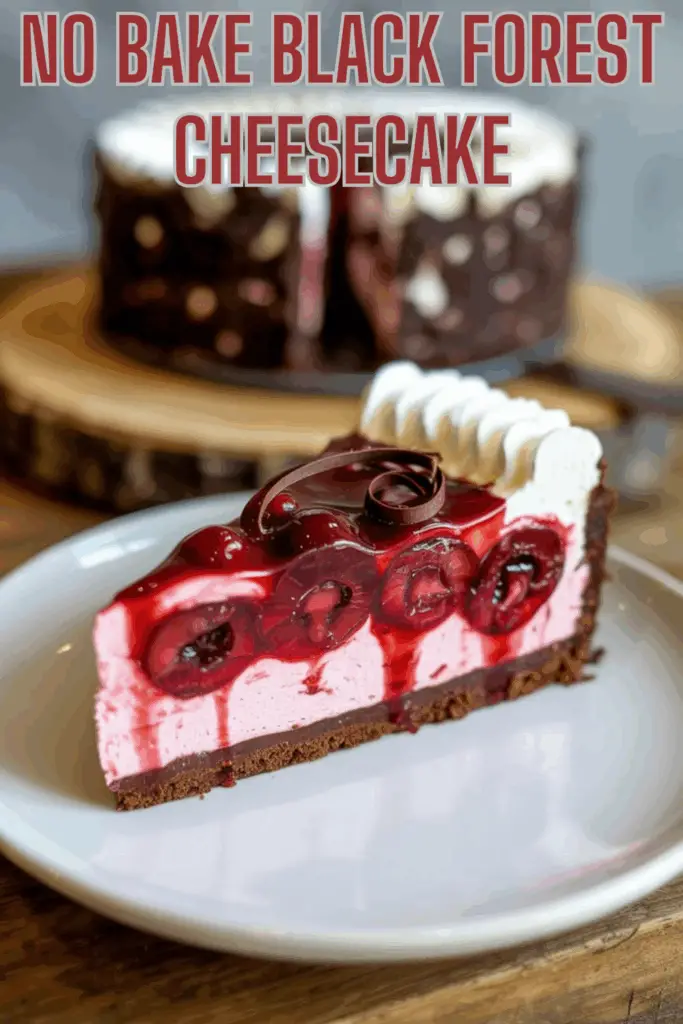
I’m always thrilled to find dessert recipes that deliver impressive, decadent flavors with absolutely no baking required, especially as the weather gets warmer! This No-Bake Black Forest Cheesecake immediately captured my imagination. It promises all the classic, beloved flavors of a traditional Black Forest cake – rich chocolate, sweet cherries, and creamy filling – transformed into an incredibly easy-to-make cheesecake format with a delicious Oreo crust.
My inspiration came from wanting a show-stopping dessert that combined chocolate and cherry, but without the time commitment or oven heat needed for a traditional layer cake or baked cheesecake. The idea of a smooth, chocolatey cream cheese filling studded with cherry pie filling, piled onto an Oreo crust, and topped with whipped cream sounded like pure, effortless indulgence.
My goal was to explore this specific no-bake recipe, highlighting its simplicity thanks to using convenience items like Oreos, cherry pie filling, and whipped topping, while still delivering that rich Black Forest experience. It seemed like the perfect dessert for parties, potlucks, holidays, or anytime you need an impressive dessert without the stress of baking.
Let’s assemble this easy, decadent, no-bake delight!
Nostalgic Appeal / Comfort Food Connection
This No-Bake Black Forest Cheesecake taps into deep wells of dessert nostalgia. Black Forest Cake itself is a classic German dessert, popular worldwide, known for its layers of chocolate cake, whipped cream, cherries, and Kirsch liqueur (though the liqueur is absent in this simplified version). Its rich chocolate and cherry combination is instantly recognizable and beloved.
No-bake cheesecakes and layered desserts using Oreo crusts and Cool Whip toppings are also nostalgic classics in American home baking, especially popular for potlucks and easy entertaining since the mid-20th century. They represent simple, crowd-pleasing comfort food.
This recipe beautifully marries these two nostalgic concepts – the classic Black Forest flavor profile and the easy, familiar format of a no-bake Oreo-crust dessert. It feels both sophisticated in its flavor inspiration and comfortingly simple in its execution.
Making and eating this dessert feels like enjoying a familiar favorite flavor combination, presented in an incredibly easy and satisfyingly creamy format.
Homemade Focus (Simple Assembly, Rich Results)
While this No-Bake Black Forest Cheesecake utilizes several convenient ingredients like Oreos, canned pie filling, and whipped topping, the process of assembling these components into a unique and delicious dessert is entirely a homemade endeavor. The focus here is on simple techniques and smart use of ingredients to create an impressive result with minimal effort.
I love recipes that demonstrate how easily you can create something special at home. Crushing Oreos and mixing them with melted butter for the crust is a simple yet satisfying homemade step. Whipping together the cream cheese, sugar, cocoa, and sour cream creates a rich, tangy chocolate base made easily in your kitchen.
Gently folding in the cherry pie filling and whipped topping are key homemade techniques that ensure the filling is light and airy, with distinct cherry pieces throughout, rather than being dense or having the cherries completely broken down.
Even though shortcuts are involved, the process of creating the distinct layers – crust, chocolate-cherry filling, whipped topping – and chilling the dessert results in a beautiful, multi-textured cheesecake that feels thoughtfully prepared and satisfyingly homemade.
Flavor Goal
The primary flavor goal of this No-Bake Black Forest Cheesecake is to capture the classic chocolate and cherry combination of Black Forest cake in a creamy, tangy, no-bake cheesecake format, supported by a crunchy chocolate cookie crust. It aims for a rich, indulgent, yet relatively easy-to-make dessert.
The Oreo crust provides a deep chocolate flavor and a satisfyingly crunchy, slightly salty base that contrasts with the creamy filling.
The cheesecake filling is the star: softened cream cheese provides tang and richness; sugar adds sweetness; unsweetened cocoa powder delivers deep chocolate flavor; sour cream (or Greek yogurt) adds moisture and extra tang; whipped topping folded in lightens the texture, making it airy like a mousse; and cherry pie filling folded in provides bursts of sweet cherry flavor and texture.
The final layer of whipped cream (or more whipped topping) adds lightness, while the extra cherry pie filling and optional chocolate shavings reinforce the Black Forest theme and add visual appeal. The overall effect is a rich, creamy, chocolatey, cherry-filled dessert with a crunchy base.
Ingredient Insights
Let’s explore the key components of this easy no-bake treat:
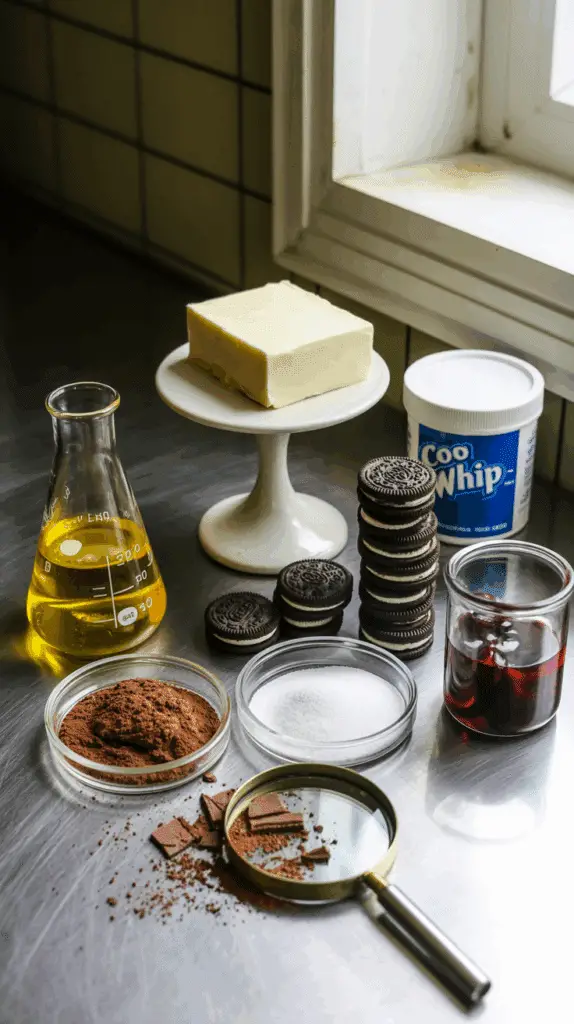
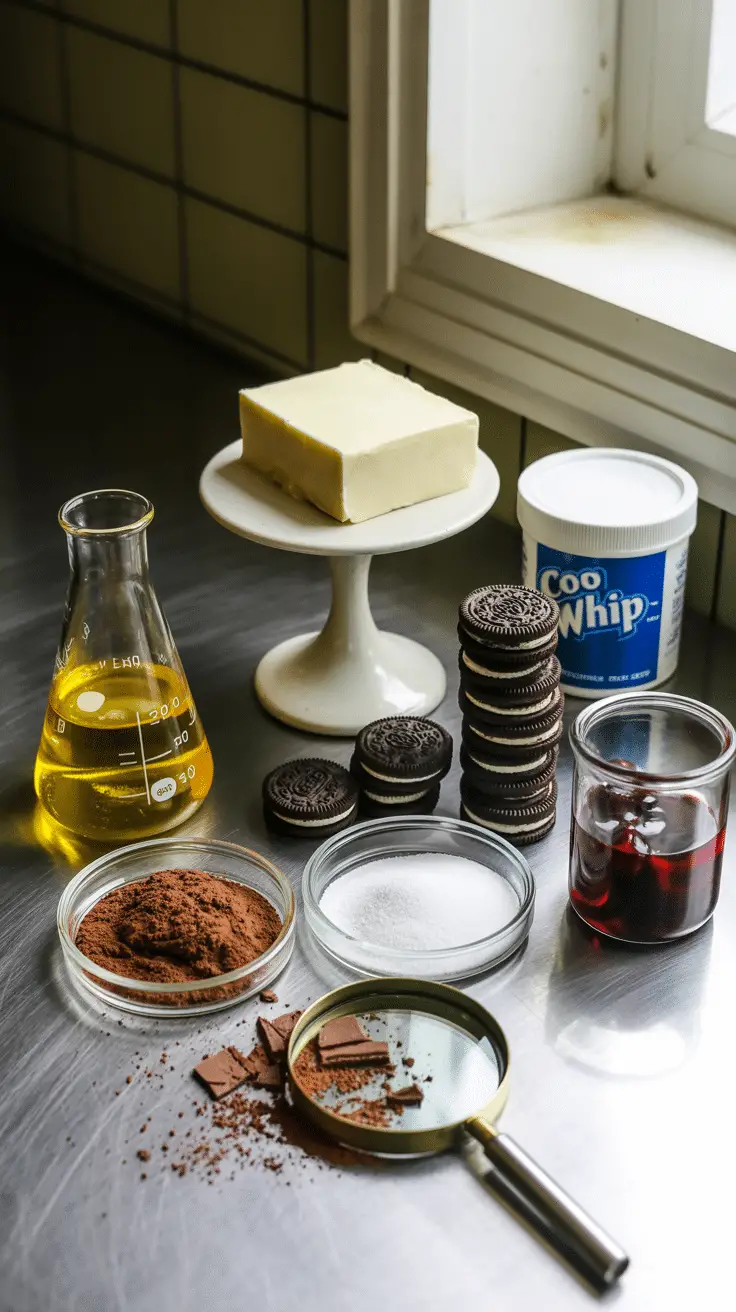
- Oreos (whole cookie, filling included): Provide the rich chocolate flavor and structure for the no-bake crust. Crushing them finely is key.
- Salted butter, melted: Binds the Oreo crumbs together for the crust. Salted butter balances the sweetness.
- Cream cheese, room temperature: The essential base for the cheesecake filling, providing tanginess and structure. Must be fully softened for a smooth filling.
- Granulated sugar: Sweetens the filling.
- Unsweetened cocoa powder: Provides the deep chocolate flavor for the filling. Use a quality brand for best taste.
- Sour cream or plain Greek yogurt: Adds moisture and extra tanginess to the filling, balancing the sweetness and richness.
- Cherry pie filling (canned): A convenient way to add sweet cherry flavor and whole/partial cherries throughout the filling and as a topping. One cup folded in, one cup for topping.
- Whipped topping (like Cool Whip), thawed: Folded into the filling to lighten the texture and add stability (common in no-bake recipes). Also used for the final topping layer. Homemade stabilized whipped cream could substitute.
- Optional Garnish: Chocolate shavings add an elegant finish.
Using room temperature cream cheese and thawed whipped topping is crucial for a smooth filling.
Essential Equipment
This recipe requires no baking, but needs tools for mixing and chilling:
- A 9-inch springform pan: Highly recommended. Allows for easy removal and clean presentation of the layered dessert. A regular 9-inch deep dish pie plate could work, but serving neatly is harder.
- Nonstick cooking spray: For the pan.
- A food processor or large ziploc bag and rolling pin: For crushing the Oreos into fine crumbs.
- Mixing bowls (large one for filling, smaller for crust):
- An electric mixer (handheld or stand mixer): Essential for beating the cream cheese filling until light and fluffy.
- A rubber spatula: Crucial for gently folding in the pie filling and whipped topping without deflating the mixture.
- Measuring cups and spoons.
- Plastic wrap: For covering the cheesecake while chilling.
- A vegetable peeler or knife: For making optional chocolate shavings.
A springform pan is ideal for easy serving.
List of Ingredients with Measurements
Here’s the complete list of ingredients, with precise measurements:
Oreo Crust:
- 32 Oreos (whole cookies, filling included)
- 4 tablespoons salted butter, melted
Chocolate Cheesecake Filling:
- 16 ounces (2 blocks) cream cheese, room temperature
- ¾ cup granulated sugar
- ½ cup unsweetened cocoa powder
- 1 cup sour cream or plain Greek yogurt
- 1 cup cherry pie filling (from a standard ~21 oz can)
- 8 ounces whipped topping (like Cool Whip), thawed
Toppings:
- 1 cup whipped cream or additional whipped topping (Cool Whip)
- 1 cup cherry pie filling (remaining from the ~21 oz can)
- Optional Garnish: chocolate shavings
These quantities perfectly fit a 9-inch springform pan.
Ensure cream cheese is fully softened and whipped topping is thawed.

Step-by-Step Instructions (Easy No-Bake Assembly!)
Let’s assemble this delicious no-bake cheesecake:
1. Prepare the Springform Pan:
- Lightly spray the bottom and sides of a 9-inch springform pan with nonstick cooking spray. Set aside.
2. Make the Oreo Crust:
- Place the whole Oreo cookies (filling included) into a food processor. Pulse until only fine crumbs remain. (Alternatively, place Oreos in a large, sealed ziploc bag and crush them thoroughly with a rolling pin).
- Add the melted salted butter to the Oreo crumbs. Pulse (or stir in the bag/bowl) until the crumbs are evenly moistened and resemble wet sand.
- Reserve about 1/2 cup of the crumb mixture for optional garnish if desired (though not mentioned in topping list, it’s common). Press the remaining crumbs firmly and evenly into the bottom and slightly up the sides of the prepared springform pan.
- Cover the pan with plastic wrap and place it in the freezer to set while you prepare the filling.
3. Make the Chocolate Cheesecake Filling:
- In a large bowl, combine the room temperature cream cheese, granulated sugar, and unsweetened cocoa powder.
- Using a hand mixer or stand mixer, beat together on medium speed for 3 to 5 minutes, scraping down the sides occasionally, until the mixture is light, fluffy, and completely smooth with no cream cheese lumps.
- Add the sour cream (or Greek yogurt) and beat on low speed until thoroughly combined.
- Switch to a rubber spatula. Gently fold in the 1 cup of cherry pie filling, being careful not to crush all the cherries – you want some whole pieces visible.
- Gently fold in the 8 ounces of thawed whipped topping until just combined and no white streaks remain. Do not overmix, as this will deflate the whipped topping.
4. Fill the Crust:
- Remove the crust from the freezer. Transfer the chocolate-cherry cheesecake filling onto the frozen crust.
- Spread the filling evenly using the spatula.
5. Chill Until Set:
- Cover the springform pan again tightly with plastic wrap.
- Refrigerate for a minimum of 4 hours, but preferably overnight (6-8 hours), until the cheesecake filling is firm and completely set. This chilling time is crucial.
6. Top and Serve:
- Once the cheesecake is fully set, carefully remove the outer ring of the springform pan.
- Spread the remaining 1 cup of whipped cream or thawed whipped topping over the top of the cheesecake.
- Spoon the remaining 1 cup of cherry pie filling over the whipped topping layer.
- Garnish with optional chocolate shavings. Slice and serve chilled.
No baking required, just mixing, layering, and chilling!

Troubleshooting
No-bake cheesecakes rely on proper chilling and ingredient temperatures:
- Problem: Crust is too crumbly and doesn’t hold together.
- Solution: Ensure enough melted butter was used and thoroughly mixed with the Oreo crumbs. Press the crust very firmly into the pan before chilling. Freezing briefly helps set it.
- Problem: Cheesecake filling is lumpy.
- Solution: Cream cheese wasn’t fully softened to room temperature before beating. Beat the cream cheese, sugar, and cocoa powder longer until absolutely smooth before adding other ingredients.
- Problem: Cheesecake didn’t set firmly enough.
- Solution: Needs more chilling time! Minimum 4 hours, but overnight is best for a firm set. Ensure correct amounts of cream cheese and whipped topping were used, as they provide structure.
- Problem: Layers mixed together unattractively.
- Solution: Ensure the crust is frozen/firm before adding filling. Fold pie filling and whipped topping gently into the base to maintain some distinction. Chill thoroughly.
Patience during chilling is the key to success!
Tips and Variations
Let’s customize this easy Black Forest treat:
- Tip: Use full-fat block cream cheese for the best texture and setting ability.
- Variation: Add 1-2 tablespoons of Kirsch (cherry liqueur), the traditional Black Forest flavor, into the cream cheese mixture for an adult version.
- Tip: Ensure whipped topping (Cool Whip) is fully thawed in the refrigerator before folding it into the filling.
- Variation: Use a different pie filling flavor like strawberry or raspberry, paired perhaps with a plain graham cracker crust or vanilla wafer crust.
- Tip: For cleaner slices, dip a large sharp knife in hot water and wipe it dry between each cut.
- Variation: Use homemade stabilized whipped cream instead of Cool Whip in the filling and/or for the topping for a less processed flavor (ensure it’s well stabilized).
- Variation: Add a layer of mini chocolate chips over the crust before adding the filling.
Make it your signature no-bake creation!
Serving and Pairing Suggestions
This No-Bake Black Forest Cheesecake is a rich and impressive dessert.
Serving: Serve well-chilled, sliced into wedges directly from the springform pan base or transferred carefully to a serving platter.
Pairing:
- Perfect for parties, potlucks, holidays, or as a decadent dessert after dinner.
- Delicious on its own, showcasing the chocolate and cherry flavors.
- A cup of coffee or espresso complements the richness well.
- A small glass of milk is always a good pairing with cheesecake.
Its rich flavor means a small slice is often very satisfying.
Nutritional Information
This is an indulgent no-bake dessert using cream cheese, sugar, Oreos, pie filling, and whipped topping. Nutritional info is approximate (per slice, assuming 10-12 slices):
- Calories: 400-550+ (based on 223kcal listed for a smaller “Cheesecake Salad” previously, this richer dessert is likely much higher – estimate adjusted)
- Fat: 25-35+ grams
- Saturated Fat: 15-20+ grams (High from cream cheese, butter, Cool Whip)
- Cholesterol: 40-60+ mg
- Sodium: 250-400+ mg
- Total Carbs.: 40-55+ grams
- Dietary Fiber: 1-3 grams
- Sugars: 30-45+ grams (Significant amount from Oreos, sugar, pie filling, Cool Whip)
- Protein: 4-6 grams
This is definitely a decadent dessert, high in sugar and fat. Using light cream cheese/Cool Whip or reducing sugar slightly can modify the profile, but will affect texture and taste.
PrintNo Bake Black Forest Cheesecake
Make this easy No-Bake Black Forest Cheesecake! Features an Oreo crust, creamy chocolate filling with cherry pie filling folded in, and whipped topping.
Ingredients
Here’s the complete list of ingredients, with precise measurements:
Oreo Crust:
- 32 Oreos (whole cookies, filling included)
- 4 tablespoons salted butter, melted
Chocolate Cheesecake Filling:
- 16 ounces (2 blocks) cream cheese, room temperature
- ¾ cup granulated sugar
- ½ cup unsweetened cocoa powder
- 1 cup sour cream or plain Greek yogurt
- 1 cup cherry pie filling (from a standard ~21 oz can)
- 8 ounces whipped topping (like Cool Whip), thawed
Toppings:
- 1 cup whipped cream or additional whipped topping (Cool Whip)
- 1 cup cherry pie filling (remaining from the ~21 oz can)
- Optional Garnish: chocolate shavings
These quantities perfectly fit a 9-inch springform pan.
Ensure cream cheese is fully softened and whipped topping is thawed.
Instructions
Let’s assemble this delicious no-bake cheesecake:
1. Prepare the Springform Pan:
- Lightly spray the bottom and sides of a 9-inch springform pan with nonstick cooking spray. Set aside.
2. Make the Oreo Crust:
- Place the whole Oreo cookies (filling included) into a food processor. Pulse until only fine crumbs remain. (Alternatively, place Oreos in a large, sealed ziploc bag and crush them thoroughly with a rolling pin).
- Add the melted salted butter to the Oreo crumbs. Pulse (or stir in the bag/bowl) until the crumbs are evenly moistened and resemble wet sand.
- Reserve about 1/2 cup of the crumb mixture for optional garnish if desired (though not mentioned in topping list, it’s common). Press the remaining crumbs firmly and evenly into the bottom and slightly up the sides of the prepared springform pan.
- Cover the pan with plastic wrap and place it in the freezer to set while you prepare the filling.
3. Make the Chocolate Cheesecake Filling:
- In a large bowl, combine the room temperature cream cheese, granulated sugar, and unsweetened cocoa powder.
- Using a hand mixer or stand mixer, beat together on medium speed for 3 to 5 minutes, scraping down the sides occasionally, until the mixture is light, fluffy, and completely smooth with no cream cheese lumps.
- Add the sour cream (or Greek yogurt) and beat on low speed until thoroughly combined.
- Switch to a rubber spatula. Gently fold in the 1 cup of cherry pie filling, being careful not to crush all the cherries – you want some whole pieces visible.
- Gently fold in the 8 ounces of thawed whipped topping until just combined and no white streaks remain. Do not overmix, as this will deflate the whipped topping.
4. Fill the Crust:
- Remove the crust from the freezer. Transfer the chocolate-cherry cheesecake filling onto the frozen crust.
- Spread the filling evenly using the spatula.
5. Chill Until Set:
- Cover the springform pan again tightly with plastic wrap.
- Refrigerate for a minimum of 4 hours, but preferably overnight (6-8 hours), until the cheesecake filling is firm and completely set. This chilling time is crucial.
6. Top and Serve:
- Once the cheesecake is fully set, carefully remove the outer ring of the springform pan.
- Spread the remaining 1 cup of whipped cream or thawed whipped topping over the top of the cheesecake.
- Spoon the remaining 1 cup of cherry pie filling over the whipped topping layer.
- Garnish with optional chocolate shavings. Slice and serve chilled.
No baking required, just mixing, layering, and chilling
Recipe Summary and Q&A
Let’s conclude with a summary and common questions:
Recipe Summary:
No-Bake Black Forest Cheesecake features a crunchy Oreo crust topped with a creamy, no-bake chocolate cheesecake filling made with cream cheese, cocoa, sugar, sour cream, and whipped topping, with cherry pie filling folded in. The cheesecake is chilled until firm, then topped with more whipped topping and cherry pie filling before serving.
Q&A:
Q: Can I make this ahead of time? A: Yes! This dessert needs to be made ahead to allow sufficient chilling time (at least 4 hours, preferably overnight) to set properly. It can be fully assembled (except perhaps final garnishes) 1-2 days ahead.
Q: How do I store leftovers? A: Store covered tightly in the refrigerator for up to 4-5 days.
Q: Can I freeze this cheesecake? A: Yes, no-bake cheesecakes generally freeze well. Freeze whole or in slices, wrapped tightly in plastic wrap and then foil, for up to 1-2 months. Thaw overnight in the refrigerator. Texture might be slightly softer after freezing.
Q: Can I use fresh cherries instead of pie filling? A: You could fold in pitted, halved fresh cherries (perhaps macerated briefly with sugar and a splash of Kirsch or lemon juice) instead of the 1 cup of pie filling folded into the batter. You would likely need to make a separate fresh cherry sauce or use jam for the topping layer, as canned pie filling provides both fruit and syrupy sauce.
Q: What if I don’t have a springform pan? A: You can make it in a regular 9-inch deep-dish pie plate or a 9×9 inch square dish, but you won’t be able to remove the sides for presentation; you’ll need to serve it directly from the dish
Did Our Recipe Hit The Spot?
There are no reviews yet. Be the first one to write one.


