Introduction & Inspiration
I am always thrilled to discover dessert recipes that require absolutely zero baking but deliver a huge “wow” factor, especially for parties or hot summer days. This No-Bake Ice Cream Sandwich Cake recipe is the absolute epitome of easy indulgence! It layers classic vanilla ice cream sandwiches with creamy Cool Whip, rich hot fudge sauce, and crunchy crushed Oreos – creating a decadent frozen dessert that takes mere minutes to assemble.
My inspiration came from seeing variations of this incredibly popular dessert at countless potlucks and gatherings. It’s a guaranteed crowd-pleaser because it combines beloved, familiar treats – ice cream sandwiches, Oreos, hot fudge – into one simple, shareable dessert. I wanted to explore this specific version and share just how effortless it is.
My goal is to walk you through this ridiculously easy recipe, perfect for beginner cooks, kids’ parties, last-minute dessert needs, or anytime you crave a cool, creamy, chocolatey treat without turning on the oven. It’s proof that impressive desserts don’t need to be complicated!
Let’s layer up some frozen deliciousness!
Nostalgic Appeal / Comfort Food Connection
This No-Bake Ice Cream Sandwich Cake is practically a symphony of nostalgic American treats! Ice cream sandwiches themselves are a classic childhood favorite, evoking memories of summer days, ice cream trucks, and simple frozen delights. Oreos, another iconic cookie, bring their own wave of comforting nostalgia and chocolatey goodness.
Layered icebox-style desserts, often featuring cookies or wafers combined with whipped topping or pudding, are mainstays of potlucks and family gatherings, representing easy, crowd-pleasing comfort food. Hot fudge sauce adds another layer of familiar indulgence, reminiscent of ice cream sundaes.
Combining all these beloved elements – ice cream sandwiches, Oreos, hot fudge, Cool Whip – creates an ultimate comfort food dessert that feels both familiar and incredibly fun.
Making and eating this cake feels like taking a trip down memory lane, indulging in multiple childhood favorites all layered together into one easy, delightful frozen treat.
Homemade Focus (Effortless Assembly Magic)
While this No-Bake Ice Cream Sandwich Cake relies entirely on store-bought convenience items, the “homemade” aspect comes from the simple, creative act of assembling these components into a unique and delicious layered dessert. The focus isn’t on complex baking, but on the ease and fun of putting together a crowd-pleasing treat.
I absolutely adore recipes that deliver maximum enjoyment with minimal effort, and this one is a prime example. There’s literally no cooking involved (unless you need to slightly warm the hot fudge for easier spreading). You’re simply layering ice cream sandwiches, spreading toppings, and sprinkling crushed cookies – it couldn’t be easier!
Even though you’re using pre-made ingredients, the process of layering them in a specific way creates a new dessert experience. Choosing your favorite brand of ice cream sandwich or Oreo adds a small personal touch.
This recipe brilliantly showcases how a satisfying, impressive-looking dessert can be achieved through effortless homemade assembly, perfect for anyone regardless of their baking skill level.
Flavor Goal
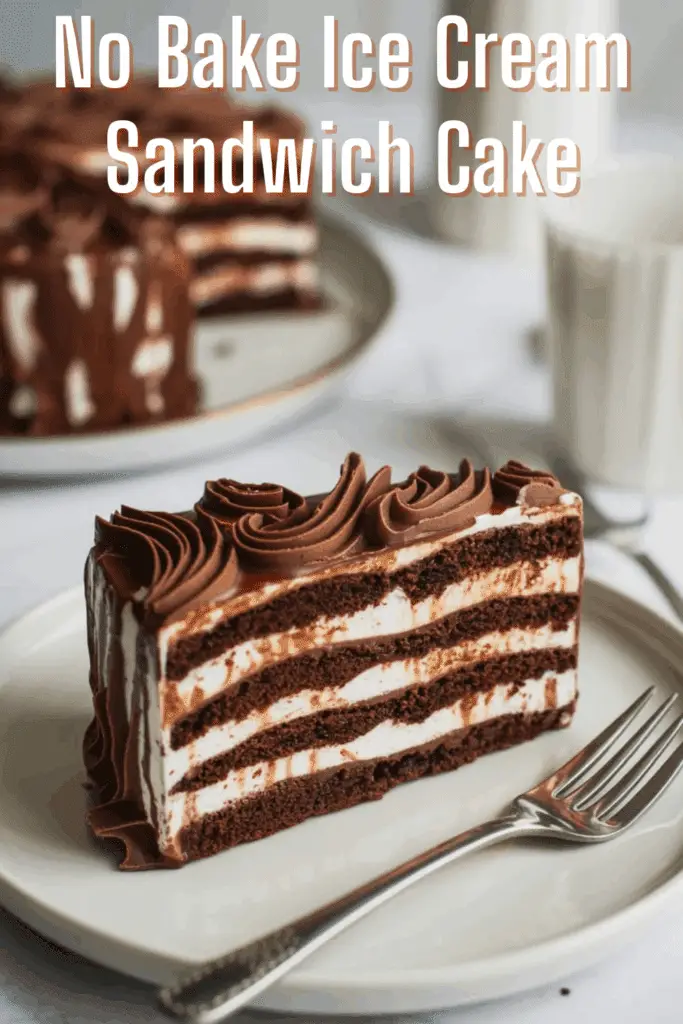
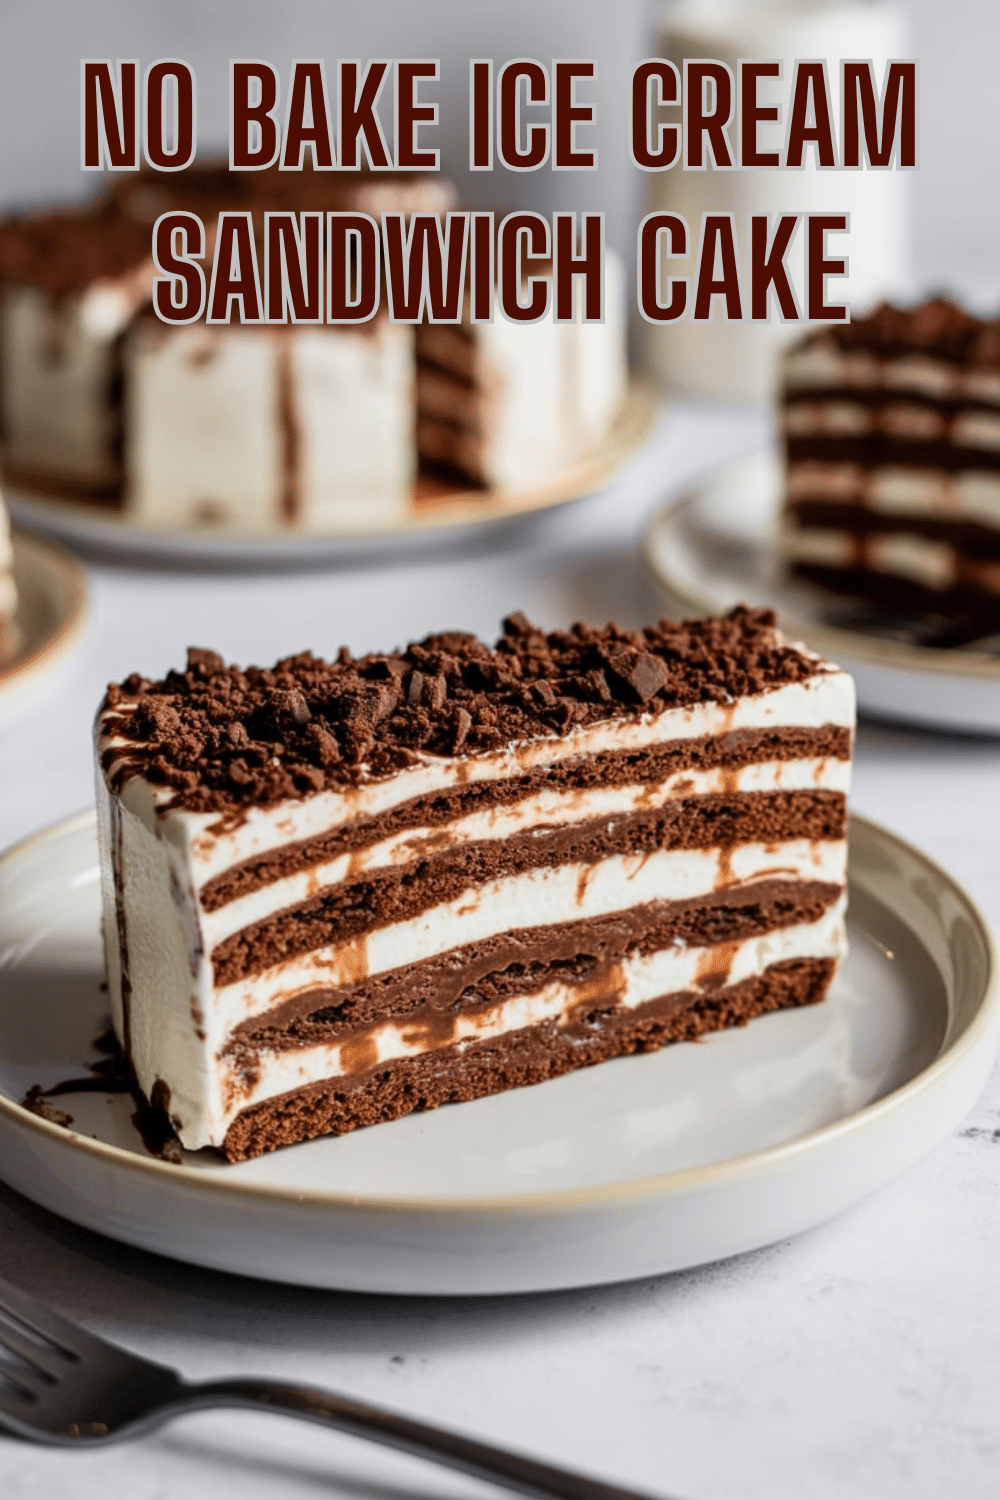
The primary flavor goal of this No-Bake Ice Cream Sandwich Cake is an indulgent combination of creamy vanilla ice cream, soft chocolate wafers, rich hot fudge sauce, light Cool Whip, and crunchy Oreo cookie bits. It aims for a classic cookies-and-cream meets hot fudge sundae flavor profile in an easy-to-slice frozen cake format.
The ice cream sandwiches provide alternating layers of sweet vanilla ice cream and soft, chocolatey wafer cookies.
The hot fudge sauce adds layers of deep, rich chocolate flavor and gooey texture (when slightly softened).
The Cool Whip layers contribute lightness, extra creaminess, and stability to the frozen structure.
The crushed Oreos sprinkled on top provide a crucial crunchy texture and intense cookies-and-cream flavor, contrasting with the creamy layers.
The overall effect is a cold, creamy, chocolatey, multi-textured frozen dessert that is undeniably sweet, indulgent, and crowd-pleasing.
Ingredient Insights
Let’s explore the super simple, store-bought stars:
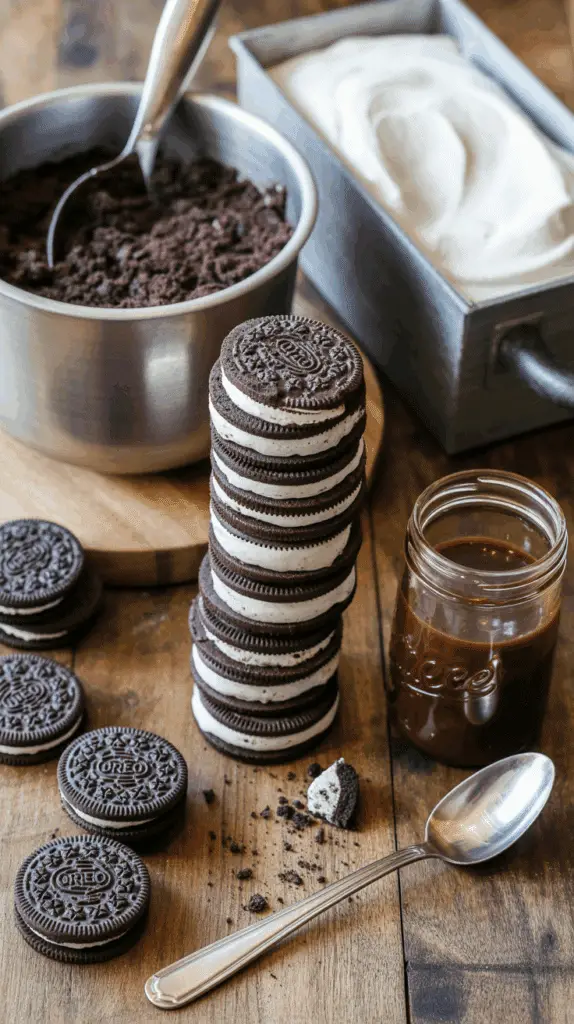
- Vanilla ice cream sandwiches: The structural “cake” layers. Standard rectangular vanilla ice cream between two soft chocolate wafers are classic. Ensure they fit your 9×13 pan (usually around 18-24 needed depending on brand size).
- Oreos (or similar chocolate sandwich cookies): Crushed for the topping layer, providing crunch and cookies-and-cream flavor. Crush coarsely for more texture.
- Hot fudge sauce: Provides intense chocolate flavor and gooeyness. Use a quality jarred hot fudge topping. Slightly warming it can make spreading easier, but don’t make it hot or it will melt the ice cream.
- Cool Whip (frozen whipped topping), thawed: Used for layering and topping. Provides lightness, sweetness, and stability when frozen. Ensure it’s fully thawed in the fridge.
That’s it! Just four main ingredients for an impressive dessert.
Essential Equipment
This recipe requires truly minimal equipment:
- A 9×13 inch baking dish: The vessel for assembling and freezing the cake. Glass or metal works.
- A spatula (preferably offset): Essential for spreading the hot fudge and Cool Whip layers evenly.
- Plastic wrap or a lid: For covering the cake during freezing.
- A food processor or rolling pin/zip-top bag: For crushing the Oreo cookies.
- Measuring cups.
- A knife or server: For slicing the frozen cake.
No mixer or oven needed!
List of Ingredients with Measurements
Here’s the complete list of ingredients, with precise measurements:
- 18-24 vanilla ice cream sandwiches (enough for two full layers in a 9×13 pan)
- 18 Oreos (or similar), crushed
- 1 (11.75 ounce) jar hot fudge sauce, divided
- 1 (16 ounce) tub Cool Whip (frozen whipped topping), thawed and divided
These simple quantities create a perfect 9×13 dessert cake.
Ensure Cool Whip is fully thawed before beginning assembly.

Step-by-Step Instructions (Super Easy Layering!)
Let’s assemble this incredibly simple frozen cake:
1. Prepare Pan and First Layer:
- Have your 9×13 inch pan ready. No need to grease it.
- Arrange a single, tight layer of ice cream sandwiches covering the entire bottom of the pan. Cut sandwiches as needed to fill any small gaps completely. (This usually takes 9-12 sandwiches).
2. Add First Fudge and Cool Whip Layers:
- Gently warm the hot fudge sauce slightly if it’s very thick, just until spreadable but not hot. Pour or spoon about 1/3 of the hot fudge sauce evenly over the first layer of ice cream sandwiches. Spread carefully with an offset spatula.
- Spread half of the thawed Cool Whip evenly over the hot fudge layer.
3. Add Second Sandwich, Fudge, and Cool Whip Layers:
- Arrange another complete layer of ice cream sandwiches on top of the Cool Whip.
- Spread another 1/3 of the hot fudge sauce over the second layer of sandwiches.
- Spread the remaining half of the Cool Whip evenly over the fudge layer.
4. Add Oreo and Final Fudge Topping:
- Sprinkle the crushed Oreos evenly over the top layer of Cool Whip.
- Drizzle the remaining 1/3 of the hot fudge sauce decoratively over the crushed Oreos.
5. Freeze Until Firm:
- Cover the baking dish tightly with plastic wrap or a lid.
- Place the assembled cake in the freezer for at least 4 hours, or preferably overnight, until completely firm and set.
6. Serve:
- Remove the cake from the freezer a few minutes before serving to make slicing slightly easier. Cut into squares or rectangles using a large, sharp knife (running the knife under hot water can help). Serve immediately.
Minimal effort for a fantastic frozen dessert!

Troubleshooting
This recipe is almost foolproof, but here are tips for perfection:
- Problem: Ice cream sandwiches melted too much during assembly.
- Solution: Work quickly! Have all ingredients ready. Ensure Cool Whip is thawed but still cold. Don’t overheat the hot fudge – just make it spreadable. If needed, pop the dish back in the freezer for 15-20 minutes between layers.
- Problem: Cake is extremely hard to slice.
- Solution: Let the frozen cake sit at room temperature for 5-10 minutes before slicing. Use a large, sturdy knife run under hot water and wiped dry between cuts.
- Problem: Layers are uneven or messy.
- Solution: Take care when spreading the fudge and Cool Whip layers to make them relatively even. Arrange sandwich layers tightly. Freeze completely solid before slicing.
- Problem: Hot fudge was too thick/thin for drizzling on top.
- Solution: Gently warm thick fudge slightly. Let thin fudge cool a bit more before drizzling for better control.
Work quickly and freeze completely!
Tips and Variations
Let’s customize this crowd-pleasing dessert:
- Tip: Use different flavors of ice cream sandwiches! Chocolate, Neapolitan, Cookies ‘n’ Cream, or even Mint Chocolate Chip would create fun variations.
- Variation: Swap Oreos for crushed Nutter Butters, Chips Ahoy, shortbread cookies, or chocolate graham crackers for the crunchy topping.
- Tip: For easier spreading, ensure Cool Whip is fully thawed in the refrigerator (this takes several hours or overnight).
- Variation: Add a layer of caramel sauce along with the hot fudge, or substitute caramel entirely for a different flavor.
- Tip: Cut sandwiches cleanly with a sharp knife to fill gaps in the layers.
- Variation: Fold mini chocolate chips, chopped nuts, or crushed candy bars (like Heath or Butterfinger) into the Cool Whip layers for extra texture.
- Variation: Use chocolate ice cream sandwiches for an ultra-chocolatey version.
Get creative with flavors and textures!
Serving and Pairing Suggestions
This No-Bake Ice Cream Sandwich Cake is the ultimate easy party dessert.
Serving: Serve frozen, sliced into squares or rectangles.
Pairing:
- Perfect for summer barbecues, potlucks, birthday parties (especially for kids!), or any casual gathering.
- It’s a complete dessert experience on its own!
- A glass of cold milk is the classic pairing.
- Offer extra hot fudge or caramel sauce on the side for drizzling, if desired.
It’s designed for easy slicing and sharing with a crowd.
Nutritional Information
This is a highly indulgent dessert made with ice cream sandwiches, Cool Whip, hot fudge, and Oreos. Nutritional info is approximate and depends heavily on specific brands and slice size (assuming 12-15 servings):
- Calories: 300-450+ per slice
- Fat: 15-25+ grams
- Saturated Fat: 8-15+ grams (High from ice cream, Cool Whip, fudge)
- Cholesterol: 20-40+ mg
- Sodium: 150-300+ mg
- Total Carbs.: 40-60+ grams
- Sugars: 30-45+ grams (Very high from all components)
- Dietary Fiber: 1-2 grams
- Protein: 3-5 grams
Definitely a decadent treat, high in sugar and fat, best enjoyed on special occasions or as part of a balanced diet.
PrintNo Bake Ice Cream Sandwich Cake
Make this super easy No-Bake Ice Cream Sandwich Cake! Layers of ice cream sandwiches, Cool Whip, hot fudge, and crushed Oreos create a perfect frozen party dessert.
Ingredients
Let’s explore the super simple, store-bought stars:
- Vanilla ice cream sandwiches: The structural “cake” layers. Standard rectangular vanilla ice cream between two soft chocolate wafers are classic. Ensure they fit your 9×13 pan (usually around 18-24 needed depending on brand size).
- Oreos (or similar chocolate sandwich cookies): Crushed for the topping layer, providing crunch and cookies-and-cream flavor. Crush coarsely for more texture.
- Hot fudge sauce: Provides intense chocolate flavor and gooeyness. Use a quality jarred hot fudge topping. Slightly warming it can make spreading easier, but don’t make it hot or it will melt the ice cream.
- Cool Whip (frozen whipped topping), thawed: Used for layering and topping. Provides lightness, sweetness, and stability when frozen. Ensure it’s fully thawed in the fridge.
That’s it! Just four main ingredients for an impressive dessert.
Essential Equipment
This recipe requires truly minimal equipment:
- A 9×13 inch baking dish: The vessel for assembling and freezing the cake. Glass or metal works.
- A spatula (preferably offset): Essential for spreading the hot fudge and Cool Whip layers evenly.
- Plastic wrap or a lid: For covering the cake during freezing.
- A food processor or rolling pin/zip-top bag: For crushing the Oreo cookies.
- Measuring cups.
- A knife or server: For slicing the frozen cake.
No mixer or oven needed!
Instructions
Here’s the complete list of ingredients, with precise measurements:
- 18-24 vanilla ice cream sandwiches (enough for two full layers in a 9×13 pan)
- 18 Oreos (or similar), crushed
- 1 (11.75 ounce) jar hot fudge sauce, divided
- 1 (16 ounce) tub Cool Whip (frozen whipped topping), thawed and divided
These simple quantities create a perfect 9×13 dessert cake.
Ensure Cool Whip is fully thawed before beginning assembly.
Step-by-Step Instructions (Super Easy Layering!)
Let’s assemble this incredibly simple frozen cake:
1. Prepare Pan and First Layer:
- Have your 9×13 inch pan ready. No need to grease it.
- Arrange a single, tight layer of ice cream sandwiches covering the entire bottom of the pan. Cut sandwiches as needed to fill any small gaps completely. (This usually takes 9-12 sandwiches).
2. Add First Fudge and Cool Whip Layers:
- Gently warm the hot fudge sauce slightly if it’s very thick, just until spreadable but not hot. Pour or spoon about 1/3 of the hot fudge sauce evenly over the first layer of ice cream sandwiches. Spread carefully with an offset spatula.
- Spread half of the thawed Cool Whip evenly over the hot fudge layer.
3. Add Second Sandwich, Fudge, and Cool Whip Layers:
- Arrange another complete layer of ice cream sandwiches on top of the Cool Whip.
- Spread another 1/3 of the hot fudge sauce over the second layer of sandwiches.
- Spread the remaining half of the Cool Whip evenly over the fudge layer.
4. Add Oreo and Final Fudge Topping:
- Sprinkle the crushed Oreos evenly over the top layer of Cool Whip.
- Drizzle the remaining 1/3 of the hot fudge sauce decoratively over the crushed Oreos.
5. Freeze Until Firm:
- Cover the baking dish tightly with plastic wrap or a lid.
- Place the assembled cake in the freezer for at least 4 hours, or preferably overnight, until completely firm and set.
6. Serve:
- Remove the cake from the freezer a few minutes before serving to make slicing slightly easier. Cut into squares or rectangles using a large, sharp knife (running the knife under hot water can help). Serve immediately.
Minimal effort for a fantastic frozen dessert
Recipe Summary and Q&A
Let’s conclude with a summary and common questions:
Recipe Summary:
No-Bake Ice Cream Sandwich Cake is an incredibly easy frozen dessert made by layering vanilla ice cream sandwiches, hot fudge sauce, and Cool Whip in a 9×13 inch pan. It’s topped with crushed Oreo cookies and more hot fudge, then frozen until firm before slicing and serving.
Q&A:
Q: Can I make this ahead of time? A: Yes! This dessert must be made ahead to allow sufficient freezing time (at least 4 hours, preferably longer). It can be made several days or even a week in advance.
Q: How do I store leftovers? A: Store leftover cake tightly covered with plastic wrap and/or foil in the freezer for up to 1-2 weeks for best quality.
Q: Can I use homemade whipped cream instead of Cool Whip? A: You can, but Cool Whip (frozen whipped topping) freezes with a more stable, lighter texture specifically suited for icebox cakes like this. Homemade whipped cream can become very hard/icy when frozen solid; if using it, fold it gently and expect a denser final texture. Stabilizing homemade whipped cream (with gelatin/pudding mix) might help.
Q: Can I use different cookies besides Oreos? A: Absolutely! Crushed Nutter Butters, Chips Ahoy, graham crackers, vanilla wafers, or shortbread would all be delicious alternatives for the topping.
Q: Does the hot fudge need to be hot? A: No, it shouldn’t be truly hot or it will melt the ice cream sandwiches excessively. If it’s very thick and hard to spread straight from the jar, warm it very slightly (e.g., microwave for 10-15 seconds) just until it reaches a spreadable consistency, but it should still be cool or lukewarm.
Did Our Recipe Hit The Spot?
There are no reviews yet. Be the first one to write one.


