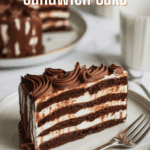
No Bake Ice Cream Sandwich Cake
Make this super easy No-Bake Ice Cream Sandwich Cake! Layers of ice cream sandwiches, Cool Whip, hot fudge, and crushed Oreos create a perfect frozen party dessert.
Ingredients
Let’s explore the super simple, store-bought stars:
- Vanilla ice cream sandwiches: The structural “cake” layers. Standard rectangular vanilla ice cream between two soft chocolate wafers are classic. Ensure they fit your 9×13 pan (usually around 18-24 needed depending on brand size).
- Oreos (or similar chocolate sandwich cookies): Crushed for the topping layer, providing crunch and cookies-and-cream flavor. Crush coarsely for more texture.
- Hot fudge sauce: Provides intense chocolate flavor and gooeyness. Use a quality jarred hot fudge topping. Slightly warming it can make spreading easier, but don’t make it hot or it will melt the ice cream.
- Cool Whip (frozen whipped topping), thawed: Used for layering and topping. Provides lightness, sweetness, and stability when frozen. Ensure it’s fully thawed in the fridge.
That’s it! Just four main ingredients for an impressive dessert.
Essential Equipment
This recipe requires truly minimal equipment:
- A 9×13 inch baking dish: The vessel for assembling and freezing the cake. Glass or metal works.
- A spatula (preferably offset): Essential for spreading the hot fudge and Cool Whip layers evenly.
- Plastic wrap or a lid: For covering the cake during freezing.
- A food processor or rolling pin/zip-top bag: For crushing the Oreo cookies.
- Measuring cups.
- A knife or server: For slicing the frozen cake.
No mixer or oven needed!
Instructions
Here’s the complete list of ingredients, with precise measurements:
- 18-24 vanilla ice cream sandwiches (enough for two full layers in a 9×13 pan)
- 18 Oreos (or similar), crushed
- 1 (11.75 ounce) jar hot fudge sauce, divided
- 1 (16 ounce) tub Cool Whip (frozen whipped topping), thawed and divided
These simple quantities create a perfect 9×13 dessert cake.
Ensure Cool Whip is fully thawed before beginning assembly.
Step-by-Step Instructions (Super Easy Layering!)
Let’s assemble this incredibly simple frozen cake:
1. Prepare Pan and First Layer:
- Have your 9×13 inch pan ready. No need to grease it.
- Arrange a single, tight layer of ice cream sandwiches covering the entire bottom of the pan. Cut sandwiches as needed to fill any small gaps completely. (This usually takes 9-12 sandwiches).
2. Add First Fudge and Cool Whip Layers:
- Gently warm the hot fudge sauce slightly if it’s very thick, just until spreadable but not hot. Pour or spoon about 1/3 of the hot fudge sauce evenly over the first layer of ice cream sandwiches. Spread carefully with an offset spatula.
- Spread half of the thawed Cool Whip evenly over the hot fudge layer.
3. Add Second Sandwich, Fudge, and Cool Whip Layers:
- Arrange another complete layer of ice cream sandwiches on top of the Cool Whip.
- Spread another 1/3 of the hot fudge sauce over the second layer of sandwiches.
- Spread the remaining half of the Cool Whip evenly over the fudge layer.
4. Add Oreo and Final Fudge Topping:
- Sprinkle the crushed Oreos evenly over the top layer of Cool Whip.
- Drizzle the remaining 1/3 of the hot fudge sauce decoratively over the crushed Oreos.
5. Freeze Until Firm:
- Cover the baking dish tightly with plastic wrap or a lid.
- Place the assembled cake in the freezer for at least 4 hours, or preferably overnight, until completely firm and set.
6. Serve:
- Remove the cake from the freezer a few minutes before serving to make slicing slightly easier. Cut into squares or rectangles using a large, sharp knife (running the knife under hot water can help). Serve immediately.
Minimal effort for a fantastic frozen dessert
Find it online: https://cookupjoy.com/no-bake-ice-cream-sandwich-cake/
