Introduction & Inspiration
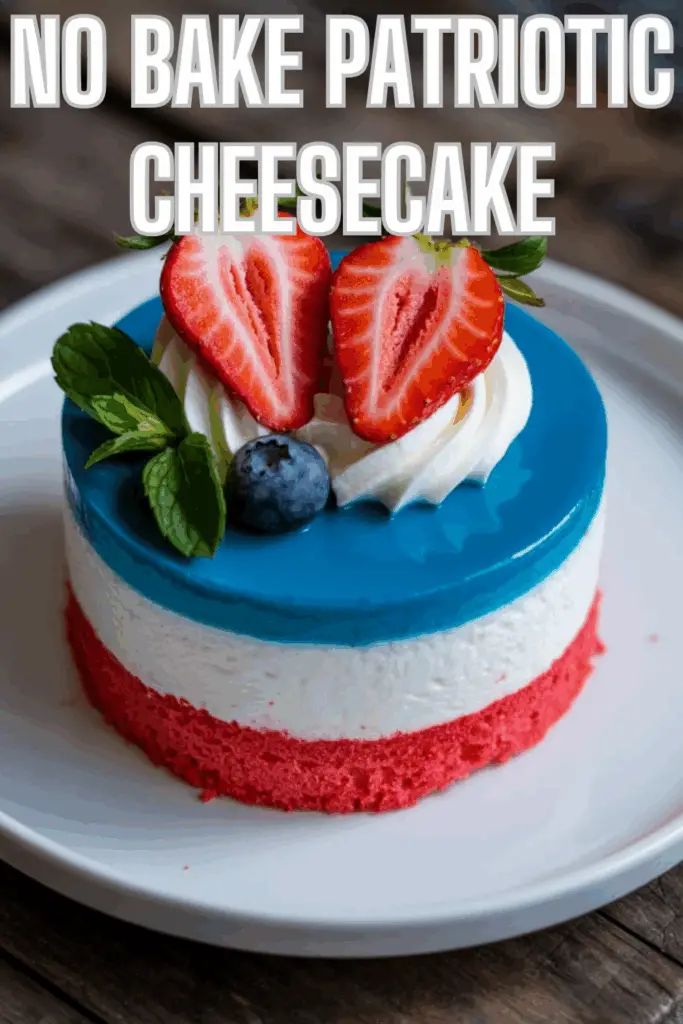
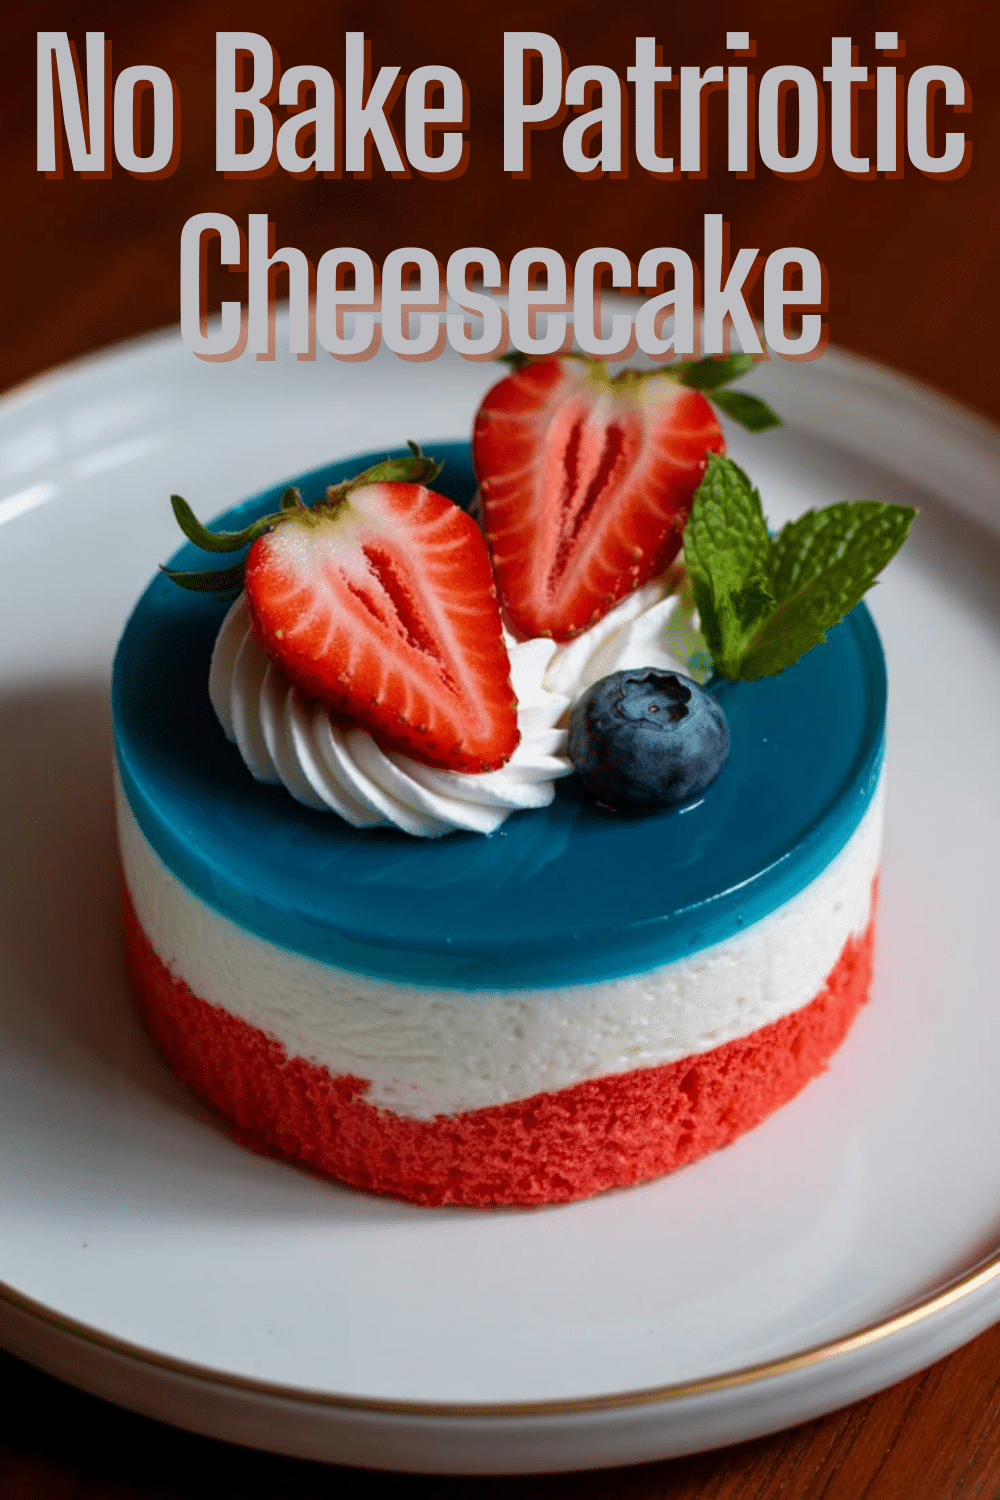
I absolutely love creating festive desserts for holidays, and this No Bake Patriotic Cheesecake recipe immediately caught my eye! It promises a stunning red, white, and blue layered cheesecake without even turning on the oven – perfect for warm-weather celebrations like Memorial Day or the Fourth of July. With a vibrant red Oreo crust, a creamy white cheesecake layer, a cool blue raspberry Jello-infused layer, and a fresh berry topping, it looked like the ultimate patriotic showstopper.
My inspiration came from wanting an impressive dessert that was relatively easy to assemble and didn’t require baking during potentially hot summer months. No-bake cheesecakes are fantastic for their creamy texture and simplicity, and this recipe cleverly uses Jello and homemade whipped cream to create distinct, colorful layers representing the American flag.
My goal is to guide you through making this fun and festive dessert. We’ll cover creating the red cookie crust, whipping up the two different creamy filling layers (one white cheesecake, one blue Jello-cream), assembling them perfectly, and adding the final frosting and berry touches. It seems like a fantastic project that yields a delicious and visually striking result.
Let’s get ready to assemble this no-bake patriotic beauty!
Nostalgic Appeal / Comfort Food Connection
This No Bake Patriotic Cheesecake taps into several layers of nostalgia and comfort. No-bake cheesecakes themselves, often featuring graham cracker or cookie crusts and creamy fillings set with gelatin or just chilling, are reminiscent of easy, crowd-pleasing desserts popular at potlucks and family gatherings for decades. They feel both indulgent and refreshingly simple.
The use of Jello, particularly flavored Jello mixes, is deeply nostalgic for many Americans, bringing back memories of colorful childhood desserts, jiggly salads, and simple sweet treats. Layered Jello desserts or those incorporating whipped topping (like the blue layer here) are retro classics.
The red, white, and blue theme instantly connects the dessert to patriotic holidays like the Fourth of July, Memorial Day, or Labor Day, evoking feelings of summer celebrations, barbecues, fireworks, and national pride.
Making and serving this cheesecake feels like creating a fun, festive, and slightly retro treat that combines the comfort of cheesecake with the playful nostalgia of Jello and patriotic celebrations.
Homemade Focus (Layering & Assembly Artistry)
While this No Bake Patriotic Cheesecake utilizes convenience items like Golden Oreos and Jello mix, the homemade focus shines through in the creation of the distinct layers and the careful assembly process. You’re crafting homemade whipped cream, blending a tangy cheesecake base, creating a unique Jello-cream layer, and assembling everything into a beautiful striped dessert.
I love recipes that involve layering different textures and flavors. This recipe requires you to make fresh whipped cream (stabilized by powdered sugar) and then divide it – folding half into the classic cream cheese mixture for the white layer, and whisking the other half into the cooled blue Jello for the vibrant blue layer. This homemade technique is key to the distinct layers.
Creating the vibrant red crust by combining crushed Golden Oreos with butter and red food coloring is another fun homemade touch. The final step of piping a decorative cream cheese frosting border and arranging fresh berries adds a polished, handcrafted finish.
From whipping the cream to carefully layering the fillings and decorating the top, the process emphasizes homemade assembly techniques to create a visually stunning and delicious dessert.
Flavor Goal
The primary flavor goal of this No Bake Patriotic Cheesecake is a refreshing and balanced combination of sweet, tangy, and fruity flavors with contrasting textures, all presented in a festive red, white, and blue theme.
The red crust, made from Golden Oreos, butter, and salt, provides a sweet, buttery, slightly salty vanilla cookie base with a vibrant color.
The white cheesecake layer offers the classic tangy, sweet, and creamy flavor of no-bake cheesecake, lightened by folded-in homemade whipped cream.
The blue layer, a combination of blue raspberry Jello and homemade whipped cream, provides a sweet, slightly artificial (in a fun, nostalgic Jello way) blue raspberry fruit flavor with a light, airy, almost mousse-like texture.
The optional cream cheese frosting border adds extra richness and tang, while the fresh strawberry and blueberry topping provides essential fresh fruit flavor and completes the patriotic color scheme.
Ingredient Insights
Let’s explore the components for this festive cheesecake:
Red Crust:
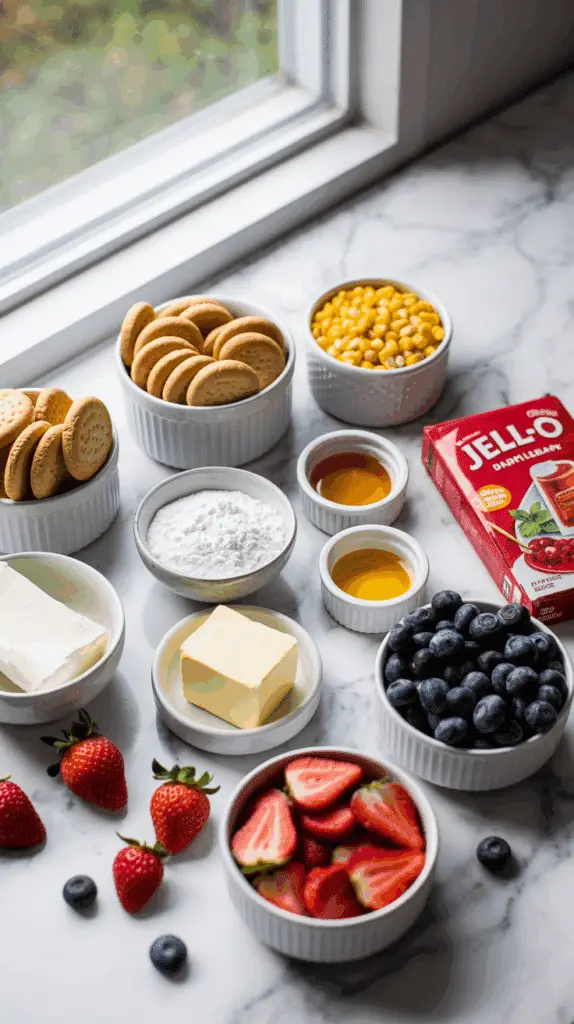
- Golden Oreos: Provide a vanilla cookie flavor (instead of chocolate) and light color that takes the red food coloring well. 1 Crush finely.
- Salted butter, melted: Binds the crumbs. Salted helps balance sweetness.
- Salt: Enhances flavor.
- Red gel food color: Provides the vibrant red crust color. Gel is more concentrated than liquid.
Filling Layer 1 (White):
- Cream cheese, softened: The tangy base. Full-fat block style, fully softened.
- Powdered sugar: Sweetens and helps stabilize.
- Vanilla extract: Flavor.
- Heavy whipping cream (half of total whipped amount): Folded in for lightness and creaminess.
Filling Layer 2 (Blue):
- Blue raspberry Jell-O: Provides flavor, color, and gelatin for setting. Other blue Jello flavors could work.
- Boiling water: Dissolves the Jello powder.
- Heavy whipping cream (other half of total whipped amount): Whisked into cooled Jello for a light, airy blue mousse layer.
Topping Frosting:
- Cream cheese, softened & Butter, softened: Rich, tangy frosting base.
- Powdered sugar, sifted: Sweetness and structure.
- Vanilla extract: Flavor.
Garnish:
- Fresh blueberries & Fresh strawberries, halved: Provide the blue and red fruit elements and fresh flavor.
Using room temperature cream cheese/butter for fillings/frosting and cold heavy cream for whipping are key. Cooling the Jello is crucial before adding cream.
Essential Equipment
This no-bake dessert requires mixing bowls, a mixer, and a springform pan:
- A 9-inch springform pan: Essential for building the layers and easy removal for a clean presentation.
- Nonstick cooking spray: For the pan.
- Food processor or large ziploc bag and rolling pin: For crushing Oreos.
- Mixing bowls (large for cheesecake base, medium for whipped cream, small/medium for Jello, medium for frosting).
- An Electric mixer (stand mixer or handheld): Crucial for whipping cream to stiff peaks and beating cream cheese mixtures smooth.
- Whisk: For dissolving Jello.
- Rubber spatula: Essential for folding whipped cream and spreading layers.
- Glass measuring cup: Useful for dissolving Jello.
- Piping bag and large star tip (optional): For decorative frosting border.
- Measuring cups and spoons.
- Plastic wrap: For covering during chilling.
A springform pan and electric mixer are highly recommended.
List of Ingredients with Measurements
Here’s the complete list of ingredients, with precise measurements (using provided weights where available for clarity):
Red Crust:
- 2 cups Golden Oreo crumbs (from ~20-24 cookies)
- 3 tablespoons salted butter, melted
- 1/4 teaspoon salt
- 1 teaspoon red gel food color (adjust for desired intensity)
Filling (Whipped Cream Component – make first):
- 2 cups heavy whipping cream, cold
- 1 cup powdered sugar (divided, for whipped cream & cheesecake base)
- 1 teaspoon vanilla extract (divided, for whipped cream & cheesecake base)
Filling (Cheesecake Layer – White):
- 16 ounces (2 blocks / 454g) cream cheese, softened
- 1 cup powdered sugar (remaining from whipped cream prep)
- 1 teaspoon vanilla extract (remaining from whipped cream prep)
- Half of the prepared whipped cream (from above)
Filling (Jell-O Layer – Blue):
- 1 package (3.94 oz) blue raspberry Jell-O mix
- 1 cup boiling water
- Other half of the prepared whipped cream (from above)
Topping Frosting:
- 6 oz cream cheese, softened
- 6 tablespoons (3/4 stick) salted butter, softened
- 3 cups powdered sugar, sifted
- 1 teaspoon vanilla extract
- (Optional: 1-2 tbsp milk/cream for consistency)
Garnish:
- Fresh blueberries
- Fresh strawberries, halved
Note: Recipe was slightly ambiguous on sugar/vanilla division for whipped cream vs cheesecake base. I’ve interpreted it as making one batch of sweetened vanilla whipped cream and dividing it, then adding the remaining sugar to the cream cheese base. Adjust if your interpretation differs.
Ensure cream cheese/butter are softened, heavy cream is cold.

Step-by-Step Instructions (Layer by Layer!)
Let’s assemble this festive no-bake cheesecake:
1. Prepare the Red Crust:
- Lightly spray a 9-inch springform pan with non-stick spray.
- Place Golden Oreos in a food processor; pulse until fine crumbs form. Add melted butter, salt, and red gel food color. Pulse until fully combined and crumbs are moist and evenly colored red.
- Press the red crumb mixture firmly into the bottom and slightly up the sides of the prepared springform pan.
- Place the crust in the freezer to set while preparing the filling (at least 15-20 minutes).
2. Prepare the Blue Jell-O Base:
- In a glass measuring cup or heatproof bowl, add the blue raspberry Jell-O mix powder. Pour 1 cup of boiling water over it.
- Whisk immediately until the Jello powder is completely dissolved.
- Set aside to cool completely to room temperature. Do NOT let it set. Cooling can be sped up with an ice bath if needed, but ensure it remains liquid.
3. Make the Stabilized Whipped Cream:
- In a large mixing bowl (preferably chilled), combine the cold heavy whipping cream, 1 cup total powdered sugar (measure this out now, you’ll use half here, half later), and 1 teaspoon total vanilla extract (measure now, use half here, half later).
- Beat with an electric mixer (whisk attachment) on medium-high speed for 4-5 minutes, or until stiff peaks form.
4. Make the White Cheesecake Filling:
- In a separate large bowl, beat the softened cream cheese with an electric mixer until completely smooth.
- Beat in the remaining 1 cup of powdered sugar (from Step 3) and the remaining 1 teaspoon of vanilla extract (from Step 3) until smooth and lump-free, about 5 minutes, scraping the bowl as needed.
- Gently fold half of the prepared whipped cream (from Step 3) into the cream cheese mixture using a rubber spatula until just combined and no white streaks remain.
5. Make the Blue Jell-O Filling:
- Ensure the dissolved Jello mixture (from Step 2) is completely cool.
- Gently whisk the other half of the prepared whipped cream (from Step 3) into the cooled liquid Jello until fully blended and uniform in color.
6. Layer the Cheesecake:
- Remove the frozen crust from the freezer.
- Spread the white cream cheese mixture evenly over the crust. Smooth the top with a spatula.
- Carefully pour the blue Jell-O mixture evenly over the white cream cheese layer.
7. Chill Until Fully Set:
- Cover the springform pan tightly with plastic wrap.
- Refrigerate the cheesecake for at least 5 hours, or preferably overnight, until both layers are completely firm and set.
8. Make Topping Frosting:
- Once cheesecake is set, prepare the frosting. In a medium bowl, beat the softened cream cheese and softened butter together with an electric mixer for 4-5 minutes until smooth and fluffy.
- Mix in the vanilla extract. Gradually add the sifted powdered sugar, one cup at a time, mixing on low until incorporated, then beating on medium-high until smooth and fluffy. (Add 1-2 tbsp milk/cream only if needed to reach desired piping consistency).
9. Decorate and Serve:
- Carefully remove the outer ring of the springform pan from the chilled cheesecake.
- Transfer the frosting to a piping bag fitted with a large star tip (like Ateco #887). Pipe decorative swirls or a border around the top edge of the set cheesecake.
- Arrange halved strawberries and fresh blueberries decoratively on top of the cheesecake inside the frosting border.
- Serve chilled.
Patience during chilling is essential for this layered dessert!

Troubleshooting
No-bake layered desserts require careful handling:
- Problem: Crust is too hard or too crumbly.
- Solution: Ensure correct butter-to-crumb ratio. Don’t press too hard, just firmly. If too hard, let it sit out briefly before serving. If too crumbly, slightly more melted butter might be needed next time.
- Problem: Fillings are lumpy.
- Solution: Cream cheese must be fully softened. Powdered sugar should be sifted. Beat cream cheese/sugar mixture thoroughly until smooth before folding in whipped cream. Ensure Jello powder was fully dissolved.
- Problem: Fillings didn’t set properly.
- Solution: Needs longer chilling time! Overnight is best. Ensure Jello mixture wasn’t too warm when combined with whipped cream. Ensure whipped cream reached stiff peaks.
- Problem: Layers bled together.
- Solution: Ensure the white cheesecake layer was spread evenly. Pour the blue Jello layer gently over the back of a spoon onto the white layer to minimize disturbance. Chill thoroughly.
- Problem: Topping Frosting is too soft/runny.
- Solution: Butter/cream cheese were too warm. Add more sifted powdered sugar. Chill the frosting before piping.
Thorough chilling and correct ingredient temperatures are key!
Tips and Variations
Let’s customize this patriotic treat:
- Tip: Use gel food coloring for the most vibrant red crust without adding excess liquid.
- Variation: Use a standard Oreo crust (chocolate) instead of coloring a Golden Oreo crust red.
- Tip: To ensure whipped cream is stable, make sure the heavy cream, bowl, and beaters are very cold before whipping.
- Variation: Use different Jello flavors and corresponding fresh fruit for other occasions (e.g., Strawberry Jello with strawberries, Lime Jello with kiwi).
- Tip: If you don’t have a springform pan, you can assemble this in a 9×9 or 8×8 square dish lined with parchment or foil sling for easier removal, serving as bars instead of a round cheesecake.
- Variation: Add 1/2 teaspoon of lemon zest to the white cheesecake layer for extra brightness.
- Variation: Fold mini white chocolate chips into the white cheesecake layer.
Have fun adapting the colors and flavors!
Serving and Pairing Suggestions
This No-Bake Patriotic Cheesecake is a festive centerpiece dessert.
Serving: Serve well-chilled, sliced into wedges. Use a hot, clean knife for the neatest slices.
Pairing:
- Occasions: Perfect for 4th of July, Memorial Day, Labor Day, or any summer party or potluck.
- Simplicity: It’s rich and flavorful enough to stand on its own.
- Beverages: Pairs well with lemonade, iced tea, coffee, or milk.
Its colorful layers make it incredibly eye-catching!
Nutritional Information
This is an indulgent no-bake cheesecake with multiple sweet, creamy layers. Nutritional info is highly approximate (per slice, assuming 10-12 slices):
- Calories: 450-600+
- Fat: 25-40+ grams
- Saturated Fat: 15-25+ grams (High from cream cheese, butter, heavy cream/Cool Whip)
- Cholesterol: 80-120+ mg
- Sodium: 250-400+ mg
- Total Carbs.: 50-70+ grams
- Dietary Fiber: 1-2 grams
- Sugars: 40-60+ grams (Very high from sugars, Oreos, Jello, Cool Whip)
- Protein: 5-8 grams
Definitely a special occasion dessert, high in sugar and fat. Using light cream cheese/Cool Whip can slightly reduce fat but may affect texture/setting.
PrintNo Bake Patriotic Cheesecake
Make this easy No-Bake Patriotic Cheesecake! Features a red Oreo crust, white cheesecake layer, blue Jello layer, and fresh berry topping.
Ingredients
Here’s the complete list of ingredients, with precise measurements:
- 2 ready-made pie crusts (standard size, usually found refrigerated or frozen)
- 3 cups diced Granny Smith apples (about 4 medium-small apples), peeled, cored, and diced small (approx. ¼-inch)
- 1/4 cup white sugar
- 1/4 cup light brown sugar, packed
- 1 teaspoon cinnamon
- 1/4 teaspoon nutmeg (OR use 1 ¼ tsp Apple Pie Spice instead of cinnamon & nutmeg)
- 2 tablespoons all-purpose flour
- 1 teaspoon vanilla extract
- 1 large egg
- 1 tablespoon water
- Optional: Sanding sugar for topping
These quantities make approximately 12 mini apple pies.
Have apples prepped and crusts ready (thawed if frozen) before starting assembly.
Instructions
Let’s create these adorable apple bites:
1. Preheat Oven and Prepare Muffin Pan:
- Preheat oven to 425°F (220°C).
- Lightly coat a standard 12-cup muffin pan with non-stick cooking spray. Set aside.
2. Prepare Egg Wash:
- In a small bowl, beat the egg with 1 tablespoon of water using a fork until well blended. Set aside.
3. Prepare Apple Filling:
- Peel, core, and finely dice the Granny Smith apples (about ¼-inch cubes).
- In a medium bowl, combine the diced apples, vanilla extract, 2 tablespoons all-purpose flour, white sugar, brown sugar, cinnamon, and nutmeg (or apple pie spice).
- Mix thoroughly until the apple pieces are completely and evenly coated with the sugar and spice mixture. Set aside.
4. Prepare Muffin Tin Crusts:
- Gently unroll the ready-made pie crusts onto a lightly floured surface if needed.
- Using a 4-inch round cookie cutter, cut out 12 circles from the two pie crusts. Gather any scraps.
- Carefully press each dough circle into a cup in the prepared muffin pan, gently pushing it down to line the bottom and sides.
- Use the prepared egg wash to lightly brush the bottom surface of each pie crust cup. This helps create a barrier against moisture.
5. Fill the Crusts:
- Scoop the prepared apple mixture evenly into each of the 12 crust-lined muffin cups.
6. Create Lattice Topping:
- Gather the leftover pie crust scraps and gently re-roll them out thin on a lightly floured surface.
- Using a sharp knife or pizza cutter, slice the dough into thin strips (less than ¼-inch wide).
- Lay about 6 strips across the top of each filled pie in a crisscross (lattice) pattern. Trim any excess dough hanging over the edges. Gently press the ends of the strips onto the edge of the bottom crust to seal slightly.
7. Finish and Bake:
- Brush the lattice tops generously with the remaining egg wash.
- If desired, sprinkle sanding sugar evenly over the egg-washed lattice tops for sparkle and crunch.
- Carefully place the muffin pan in the preheated oven.
- Bake for 20-25 minutes, or until the crust is a light golden brown color and the filling is bubbling gently.
8. Cool and Serve:
- Carefully remove the muffin pan from the oven and let the mini pies rest in the pan for about 5-10 minutes. This allows the filling to set slightly.
- Gently loosen the edges if needed with a thin knife or small offset spatula and carefully remove the warm apple bites from the muffin pan. Place them on a wire rack to cool further or serve warm.
Enjoy these perfect little pies
Recipe Summary and Q&A
Let’s conclude with a summary and common questions:
Recipe Summary:
No-Bake Patriotic Cheesecake features a red Golden Oreo crust, a white layer of sweetened cream cheese folded with homemade whipped cream, and a blue layer of blue raspberry Jello mixed with more homemade whipped cream. After thorough chilling in a springform pan, it’s topped with a piped cream cheese frosting border and garnished with fresh strawberries and blueberries.
Q&A:
Q: Can I make this ahead of time? A: Yes! This dessert must be made ahead to allow for proper chilling and setting (at least 5 hours, overnight is best). It can be fully assembled (including frosting border) 1-2 days ahead and kept refrigerated. Add fresh berry garnish just before serving for best appearance.
Q: How do I store leftovers? A: Store covered tightly in the refrigerator for up to 4-5 days.
Q: Can I freeze this cheesecake? A: Yes, no-bake cheesecakes generally freeze well. Freeze whole or in slices, wrapped very well, for up to 1-2 months. Thaw overnight in the refrigerator. The texture might be slightly denser after freezing.
Q: Can I use Cool Whip instead of making homemade whipped cream for the filling layers? A: Yes, you can substitute an equivalent amount (likely one 8-oz tub, divided) of thawed Cool Whip. Fold half into the cream cheese mixture and gently whisk the other half into the cooled Jello. The texture will be slightly different but still delicious and stable.
Q: Does the blue Jello layer taste artificial? A: Flavored Jello inherently has an artificial fruit taste. Using “Blue Raspberry” provides the necessary color and a familiar fruity flavor that works in this fun, nostalgic dessert context.
Did Our Recipe Hit The Spot?
There are no reviews yet. Be the first one to write one.


