Are you searching for that perfect, old-fashioned pie crust recipe? The kind that is unbelievably flaky, tender, rich with buttery flavor, and, most importantly, never fails? This incredible, from-scratch “Grandma’s” Perfect Pie Crust is that recipe. We’re talking a classic, foolproof dough that is wonderfully pliable, easy to roll out, and bakes up into the most magnificent, golden-brown, and shatteringly flaky crust that will be the star of your holiday table.
This isn’t just another pie crust recipe; it’s a guide to mastering a legendary, multi-generational secret. Forget the store-bought crusts and the crumbly, hard-to-work-with doughs of years past. We’ll show you the simple but crucial professional secrets—including the “magic” combination of two fats and one secret ingredient—that guarantee a flawless, tender, and delicious result every single time.
Table of Contents
Table of Contents
Recipe Overview: The Ultimate Flaky & Tender Foundation
What makes this “Grandma’s” pie crust so spectacularly delicious is its incredible texture and its rich, classic flavor. This recipe is a masterpiece of classic American baking. The dough itself is a classic pâte brisée, made brilliantly foolproof with two simple secrets. The first is a combination of butter and shortening—the key to a crust that has both rich, buttery flavor and a melt-in-your-mouth, tender flakiness. The second is the addition of a single egg, a classic “grandma” trick that makes the dough wonderfully rich, pliable, and incredibly easy to roll out without cracking or tearing.
| Metric | Time / Level |
| Total Time | 1 hour 30 minutes (includes 1-hour chilling) |
| Active Prep Time | 20 minutes |
| Difficulty Level | Easy |
| Yields | 2 double-crust pies or 4 single-crusts (approx.) |
The Baker’s Pantry: The Essential Ingredients & Tools
The beauty of this classic recipe is in its simplicity, which means the quality of your ingredients and the proper technique are absolutely paramount.
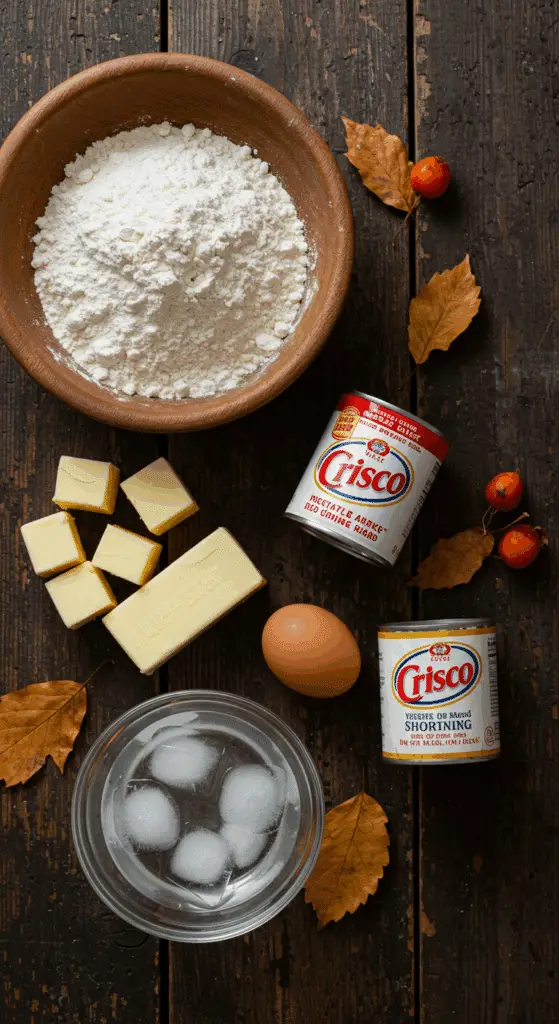
- The “Foolproof” Fat Duo (The Secret to Perfection!):
- Cold Unsalted Butter: The key to incredible flavor! The butter is what gives your crust that rich, delicious, bakery-quality taste.
- Cold Vegetable Shortening: The secret to tenderness! Shortening has a higher melting point than butter, which is the key that helps to create an incredibly tender and flaky crust that has a beautiful “short” texture and is less prone to becoming tough.1
- The “Easy-to-Roll” Secret (The Egg!):
- One Egg: This is the brilliant, old-fashioned trick that makes this dough a joy to work with. The fat and protein in the egg add richness and help to bind the dough, making it much more pliable and far less likely to tear or crack as you roll it out.2
- The Key Equipment:
- A Pastry Blender: The classic, “grandma-approved” tool for this job! A simple, inexpensive pastry blender (or “dough cutter”) is the perfect tool for cutting the cold fats into the flour quickly and efficiently.3
The Baker’s Masterclass: The Secrets to a Shatteringly Flaky Crust
Making a perfect pie crust is a beautiful bit of kitchen science, and it’s surprisingly easy if you follow these three simple, non-negotiable rules.
- COLD, COLD, COLD!: This is the golden rule of pie making. Your butter, shortening, and water must all be ice cold. The reason is simple: a flaky crust is made up of dozens of paper-thin layers of dough separated by pockets of fat. In the hot oven, these cold pockets of butter and shortening melt and release steam, which is the magic that pushes the layers of dough apart and creates that signature, shatteringly flaky texture.
- The “Pea-Sized Pieces” Technique: The secret to those flaky layers is to not over-mix your fats. When you are cutting your cold fats into the flour, you want to stop when the mixture resembles coarse cornmeal, with some larger, bean-sized bits of butter still visible. These are your “flavor-flakes”!
- The CHILL is CRUCIAL!: After you have made your dough, you must let it rest in the refrigerator for at least 1 hour. This crucial, patient step does two important things: it allows the gluten to relax (which makes the dough more tender and much easier to roll out without shrinking), and it re-chills the fats, which is essential for that perfect, flaky result.

Step-by-Step to the Best Old-Fashioned Pie Crust
This impressive skill is a joy to master.
Part 1: The “Cutting In” Method
Step 1: In a large mixing bowl, whisk together your 4 cups of all-purpose flour, 3 tablespoons of white sugar, and 2 teaspoons of salt.
Step 2: Add your 1 3/4 cups of cold shortening and your 3/4 cup of cold, cubed butter to the bowl.
Step 3 (The Most Important Step!): Using a pastry cutter or your fingertips, “cut” the fats into the dry ingredients until the mixture is crumbly and resembles coarse cornmeal with some small, pea-sized bits of butter still visible.
Part 2: The “Just Combined” Mix and Crucial Chill
Step 1: In a separate, small bowl, mix your 1 egg with the 1/2 cup of cold water.
Step 2: Blend this egg mixture into your flour-and-fat mixture. Use a fork or your hands to gently mix until the dough is just combined.
Step 3: Form the dough into a disk, wrap it in plastic wrap, and refrigerate it until it is thoroughly chilled, for at least 1 hour, or preferably overnight.
This recipe makes a generous amount of dough, perfect for your holiday baking. You can divide it into 2, 3, or 4 disks, depending on the pies you plan to make.

Old-Fashioned Pie Crust (Grandma’s Foolproof Recipe!)
A classic, old-fashioned recipe for a homemade pie crust, attributed to ‘Ruth’s Grandma.’ This recipe uses all shortening, which makes for an incredibly tender, flaky dough that holds its shape well. The simple, from-scratch dough is enriched with an egg and is perfect for any sweet or savory pie.
Ingredients
- 4 cups all-purpose flour
- 1 ¾ cups shortening
- 3 tablespoons white sugar
- 2 teaspoons salt
- 1 egg
- ½ cup water
Instructions
- In a large mixing bowl, combine the all-purpose flour, shortening, sugar, and salt.
- Blend the ingredients together with a pastry cutter or your fingers until the mixture is crumbly and resembles coarse meal.
- In a small bowl, lightly beat the egg with the water.
- Pour the egg and water mixture into the flour mixture. Blend with a fork or your hands until the dough just comes together. Do not overmix.
- Divide the dough in half, form each half into a flat disk, and wrap tightly in plastic wrap.
- Chill in the refrigerator for at least 30 minutes, or until ready to use.
- Once chilled, roll out on a floured surface to fit your pie pan.
Notes
- This is a very large batch of pie dough, enough for two double-crust 9-inch pies or four single-crust 9-inch pies.
- Using a pastry cutter (or your fingers) to work the cold shortening into the flour is key to creating a flaky texture.
- Do not overwork the dough once the liquid is added, as this will make the crust tough. Mix only until the ingredients are just combined.
- The dough must be chilled for at least 30 minutes to rest the gluten and make it easier to roll out without shrinking.
Storage and Make-Ahead Tips
Pie dough is the ultimate make-ahead baking component!
- Make-Ahead: This is the perfect, stress-saving holiday recipe! You can prepare your dough up to 3 days in advance and store it, well-wrapped, in the refrigerator.
- Storage: Store the raw dough, well-wrapped, in the refrigerator for up to 3 days.
- Freezing: This dough freezes beautifully! You can freeze the disk of dough, well-wrapped in a double layer of plastic wrap and then placed in a freezer-safe bag, for up to 3 months. Simply thaw it in the refrigerator overnight before you plan to use it.
For more recipe follow my pinterest account
Frequently Asked questions (FAQs)
Q1: Why is my pie crust tough?
The most common culprits are overworking the dough or not using cold enough ingredients. Be sure to stop mixing your dough as soon as it comes together, and make sure your butter, shortening, and water are all ice cold!
Q2: Can I make this in a food processor?
Yes, absolutely! It’s even faster. Simply pulse your dry ingredients first. Add your cold fats and pulse 8-10 times, until you have those pea-sized bits. Then, with the machine running, pour your egg and water mixture in and pulse just until the dough begins to come together.
Q3: Can I make this with all butter?
You can, but you will lose the “Grandma’s secret” and the signature, melt-in-your-mouth tenderness that only the shortening can provide. The all-butter crust will also be a bit more difficult to roll out without tearing.
Q4: My crust shrunk in the pan when I baked it. What happened?
Shrinking is almost always because the dough was not allowed to rest for long enough. The chilling time is crucial for allowing the gluten in the dough to relax.
Q5: Can I use this crust for a savory pie?
Yes! This is a fantastic, all-purpose crust. For a savory pie, like a quiche or a chicken pot pie, you can simply reduce the sugar to 1 teaspoon, or omit it entirely.


