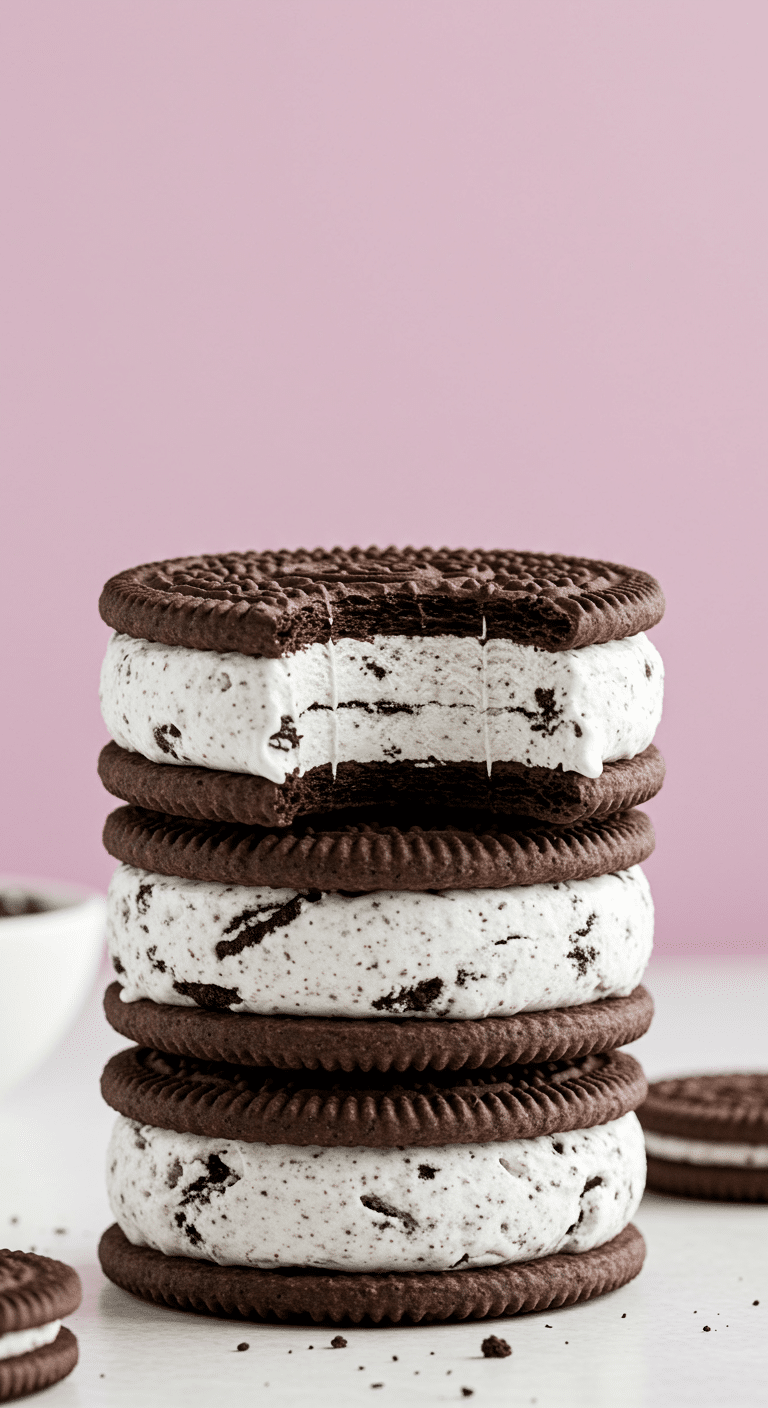
What’s better than a classic cookies and cream ice cream sandwich on a hot summer day? A giant, homemade version that’s richer, creamier, and packed with even more authentic Oreo flavor in every single bite! Get ready to create the most popular treat of the summer with this incredible, easy-to-make recipe for Homemade Oreo Ice Cream Sandwiches.
This isn’t just a recipe; it’s a fun and delicious project that will blow the store-bought version out of the water. We’ll show you how to create a simple, no-churn cookies and cream ice cream that is unbelievably creamy and delicious. This dreamy filling is then sandwiched between two rich, buttery, and intensely chocolatey layers of Oreo cookie crust. It’s a make-ahead, freezer-friendly dessert that is guaranteed to be a massive hit with kids and adults alike.
Table of Contents
Table of Contents
Recipe Overview: The Ultimate Summer Project
What makes these Homemade Oreo Ice Cream Sandwiches so special is the incredible flavor and texture you get from making them from scratch. The no-churn ice cream method is brilliantly simple and requires no special equipment, creating a result that is far superior to any store-bought tub. The double layer of a soft, yet sturdy, chocolate cookie crust provides the perfect, rich contrast to the sweet, creamy filling. It’s a perfect treat to keep stashed in your freezer for any time a craving strikes.
| Metric | Time / Level |
| Total Time | 8 hours 20 minutes (includes freezing) |
| Active Prep Time | 20 minutes |
| Difficulty Level | Easy |
| Servings | 8-10 sandwiches |
The Essential Ingredients for the Best Ice Cream Sandwiches
This recipe uses a handful of simple, classic ingredients to create a truly spectacular frozen dessert.
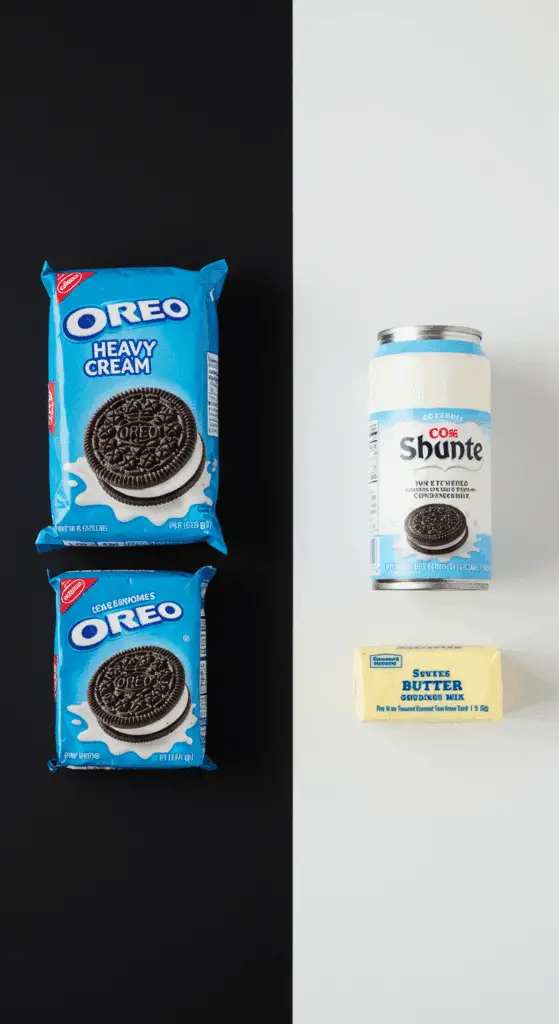
- Whole Oreo Cookies: This is the heart and soul of our dessert, used in two crucial ways. We use the entire cookie—chocolate wafer and cream filling—to create the crust layers and to fold into the ice cream. Using the whole cookie provides the most authentic, intense cookies and cream flavor.
- The No-Churn Ice Cream Base: This is the magical, two-ingredient secret to ridiculously creamy homemade ice cream without an ice cream maker.
- Heavy Whipping Cream: Fresh, cold heavy cream is whipped to stiff peaks, which incorporates air into the mixture and creates the light, scoopable texture of real ice cream.
- Sweetened Condensed Milk: This is the other key player. It provides the sweetness for the ice cream, but more importantly, its high sugar content lowers the freezing point of the mixture. This prevents large ice crystals from forming and ensures your final product is creamy and smooth, not icy and hard.
- Unsalted Butter: Melted butter is the simple binder that transforms the Oreo cookie crumbs into a delicious, press-able crust that holds its shape beautifully once frozen.
- Vanilla Extract: A touch of pure vanilla extract adds a lovely, warm depth of flavor to the ice cream base that perfectly complements the chocolate cookies.

Step-by-Step to Homemade Perfection
Follow these simple, detailed steps to create these stunning and delicious frozen treats.
Step 1: Prepare the Oreo Cookie Crust Mixture
First, line a 9×9-inch square pan with two crisscrossing pieces of parchment paper, allowing the paper to overhang on all four sides. These overhangs will act as “handles” to easily lift the entire frozen block out later. Set the pan aside.
Place the whole Oreo cookies into the bowl of a food processor and pulse them into fine crumbs. If you don’t have a food processor, you can place the Oreos in a large, sturdy, resealable plastic bag and crush them thoroughly with a rolling pin.
Weigh out 100g (which is about 1 cup) of the Oreo crumbs and set them aside in a separate small bowl. These will be folded into your ice cream filling later.
Transfer the rest of the Oreo crumbs to a medium mixing bowl. Pour in the melted unsalted butter and stir with a fork until all the crumbs are evenly moistened and the mixture resembles wet sand.
Step 2: Form the Bottom Crust and Chill
Add half of the buttery Oreo crumb mixture to your prepared parchment-lined pan.
Use a spatula or the flat bottom of a small measuring cup or glass to press the cookie crumbs into a flat, even, and compact layer on the bottom of the pan.
Place this pan in the freezer to chill and firm up while you prepare the ice cream filling. Cover the bowl with the remaining half of the Oreo crumb mixture and keep it somewhere warm (like near your preheating oven, if you had one on) or at room temperature to ensure the butter stays melted and it remains easy to spread later.
Step 3: Make the No-Churn Oreo Ice Cream Filling
In a large, chilled mixing bowl, use an electric hand mixer or a stand mixer to beat the cold heavy cream and the vanilla extract on medium-high speed until it becomes thick and forms stiff peaks.
Pro Tip: “Stiff peaks” means that when you lift the beaters out of the cream, the peak that forms will stand up straight and not curl over. This indicates that you have whipped the maximum amount of air into the cream, which is key for a light ice cream texture.
In a separate medium bowl, pour in the sweetened condensed milk. Slowly pour the condensed milk into the whipped cream while gently folding the mixture together with a large rubber spatula until no white streaks remain.
Finally, add the 100g of Oreo crumbs that you set aside earlier to the cream mixture. Gently fold them in until they are just combined.
Step 4: Assemble the Layers and Freeze
Remove the pan with the chilled Oreo crust from the freezer. Pour the creamy Oreo ice cream mixture on top of the chilled crust. Use an offset spatula or the back of a spoon to smooth it into a flat, even layer.
Freeze this for 1 to 2 hours, until the surface of the ice cream is firm to the touch. This step ensures you’ll have a clean, distinct layer when you add the top crust.
Once the surface is firm, gently spread the remaining Oreo crust mixture evenly on top of the ice cream layer. Use the same flat-bottomed cup or spatula to gently press the crust into a flat and even layer. Be careful not to press too hard, as the middle of the ice cream may not be completely solid yet.
Step 5: Final Freeze and Slicing
Cover the pan with plastic wrap or foil and return it to the freezer. Freeze again for at least 6 hours, or preferably overnight. This long, final freeze is essential to ensure the entire block is solid and can be cut into clean sandwiches.
Once it’s fully frozen, use the parchment paper “handles” to lift the entire ice cream block out of the pan and onto a cutting board.
Use a large, sharp knife to cut the block into 8 rectangular slices or 9 square slices. For the cleanest cuts, run the blade of the knife under hot water and wipe it dry between each slice.
Serve the sandwiches immediately, or wrap each individual sandwich in plastic wrap or wax paper and return them to the freezer for later.

The Ultimate Homemade Oreo Ice Cream Sandwiches
A homemade, no-bake recipe for thick Oreo ice cream sandwiches made in a square pan. The dessert features a top and bottom layer made from a simple crust of crushed Oreo cookies and melted butter. The filling is a creamy, no-churn ‘cookies and cream’ ice cream, created by folding crushed Oreos into a mixture of sweetened condensed milk and freshly whipped cream. The entire block is frozen solid and then sliced into individual rectangular sandwiches.
- Prep Time: 30 minutes
- Cook Time: 0 minutes
- Total Time: 7 hours 30 minutes (includes freezing time)
- Yield: 8 sandwiches
- Category: Dessert
- Method: No-Bake, Layering, Freezing
- Cuisine: American
- Diet: Vegetarian
Ingredients
- 600 g (about 50) whole Oreo cookies
- 170 g (about 3/4 cup) unsalted butter, melted
- 500 g (about 2 cups) heavy cream
- 1 tablespoon vanilla extract
- 150 g (about 1/2 cup) condensed milk
Instructions
- Line a 9×9-inch square pan with parchment paper, leaving an overhang on the sides to act as handles.
- In a food processor, pulse the Oreo cookies into fine crumbs. Set aside 100g (about ½ cup) of the crumbs for the filling.
- Transfer the rest of the Oreo crumbs to a medium bowl. Add the melted butter and stir until the mixture resembles wet sand.
- Press half of the buttered crumb mixture into the bottom of the prepared pan in a flat, even layer. Place the pan in the freezer to chill.
- Make the Filling: In a large mixing bowl, use an electric mixer to whip the heavy cream and vanilla extract until stiff peaks form.
- Slowly pour in the condensed milk while gently folding with a spatula until no streaks remain.
- Fold in the 100g of reserved Oreo crumbs until just combined.
- Assemble and Freeze: Pour the ice cream mixture over the chilled Oreo crust and smooth it into an even layer. Freeze for 1-2 hours, until the surface is firm to the touch.
- Gently spread the remaining Oreo crust mixture on top of the firm ice cream layer and press it down into a flat, even layer.
- Freeze for at least 6 more hours, or preferably overnight, until completely solid.
- To serve, use the parchment paper handles to lift the block out of the pan. Run a sharp knife under hot water, wipe it dry, and cut the block into 8 rectangular sandwiches.
- Serve immediately or wrap individually and return to the freezer.
Notes
- Using a parchment paper sling in the pan is a key step that makes it easy to remove the frozen block for cutting.
- The ice cream layer needs to be partially frozen before adding the top crust to prevent it from mixing in.
- The long final freeze of at least 6 hours is crucial for the sandwiches to become firm enough to slice cleanly.
- Running your knife under hot water before each cut will help you make neat, clean slices.
Storage and Make-Ahead Tips
These homemade ice cream sandwiches are the absolute perfect make-ahead treat.
- Make-Ahead: You can make these sandwiches up to a month in advance! They are a fantastic dessert to have stashed in your freezer for a hot day or for unexpected guests.
- Storage: To store, wrap each individual ice cream sandwich tightly in plastic wrap or wax paper, and then place them in a larger, freezer-safe bag or container. This double-wrapping will protect them from freezer burn and keep them fresh for up to one month.
For more recipe follow my Pinterest account
Creative Recipe Variations
This easy no-churn recipe is a fantastic base for all sorts of delicious ice cream sandwich creations.
- Ultimate Mint Oreo Ice Cream Sandwiches: For a refreshing mint-chocolate version, swap the vanilla extract for 1 teaspoon of pure mint extract. You can also use Mint Oreos instead of the classic variety for an extra layer of minty flavor.
- Peanut Butter Oreo Swirl: For a delicious peanut butter twist, gently warm 1/4 cup of creamy peanut butter in the microwave until it is pourable. After you have spread the ice cream mixture into the pan in Step 4, drizzle the peanut butter over the top and use a knife to gently swirl it into the ice cream before the first freeze.
- Use a Different Cookie: Feel free to experiment with other cookies for the crust and the mix-in! Golden Oreos would make a wonderful vanilla-forward “birthday cake” version. Nutter Butters would create an intense peanut butter cookie sandwich. Or try Biscoff cookies for a spiced, caramelized flavor.
Enjoy Your Ultimate Homemade Treat!
You’ve just created a truly special frozen dessert that is miles ahead of anything you can buy in a box. These Homemade Oreo Ice Cream Sandwiches are a fun, satisfying project that results in a rich, creamy, and intensely flavorful treat. They are the perfect way to celebrate summer and are guaranteed to be a huge hit with everyone you share them with.
We hope you love every last, delicious bite!
If you enjoyed making this recipe, please leave a comment below or share it with a friend who loves all things cookies and cream!
Frequently Asked Questions (FAQs)
Q1: What is no-churn ice cream, and how does it work?
No-churn ice cream is a magical method for making creamy ice cream without an ice cream maker. It works by combining two key ingredients: whipped heavy cream, which provides the air and light, frozen texture, and sweetened condensed milk, which provides the sweetness and, crucially, its high sugar content prevents the mixture from freezing into a solid, icy block. The result is a perfectly smooth and scoopable ice cream.
Q2: Do I have to use a food processor to crush the Oreos?
No, a food processor is just the fastest and easiest way to get very fine, uniform crumbs. If you don’t have one, you can place the cookies in a large, heavy-duty, resealable plastic bag. Seal it, getting most of the air out, and then use a rolling pin, a meat mallet, or even a heavy can to whack and roll over the cookies until they are finely crushed.
Q3: Can I make this recipe dairy-free or vegan?
Yes, with a few smart swaps, you can make a delicious vegan version! Use a vegan “chocolate sandwich cookie” for the crust with melted coconut oil or vegan butter. For the filling, use a can of sweetened condensed coconut milk and whip a can of chilled, full-fat coconut cream (just the thick, solid part) instead of the heavy dairy cream.
Q4: How long will these homemade ice cream sandwiches last in the freezer?
When wrapped properly to protect them from freezer burn, these sandwiches will last for up to one month in the freezer. Be sure to wrap each one individually and tightly in plastic wrap, and then store them in a freezer-safe bag or container.
Q5: Why is it important to chill the first crust layer before adding the filling?
Chilling the first layer of the crust in the freezer for a few minutes helps the melted butter and cookie crumbs to firm up and solidify. This creates a solid, stable base so that when you spread the soft ice cream filling on top, the two layers remain distinct and don’t get mixed together.


