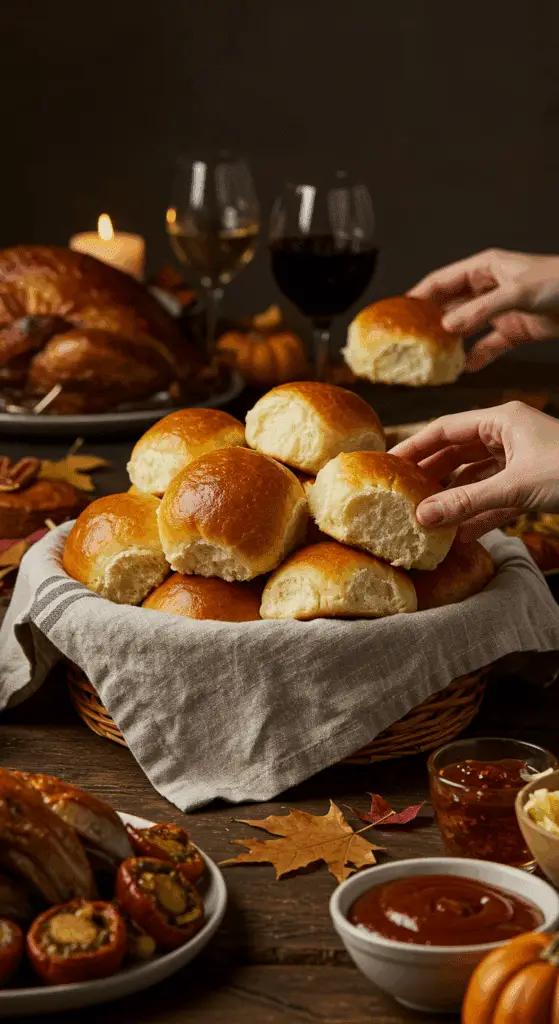
Is there anything more satisfying or more deeply comforting than pulling a warm, buttery, and unbelievably soft dinner roll from a freshly baked batch? These classic Parker House Rolls, baked together in a pan to create the ultimate, tender pull-apart texture, are the stuff of holiday dreams. This is, without a doubt, the only recipe you will ever need for perfect, fluffy, and completely irresistible dinner rolls.
This isn’t just a recipe; it’s a guide to mastering a true American legend. We’ll show you the simple, time-honored secrets to creating a beautifully soft and rich “enriched” yeast dough from scratch. Finished with a generous brushing of melted butter and a sprinkle of flaky sea salt, these rolls are so incredibly delicious, they are destined to become the most requested item at every Thanksgiving dinner, holiday feast, and special family meal.
Table of Contents
Table of Contents
Recipe Overview: The Ultimate Pull-Apart Dinner Rolls
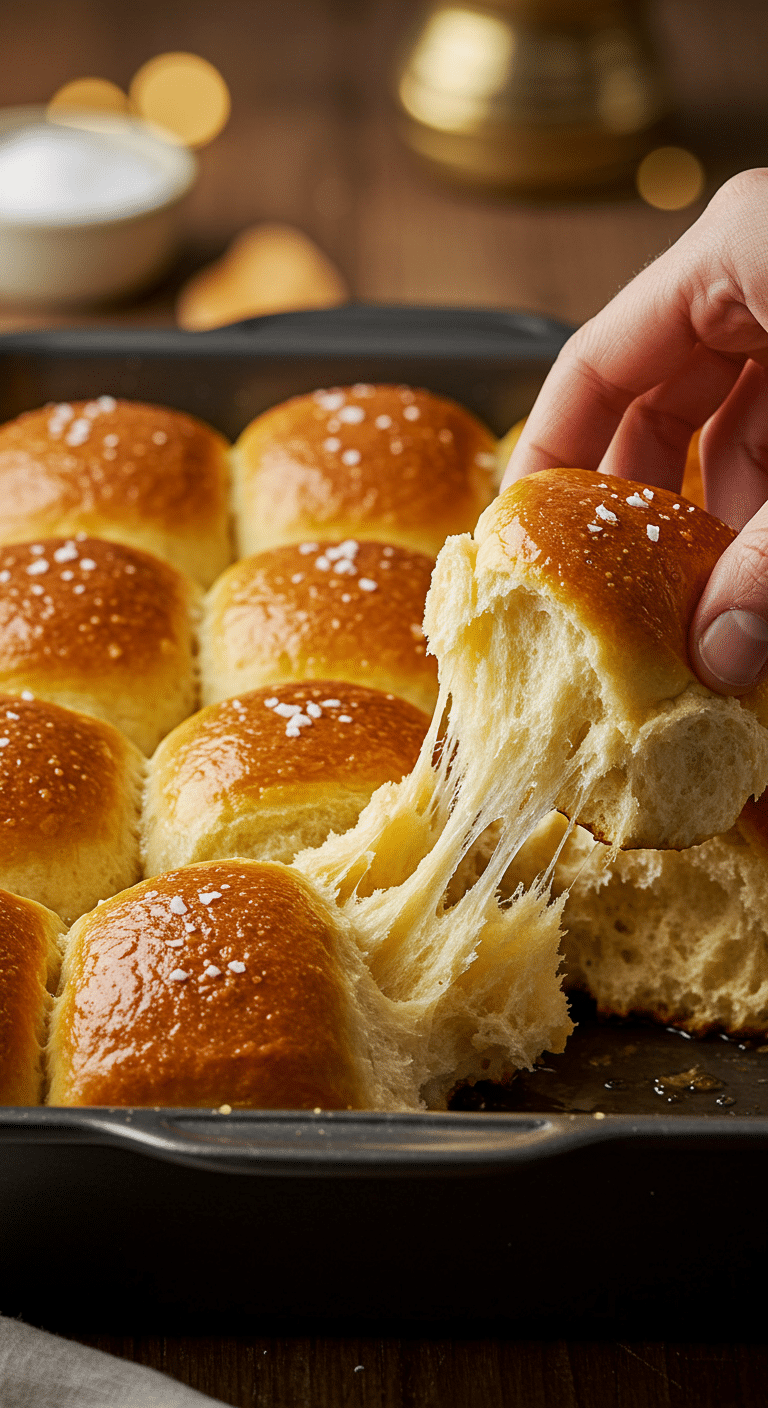
What makes these Parker House Rolls the absolute “best ever” is their incredible, cloud-like texture and their rich, buttery flavor. The magic comes from an “enriched” dough, which includes milk, butter, sugar, and eggs, resulting in a supremely soft and tender crumb. By shaping the dough into individual balls and baking them snugly together in a pan, we create rolls with wonderfully soft sides that are an absolute joy to pull apart. It’s a rewarding, from-scratch baking project that is perfect for making ahead.
| Metric | Time / Level |
| Total Time | 3 hours 15 minutes (includes rising time) |
| Active Prep Time | 25 minutes |
| Difficulty Level | Intermediate |
| Servings | 24 rolls |
The Essential Ingredients for the Fluffiest Rolls
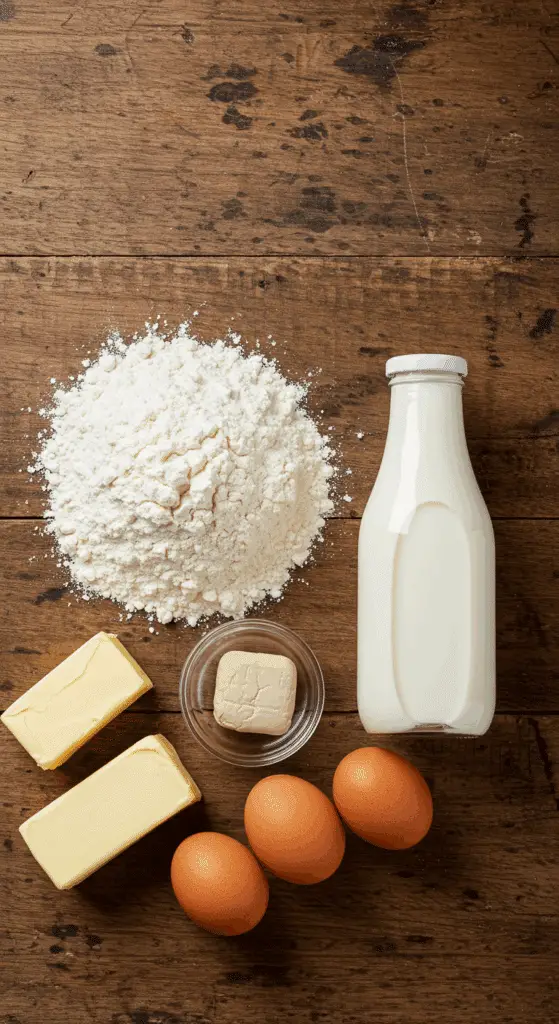
This recipe uses a handful of simple pantry staples to create a truly spectacular, enriched dough.
- The Enriched Dough: This is what gives the rolls their signature soft texture and rich flavor.
- Whole Milk, Unsalted Butter, and Sugar: We start by gently heating the milk and melting in the butter and sugar. This combination is the key to a tender, soft crumb and a lovely, subtle sweetness that is the hallmark of a Parker House roll.
- Large Eggs: Eggs add richness, flavor, and a beautiful golden color to the dough.
- The Leavener (Active Dry Yeast): We use active dry yeast, which needs to be “bloomed” or activated in warm water first. This simple step proves your yeast is alive and ready to work its magic, giving your rolls a beautiful, airy rise.
- All-Purpose Flour: The structural foundation of our rolls. All-purpose flour has the perfect amount of protein to create a dough that is both strong enough to hold its shape and tender enough for a soft, fluffy roll.
- The Finishing Touches (Butter & Flaky Sea Salt): These two final ingredients are non-negotiable for the best result! A generous brushing of melted butter after baking gives the rolls a beautiful, shiny finish and a final layer of incredible flavor. A sprinkle of flaky sea salt, like Maldon, before baking provides a beautiful, sparkling look and a delightful, subtle crunch that perfectly balances the richness of the rolls.

Step-by-Step to Perfect Pull-Apart Rolls
Making yeast dough is a fun and rewarding process. A stand mixer makes this enriched dough especially easy to handle.
Step 1: Create the Enriched Dough
Step 1: In a small saucepan, heat the 1 1/3 cups of whole milk over medium-high heat until it just starts to simmer around the edges, about 4 minutes. Remove the pan from the heat. Stir in the 1 stick (8 tablespoons) of butter and the 1/3 cup of sugar until they are completely melted. Set this mixture aside to cool until it is just lukewarm (around 110°F).
Step 2: While the milk mixture is cooling, activate your yeast. In a small liquid measuring cup, put the 1/2 cup of warm water and stir in the packet of active dry yeast. Let it sit for about 5 minutes, until the mixture becomes foamy and fragrant. This “blooming” process proves your yeast is active and ready to go.
Step 3: In the bowl of a stand mixer fitted with the dough hook, combine the cooled milk mixture, the foamy yeast mixture, the 3 lightly beaten eggs, the 1 1/2 teaspoons of kosher salt, and half of the flour (about 2 3/4 cups).
Step 4: Mix on medium speed for about 2 minutes, until the ingredients are smooth. With the mixer on low speed, slowly add the remaining flour, mixing until a smooth, soft ball of dough forms that pulls away from the sides of the bowl.
Step 2: Knead the Dough and The First Rise
Increase the mixer speed to medium-high and continue to knead the dough with the dough hook for about 5 minutes. The dough should be very smooth and elastic.
Coat a large, clean bowl with nonstick cooking spray. Place the dough inside the bowl, turning it once to coat. Cover the bowl with plastic wrap and let it rise in a warm, draft-free place until it has doubled in size, which will take about 60 to 75 minutes.
Step 3: Shape the Rolls for a Pull-Apart Bake
Step 1: While the dough is rising, melt the remaining 1 stick (8 tablespoons) of butter in a small saucepan. Set it aside.
Step 2: Spray a 9×13-inch baking pan with nonstick cooking spray, line it with a sheet of parchment paper, and then spray the paper as well. This will ensure your rolls come out perfectly.
Step 3: Lightly dust a clean work surface with flour. Gently punch down the risen dough to release the air and turn it out onto the prepared surface. Pat the dough into an even thickness.
Step 4: Use a chef’s knife or a bench scraper to divide the dough into 24 equal pieces. Gently shape each piece into a smooth ball to create small rolls.
Step 5: Place the shaped rolls in your prepared baking dish in neat rows of 4 by 6. Then, use a pastry brush to brush the tops of the rolls with about half of the melted butter (4 tablespoons).
Step 4: The Second Rise and Baking
Cover the pan with plastic wrap and let the rolls rise in a warm place for a final time, until they are puffy and have almost doubled in size, about 30 to 40 minutes.
While the rolls are on their second rise, preheat your oven to 350°F (175°C).
Remove the plastic wrap from the risen rolls and sprinkle them lightly with a pinch of flaky sea salt.
Bake for about 40 minutes, until the rolls are puffed up and a deep golden brown on top.
As soon as you remove the rolls from the oven, brush them with the remaining 4 tablespoons of melted butter. Serve the rolls warm, straight from the pan.

The Best Fluffy Parker House Rolls (Pull-Apart Style!)
A classic recipe for ‘The Best Parker House Rolls,’ a type of soft, buttery, and slightly sweet dinner roll. The enriched dough is made with milk, butter, sugar, and eggs, and is prepared using a stand mixer. The dough goes through two rising periods to develop a light and fluffy texture. The shaped rolls are brushed with melted butter before their final rise and again after baking, then finished with a sprinkle of flaky sea salt.
- Prep Time: 2 hours 15 minutes (includes rising times)
- Cook Time: 40 minutes
- Total Time: 2 hours 55 minutes
- Yield: 24 rolls
- Category: Bread
- Method: Baking
- Cuisine: American
- Diet: Vegetarian
Ingredients
- 1 1/3 cups whole milk
- 2 sticks (16 tablespoons) unsalted butter, cut into pieces
- 1/3 cup sugar
- 1/2 cup warm water (about 110°F)
- One 1/4-ounce package active dry yeast (2 1/4 teaspoons)
- 3 large eggs, lightly beaten
- 1 1/2 teaspoons kosher salt
- 5 3/4 cups all-purpose flour, plus more for dusting
- Nonstick cooking spray
- Flaky sea salt, such as Maldon, for sprinkling
Instructions
- In a small saucepan, heat the milk over medium-high heat until it just starts to simmer. Remove from the heat and stir in 1 stick (8 tablespoons) of butter and the sugar until melted. Set aside to cool.
- In a small cup, stir the yeast into the warm water. Let it sit for about 5 minutes, until foamy.
- In the bowl of a stand mixer fitted with a dough hook, combine the cooled milk mixture, the yeast mixture, the beaten eggs, 1 1/2 teaspoons of salt, and half of the flour. Mix on medium speed for about 2 minutes until smooth.
- Slowly add the remaining flour, mixing until a smooth ball forms. Increase the speed to medium-high and knead the dough for about 5 minutes until it is very smooth and elastic.
- Coat a large bowl with nonstick cooking spray and place the dough inside. Cover and let it rise in a warm place for 60 to 75 minutes, until doubled in size.
- Melt the remaining 1 stick (8 tablespoons) of butter in a small saucepan.
- Spray a 9-by-13-inch baking pan with nonstick spray and line it with parchment paper.
- Lightly dust a work surface with flour. Punch down the risen dough and turn it out onto the surface. Divide the dough into 24 equal pieces and shape each into a ball.
- Place the dough balls in the prepared baking dish in rows of 4 by 6. Brush the tops with half (4 tablespoons) of the melted butter.
- Cover the rolls with plastic wrap and let them rise in a warm place for 30 to 40 minutes, until almost doubled in size.
- Meanwhile, preheat the oven to 350°F.
- Remove the plastic wrap, sprinkle the rolls lightly with flaky sea salt, and bake for about 40 minutes until puffed and golden brown.
- Remove the rolls from the oven and immediately brush with the remaining 4 tablespoons of melted butter. Serve warm.
Notes
- The recipe recommends using a stand mixer with a dough hook for ease of preparation.
- This dough requires two separate rises to achieve its characteristic light and fluffy texture.
- The article mentions a ‘Cook’s Note’ for the flour, but the note itself is not provided.
- Brushing the rolls with butter both before and after baking is a key step for their rich flavor and soft crust.
Storage and Make-Ahead Tips
These Parker House Rolls are a fantastic make-ahead option for a big holiday meal.
- Storing Baked Rolls: The baked rolls are at their best on the day they are made. However, you can store them in an airtight bag or container at room temperature for up to 3 days.
- Reheating: To bring back that fresh-from-the-oven softness, you can re-warm the rolls, wrapped in foil, in a 350°F oven for about 5-10 minutes.
- Freezing Baked Rolls: Let the baked rolls cool completely, then place them in a freezer-safe bag. They will keep in the freezer for up to 3 months. Thaw at room temperature and re-warm as directed above.
- Freezing the Dough: After you have shaped the dough into 24 balls, you can place them on a parchment-lined baking sheet and freeze them until solid. Then, transfer the frozen dough balls to a freezer-safe bag. When you are ready to bake, arrange the frozen balls in the prepared pan, let them thaw and rise at room temperature (this will take a few hours), and then bake as directed.
For more recipe follow my Pinterest account
Creative Recipe Variations
This classic, enriched dough is a wonderful base for your own delicious and creative twists.
- Classic Folded Parker House Rolls: For the iconic “pocketbook” shape, after the first rise, roll the dough out to 1/2-inch thickness and cut it into 3-inch circles. Brush the circles with melted butter, press a crease just off-center, and then fold the larger side over the smaller side before the second rise.
- Savory Herb & Garlic Rolls: For a wonderful, savory roll, you can add 2 to 3 tablespoons of finely chopped fresh herbs (like rosemary, thyme, and chives) to the dough along with the flour. After baking, brush the hot rolls with a garlic-infused melted butter.
- Sweet Cinnamon-Sugar Morning Rolls: For a delicious breakfast treat, you can brush the rolls with melted butter and sprinkle them generously with cinnamon-sugar before the final bake instead of the flaky sea salt.
Enjoy a True American Classic!
You’ve just created a truly special, from-scratch bake that is a treasured piece of American culinary history. These Classic Parker House Rolls, with their impossibly soft, pillowy texture and their rich, buttery flavor, are guaranteed to be the most requested and beloved bread on your holiday table. It’s a rewarding and deeply satisfying project that proves the magic of simple, classic baking.
We hope you and your loved ones enjoy every last, perfect, buttery bite!
If you enjoyed making this recipe, please leave a comment below or share it with a friend who loves to bake!
Frequently Asked Questions (FAQs)
Q1: What is the “windowpane test,” and how do I know when my dough is perfectly kneaded?
The windowpane test is a great way to check if you have developed enough gluten in your dough. Take a small piece of the kneaded dough and gently stretch it between your fingers. If the gluten is well-developed, you should be able to stretch the dough thin enough to see light through it without it tearing, like a small “windowpane.” If it tears easily, it needs a few more minutes of kneading.
Q2: Why did my rolls come out dense instead of fluffy?
Dense rolls are usually caused by an issue with the rise. This can happen if your yeast was not active (always check for the foamy “bloom”), if your kitchen was too cold for the dough to rise properly, or if you did not let the dough rise for long enough (it should truly double in size).
Q3: Can I use instant yeast instead of active dry yeast?
Yes. If you are using instant yeast, you can typically skip the “blooming” step and add the instant yeast directly to the bowl with your dry ingredients.
Q4: What is the best way to make these rolls ahead for a big holiday like Thanksgiving?
The absolute best make-ahead method is to freeze the unbaked, shaped dough balls. On Thanksgiving morning, you can arrange the frozen dough balls in your prepared pan. Let them thaw and rise in a warm place (this will take 2-3 hours). Then, you can bake them fresh, so you have perfectly hot, fresh-from-the-oven rolls for dinner with minimal last-minute work.
Q5: Can I make these rolls without a stand mixer?
Yes, you absolutely can! A stand mixer just makes the kneading process a bit easier. To make them by hand, simply mix all the ingredients together in a large bowl with a wooden spoon until a shaggy dough forms. Then, turn the dough out onto a floured surface and knead it by hand for about 8 to 10 minutes, until it is smooth, elastic, and passes the windowpane test.


