Introduction & Inspiration
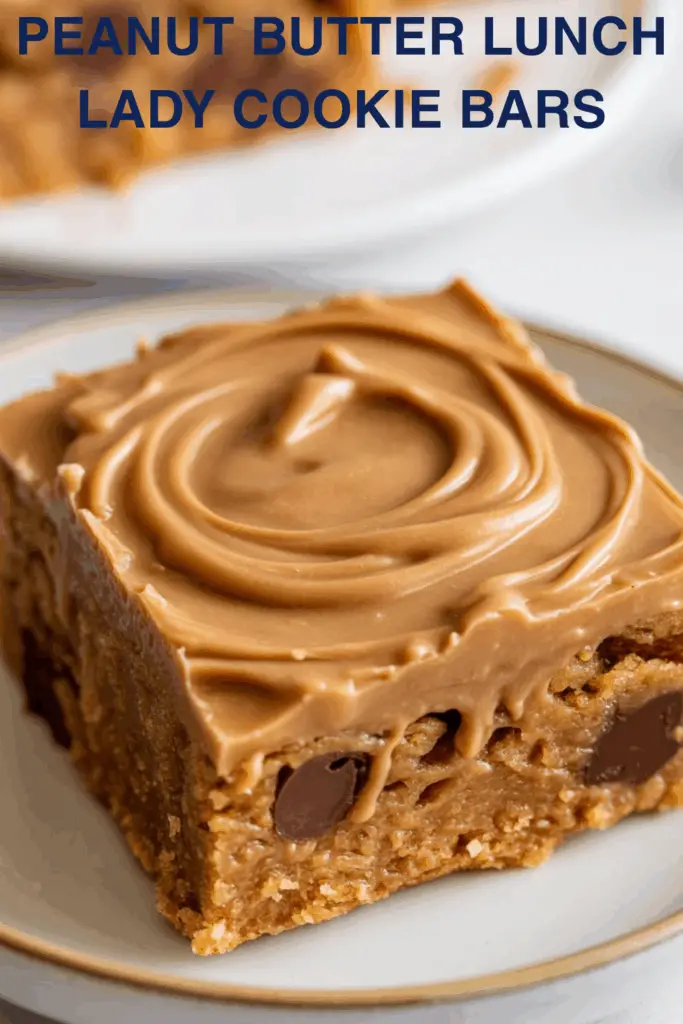
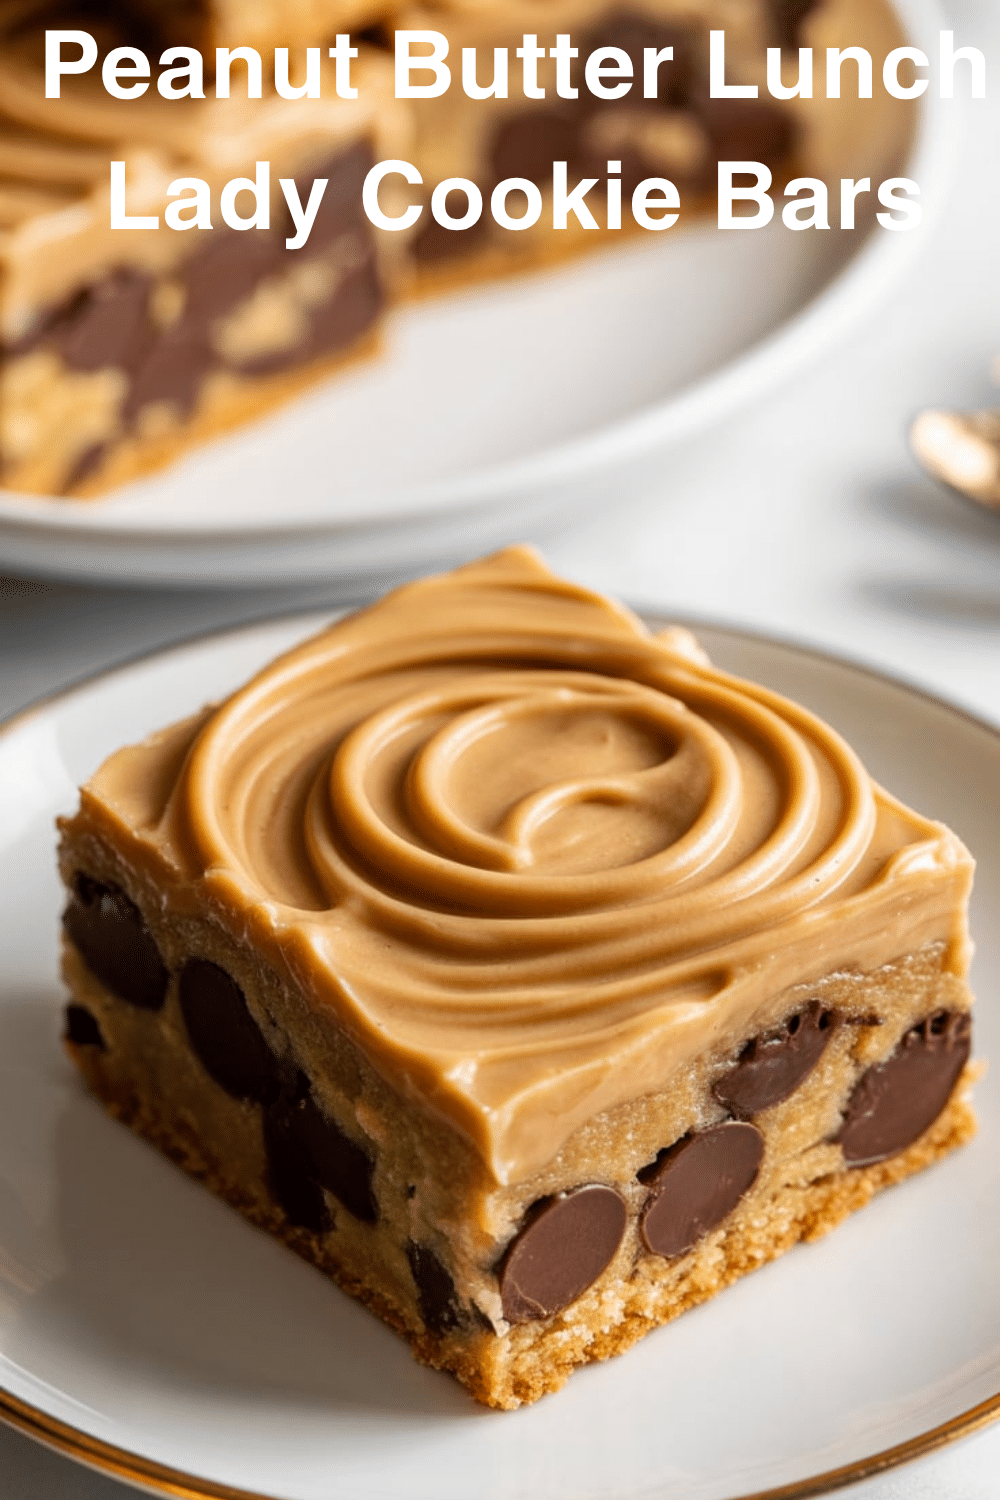
There’s a special kind of magic in recipes that transport you right back to childhood, and these “Lunch Lady” Peanut Butter Cookie Bars do exactly that! This recipe promises a soft, chewy, incredibly rich peanut butter cookie bar, baked to perfection in a single pan and topped with a simple, sweet vanilla glaze. It immediately reminded me of those classic, comforting treats from school cafeterias or bake sales that were always a favorite.
My inspiration for diving into this particular recipe came from a deep sense of nostalgia and a love for simple, crowd-pleasing bar desserts. Peanut butter cookies are a timeless classic, and turning them into an easy-to-make bar with a simple glaze seemed like the perfect way to satisfy a comfort food craving without the fuss of scooping individual cookies.
My goal is to guide you step-by-step through making these delightful and satisfying cookie bars. We’ll cover creating the rich peanut butter dough, baking it to chewy perfection, and finishing it with an easy homemade glaze. They’re perfect for sharing, packing in lunchboxes, or enjoying anytime you need a taste of simple, sweet comfort.
Let’s get ready to bake up some delicious nostalgia!
Nostalgic Appeal / Comfort Food Connection
These “Lunch Lady” Peanut Butter Cookie Bars are a direct line to comforting, nostalgic memories for so many of us. The term “lunch lady” treat evokes a specific kind of simple, satisfying, and often sheet-pan-style dessert that was a highlight of school lunches. These were the reliable, unpretentious, and utterly delicious bars that always brought a smile.
Peanut butter cookies themselves are a cornerstone of American home baking, a classic comfort food beloved for their rich, nutty, sweet-and-salty flavor. This recipe captures that iconic taste in an easy-to-make bar format, which is often associated with potlucks, bake sales, and casual family gatherings.
The simple vanilla glaze on top is another familiar touch, adding just the right amount of extra sweetness and a smooth finish, much like a classic sugar cookie or simple doughnut.
Making and eating these bars feels like indulging in a cherished memory – a taste of simple, happy times and the pure comfort of a homemade peanut butter treat.
Homemade Focus (From-Scratch Dough, Simple Glaze)
This recipe for “Lunch Lady” Peanut butter Cookie Bars is a wonderful example of creating a classic, comforting dessert entirely from scratch using straightforward baking techniques. You’re crafting a rich, flavorful peanut butter cookie dough and a simple vanilla glaze using basic pantry staples.
I love recipes that focus on fundamental baking methods for delicious results. This one starts with the classic technique of creaming together softened butter and sugars until light and fluffy, which incorporates air and creates a tender texture. Adding peanut butter, eggs, and vanilla builds the rich, homemade flavor base. The dry ingredients are then gently mixed in to form the perfect cookie bar dough.
Making the simple glaze yourself by whisking together powdered sugar, milk, and vanilla ensures a fresh taste and allows you to control the consistency perfectly. Spreading this homemade glaze over the completely cooled bars is a satisfying final touch.
From creaming the butter to drizzling the final glaze, every step emphasizes the care and superior taste that comes from traditional, from-scratch homemade baking.
Flavor Goal
The primary flavor goal of these “Lunch Lady” Peanut Butter Cookie Bars is a rich, intense peanut butter flavor delivered in a soft, chewy, slightly dense cookie bar, all complemented by a simple, sweet vanilla glaze. It aims for that perfect, satisfying balance of nutty, sweet, and slightly salty notes characteristic of the best peanut butter cookies.
The cookie bar itself, made with both granulated and brown sugar, creamy peanut butter, and butter, should be incredibly moist, chewy, and deeply flavorful. The combination of baking powder and salt balances the sweetness and provides the right texture.
The vanilla glaze adds a layer of pure, sweet vanilla flavor and a smooth, slightly crisp (once set) textural contrast to the soft cookie bar beneath it.
Optional toppings like sprinkles add a touch of fun and color, while chopped peanuts or mini chocolate chips can reinforce the nutty or add a chocolatey dimension, perfectly complementing the peanut butter base. The overall effect is a simple yet incredibly satisfying and comforting peanut butter treat.
Ingredient Insights
Let’s explore the key components for these classic cookie bars:
For the Bars:
- Unsalted butter, softened to room temperature: Crucial for the creaming process, which incorporates air for a tender texture.
- Granulated sugar & Packed brown sugar: The combination provides both sweetness and moisture (from the molasses in the brown sugar), contributing to a chewy texture.
- Creamy peanut butter: The star flavor! Standard commercial creamy peanut butter (like Jif or Skippy) works best for a classic, stable cookie dough.
- Large eggs: Provide structure, richness, and binding. Room temperature is ideal.
- Vanilla extract: Enhances the sweet flavors.
- All-purpose flour, Baking powder, Salt: The dry ingredients that provide structure, leavening, and flavor balance.
For the Glaze:
- Powdered sugar: The base for a smooth, sweet glaze. Sifting is recommended to prevent lumps.
- Milk (or cream): Provides the liquid to create the glaze. The amount can be adjusted for desired consistency.
- Vanilla extract: Flavors the glaze.
Using room temperature butter and eggs is key for a well-emulsified cookie dough.
Essential Equipment
You’ll need standard baking tools for these cookie bars:
- An 8×8-inch baking pan: The recipe specifies this size for thick, chewy bars. A 9×9-inch pan can be used, but the bars will be thinner and may bake slightly faster.
- Parchment paper or Cooking spray: Lining the pan with parchment, leaving an overhang, is highly recommended for easy removal and clean slicing.
- Mixing bowls (large for dough, small for glaze).
- An Electric mixer (handheld or stand mixer): Essential for properly creaming the butter and sugars to achieve a light, fluffy texture.
- A Whisk: For dry ingredients and for the glaze.
- A Spatula: For scraping the bowl and pressing dough into the pan.
- Measuring cups and spoons.
- Wire rack: For cooling the baked bars completely.
An electric mixer is key for getting the right texture in the cookie dough.
List of Ingredients with Measurements
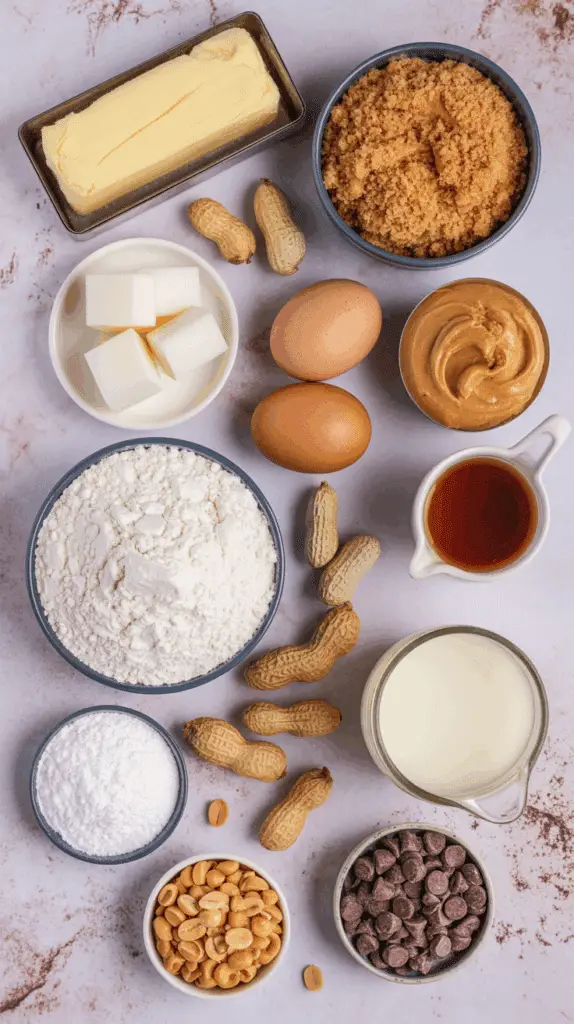
Here’s the complete list of ingredients, with precise measurements:
For the Bars:
- 1 cup (2 sticks) unsalted butter, softened to room temperature
- 1 cup granulated sugar
- 1 cup packed brown sugar
- 1 cup creamy peanut butter
- 2 large eggs, room temperature
- 2 teaspoons vanilla extract
- 1 1/2 cups all-purpose flour
- 1 teaspoon baking powder
- 1/2 teaspoon salt
For the Glaze:
- 1 cup powdered sugar, sifted
- 2–3 tablespoons milk (or cream)
- 1/2 teaspoon vanilla extract
Optional Toppings:
- Sprinkles, chopped peanuts, or mini chocolate chips
These quantities are perfect for an 8×8-inch pan of thick, chewy bars.
Ensure butter and eggs are at room temperature before you start.

Step-by-Step Instructions (Classic Cookie Bar Goodness!)
Let’s bake these comforting “Lunch Lady” Peanut Butter Cookie Bars:
1. Preheat Oven and Prepare Pan:
- Preheat your oven to 350°F (175°C).
- Line an 8×8-inch baking pan with parchment paper, leaving a slight overhang on two opposite sides to act as “handles.” Alternatively, lightly grease the pan thoroughly.
2. Make the Cookie Dough (Creaming):
- In a large mixing bowl (or the bowl of a stand mixer), add the softened unsalted butter, granulated sugar, and packed brown sugar.
- Using a hand mixer or a stand mixer with the paddle attachment, cream these ingredients together on medium-high speed until the mixture is light in color and fluffy in texture. This should take about 3-4 minutes. Scrape down the sides of the bowl as needed.
3. Add Wet Ingredients:
- Add the creamy peanut butter to the creamed butter and sugar mixture. Continue mixing until it’s smooth and well incorporated.
- Next, beat in the large eggs, one at a time, mixing well after each egg is added until it’s fully incorporated.
- Stir in the vanilla extract.
4. Combine Dry Ingredients and Finish Dough:
- In a separate medium bowl, whisk together the all-purpose flour, baking powder, and salt.
- Gradually add the dry ingredients to the wet ingredients in the large bowl. Mix on low speed just until the dough comes together and no large streaks of flour remain. Be careful not to overmix!
5. Press Dough into Pan:
- Transfer the prepared cookie dough to your prepared 8×8-inch baking pan.
- Use a spatula or your lightly floured hands to spread and press the dough evenly into the pan, creating a smooth, flat layer.
6. Bake the Bars:
- Place the pan in the preheated oven.
- Bake for 20-25 minutes. The bars are done when the edges are golden brown and the center is set (it shouldn’t look wet or jiggly). A toothpick inserted into the center should come out clean or with a few moist crumbs attached.
7. Cool Completely (Crucial Step!):
- Remove the pan from the oven and place it on a wire rack.
- Let the bars cool completely in the pan before attempting to glaze them. This can take 1-2 hours or longer. Glazing warm bars will result in a runny, melted mess.
8. Make and Apply the Glaze:
- Once the bars have cooled completely, prepare the glaze. In a small bowl, whisk together the sifted powdered sugar, 2 tablespoons of milk (or cream), and ½ teaspoon vanilla extract until smooth. If the glaze is too thick, add more milk, a tiny bit at a time. If too thin, add more sifted powdered sugar.
- Drizzle or spread the glaze evenly over the top of the cooled peanut butter bars.
9. Add Optional Toppings:
- If you’re using them, immediately sprinkle your choice of toppings (sprinkles, chopped peanuts, or mini chocolate chips) over the wet glaze before it sets.
- Let the glaze set for about 20-30 minutes before slicing and serving.
Patience during cooling is key for perfect glazing and slicing!

Troubleshooting
Bar cookies are generally easy, but texture is important:
- Problem: Bars are too dry or crumbly.
- Solution: Overbaking is the most likely cause. Check for doneness at the earlier end of the bake time. Ensure accurate flour measurement (spooned and leveled, don’t scoop/pack). The combination of butter, peanut butter, and brown sugar should yield a moist bar.
- Problem: Bars are too greasy.
- Solution: Butter might have been too soft/melty when creamed. Ensure it’s at a proper soft room temperature. Also ensure your peanut butter wasn’t overly oily (if using a natural variety that separates).
- Problem: Bars are underbaked or gooey in the center.
- Solution: Needs more baking time. Oven temperatures vary. Ensure a toothpick comes out clean or with moist crumbs, not wet batter. The center should look set.
- Problem: Glaze is too thin and just soaked in.
- Solution: Use less milk in your glaze mixture for a thicker consistency. Ensure the bars were completely cooled before glazing.
- Problem: Hard to slice neatly.
- Solution: Cool bars completely, and even chilling them in the refrigerator for 30 minutes after glazing can help create very clean, neat slices. Use a large, sharp knife.
Don’t overmix the dough once the flour is added!
Tips and Variations
Let’s customize these classic peanut butter bars:
- Tip: Use a good quality commercial creamy peanut butter (like Jif or Skippy) for the classic “lunch lady” flavor and texture. Natural peanut butter can sometimes have a different consistency.
- Variation: Add 1 cup of chocolate chips, peanut butter chips, or butterscotch chips directly to the cookie dough before pressing it into the pan.
- Tip: For easy removal and slicing, line your baking pan with parchment paper, leaving an overhang on two sides to act as “handles.”
- Variation: Instead of a thin glaze, make a thicker peanut butter frosting (like the one in a previous user recipe) or a rich chocolate frosting to spread on top.
- Tip: Ensure your butter and eggs are at room temperature for the best results when creaming, leading to a more tender bar.
- Variation: Press the dough into a 9×9-inch pan for slightly thinner bars; reduce baking time by a few minutes and watch carefully.
- Variation: Use crunchy peanut butter for extra texture within the bars.
A wonderfully versatile recipe for peanut butter lovers!
Serving and Pairing Suggestions
“Lunch Lady” Peanut Butter Cookie Bars are the perfect comforting treat.
Serving: Serve at room temperature, cut into squares.
Pairing & Occasions:
- Snack/Dessert: A perfect satisfying afternoon or evening treat.
- Lunchbox Favorite: A wonderful addition to a packed lunch.
- Bake Sales & Potlucks: Easy to make, transport, and share. They are always a huge hit!
- With Milk or Coffee: The absolute classic pairing for peanut butter cookies!
Their simple, satisfying flavor makes them universally appealing.
Nutritional Information
These are indulgent bars made with butter, sugar, and peanut butter. Nutritional info is approximate (per bar, assuming 16 bars from an 8×8 pan):
- Calories: 250-350+
- Fat: 15-22+ grams
- Saturated Fat: 7-12+ grams (from butter)
- Cholesterol: 40-60+ mg
- Sodium: 100-150+ mg
- Total Carbs.: 28-38+ grams
- Dietary Fiber: 1-2 grams
- Sugars: 20-30+ grams (High from brown sugar, granulated sugar, powdered sugar)
- Protein: 5-7 grams
A rich treat, high in sugar and fat. Enjoy in moderation!
PrintPeanut Butter Lunch Lady Cookie Bars
Bake nostalgic “Lunch Lady” Peanut Butter Cookie Bars! This easy recipe creates soft, chewy peanut butter bars with a simple vanilla glaze.
Ingredients
Here’s the complete list of ingredients, with precise measurements:
For the Bars:
- 1 cup (2 sticks) unsalted butter, softened to room temperature
- 1 cup granulated sugar
- 1 cup packed brown sugar
- 1 cup creamy peanut butter
- 2 large eggs, room temperature
- 2 teaspoons vanilla extract
- 1 1/2 cups all-purpose flour
- 1 teaspoon baking powder
- 1/2 teaspoon salt
For the Glaze:
- 1 cup powdered sugar, sifted
- 2–3 tablespoons milk (or cream)
- 1/2 teaspoon vanilla extract
Optional Toppings:
- Sprinkles, chopped peanuts, or mini chocolate chips
These quantities are perfect for an 8×8-inch pan of thick, chewy bars.
Ensure butter and eggs are at room temperature before you start.
Instructions
Let’s bake these comforting “Lunch Lady” Peanut Butter Cookie Bars:
1. Preheat Oven and Prepare Pan:
- Preheat your oven to 350°F (175°C).
- Line an 8×8-inch baking pan with parchment paper, leaving a slight overhang on two opposite sides to act as “handles.” Alternatively, lightly grease the pan thoroughly.
2. Make the Cookie Dough (Creaming):
- In a large mixing bowl (or the bowl of a stand mixer), add the softened unsalted butter, granulated sugar, and packed brown sugar.
- Using a hand mixer or a stand mixer with the paddle attachment, cream these ingredients together on medium-high speed until the mixture is light in color and fluffy in texture. This should take about 3-4 minutes. Scrape down the sides of the bowl as needed.
3. Add Wet Ingredients:
- Add the creamy peanut butter to the creamed butter and sugar mixture. Continue mixing until it’s smooth and well incorporated.
- Next, beat in the large eggs, one at a time, mixing well after each egg is added until it’s fully incorporated.
- Stir in the vanilla extract.
4. Combine Dry Ingredients and Finish Dough:
- In a separate medium bowl, whisk together the all-purpose flour, baking powder, and salt.
- Gradually add the dry ingredients to the wet ingredients in the large bowl. Mix on low speed just until the dough comes together and no large streaks of flour remain. Be careful not to overmix!
5. Press Dough into Pan:
- Transfer the prepared cookie dough to your prepared 8×8-inch baking pan.
- Use a spatula or your lightly floured hands to spread and press the dough evenly into the pan, creating a smooth, flat layer.
6. Bake the Bars:
- Place the pan in the preheated oven.
- Bake for 20-25 minutes. The bars are done when the edges are golden brown and the center is set (it shouldn’t look wet or jiggly). A toothpick inserted into the center should come out clean or with a few moist crumbs attached.
7. Cool Completely (Crucial Step!):
- Remove the pan from the oven and place it on a wire rack.
- Let the bars cool completely in the pan before attempting to glaze them. This can take 1-2 hours or longer. Glazing warm bars will result in a runny, melted mess.
8. Make and Apply the Glaze:
- Once the bars have cooled completely, prepare the glaze. In a small bowl, whisk together the sifted powdered sugar, 2 tablespoons of milk (or cream), and ½ teaspoon vanilla extract until smooth. If the glaze is too thick, add more milk, a tiny bit at a time. If too thin, add more sifted powdered sugar.
- Drizzle or spread the glaze evenly over the top of the cooled peanut butter bars.
9. Add Optional Toppings:
- If you’re using them, immediately sprinkle your choice of toppings (sprinkles, chopped peanuts, or mini chocolate chips) over the wet glaze before it sets.
- Let the glaze set for about 20-30 minutes before slicing and serving.
Patience during cooling is key for perfect glazing and slicing
Recipe Summary and Q&A
Let’s conclude with a summary and common questions:
Recipe Summary:
“Lunch Lady” Peanut Butter Cookie Bars feature a soft and chewy peanut butter cookie base made by creaming together butter, sugars, and peanut butter, then incorporating eggs, vanilla, and dry ingredients. The dough is pressed into an 8×8-inch pan, baked until golden, and cooled completely. The cooled bars are then topped with a simple homemade vanilla glaze and optional sprinkles or nuts.
Q&A:
Q: Can I make these ahead of time? A: Yes, these bars are great for making ahead. Bake and cool completely. They can be stored, un-glazed or glazed, for a couple of days.
Q: How do I store these cookie bars? A: Store cut bars in an airtight container at room temperature for up to 5 days. Layer with wax paper to prevent the glaze from sticking if stacking.
Q: Can I freeze these bars? A: Yes, they freeze well! Cool completely and slice. They can be frozen either glazed or unglazed. Wrap them well (individually or in a single layer) and place in a freezer-safe container for up to 3 months. Thaw at room temperature.
Q: Can I use natural peanut butter? A: You can, but natural peanut butter often has a different (sometimes runnier or grittier) consistency and can separate. Standard commercial creamy peanut butter is generally recommended for the classic texture and stability in this type of baked good. If using natural, ensure it is very well stirred.
Q: Do I have to cool the bars completely before glazing? A: Yes, this is very important! If you apply the glaze to warm bars, it will melt, become very thin, and just soak into the bars instead of forming a nice layer on top. Patience during cooling is key for a beautiful finish.
Did Our Recipe Hit The Spot?
There are no reviews yet. Be the first one to write one.


