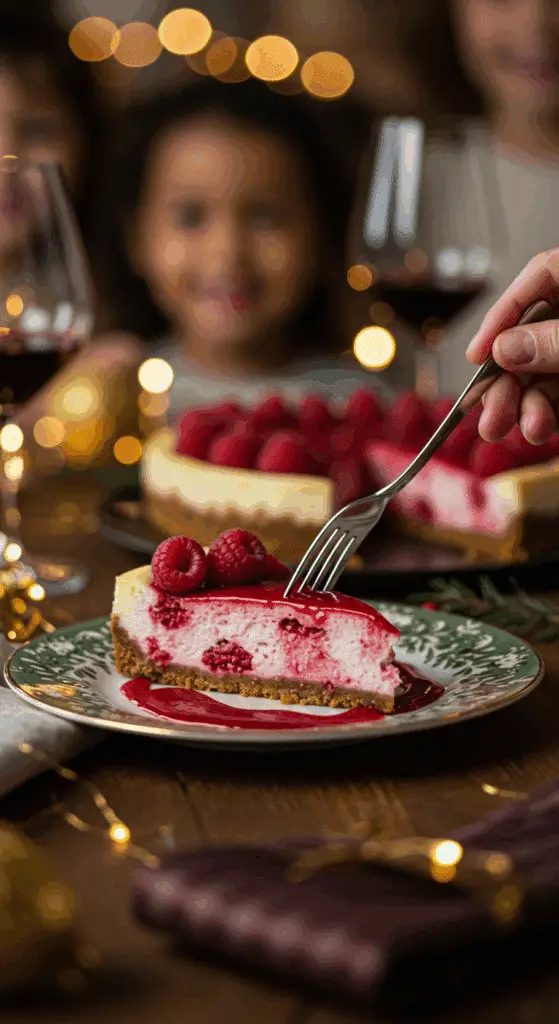
Are you searching for the secret to a truly perfect, show-stopping, restaurant-quality cheesecake, but you’re intimidated by the thought of a fussy, messy, and leaky water bath? This incredible, from-scratch Raspberry Cheesecake is your answer. This is your ultimate guide to a foolproof, professional baking method that uses a simple temperature change to create the creamiest, densest, and most stunningly crack-free cheesecake you’ve ever made.
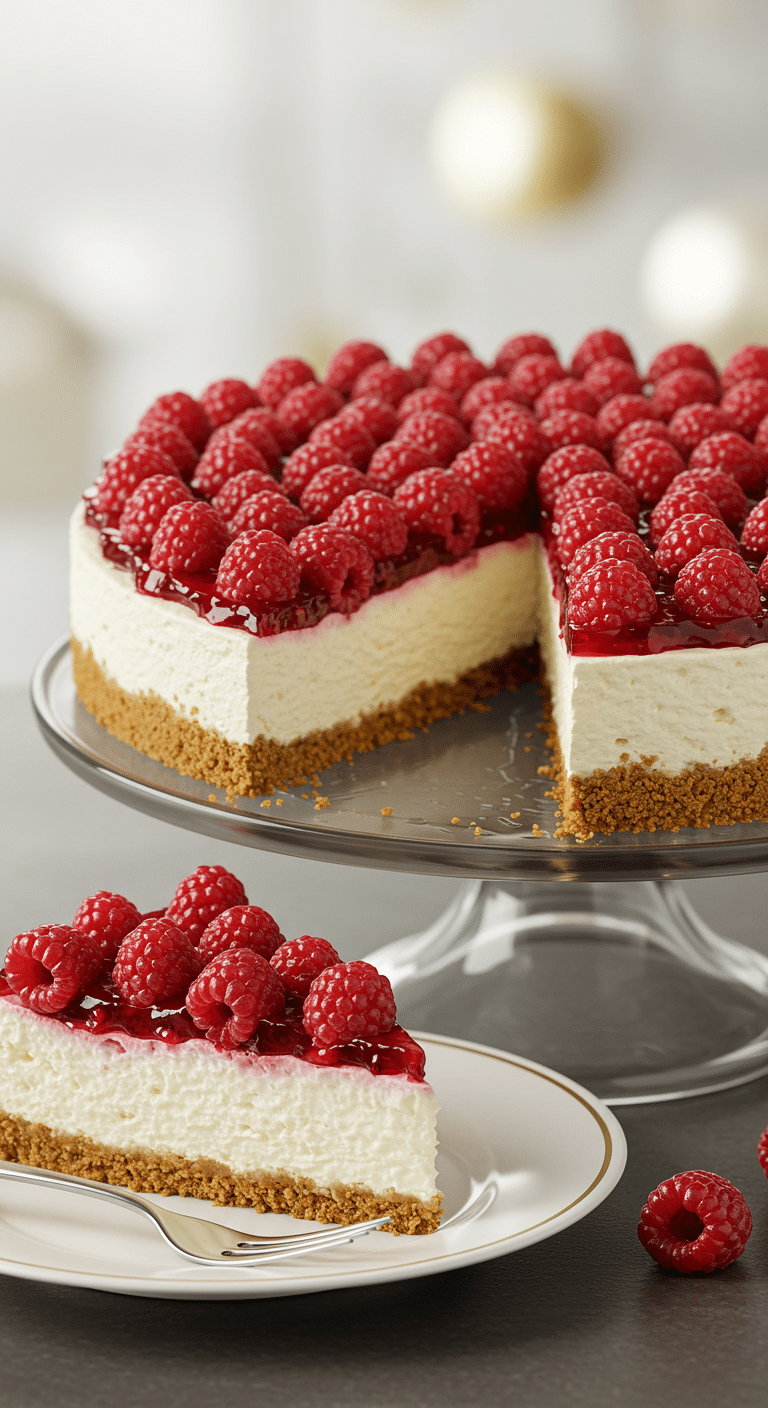
This isn’t just a recipe; it’s a complete masterclass in the art of the perfect New York-style cheesecake. We’ll show you how to create a rich, dense, and unbelievably velvety custard filling, a crisp and buttery graham cracker crust, and a beautiful, vibrant fresh raspberry topping. Get ready to bake a flawless, legendary dessert that will be the star of any holiday or special occasion.
Table of Contents
Table of Contents
Recipe Overview: The Ultimate No-Water-Bath Cheesecake
What makes this Raspberry Cheesecake truly “the best” is its brilliant, no-water-bath baking technique that guarantees a perfect, crack-free result. The method is simple: a short, high-heat blast sets the outside of the cheesecake, and then a long, low-and-slow bake gently cooks the delicate custard to creamy perfection. The filling itself is a classic, rich, and tangy New York-style cheesecake, which is the perfect canvas for the sweet-tart, beautiful fresh raspberry topping. It’s the ultimate make-ahead dessert for stress-free, impressive entertaining.
| Metric | Time / Level |
| Total Time | 12 hours (includes overnight chilling) |
| Active Prep Time | 25 minutes |
| Difficulty Level | Intermediate |
| Servings | 12-16 |
The Essential Ingredients for a Perfect Cheesecake
This recipe is built from two perfect, from-scratch components.
- The Classic Graham Cracker Crust: The crunchy, buttery, and slightly sweet foundation. A simple, press-in crust made from finely ground graham cracker crumbs, a touch of sugar, and melted butter provides the perfect textural contrast to the ultra-creamy filling.
- The Silky-Smooth Cheesecake Filling: This is the rich, dense, and tangy heart of our dessert.
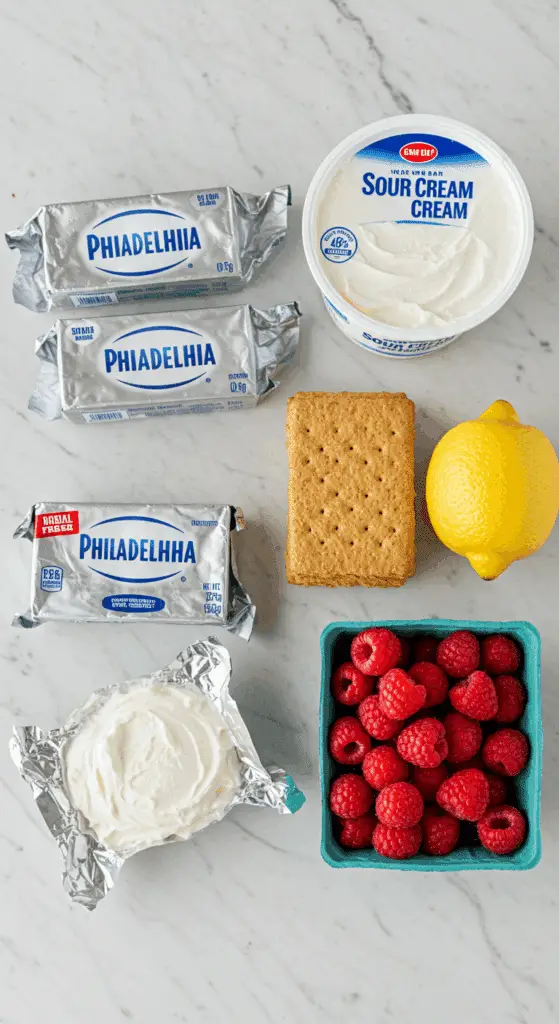
- Room Temperature Ingredients: This is the single most important secret to a smooth, non-lumpy cheesecake batter. Your full-fat, block-style cream cheese, your large eggs and egg yolks, and your sour cream must all be at room temperature before you begin mixing.
- Full-Fat Cream Cheese: For a classic, rich, and dense New York-style cheesecake, you must use 2 1/2 pounds of full-fat, block-style cream cheese. The kind sold in a tub is too soft and contains more water, which will not produce the correct texture.
- Sour Cream & Lemon Zest: A touch of sour cream and fresh lemon zest adds a wonderful, bright tanginess that is the signature of a great cheesecake and cuts through the richness.
- The Beautiful Fresh Raspberry Topping:
- Fresh Raspberries: Beautiful, sweet-tart, and vibrant fresh raspberries are the star of our elegant topping.
- Red Jelly: The secret to a beautiful, glossy, and professional-looking topping is to toss the fresh berries in a little bit of melted red jelly, like currant or raspberry jelly. This creates a stunning, jewel-like glaze without making the fresh berries mushy.

Step-by-Step to a Flawless, Crack-Free Cheesecake
Making a cheesecake from scratch is a rewarding process. Follow these detailed steps for a perfect, show-stopping result.
Part 1: Make and Pre-Bake the Graham Cracker Crust
Step 1: First, position a rack in the middle of your oven and preheat it to 350°F (175°C).
Step 2: In a medium bowl, combine the 1 1/2 cups of graham cracker crumbs, the 1 tablespoon of sugar, and the 6 tablespoons of melted butter. Stir with a fork until all the crumbs are evenly moistened.
Step 3: Firmly press the crumb mixture into the bottom and about 1 inch up the sides of your 9 1/2-inch springform pan. Use the flat bottom of a measuring cup to get a nice, compact, and even crust.
Step 4: Bake the crust for 8 minutes, until it is set and fragrant. Let the crust cool completely on a wire rack.
Part 2: Create the Silky-Smooth Cheesecake Filling
Step 1: Raise the oven temperature to 450°F (230°C).
Step 2: In the large bowl of an electric mixer fitted with the paddle attachment, beat the 2 1/2 pounds of room temperature cream cheese and the 1 1/2 cups of sugar on medium-high speed for about 5 minutes, until the mixture is completely smooth, light, and fluffy.
Step 3: Reduce the mixer speed to medium and add the 5 large, room temperature eggs and the 2 room temperature egg yolks, two at a time, mixing well after each addition and scraping down the sides of the bowl as needed.
Step 4: With the mixer on its lowest speed, add the 1/4 cup of room temperature sour cream, the 1 tablespoon of grated lemon zest, and the 1 1/2 teaspoons of pure vanilla extract. Mix thoroughly until the batter is smooth and just combined.
Pro Tip: Be very careful not to over-mix the batter, especially after you add the eggs. Over-mixing whips too much air into the batter, which causes the cheesecake to puff up dramatically in the oven like a soufflé, and then sink and crack as it cools.
Step 5: Pour the finished cheesecake batter into the cooled crust in the springform pan and smooth the top with an offset spatula.
Part 3: The No-Water-Bath Bake and Slow Cool-Down
Step 1: Place the cheesecake on a baking sheet and bake at 450°F for 15 minutes.
Step 2: Without opening the oven door, turn the oven temperature down to 225°F (110°C) and continue to bake for another 1 hour and 15 minutes. The cheesecake is perfectly baked when the outer edges of the cake are set, but the very center is still loose and has a slight jiggle to it when you gently tap the pan.
Step 3 (The Secret to No Cracks!): Turn the oven off and open the oven door wide. Let the cheesecake cool slowly in the open, turned-off oven for 30 minutes.
Step 4 (The Final, Crucial Chill!): Remove the cheesecake from the oven and let it cool completely to room temperature on a wire rack for another 2 to 3 hours. Run a thin knife around the edge of the cheesecake to loosen it from the pan. Cover it with plastic wrap and place it in the refrigerator to chill and set completely for at least 8 hours, but preferably overnight.
Part 4: The Beautiful Fresh Raspberry Topping
Just before you are ready to serve, prepare the simple, stunning topping.
In a medium saucepan over low heat, gently melt the 1 cup of red jelly until it is smooth and pourable.
Add the 3 half-pints of fresh raspberries to the warm jelly and toss them gently until they are all beautifully coated in the glossy glaze.
Carefully pile the glazed berries on top of the chilled cheesecake. Refrigerate the finished cheesecake until you are ready to serve it.

The Best Creamy & Perfect Raspberry Cheesecake (No-Crack Recipe!)
A classic and decadent New York-style baked cheesecake with a fresh raspberry topping. The recipe starts with a simple, homemade graham cracker crust that is pre-baked for crispness. The rich and creamy filling is made with a generous amount of room-temperature cream cheese and sour cream, flavored with lemon zest and vanilla. The cheesecake is baked using a two-temperature method and then cooled very slowly to achieve a dense, smooth texture. It is chilled overnight and finished with a beautiful topping of fresh raspberries coated in a simple red jelly glaze.
- Prep Time: 25 minutes
- Cook Time: 1 hour 40 minutes
- Total Time: 13 hours 35 minutes (includes extensive cooling and chilling)
- Yield: 12-16 servings
- Category: Dessert
- Method: Baking
- Cuisine: American
- Diet: Vegetarian
Ingredients
- For the Crust:
- 1 1/2 cups graham cracker crumbs (from 10 crackers)
- 1 tablespoon sugar
- 6 tablespoons (3/4 stick) unsalted butter, melted
- For the Filling:
- 2 1/2 pounds (five 8-ounce packages) cream cheese, at room temperature
- 1 1/2 cups sugar
- 5 whole extra-large eggs, at room temperature
- 2 extra-large egg yolks, at room temperature
- 1/4 cup sour cream, at room temperature
- 1 tablespoon grated lemon zest (from 2 lemons)
- 1 1/2 teaspoons pure vanilla extract
- For the Topping:
- 1 cup red jelly (such as currant, raspberry, or strawberry)
- 3 half-pints fresh raspberries
Instructions
- Preheat the oven to 350°F.
- Make the Crust: In a bowl, combine the graham cracker crumbs, sugar, and melted butter. Press the mixture into the bottom and about 1 inch up the sides of a 9 1/2-inch springform pan. Bake for 8 minutes. Let the crust cool to room temperature.
- Make the Filling: Raise the oven temperature to 450°F.
- In the bowl of an electric mixer with a paddle attachment, beat the room-temperature cream cheese and sugar on medium-high speed for about 5 minutes, until light and fluffy.
- Reduce the speed to medium and add the eggs and egg yolks, two at a time, mixing well after each addition.
- On low speed, add the sour cream, lemon zest, and vanilla. Mix thoroughly and pour the filling into the cooled crust.
- Bake the Cheesecake: Place the cheesecake on a sheet pan. Bake at 450°F for 15 minutes.
- Turn the oven temperature down to 225°F and bake for another 1 hour and 15 minutes. The center will not be completely set.
- Cool the Cheesecake: Turn the oven off and open the door wide for 30 minutes, leaving the cheesecake inside.
- Remove the cake from the oven and let it cool at room temperature for another 2 to 3 hours.
- Wrap the cooled cheesecake and refrigerate overnight.
- Top and Serve: Before serving, run a hot knife around the edge of the cake and remove the springform ring.
- In a small saucepan, melt the jelly over low heat. Add the fresh raspberries and toss gently to coat.
- Pile the glazed berries on top of the cheesecake. Refrigerate until ready to serve.
Notes
- Using room temperature ingredients, especially cream cheese and eggs, is crucial for a smooth, lump-free cheesecake filling.
- The two-temperature baking method and the very slow cooling process are key techniques to prevent the cheesecake from cracking.
- The cheesecake requires a long, overnight chilling period to fully set. This is an excellent make-ahead dessert.
Storage and Make-Ahead Tips
Cheesecake is the absolute perfect make-ahead dessert for a stress-free holiday or party.
- Make-Ahead: This cheesecake is actually better when made a day or two in advance! You can bake the entire cheesecake completely up to 3 days ahead of time. Let it cool and chill completely, and then keep it, covered, in the refrigerator. Wait to add the fresh raspberry topping until the day you plan to serve it for the best, freshest result.
- Storage: Store any leftover cheesecake, covered, in the refrigerator for up to a week.
For more recipe follow my Pinterest account
Creative Recipe Variations
This stunning cheesecake is a wonderful base for your own delicious and creative twists.
- Use a Different Fresh Berry Topping: This same beautiful jelly glaze technique is fantastic with other fresh berries. Try it with a mix of fresh strawberries, blueberries, and blackberries for a beautiful mixed berry cheesecake.
- Add a Classic Chocolate Crust: For a delicious chocolate-raspberry flavor combination, you can substitute the graham crackers in the crust with an equal amount of finely crushed chocolate wafer cookies (like Oreo® cookies with the cream filling removed).
- Make it a White Chocolate Raspberry Cheesecake: For an even more decadent and luxurious dessert, you can melt 4 ounces of a high-quality white chocolate, let it cool slightly, and then beat the cooled, melted white chocolate into the cream cheese before you add the sugar.
Enjoy Your Flawless, Restaurant-Quality Cheesecake!
You’ve just created a truly special, show-stopping dessert that is the very definition of a decadent indulgence. This perfect, from-scratch Raspberry Cheesecake, with its creamy, dense texture and its beautiful, flawless top, is a rewarding baking project that is guaranteed to impress. It’s a timeless classic that will make any occasion feel special.
We hope you enjoy every last, perfect, rich, and creamy bite!
If you enjoyed making this recipe, please leave a comment below or share it with a friend who is ready to master homemade cheesecake!
Frequently Asked Questions (FAQs)
Q1: What is the secret to a perfect, crack-free cheesecake without using a water bath?
This recipe uses a brilliant, professional baking technique. The initial, short blast of high heat (450°F) quickly sets the outer edges and the surface of the cheesecake, creating a sort of “crust” that helps to prevent cracks from forming later. The long, low-and-slow bake at 225°F then allows the delicate egg custard to cook very gently and evenly all the way through without puffing up or curdling. It’s a fantastic, foolproof alternative to a water bath!
Q2: Do my ingredients really all need to be at room temperature?
Yes, this is non-negotiable for a smooth, lump-free cheesecake! If your cream cheese is cold, it will not blend smoothly and you will have small, unpleasant lumps in your final cheesecake. Cold eggs or sour cream can also cause the cream cheese to seize up. To quickly bring your ingredients to room temperature, you can place the wrapped cream cheese and the eggs in a bowl of warm (not hot) tap water for about 10-15 minutes.
Q3: How do I know for sure when my cheesecake is done baking?
The key is the “jiggle test.” A perfectly baked cheesecake should not be completely firm all the way through when you take it out of the oven. The outer 2-3 inches of the cheesecake should look set and matte, but the very center should still have a distinct wobble or jiggle, similar to a pan of Jell-O. This small, jiggly center will continue to cook and set up perfectly from the residual heat as the cheesecake cools.
Q4: What is the best way to get perfect, clean slices of my cheesecake?
The secret to clean slices is a well-chilled cheesecake and a hot, sharp knife. Use a long, thin knife. For each slice, dip the blade of the knife into a pitcher of hot water, wipe the blade completely dry with a paper towel, and then make one clean, decisive cut. Repeat this process of heating and wiping the knife for every single slice.
Q5: Can I make this cheesecake ahead of time?
Yes, this is the perfect make-ahead dessert! A cheesecake’s flavor and texture actually improve after a long, uninterrupted chill. You can bake the entire cheesecake completely up to 3 days ahead of time. Keep it covered in the refrigerator and wait to add the fresh raspberry topping until just before you are ready to serve it for the best result.


