Are you looking for the ultimate fun, festive, and unbelievably easy appetizer to bring to your next Halloween party or Thanksgiving feast? A show-stopping centerpiece that is so cute and creative, it will have everyone snapping photos before they dive in? This incredible, super-easy Pumpkin-Shaped Cheese Ball is that perfect recipe! We’re talking a rich, creamy, and savory cheddar and chive cheese ball, cleverly coated in a vibrant orange crust and topped with a real pepper stem to look just like a perfect, miniature pumpkin.
This isn’t just another cheese ball recipe; it’s a guide to your new favorite edible craft project. We’ll show you the simple but crucial secrets to a perfectly firm and shapeable cheese ball and the brilliant, easy trick for that amazing pumpkin color. This is a guaranteed, crowd-pleasing hit that is as fun to make as it is to eat!
Table of Contents
Table of Contents
Recipe Overview: The Ultimate Fun & Festive Fall Appetizer
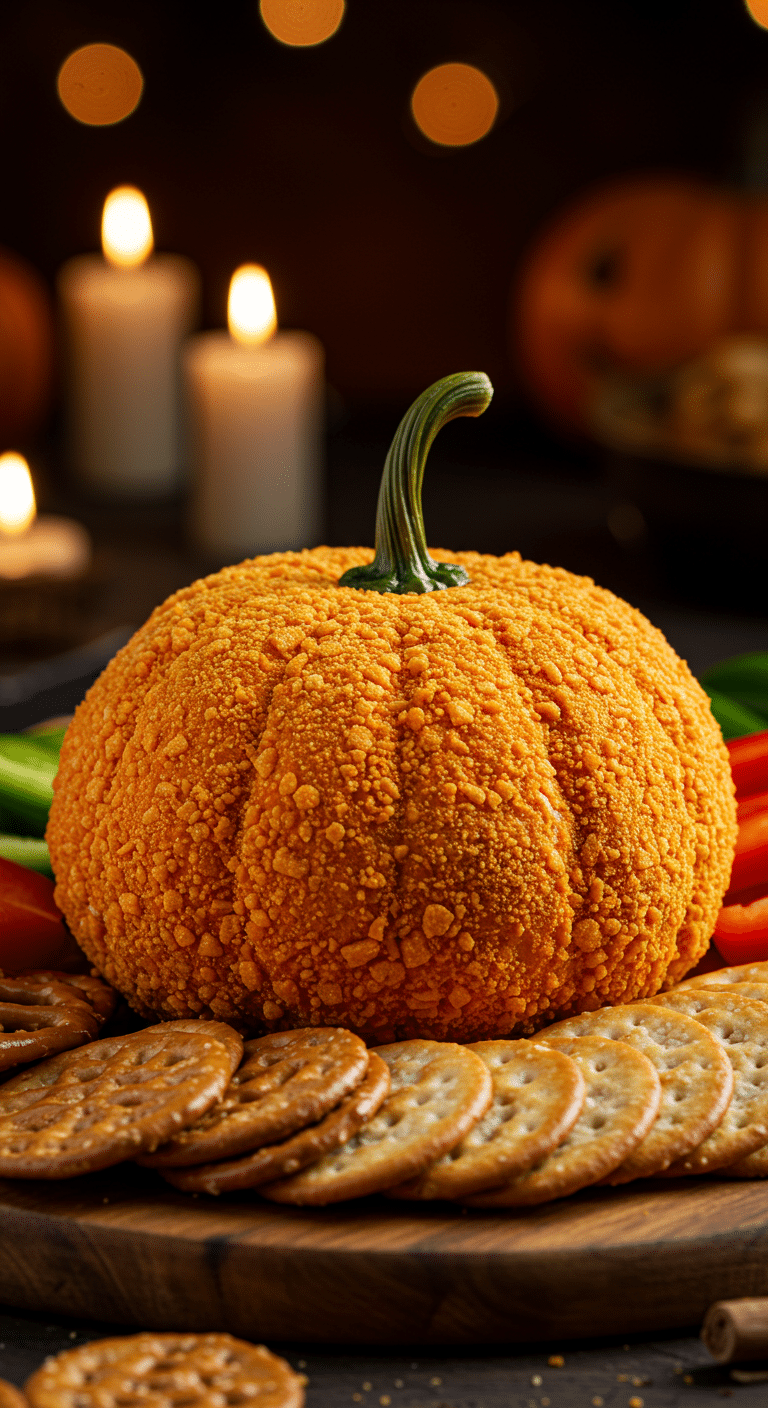
What makes this Pumpkin Cheese Ball so spectacularly fun is its brilliant, easy-to-make design and its classic, crowd-pleasing savory flavor. This recipe is a masterpiece of festive simplicity. The cheese ball itself is a classic, rich, and tangy blend of cream cheese, sharp cheddar cheese, and fresh chives. The true magic, however, is in the decoration. The “pumpkin” color comes from a brilliant and fun hack of rolling the cheese ball in finely crushed, bright orange cheese puffs, which also adds a wonderful, salty, cheesy crunch. The final, adorable touch is a simple but incredibly realistic “stem” made from the top of a bell pepper.
| Metric | Time / Level |
| Total Time | 2 hours 30 minutes (includes chilling) |
| Active Prep Time | 20 minutes |
| Difficulty Level | Easy |
| Servings | 12-16 servings |
The Cheese Ball Workshop: The Essential Ingredients
This iconic party treat uses just a handful of smart shortcuts and pantry staples to create its signature festive look and delicious flavor.
- The Cheese Ball Base:
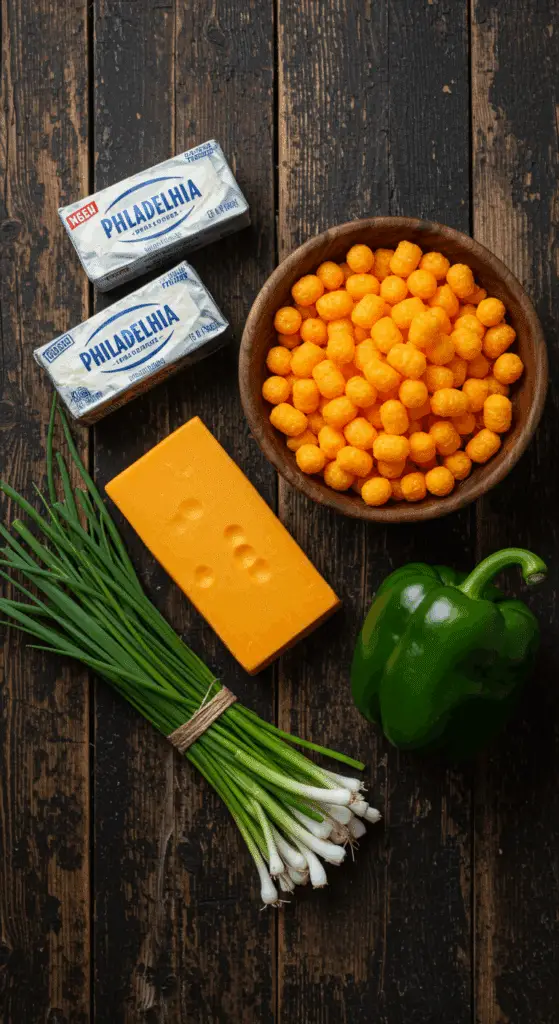
- Cream Cheese: The secret to a smooth, creamy, and completely lump-free cheese ball is to use two blocks of full-fat cream cheese that have been softened to room temperature.
- Cheddar Cheese: For the best, most robust, and tangiest flavor, it is essential to use a good quality, sharp or extra-sharp cheddar cheese. For the absolute best texture, it is highly recommended to shred your own cheese from a block.
- The “Pumpkin” Coating (The Secret Hack!):
- Orange Cheese Puffs: This is the brilliant and fun secret to the perfect pumpkin color and a unique, cheesy, and crunchy texture! A few cups of your favorite brand of a classic, crunchy (not the puffy kind) orange cheese puff, pulverized in a food processor, creates the most vibrant and delicious coating.
- The “Pumpkin” Stem:
- Bell Pepper Stem: A simple but incredibly effective trick! The top stem of a green or a brown bell pepper makes the perfect, realistic-looking, and completely edible (if you want!) pumpkin stem.
The Cheese Ball Masterclass: The Secret to a Perfect, Firm Shape
The number one, non-negotiable secret to a cheese ball that is firm, easy to shape, and not a soft, sticky mess is to chill the cheese mixture.
- Mix and Chill: After you have mixed all your cheese ball ingredients together, you must transfer the soft mixture to a piece of plastic wrap, form it into a rough ball, and let it chill in the refrigerator for at least 1 to 2 hours.
- Shape and Coat: This crucial chilling step is the key that will solidify the fats in the cheese, making the ball firm and very easy to handle. Once it is firm, you can perfect its pumpkin shape, carve the ridges, and easily roll it in the cheese puff coating without it losing its shape or making a mess. Do not skip this step!

Step-by-Step to the Best Pumpkin Cheese Ball
This fun and festive appetizer is incredibly simple to prepare.
Step 1: Make the Cheese Ball Base (and Chill!)
Step 1: In a food processor, process the 3 cups of orange cheese puffs until they are finely ground. Transfer the crumbs to a rimmed baking sheet and spread them out.
Step 2: In a large bowl, combine your 2 pounds of room temperature cream cheese, the 3 cups of shredded cheddar, the 1/4 cup of chopped chives, and a generous pinch of salt and pepper. Mix everything together until it is well combined.
Step 3 (The Most Important Step!): Transfer the cheese mixture to a large piece of plastic wrap. Use the plastic wrap to help you form the mixture into a ball. Wrap it tightly and place it in the refrigerator to chill for at least 1 to 2 hours, until it is firm.
Part 2: Shape and Coat Your Pumpkin
Step 1: Once the cheese ball is firm, unwrap it. Use your hands to smooth it into a round ball, then gently press down on the top to flatten it slightly into a pumpkin-like shape.
Step 2 (The Fun Part!): Use the tip of a butter knife or the back of a regular knife to carve shallow, vertical lines down the sides of the cheese ball to resemble the ridges of a pumpkin.
Step 3: Gently roll the cheese ball in your prepared, ground cheese puff crumbs until it is completely and evenly coated in the vibrant orange color.
Step 4: Carefully remove the entire stem from your bell pepper with a paring knife and place it on top of your cheese ball.
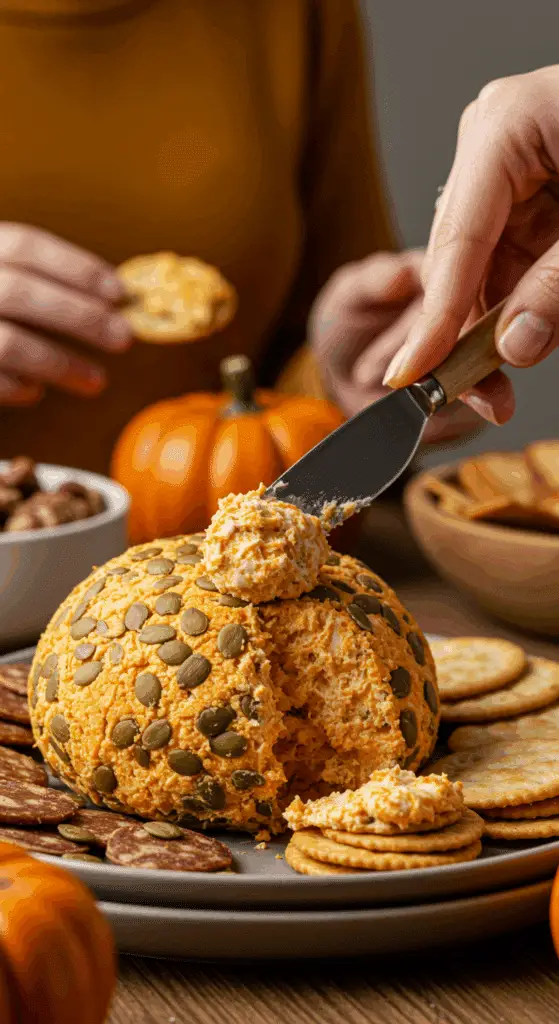
Serve the cheese ball on a platter with crackers and slices of the bell pepper.

Pumpkin Cheese Ball (A Festive Fall Appetizer!)
An easy, no-bake recipe for a festive ‘Pumpkin Cheese Ball,’ perfect for a fall or Halloween party appetizer. The dish features a simple and savory mixture of room-temperature cream cheese, shredded Cheddar, and fresh chives. This mixture is molded by hand into the shape of a pumpkin and then coated in finely ground orange cheese puffs for a vibrant color and crunchy texture. The ‘pumpkin’ is finished with a real bell pepper stem on top and is served with crackers.
Ingredients
- 3 cups orange cheese puffs
- 2 pounds cream cheese, at room temperature
- 3 cups shredded Cheddar
- 1/4 cup chopped chives
- Kosher salt and freshly ground black pepper
- 1 bell pepper with a long stem
- Crackers, for serving
Instructions
- Place the cheese puffs in a food processor and process until they are finely ground. Transfer the ground puffs to a rimmed baking sheet.
- In a large bowl, combine the room-temperature cream cheese, shredded Cheddar, chives, 1 teaspoon of salt, and 1/4 teaspoon of pepper. Mix with a spatula or your hands until well combined.
- Mold the cheese mixture into a ball shape. Press the top of the ball with your hand to flatten it slightly, resembling a pumpkin.
- Use the tip of a butter knife to carve vertical lines down the sides of the ball to look like a pumpkin’s ridges.
- Gently roll the cheese ball in the ground cheese puffs, coating it completely.
- Carefully cut the entire stem section from the bell pepper. Place it on top of the cheeseball to serve as the pumpkin stem.
- Chill for at least 1-2 hours to allow the cheese ball to firm up before serving.
- Serve on a platter with crackers and slices of the remaining bell pepper.
Notes
- This is a very easy no-bake appetizer that relies on creative shaping and coating for its festive appearance.
- Using room-temperature cream cheese is a key step that makes it much easier to mix the ingredients and shape the ball.
- This cheese ball can be made a day ahead of time and kept refrigerated; just add the bell pepper stem before serving.
What to Serve With Your Pumpkin Cheese Ball
A beautiful and savory cheese ball is a fantastic centerpiece for any appetizer spread. It pairs wonderfully with a huge variety of dippers.
- Crackers & Pretzels: A variety of your favorite crackers, like a buttery club cracker, a hearty wheat cracker, or some pretzel crisps.
- Fresh Vegetables: Slices of the bell pepper (from the stem!), cucumber slices, carrot sticks, and celery sticks are all fantastic, healthy choices.
- Other Dippers: Sturdy apple slices, crostini, or even some sturdy potato chips.
For more recipe follow my pinterest account
Storage and Make-Ahead Tips
This Pumpkin Cheese Ball is the ultimate make-ahead party appetizer!
- Make-Ahead: You can prepare the entire cheese ball, fully shaped and coated, up to 3 days in advance. Simply wrap it tightly in plastic wrap and store it in the refrigerator. Wait to add the fresh pepper stem until just before serving for the best, freshest look.
- Storage: Store any leftover cheese ball, well-covered, in the refrigerator for up to 1 week.
Frequently Asked Questions (FAQs)
Q1: What is the absolute, number one secret to a firm cheese ball that isn’t a soft, sticky mess to work with?
The secret is to chill the cheese mixture before you shape and coat it. By letting the soft, freshly mixed cheese firm up in the refrigerator for at least an hour or two, you are solidifying the fats. This is the key that will make your cheese ball firm, easy to handle, and able to be rolled and shaped without smearing all over your hands.
Q2: Can I make this cheese ball ahead of time for a party?
Yes, absolutely! This is a perfect make-ahead appetizer. You can prepare the entire recipe up to 3 days in advance and keep it, well-wrapped, in the refrigerator. This allows all the delicious, savory flavors to meld and deepen.
Q3: Can I make this recipe with a different kind of cheese?
Yes! This recipe is wonderfully versatile. You can substitute the sharp cheddar with an equal amount of your other favorite shredded cheese, like a spicy pepper jack, a smoky Gouda, or a classic Colby Jack.
Q4: What can I use for the orange coating if I don’t want to use cheese puffs?
If you’re not a fan of cheese puffs, you can create a beautiful, natural orange coating by rolling your cheese ball in a generous amount of finely shredded, bright orange, sharp cheddar cheese. You can also mix the shredded cheese with a little bit of smoked paprika for an even deeper color and flavor.
Q5: Can I make this recipe without a food processor?
Of course! To crush the cheese puffs, you can simply place them in a large, resealable plastic bag, seal it, and use a rolling pin or the bottom of a heavy pan to crush them into fine crumbs. The cheese ball itself can be easily mixed by hand in a large bowl.


