Introduction & Inspiration
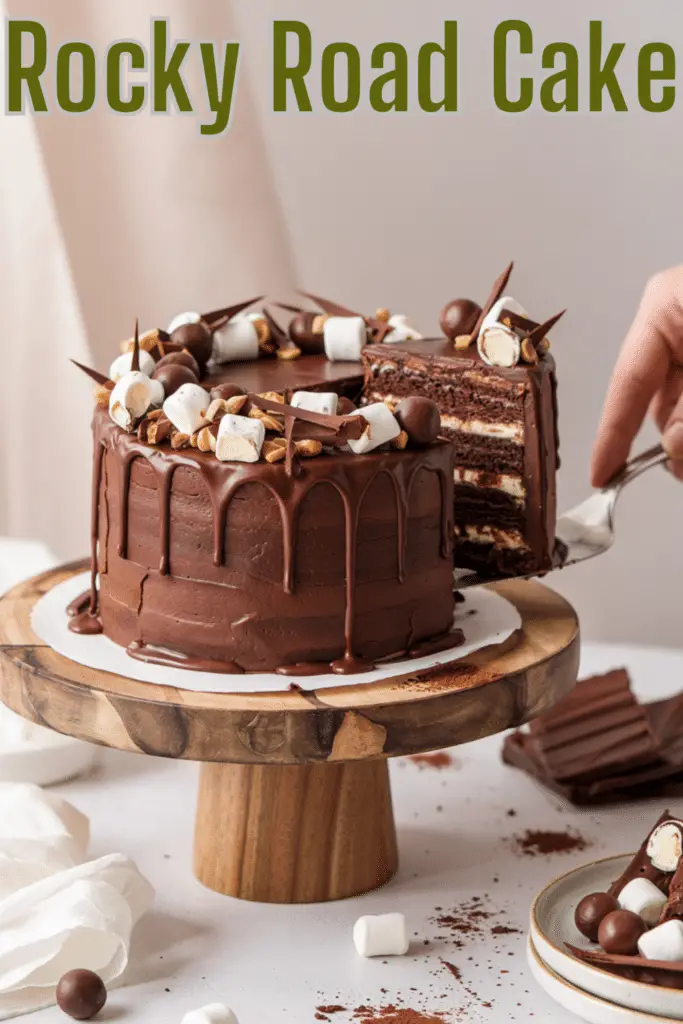
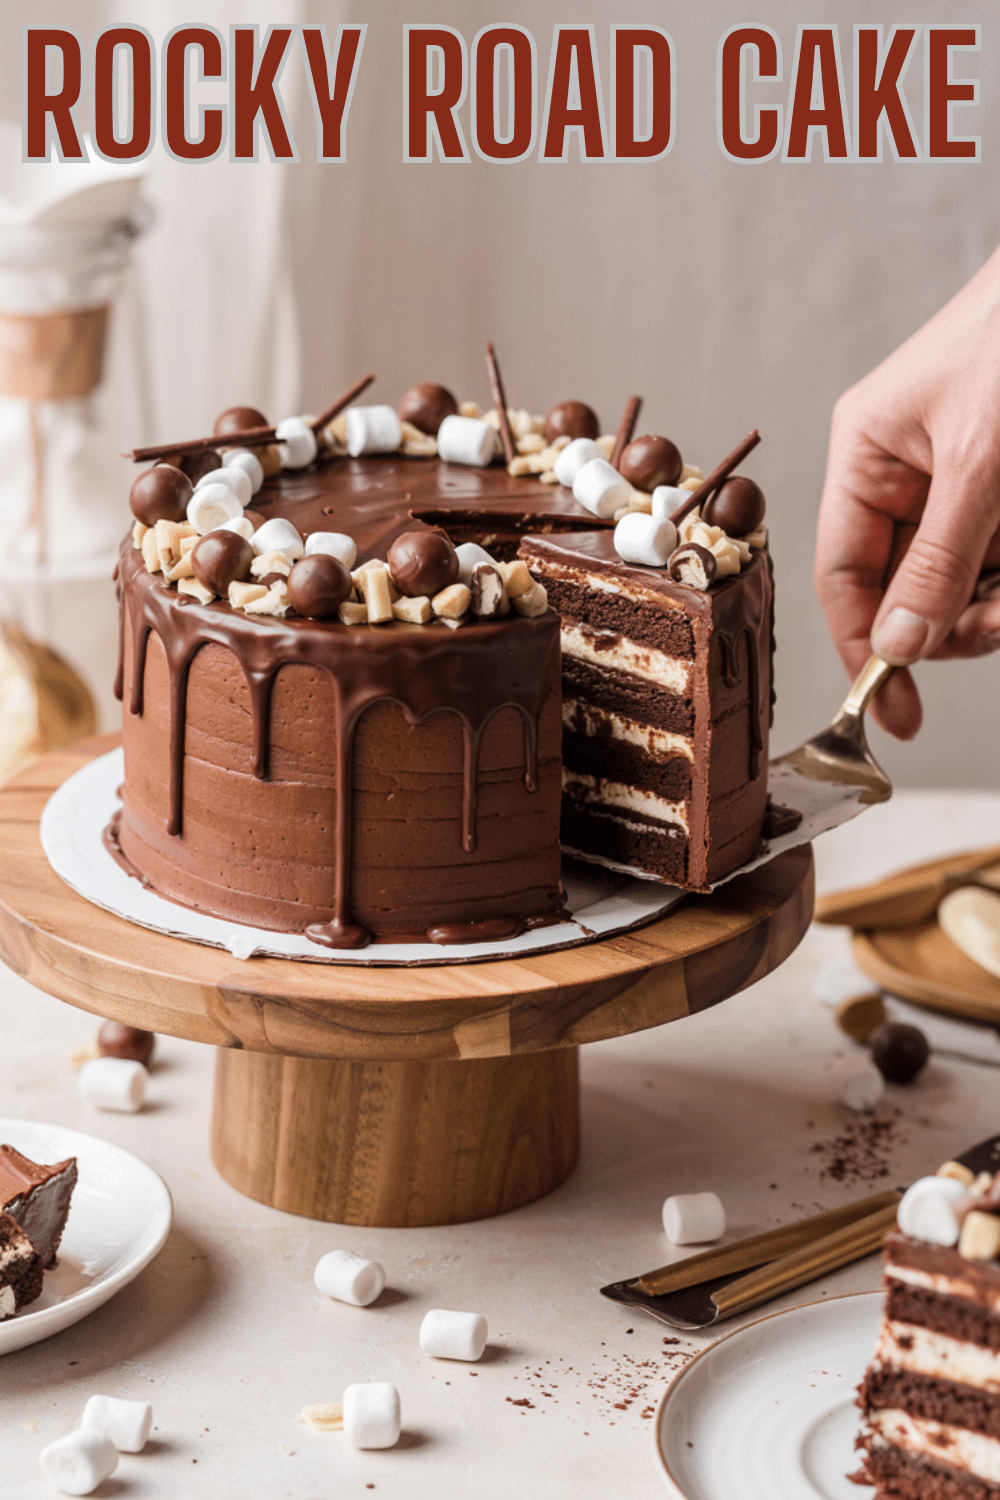
I’m an absolute sucker for anything “Rocky Road” – that irresistible combination of chocolate, marshmallows, and nuts is pure nostalgic bliss. So, when I came across this recipe for a full-blown Rocky Road Cake, featuring layers of rich chocolate cake, a chocolate-hazelnut buttercream, and a ganache filling loaded with walnuts and marshmallows, I knew I had found something truly special! It looked like the ultimate celebration cake for any Rocky Road enthusiast.
My inspiration came from wanting to transform the beloved ice cream and candy bar flavor into an impressive layer cake. I envisioned a dessert that was incredibly decadent, multi-textured, and visually stunning, with chocolate, marshmallow, and nutty elements in every single bite.
My goal was to tackle this multi-component recipe, breaking down the steps for the cake, the complex buttercream, the rocky road ganache filling, and the final assembly, including a chocolate drip. This recipe, with its specific ingredients and techniques, promised a sophisticated yet fun cake perfect for a major celebration or just a seriously indulgent treat.
Get ready for a chocolatey, marshmallowy, nutty adventure!
Nostalgic Appeal
This Rocky Road Cake brilliantly taps into the nostalgic appeal of its namesake flavor. Rocky Road, whether as ice cream or candy, evokes memories of childhood treats, movie nights, and comforting indulgence. The combination of soft marshmallows, crunchy nuts, and rich chocolate is a universally loved classic.
This cake takes those familiar elements and elevates them into a sophisticated layer cake format. The chocolate cake layers provide a comforting base, reminiscent of classic birthday cakes. The marshmallows folded into the ganache filling offer that gooey texture we associate with Rocky Road.
The walnuts provide the essential nutty crunch, while the multiple layers of chocolate – in the cake, the buttercream, the ganache filling, and the drip – satisfy even the most intense chocolate cravings, connecting back to countless beloved chocolate desserts.
Even though it’s an elaborate cake, the core flavors feel familiar, comforting, and deeply satisfying, triggering happy memories associated with the classic Rocky Road combination.
Homemade Focus (A Decadent Project)
Creating this Rocky Road Cake from scratch is a truly rewarding homemade project. It involves crafting several distinct, luxurious components: a moist chocolate cake enhanced with coffee and sour cream, a unique buttercream featuring three types of chocolate (including hazelnut!), a rich ganache transformed into a rocky road filling, and a final decorative ganache drip. This is homemade baking at its finest.
I love recipes that encourage building complex flavors and textures layer by layer. This cake requires attention to detail, from ensuring the cake batter is properly mixed using the alternating wet-and-dry method to carefully making the ganache and folding in the marshmallows and nuts without deflating it too much.
The buttercream itself is a homemade highlight, blending butter with melted semi-sweet chocolate, melted hazelnut chocolate, and cocoa powder for an incredibly deep flavor profile. Making each component yourself ensures maximum freshness and allows you to appreciate the interplay of flavors in the final product.
While it requires more effort than a simple sheet cake, the process of creating each element and assembling this stunning layer cake is incredibly satisfying, resulting in a truly impressive homemade centerpiece.
Flavor Goal
The primary flavor goal of this Rocky Road Cake is an explosion of rich, complex chocolate flavors interwoven with the classic Rocky Road elements: chewy marshmallows and crunchy walnuts. It aims for a decadent, multi-textured experience that balances intense chocolate with the sweetness of marshmallow and the earthiness of nuts.
The chocolate cake layers, enriched with buttermilk, sour cream, coffee, vanilla paste, and extra egg yolks, provide a deeply flavorful, incredibly moist, and tender foundation.
The chocolate hazelnut buttercream adds another layer of richness, combining semi-sweet chocolate, hazelnut chocolate, and cocoa powder for a complex, nutty-chocolate frosting.
The rocky road ganache filling is where the classic texture comes in – smooth, rich chocolate ganache studded with chewy mini marshmallows and crunchy toasted walnuts.
The final chocolate ganache drip adds visual appeal and a final hit of pure chocolate. The overall effect is luxurious, intense, and utterly reminiscent of the best rocky road treat you’ve ever had, elevated into cake form.
Ingredient Insights
Let’s break down the components and their key ingredients:
For the Cake:
- Cake Flour: Lower protein for a more tender crumb than all-purpose.
- Baking Soda & Baking Powder: Leavening.
- Butter & Sugars (Brown & White): Flavor, tenderness, structure, moisture.
- Coffee: Enhances chocolate flavor.
- Vanilla Paste: Intense vanilla flavor with visible seeds. Extract can be substituted.
- Buttermilk & Sour Cream: Acidity for tenderness and moisture, slight tang.
- Eggs & Egg Yolks: Richness, structure, binding.
For the Ganache (Filling & Drip):
- Semi-sweet Chocolate Chips: The chocolate base.
- Heavy Cream: Creates the smooth ganache texture.
- Walnuts, toasted: Classic rocky road nut, adds crunch and flavor. Toasting enhances nuttiness.
- Mini Marshmallows: The essential marshmallow element.
For the Buttercream:
- Semi-sweet Chocolate, melted & cooled: Adds chocolate depth.
- Hazelnut Chocolate, melted & cooled: Adds a distinct nutty, chocolate flavor (like melted Nutella or a similar product).
- Cocoa Powder: Intensifies the chocolate flavor further.
- Unsalted Butter, room temp: The frosting base.
- Sugar (Assuming Powdered Sugar based on method): Sweetness and structure. The recipe lists “sugar” but the method implies powdered for buttercream. I will assume powdered sugar.
- Salt: Balances sweetness.
- Vanilla: Flavor enhancement.
- Heavy Cream (optional): To adjust consistency.
Using high-quality chocolates and vanilla paste elevates the final result.
Essential Equipment
This multi-component layer cake benefits from specific tools:
- Three 6-by-2-inch cake pans: Note the smaller diameter for taller layers.
- Parchment paper rounds:
- Stand mixer with paddle attachment: Highly recommended for the cake batter and especially the buttercream.
- Large bowls:
- Small bowl: For wet cake ingredients.
- Whisk:
- Rubber spatula:
- Cooling rack:
- Small saucepan: For heating cream for ganache.
- Heatproof bowl: For making ganache.
- Offset spatula: Essential for smooth frosting.
- Bench scraper (optional): For very smooth sides.
- Piping bag with a large tip (optional but helpful): For piping the buttercream dam.
- Measuring cups, spoons, and ideally a kitchen scale.
The 6-inch pans and cake decorating tools are particularly helpful here.
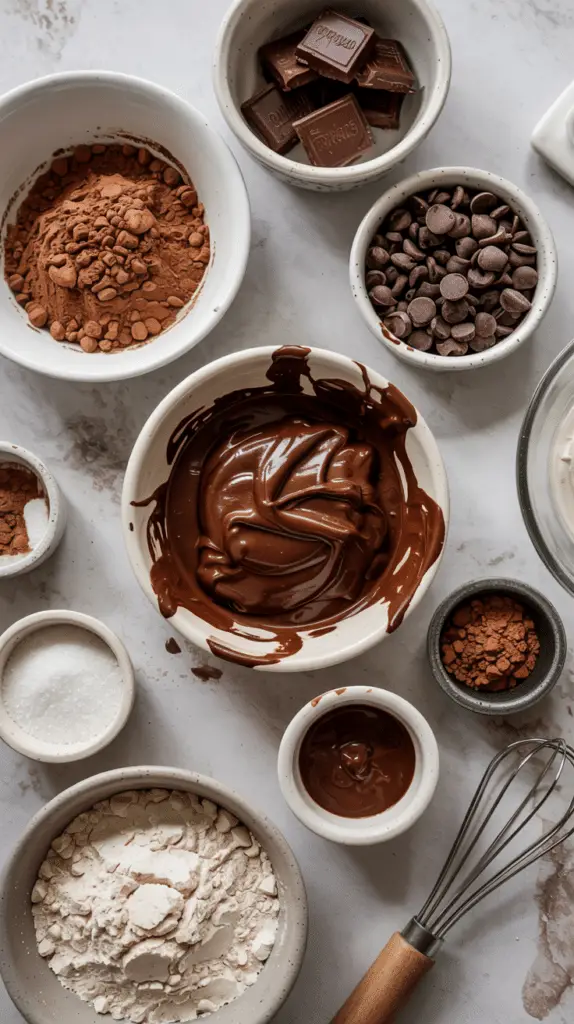
List of Ingredients with Measurements
Here’s the complete list, including the correction for powdered sugar in the buttercream:
For the Cake:
- 1 3/4 cups cake flour (210g)
- 1 tsp baking soda (6g)
- 1/2 tsp baking powder (2g)
- 13 tbsp (1 stick + 5 tbsp) unsalted butter (185g)
- 1/2 cup brown sugar (100g)
- 1/2 cup white sugar (100g)
- 3 tbsp coffee (45mL)
- 1 tbsp vanilla paste (15mL)
- 2/3 cup buttermilk (158mL)
- 2 large eggs
- 2 egg yolks
- 1/2 cup sour cream (118mL)
- 1 cup cocoa powder (100g) Note: This seems high for the flour amount, double-check original source if possible. Standard cakes might use 1/2 to 3/4 cup. I’ll proceed as written.
For the Ganache:
- 2 cups semi-sweet chocolate chips (350g)
- 1 1/2 cup heavy cream (355mL)
- 1 cup walnuts (125g), toasted
- 1 1/2 cup mini marshmallows (75g)
For the Buttercream:
- 2/3 cup semi-sweet chocolate (115g), melted and cooled
- 1/3 cup hazelnut chocolate (e.g., melted Nutella or similar) (60g), melted and cooled
- 1/3 cup cocoa powder (35g)
- 1 lb (4 sticks) unsalted butter (454g), room temp
- 4 cups powdered sugar (460-500g approx.) (Corrected from “sugar”)
- 1/4 tsp salt (1g), heaping
- 1 tsp vanilla extract (5mL)
- 1-2 Tbsp Heavy Cream (if needed)
Ensure all temperatures are correct (room temp butter/eggs, cooled melted chocolates).

Step-by-Step Instructions
Let’s build this decadent cake layer by layer:
1. Make the Cake Layers:
- Preheat oven to 350°F (175°C). Butter and flour three 6-by-2-inch cake pans, lining the bottoms with parchment.
- In a small bowl, mix together the buttermilk, sour cream, coffee, and vanilla paste.
- In a large bowl, whisk together the cake flour, cocoa powder, baking powder, baking soda, and salt.
- In the bowl of a standing mixer with the paddle attachment, beat the butter and both sugars until light and fluffy.
- With the mixer on low, beat in the eggs and egg yolks, one at a time.
- Beat in the flour mixture and the buttermilk mixture in three alternating batches, beginning and ending with the flour mixture. Mix just until almost combined after each addition.
- Use a spatula to scrape the bottom and sides and gently complete the mixing. Do not overmix.
- Divide the batter evenly between the prepared pans; smooth the tops.
- Bake for about 30 minutes, or until a wooden skewer inserted into the center comes out clean.
- Let the cakes cool in pans for 10 minutes, then invert onto a wire rack, remove parchment, and let cool completely.
2. Make the Buttercream:
- In a large mixer bowl (paddle attachment), beat the room temperature butter until light and fluffy.
- Mix in the sifted powdered sugar, cocoa powder, vanilla, and salt on low speed until combined, then increase speed and beat until smooth.
- Add the cooled melted semi-sweet chocolate and cooled melted hazelnut chocolate. Beat until fully combined and fluffy.
- If the buttercream seems too thick, add heavy cream, one tablespoon at a time, until desired consistency is reached.
3. Make the Rocky Road Ganache:
- Place the semi-sweet chocolate chips in a medium heatproof bowl.
- Scald the heavy cream in a small saucepan over medium heat (bring it just to a boil).
- Pour the hot cream over the chocolate chips. Let sit undisturbed for two minutes.
- Whisk gently until completely smooth and glossy.
- Reserve about 2/3 cup of the plain ganache for the drip later (cover and keep at room temperature).
- Let the remaining larger portion of ganache cool slightly until it’s thickened but still stirrable. Fold in the toasted walnuts and mini marshmallows.
4. Assemble the Cake:
- Level the cooled cake layers if necessary.
- Place the first cake layer on your serving plate or cake board. Pipe a ring (dam) of buttercream around the top edge.
- Use an offset spatula to fill the center (inside the dam) with half of the rocky road ganache filling.
- Place the second cake layer on top. Pipe another buttercream dam. Fill with the remaining rocky road ganache filling.
- Place the third cake layer on top.
- Apply a thin crumb coat of buttercream over the entire cake and chill for 30 minutes.
- Frost the outside of the cake smoothly with the remaining buttercream.
5. Decorate:
- Gently reheat the reserved plain ganache in the microwave (50% power, short bursts) until it’s pourable but not hot.
- Drizzle the ganache over the top edge of the chilled cake, encouraging drips down the sides.
- Pile some extra rocky road ganache mixture (if you reserved any, or make a small extra bit) or simply some extra toasted walnuts and mini marshmallows decoratively on top of the cake.
- Add a final light drizzle of chocolate ganache over the topping, if desired.
- Chill briefly to set the drip before serving.
This multi-step assembly creates the final masterpiece!

Troubleshooting
Complex cakes mean more potential troubleshooting:
- Cake Texture Issues (Dry/Dense): Check baking time, ensure accurate flour/cocoa measurements, avoid overmixing batter. The sour cream/buttermilk/oil should yield moistness.
- Buttercream Splitting/Greasy: Usually temperature-related. Ensure butter is correct room temp, melted chocolates are fully cooled. Try the chilling/re-whipping or gentle warming tricks mentioned previously.
- Ganache Too Thick/Thin (Filling): If too thick to fold in nuts/marshmallows, gently warm slightly. If too thin, let it cool longer.
- Ganache Drip Too Thick/Thin: Temperature is key. Too cold = too thick, won’t drip nicely. Too warm = too thin, drips too fast/pools. Reheat gently or let cool as needed, testing on a glass.
- Assembly Instability: Chill the cake after the crumb coat and potentially briefly after applying the final frosting layer before dripping. Ensure buttercream dam is sturdy.
Work patiently and control temperatures.
Tips and Variations
- Tip: Toasting the walnuts brings out their flavor significantly – don’t skip this! Spread on a baking sheet and bake at 350°F for 5-8 minutes until fragrant.
- Variation: Substitute pecans or almonds for walnuts if preferred.
- Tip: Use high-quality cocoa powder and chocolates for the best flavor throughout the cake.
- Variation: Add 1-2 tsp instant espresso powder to the cake batter or coffee buttercream for a mocha-rocky road twist.
- Tip: For clean slices, use a long, sharp knife dipped in hot water and wiped clean between each cut.
- Variation: Incorporate graham cracker crumbs into the filling layers or around the base, similar to the S’mores Cake, for another textural element.
Make this impressive cake your own!
Serving and Pairing Suggestions
This Rocky Road Cake is a statement dessert, perfect for celebrations.
Serving: Serve slices at cool room temperature. Let it sit out for 20-30 minutes if fully refrigerated for the best frosting texture.
Pairing:
- Ideal for birthdays, holidays, or any event deserving a show-stopping chocolate cake.
- A glass of cold milk is a perfect, simple pairing.
- Coffee or espresso cuts through the richness nicely.
- For adults, a stout beer, a coffee liqueur, or even a port wine could complement the deep flavors. Drink with moderation.
Due to its richness, a small slice goes a long way!
Nutritional Information
This is a very decadent, multi-component cake. Nutritional information is highly approximate and depends greatly on slice size. A slice (assuming 12-16 slices from a 6-inch, 3-layer cake) could contain:
- Calories: 700-900+
- Fat: 45-60+ grams
- Saturated Fat: 25-35+ grams
- Cholesterol: 120-180+ mg
- Sodium: 250-400+ mg
- Total Carbs.: 80-110+ grams
- Dietary Fiber: 4-7 grams
- Sugars: 60-80+ grams
- Protein: 8-12 grams
This is an exceptionally rich dessert for special occasions, to be enjoyed in moderation.
PrintRocky Road Cake
Bake the ultimate Rocky Road Cake! Features moist chocolate cake layers, rocky road ganache filling, chocolate hazelnut buttercream, and a chocolate drip.
Ingredients
Here’s the complete list, including the correction for powdered sugar in the buttercream:
For the Cake:
- 1 3/4 cups cake flour (210g)
- 1 tsp baking soda (6g)
- 1/2 tsp baking powder (2g)
- 13 tbsp (1 stick + 5 tbsp) unsalted butter (185g)
- 1/2 cup brown sugar (100g)
- 1/2 cup white sugar (100g)
- 3 tbsp coffee (45mL)
- 1 tbsp vanilla paste (15mL)
- 2/3 cup buttermilk (158mL)
- 2 large eggs
- 2 egg yolks
- 1/2 cup sour cream (118mL)
- 1 cup cocoa powder (100g) Note: This seems high for the flour amount, double-check original source if possible. Standard cakes might use 1/2 to 3/4 cup. I’ll proceed as written.
For the Ganache:
- 2 cups semi-sweet chocolate chips (350g)
- 1 1/2 cup heavy cream (355mL)
- 1 cup walnuts (125g), toasted
- 1 1/2 cup mini marshmallows (75g)
For the Buttercream:
- 2/3 cup semi-sweet chocolate (115g), melted and cooled
- 1/3 cup hazelnut chocolate (e.g., melted Nutella or similar) (60g), melted and cooled
- 1/3 cup cocoa powder (35g)
- 1 lb (4 sticks) unsalted butter (454g), room temp
- 4 cups powdered sugar (460-500g approx.) (Corrected from “sugar”)
- 1/4 tsp salt (1g), heaping
- 1 tsp vanilla extract (5mL)
- 1-2 Tbsp Heavy Cream (if needed)
Ensure all temperatures are correct (room temp butter/eggs, cooled melted chocolates).
Instructions
Let’s build this decadent cake layer by layer:
1. Make the Cake Layers:
- Preheat oven to 350°F (175°C). Butter and flour three 6-by-2-inch cake pans, lining the bottoms with parchment.
- In a small bowl, mix together the buttermilk, sour cream, coffee, and vanilla paste.
- In a large bowl, whisk together the cake flour, cocoa powder, baking powder, baking soda, and salt.
- In the bowl of a standing mixer with the paddle attachment, beat the butter and both sugars until light and fluffy.
- With the mixer on low, beat in the eggs and egg yolks, one at a time.
- Beat in the flour mixture and the buttermilk mixture in three alternating batches, beginning and ending with the flour mixture. Mix just until almost combined after each addition.
- Use a spatula to scrape the bottom and sides and gently complete the mixing. Do not overmix.
- Divide the batter evenly between the prepared pans; smooth the tops.
- Bake for about 30 minutes, or until a wooden skewer inserted into the center comes out clean.
- Let the cakes cool in pans for 10 minutes, then invert onto a wire rack, remove parchment, and let cool completely.
2. Make the Buttercream:
- In a large mixer bowl (paddle attachment), beat the room temperature butter until light and fluffy.
- Mix in the sifted powdered sugar, cocoa powder, vanilla, and salt on low speed until combined, then increase speed and beat until smooth.
- Add the cooled melted semi-sweet chocolate and cooled melted hazelnut chocolate. Beat until fully combined and fluffy.
- If the buttercream seems too thick, add heavy cream, one tablespoon at a time, until desired consistency is reached.
3. Make the Rocky Road Ganache:
- Place the semi-sweet chocolate chips in a medium heatproof bowl.
- Scald the heavy cream in a small saucepan over medium heat (bring it just to a boil).
- Pour the hot cream over the chocolate chips. Let sit undisturbed for two minutes.
- Whisk gently until completely smooth and glossy.
- Reserve about 2/3 cup of the plain ganache for the drip later (cover and keep at room temperature).
- Let the remaining larger portion of ganache cool slightly until it’s thickened but still stirrable. Fold in the toasted walnuts and mini marshmallows.
4. Assemble the Cake:
- Level the cooled cake layers if necessary.
- Place the first cake layer on your serving plate or cake board. Pipe a ring (dam) of buttercream around the top edge.
- Use an offset spatula to fill the center (inside the dam) with half of the rocky road ganache filling.
- Place the second cake layer on top. Pipe another buttercream dam. Fill with the remaining rocky road ganache filling.
- Place the third cake layer on top.
- Apply a thin crumb coat of buttercream over the entire cake and chill for 30 minutes.
- Frost the outside of the cake smoothly with the remaining buttercream.
5. Decorate:
- Gently reheat the reserved plain ganache in the microwave (50% power, short bursts) until it’s pourable but not hot.
- Drizzle the ganache over the top edge of the chilled cake, encouraging drips down the sides.
- Pile some extra rocky road ganache mixture (if you reserved any, or make a small extra bit) or simply some extra toasted walnuts and mini marshmallows decoratively on top of the cake.
- Add a final light drizzle of chocolate ganache over the topping, if desired.
- Chill briefly to set the drip before serving.
This multi-step assembly creates the final masterpiece!
Recipe Summary and Q&A
Let’s finish with a summary and questions:
Recipe Summary:
Rocky Road Cake is a three-layer chocolate cake featuring a rich batter with buttermilk, sour cream, and coffee. It’s filled with a rocky road ganache (chocolate ganache with walnuts and marshmallows), frosted with a chocolate hazelnut buttercream, and finished with a chocolate drip and extra rocky road toppings.
Q&A:
Q: Can I make this cake ahead of time? A: Yes. Components can be made ahead: bake/freeze cake layers, make buttercream/ganache (refrigerate, bring to temp/re-whip/reheat as needed). Assemble the cake up to 1-2 days before serving (store covered in fridge).
Q: How do I store the finished cake? A: Store covered in the refrigerator due to the buttercream and ganache. Let sit out briefly before serving. Keeps for 3-4 days.
Q: Can I use different nuts? A: Absolutely. Pecans or almonds would work well.
Q: What if I can’t find vanilla paste? A: Substitute an equal amount of high-quality pure vanilla extract.
Q: Can I make this in larger pans (e.g., 8-inch)? A: Yes, but you’ll get two shorter layers instead of three taller ones, and the baking time will likely be longer. Adjust frosting/filling amounts accordingly.
I hope this detailed guide helps you create this incredible Rocky Road Cake! It’s a fantastic baking project with a truly delicious payoff. Enjoy!
Did Our Recipe Hit The Spot?
There are no reviews yet. Be the first one to write one.


