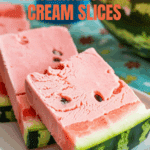
Spectacular No-Churn Watermelon Ice Cream Slices (A Showstopper!)
Make spectacular No-Churn Watermelon Ice Cream Slices! This unique recipe shows you how to make creamy watermelon ice cream and serve it inside the watermelon rind.
Ingredients
Here’s the complete list of ingredients, with precise measurements:
- One 4- to 5-pound mini seedless watermelon
- One 14-ounce can sweetened condensed milk
- Pinch of fine salt
- 2 cups heavy cream, chilled
These four simple ingredients create a truly spectacular dessert!
Have your watermelon chilled and your heavy cream very cold before you begin.
Instructions
Let’s create this incredible and fun frozen dessert:
1. Prepare the Watermelon Shell:
- Wash and dry the outside of the watermelon.
- Carefully cut a thin slice off the top of the watermelon, just enough to expose the pink flesh inside and create an opening large enough for your immersion blender.
- Stand the watermelon upright (cut-side up) in a large bowl to keep it stable.
- Insert an immersion blender into the cut opening. Begin to puree the watermelon flesh inside the rind, moving the blender around and following the shape of the watermelon’s interior. Be careful not to press too hard or cut through the sides or bottom of the watermelon rind.
- Once the inside is mostly liquefied, pour out the juice into a large measuring cup or bowl. Measure out 1 ½ cups of this fresh watermelon juice and reserve it for the ice cream base. Save any remaining juice for another use (it’s delicious to drink!).
- Using a large spoon, carefully scoop out any remaining red watermelon flesh from inside the rind, so you are left with a smooth, white interior surface.
- Make sure there is no loose juice remaining inside the watermelon shell. Pat the inside dry with a paper towel.
- Place the hollowed-out watermelon rind “bowl” in the freezer while you make the ice cream (at least 30-60 minutes).
2. Make the No-Churn Ice Cream Base:
- In a large bowl, whisk together the 14-ounce can of sweetened condensed milk, the pinch of fine salt, and the reserved 1 ½ cups of fresh watermelon juice until well combined. Set this mixture aside.
3. Whip the Heavy Cream:
- In a separate large bowl (preferably chilled), pour in the 2 cups of cold heavy cream.
- Using an electric mixer on medium-high speed, whip the cream until it holds firm peaks, about 2-3 minutes. Firm peaks hold their shape and the tip of the peak stands up straight when the beaters are lifted.
4. Combine to Make Ice Cream Mixture:
- Gently fold about half of the whipped cream into the condensed milk and watermelon juice mixture using a rubber spatula. This lightens the condensed milk base, making it easier to incorporate without deflating all the air.
- Once that is combined, pour the lightened mixture back into the bowl with the remaining whipped cream.
- Gently fold everything together until just well blended and no streaks remain. Be careful not to overmix and knock out all the air from the whipped cream.
5. Assemble and Freeze:
- Remove the frozen watermelon rind shell from the freezer.
- Pour the prepared watermelon ice cream mixture into the frozen watermelon, filling it all the way to the top.
- Cover the opening tightly with plastic wrap.
- Carefully place the filled watermelon back in the freezer on a level surface. Freeze until completely solid, at least 3 hours, but preferably up to 12 hours or overnight for the firmest set.
6. Thaw and Slice:
- Important: If the watermelon ice cream has been frozen overnight, it will be very hard. Let it thaw in the refrigerator for about 2 hours, or at room temperature for 30-60 minutes, before attempting to slice it.
- Once slightly thawed, place the watermelon cut-side down on a large cutting board.
- Using a long, sharp chef’s knife, carefully halve the watermelon lengthwise. Then, cut each half lengthwise into 3 or 4 wedges, so they look like classic watermelon slices.
7. Serve:
- Serve the No-Churn Watermelon Ice Cream Slices immediately!
The unique presentation is half the fun!
