ntroduction & Inspiration
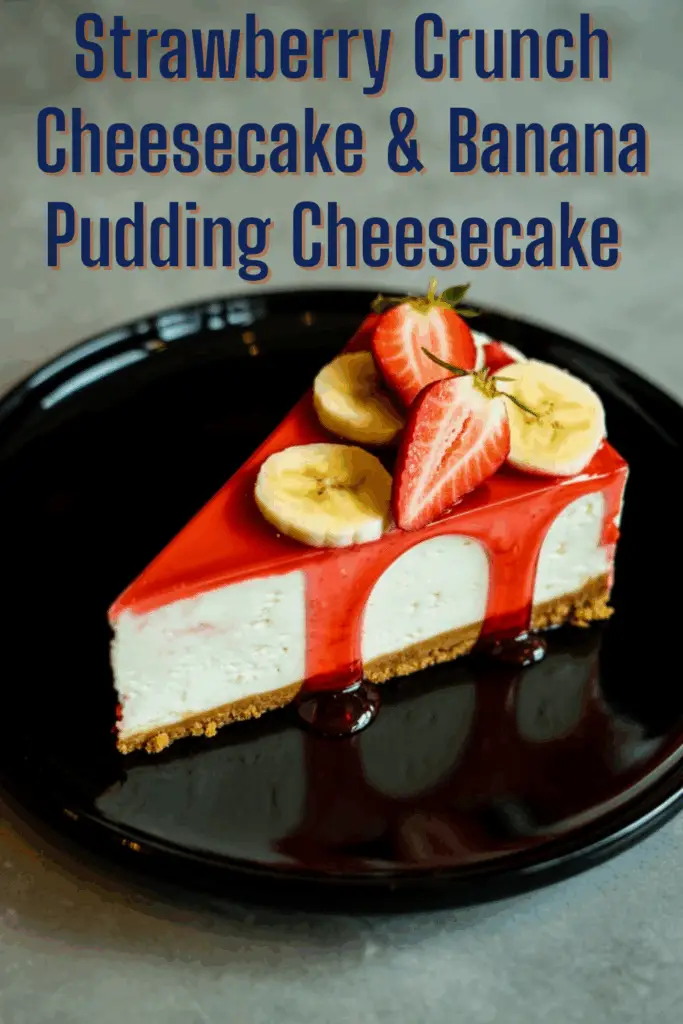
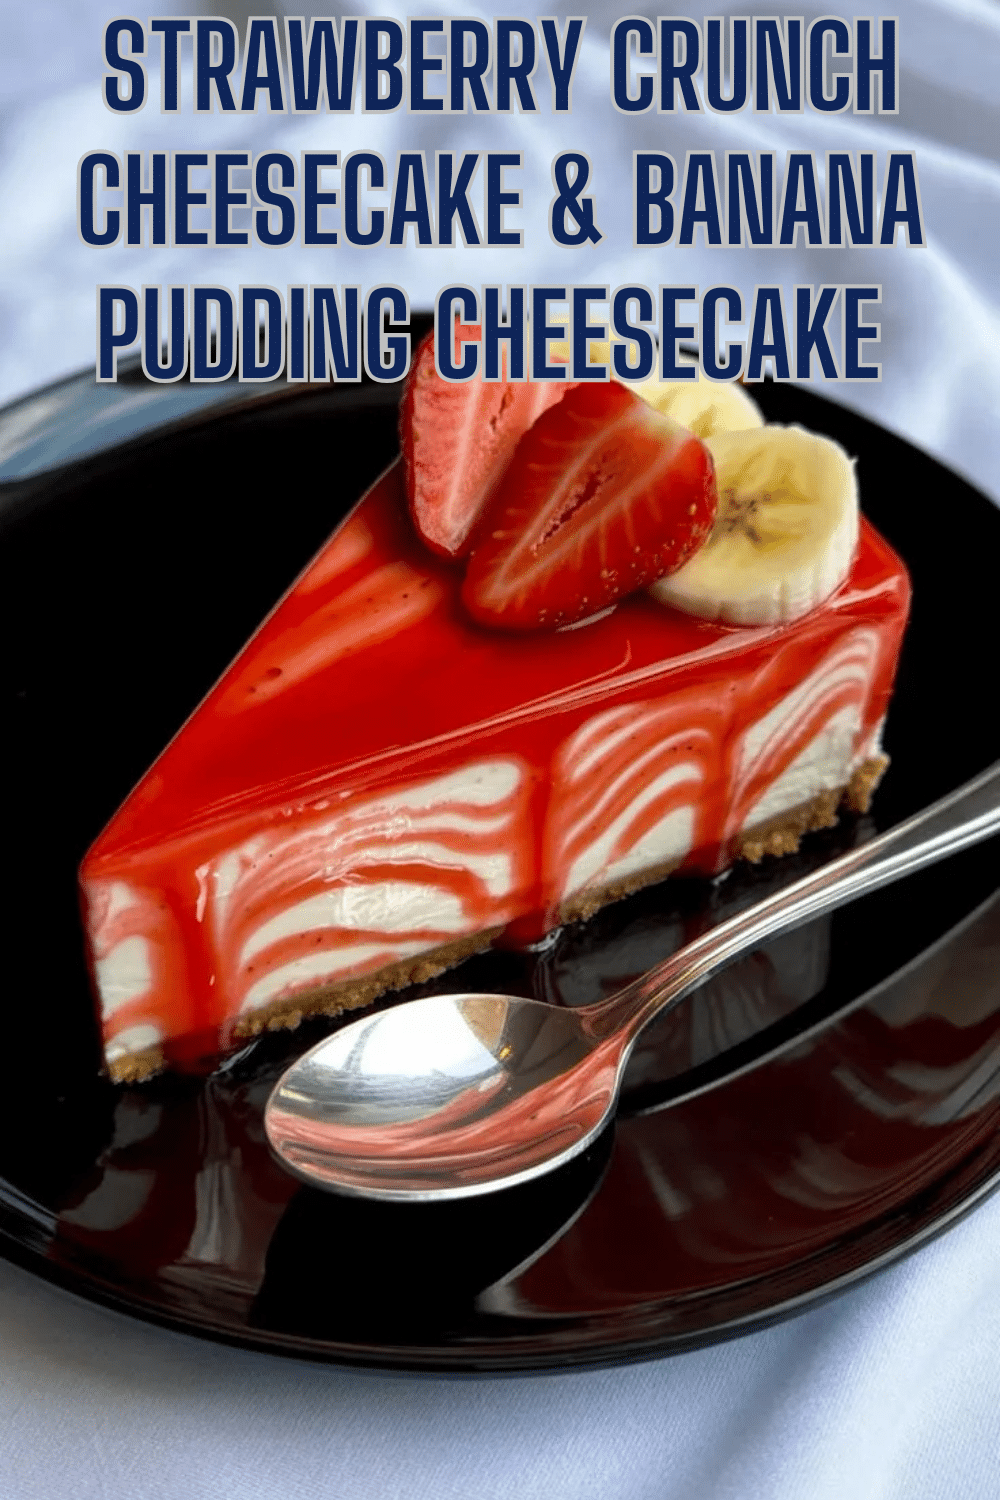
Why choose between two incredible desserts when you can have both? That was exactly my thought when I saw this genius recipe for Strawberry Crunch Cheesecake & Banana Pudding Cheesecake Bars! It features a classic baked cheesecake base on a cookie crust, cleverly divided down the middle and topped with two distinct, beloved dessert flavors: one half gets the sweet strawberry, crunchy cookie treatment, and the other half gets the creamy, comforting banana pudding treatment.
My inspiration struck immediately – imagine bringing this to a potluck or party! It caters to different tastes and looks absolutely stunning with its contrasting halves. I love both strawberry crunch desserts (reminiscent of those ice cream bars!) and classic banana pudding, so combining them with a tangy cheesecake base sounded like an incredibly fun and delicious project.
My goal is to guide you through creating this impressive dessert bar. We’ll bake the perfect cheesecake foundation and then assemble the distinct Strawberry Crunch and Banana Pudding toppings on each half. It’s easier than making two separate desserts but delivers twice the flavor excitement!
Let’s get ready to bake and assemble this amazing two-in-one cheesecake bar!
Nostalgic Appeal / Comfort Food Connection
This dessert is a powerhouse of nostalgic comfort! The base layer – baked cheesecake on a vanilla wafer or graham cracker crust – is a timeless classic, evoking celebrations, holidays, and rich, creamy indulgence. Baked cheesecake feels special yet deeply comforting.
Then you have the toppings, each tapping into its own nostalgia. The Strawberry Crunch side brings back memories of those iconic strawberry shortcake ice cream bars with their crunchy coating, combined with the simple pleasure of fresh strawberries and glaze. The Banana Pudding side is pure Southern comfort food nostalgia, reminiscent of family gatherings, potlucks, and layers of creamy pudding, bananas, and vanilla wafers.
Combining these distinct nostalgic profiles – cheesecake, strawberry crunch, banana pudding – onto one shareable dessert bar creates a unique experience that feels both comfortingly familiar and excitingly novel. It’s like a greatest hits compilation of comforting homemade desserts!
Making and sharing this feels like offering a little something special for everyone, rooted in beloved flavors and comforting traditions.
Homemade Focus (Building the Base & Toppings)
While this recipe cleverly combines popular flavor profiles often associated with specific products (like strawberry crunch ice cream bars), the core components are largely homemade, showcasing the rewarding process of building a dessert from scratch. You’re creating a classic baked cheesecake base and assembling two distinct, flavorful toppings.
I appreciate recipes that involve distinct stages, allowing focus on each element. First, you make the homemade crust – simple, but satisfying. Then, you whip up the classic baked cheesecake filling, focusing on achieving that smooth, creamy texture without cracks (we’ll share tips!). Baking this base requires patience and care, hallmarks of homemade quality.
Once the cheesecake base is baked and thoroughly chilled (crucial!), the homemade focus shifts to assembly. You create the buttery Golden Oreo crumble for the strawberry side and layer it with fresh berries and glaze. For the other side, you layer banana pudding (homemade or store-bought), fresh banana slices, and whipped cream (homemade recommended in tips!). This careful layering and topping process results in a truly impressive homemade dessert bar.
From baking the cheesecake foundation to crafting the individual toppings, this recipe celebrates the rewarding process of creating a multi-faceted dessert in your own kitchen.
Flavor Goal
The primary flavor goal of this dessert bar is to offer two distinct yet complementary flavor experiences unified by a tangy, creamy cheesecake base and a buttery cookie crust.
On the Strawberry Crunch side: The goal is a balance of sweet-tart fresh strawberries, a sweet strawberry glaze or preserve, and the buttery, crunchy texture of the Golden Oreo crumble, all contrasting with the smooth cheesecake.
On the Banana Pudding side: The aim is the classic comforting flavor of creamy vanilla-banana pudding, sweet fresh banana slices, and light whipped cream, complemented by the cheesecake base and potentially vanilla wafer crumbs.
Overall: The cheesecake base provides a tangy, rich foundation that works well with both the bright, fruity strawberry side and the creamy, comforting banana side. The crust adds a necessary textural contrast. It’s designed to be a crowd-pleaser offering two distinct flavor profiles in one impressive dessert.
Ingredient Insights
Let’s explore the components for this two-in-one treat:
For the Crust:
- Crushed vanilla wafers or graham crackers: Provides the base texture and flavor. Vanilla wafers lean into the banana pudding theme, graham crackers are classic cheesecake.
- Melted butter & Sugar: Bind the crumbs and add richness/sweetness.
For the Cheesecake Base:
- Cream cheese, softened: Essential! Full-fat block style provides the best texture and tang. Must be fully softened.
- Granulated sugar: Sweetens the cheesecake.
- Large eggs: Provide structure and richness. Room temperature incorporates better.
- Vanilla extract: Classic cheesecake flavoring.
- Sour cream: Adds moisture and extra tang, contributing to a creamy texture. Room temperature incorporates better.
For the Strawberry Crunch Topping:
- Crushed golden Oreos: Provide the signature “crunch” element with a vanilla cookie flavor.
- Melted butter: Binds the Oreo crumbs.
- Fresh strawberries, chopped: Provide fresh fruit flavor.
- Strawberry glaze or strawberry preserves: Adds intense strawberry flavor, sweetness, and moisture.
For the Banana Pudding Topping:
- Banana pudding: Recipe Missing! This implies using prepared pudding – either from a box mix (like instant vanilla), homemade stovetop pudding, or even store-bought pudding cups. Needs about 1-2 cups depending on desired layer thickness.
- Banana slices: Fresh banana flavor and texture. Toss with lemon juice to prevent browning.
- Whipped cream: Recipe Missing! Implies topping with whipped cream. Homemade (sweetened heavy cream + vanilla) or Cool Whip could be used.
- Garnish: Crushed vanilla wafers or cinnamon enhance the theme.
Using room temperature cream cheese, eggs, and sour cream is crucial for a smooth cheesecake base. The missing pudding/whipped cream recipes require external sourcing or simple preparation.
Essential Equipment
You’ll need standard baking tools for cheesecake bars:
- A 9×13-inch baking pan: Metal is generally preferred for cheesecakes/bars.
- Foil or Parchment paper: Highly recommended for lining the pan for easy removal and slicing.
- Mixing bowls (large for cheesecake, medium for crust, small for crumble).
- An Electric mixer (stand mixer or handheld): Essential for beating the cream cheese filling smooth and lump-free. 1 1. Cream Cheese Filling – Wilton wilton.com
- A food processor or rolling pin/zip-top bag: For crushing cookies for the crust and topping.
- Rubber spatula: For folding ingredients and spreading batter/layers.
- Offset spatula (optional but helpful): For spreading cheesecake batter and toppings evenly.
- Measuring cups and spoons.
Lining the 9×13 pan is key for getting these bars out cleanly.
List of Ingredients with Measurements
Here’s the complete list of ingredients, with precise measurements (and notes on missing components):
For the Crust:
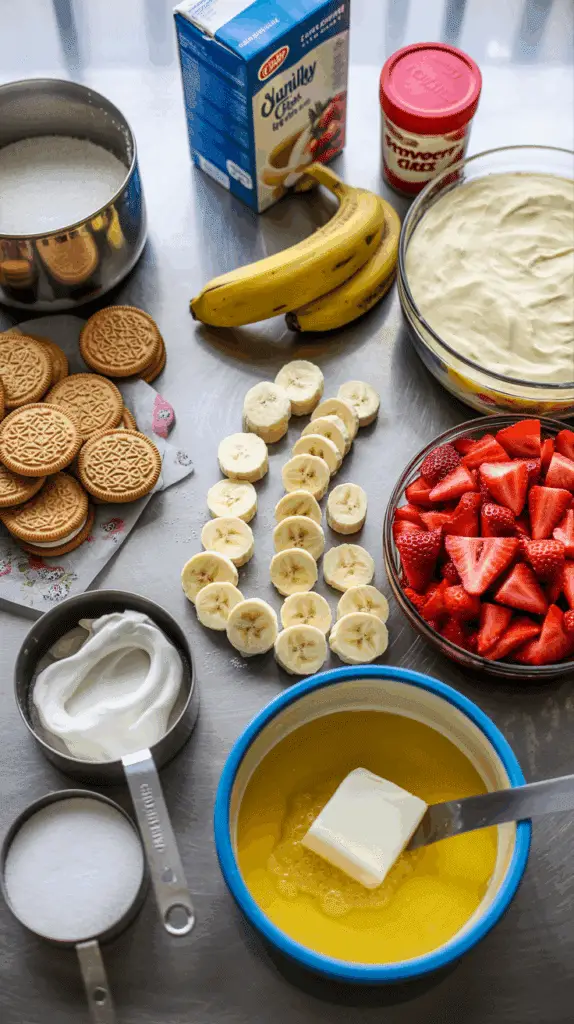
- 2 cups crushed vanilla wafers or graham crackers
- ½ cup melted butter (salted or unsalted)
- ¼ cup sugar
For the Cheesecake Base:
- 16 oz (2 blocks) cream cheese, softened
- ¾ cup granulated sugar
- 2 large eggs, room temperature
- 1 tsp vanilla extract
- ½ cup sour cream, room temperature
For the Strawberry Crunch Topping:
- 1 cup crushed golden Oreos
- 2 tbsp melted butter
- ½ cup fresh strawberries, chopped
- ½ cup strawberry glaze or strawberry preserves
For the Banana Pudding Topping:
- Banana Pudding: (Recipe not provided) Approx. 1.5-2 cups needed. Can use prepared instant vanilla pudding (e.g., one small box made with milk) or homemade vanilla pudding.
- Banana slices: From 1-2 ripe bananas. (Tip: Toss with lemon juice).
- Whipped Cream: (Recipe not provided) Approx. 1-2 cups needed for topping. Can use store-bought whipped topping (like Cool Whip, thawed) or homemade whipped cream (heavy cream + powdered sugar + vanilla).
Optional Garnishes:
- Fresh strawberry slices
- Strawberry syrup/drizzle
- Crushed vanilla wafers
- Ground cinnamon
Ensure cream cheese, eggs, and sour cream are at room temperature for the cheesecake base.

Step-by-Step Instructions (Bake & Assemble)
Let’s build this amazing half-and-half dessert bar:
1. Prepare Oven and Crust:
- Preheat your oven to 350°F (175°C).
- Line a 9×13-inch baking pan with foil or parchment paper, leaving an overhang on the long sides to act as a sling for easy removal later. Lightly grease the lining.
- In a medium bowl, combine the crushed vanilla wafers (or graham crackers), melted butter, and ¼ cup sugar. Mix until crumbs are evenly moistened.
- Press the mixture firmly and evenly into the bottom of the prepared pan.
- Bake the crust for 10 minutes. Remove from oven and let cool on a wire rack while you prepare the filling. Keep the oven on.
2. Make the Cheesecake Base:
- In a large mixing bowl, beat the softened cream cheese and ¾ cup granulated sugar together with an electric mixer (medium speed) until completely smooth and fluffy, scraping down the sides as needed.
- Add the room temperature eggs one at a time, beating well on low speed just until combined after each addition. Don’t overbeat once eggs are added.
- Stir in the vanilla extract and room temperature sour cream until fully combined and the mixture is smooth.
3. Bake the Cheesecake:
- Pour the cheesecake batter evenly over the cooled crust in the pan. Spread smoothly with a spatula.
- Bake for 35–40 minutes, or until the edges are set and the center is almost set (it should still have a slight wobble).
- Turn off the oven, crack the oven door open slightly, and let the cheesecake cool slowly in the cooling oven for about 1 hour. This helps prevent cracking.
- Remove from oven and let cool completely at room temperature.
4. Chill Cheesecake Base:
- Once completely cool, cover the pan tightly with plastic wrap and refrigerate for at least 4 hours, or preferably overnight, until completely chilled and firm. This step is crucial for clean slicing and for the toppings to sit nicely.
5. Prepare Strawberry Crunch Crumble:
- In a small bowl, mix the crushed golden Oreos with 2 tbsp melted butter until combined and crumbly. Set aside.
6. Assemble the Strawberry Crunch Side:
- Visually divide the chilled cheesecake base in half lengthwise down the middle.
- On one half, evenly spread the ½ cup of chopped fresh strawberries.
- Drizzle the ½ cup of strawberry glaze or preserves generously over the strawberries on that half.
- Sprinkle the prepared golden Oreo crumble evenly over the glaze/strawberries on that same half.
7. Assemble the Banana Pudding Side:
- On the other half of the chilled cheesecake base, spread a generous layer of prepared banana pudding (homemade or from a mix).
- Arrange banana slices (tossed in lemon juice to prevent browning) evenly over the pudding layer.
- Top the banana/pudding layer with whipped cream (homemade or Cool Whip), spreading it gently.
8. Add Final Garnishes:
- Garnish the strawberry side further with fresh strawberry slices or an extra drizzle of glaze/syrup if desired.
- Garnish the banana side with more banana slices, a sprinkle of crushed vanilla wafers, or a light dusting of cinnamon.
9. Chill Briefly & Serve:
- Chill the fully assembled dessert bar for about 15-30 minutes to allow toppings to set slightly.
- Use the parchment/foil overhang to lift the entire bar out of the pan onto a cutting board. Slice into squares or bars using a sharp knife (dip in hot water and wipe clean between cuts for neatest results). Serve chilled.
Careful layering and thorough chilling are key!

Troubleshooting
Cheesecakes and layered desserts can have quirks:
- Problem: Cheesecake cracked during baking/cooling.
- Solution: Often caused by overbaking, mixing on too high speed after adding eggs, or cooling too rapidly. The slow cool-down in the oven helps prevent this. Don’t worry too much – the toppings will cover cracks! Ensure ingredients were room temp.
- Problem: Crust is too hard or too crumbly.
- Solution: Ensure correct butter-to-crumb ratio. Don’t overbake the crust initially. Press firmly but evenly.
- Problem: Cheesecake base isn’t fully set after chilling.
- Solution: Needs more chilling time! Ensure it was baked until the center was just almost set initially. Refrigerate overnight for best results.
- Problem: Toppings are sliding off or messy.
- Solution: Ensure the cheesecake base is completely chilled and firm before adding toppings. Apply toppings gently. Chill briefly after assembly to help toppings set.
- Problem: Bananas turned brown.
- Solution: Toss banana slices gently with a little fresh lemon juice right before placing them on the pudding layer, as suggested in the tips. Assemble closer to serving time if possible.
Don’t skimp on chilling time!
Tips and Variations
Let’s customize this fun dessert bar:
- Tip: Use full-fat block cream cheese and room temperature ingredients (eggs, sour cream, cream cheese) for the smoothest, richest cheesecake base.
- Variation: Make a full Strawberry Crunch Cheesecake bar by doubling the strawberry topping components and covering the whole cheesecake. Do the same for a full Banana Pudding version.
- Tip: Prepare your own simple banana pudding using instant vanilla pudding mix prepared with slightly less milk for a thicker consistency.
- Variation: Use different cookies for the crust or the crunch topping (e.g., shortbread for crust, different Oreo flavors for crunch).
- Tip: If using homemade whipped cream for the topping, stabilize it with a little cream cheese or unflavored gelatin for better holding power.
- Variation: Add a layer of chocolate ganache or melted chocolate over the crust before adding the cheesecake filling.
- Variation: Use different fruit glazes or pie fillings for the strawberry side (e.g., raspberry).
Mix and match your favorite dessert elements!
Serving and Pairing Suggestions
These Strawberry Crunch & Banana Pudding Cheesecake Bars are perfect for parties and potlucks.
Serving: Serve chilled, cut into squares or rectangles. The half-and-half presentation is the main visual appeal!
Pairing:
- Potlucks/Parties: Ideal because it offers two popular flavors in one easy-to-serve format.
- Dessert Table: A stunning addition to any dessert spread.
- Beverages: Pairs well with coffee, tea, milk, or even iced coffee.
It’s a fun conversation starter and pleases multiple palates!
Nutritional Information
This is a rich, multi-component dessert bar. Nutritional info is highly approximate and depends greatly on specific ingredients (pudding type, whipped topping vs cream, crust type) and bar size (assuming 12-16 bars):
- Calories: 400-550+ per bar
- Fat: 20-35+ grams
- Saturated Fat: 12-20+ grams (from butter, cream cheese, potentially whipped topping/pudding)
- Cholesterol: 60-100+ mg
- Sodium: 200-350+ mg
- Total Carbs.: 45-60+ grams
- Dietary Fiber: 1-3 grams
- Sugars: 30-45+ grams (Significant amount from sugar, cookies, glaze, pudding, topping)
- Protein: 4-7 grams
Definitely an indulgent dessert, high in sugar and fat. Enjoy as a special treat!
PrintStrawberry Crunch Cheesecake & Banana Pudding Cheesecake
Make amazing Strawberry Crunch & Banana Pudding Cheesecake Bars! Features a baked cheesecake base topped half with strawberry crunch and half with banana pudding
Ingredients
Here’s the complete list of ingredients, with precise measurements (and notes on missing components):
For the Crust:
- 2 cups crushed vanilla wafers or graham crackers
- ½ cup melted butter (salted or unsalted)
- ¼ cup sugar
For the Cheesecake Base:
- 16 oz (2 blocks) cream cheese, softened
- ¾ cup granulated sugar
- 2 large eggs, room temperature
- 1 tsp vanilla extract
- ½ cup sour cream, room temperature
For the Strawberry Crunch Topping:
- 1 cup crushed golden Oreos
- 2 tbsp melted butter
- ½ cup fresh strawberries, chopped
- ½ cup strawberry glaze or strawberry preserves
For the Banana Pudding Topping:
- Banana Pudding: (Recipe not provided) Approx. 1.5-2 cups needed. Can use prepared instant vanilla pudding (e.g., one small box made with milk) or homemade vanilla pudding.
- Banana slices: From 1-2 ripe bananas. (Tip: Toss with lemon juice).
- Whipped Cream: (Recipe not provided) Approx. 1-2 cups needed for topping. Can use store-bought whipped topping (like Cool Whip, thawed) or homemade whipped cream (heavy cream + powdered sugar + vanilla).
Optional Garnishes:
- Fresh strawberry slices
- Strawberry syrup/drizzle
- Crushed vanilla wafers
- Ground cinnamon
Ensure cream cheese, eggs, and sour cream are at room temperature for the cheesecake base
Instructions
Let’s build this amazing half-and-half dessert bar:
1. Prepare Oven and Crust:
- Preheat your oven to 350°F (175°C).
- Line a 9×13-inch baking pan with foil or parchment paper, leaving an overhang on the long sides to act as a sling for easy removal later. Lightly grease the lining.
- In a medium bowl, combine the crushed vanilla wafers (or graham crackers), melted butter, and ¼ cup sugar. Mix until crumbs are evenly moistened.
- Press the mixture firmly and evenly into the bottom of the prepared pan.
- Bake the crust for 10 minutes. Remove from oven and let cool on a wire rack while you prepare the filling. Keep the oven on.
2. Make the Cheesecake Base:
- In a large mixing bowl, beat the softened cream cheese and ¾ cup granulated sugar together with an electric mixer (medium speed) until completely smooth and fluffy, scraping down the sides as needed.
- Add the room temperature eggs one at a time, beating well on low speed just until combined after each addition. Don’t overbeat once eggs are added.
- Stir in the vanilla extract and room temperature sour cream until fully combined and the mixture is smooth.
3. Bake the Cheesecake:
- Pour the cheesecake batter evenly over the cooled crust in the pan. Spread smoothly with a spatula.
- Bake for 35–40 minutes, or until the edges are set and the center is almost set (it should still have a slight wobble).
- Turn off the oven, crack the oven door open slightly, and let the cheesecake cool slowly in the cooling oven for about 1 hour. This helps prevent cracking.
- Remove from oven and let cool completely at room temperature.
4. Chill Cheesecake Base:
- Once completely cool, cover the pan tightly with plastic wrap and refrigerate for at least 4 hours, or preferably overnight, until completely chilled and firm. This step is crucial for clean slicing and for the toppings to sit nicely.
5. Prepare Strawberry Crunch Crumble:
- In a small bowl, mix the crushed golden Oreos with 2 tbsp melted butter until combined and crumbly. Set aside.
6. Assemble the Strawberry Crunch Side:
- Visually divide the chilled cheesecake base in half lengthwise down the middle.
- On one half, evenly spread the ½ cup of chopped fresh strawberries.
- Drizzle the ½ cup of strawberry glaze or preserves generously over the strawberries on that half.
- Sprinkle the prepared golden Oreo crumble evenly over the glaze/strawberries on that same half.
7. Assemble the Banana Pudding Side:
- On the other half of the chilled cheesecake base, spread a generous layer of prepared banana pudding (homemade or from a mix).
- Arrange banana slices (tossed in lemon juice to prevent browning) evenly over the pudding layer.
- Top the banana/pudding layer with whipped cream (homemade or Cool Whip), spreading it gently.
8. Add Final Garnishes:
- Garnish the strawberry side further with fresh strawberry slices or an extra drizzle of glaze/syrup if desired.
- Garnish the banana side with more banana slices, a sprinkle of crushed vanilla wafers, or a light dusting of cinnamon.
9. Chill Briefly & Serve:
- Chill the fully assembled dessert bar for about 15-30 minutes to allow toppings to set slightly.
- Use the parchment/foil overhang to lift the entire bar out of the pan onto a cutting board. Slice into squares or bars using a sharp knife (dip in hot water and wipe clean between cuts for neatest results). Serve chilled.
Careful layering and thorough chilling are key
Recipe Summary and Q&A
Let’s conclude with a summary and common questions:
Recipe Summary:
Strawberry Crunch Cheesecake & Banana Pudding Cheesecake Bars feature a baked vanilla wafer or graham cracker crust topped with a classic baked cheesecake layer. Once chilled, the cheesecake is divided in half: one side is topped with fresh strawberries, strawberry glaze, and a buttery Golden Oreo crumble; the other side is topped with banana pudding, fresh banana slices, and whipped cream.
Q&A:
Q: Can I make this ahead of time? A: Yes! The cheesecake base needs to be made ahead (baked and chilled overnight is best). The toppings can be added several hours before serving. Assemble fully and keep refrigerated.
Q: How do I store leftovers? A: Store covered tightly in the refrigerator for up to 3 days. Note that the bananas will brown and the Oreo/wafer crumbs may soften over time.
Q: Can I freeze this dessert? A: Freezing the fully assembled bar is generally not recommended due to the fresh fruit, banana pudding, and whipped cream textures changing upon thawing. You can freeze the plain baked cheesecake base (cooled and well-wrapped) for up to 2 months, thaw in the fridge, then add toppings.
Q: What kind of banana pudding should I use? A: The recipe doesn’t specify. You can use homemade vanilla pudding (chilled), instant vanilla pudding prepared according to package directions (perhaps using slightly less milk for thickness), or even store-bought pudding cups.
Q: Can I make this in a round springform pan? A: Yes, you could bake the base in a 9 or 10-inch springform pan. Dividing the top visually might be slightly trickier than in a rectangle, but definitely possible! Adjust baking time slightly if needed.
Did Our Recipe Hit The Spot?
There are no reviews yet. Be the first one to write one.


