Have you ever gazed in wonder at the stunning fruit tarts in a French patisserie window—with their glossy, perfectly placed berries, their crisp, golden crusts, and their luscious, creamy filling—and thought, “I could never make that at home”? What if I told you that you absolutely can? This is your ultimate guide to creating a truly spectacular, bakery-worthy Strawberry Custard Tart from scratch.
This isn’t just a dessert; it’s a beautiful and rewarding project that will make you feel like a true pastry chef. This timeless classic is built on three perfect components: a crisp, sweet, and buttery pastry crust (pâte sucrée), a rich, smooth, and velvety vanilla pastry cream (crème pâtissière), and a simple, stunning crown of fresh, juicy strawberries. While it looks incredibly impressive, the steps are simple and straightforward.
Table of Contents
Table of Contents
Recipe Overview: A Bakery-Worthy Masterpiece
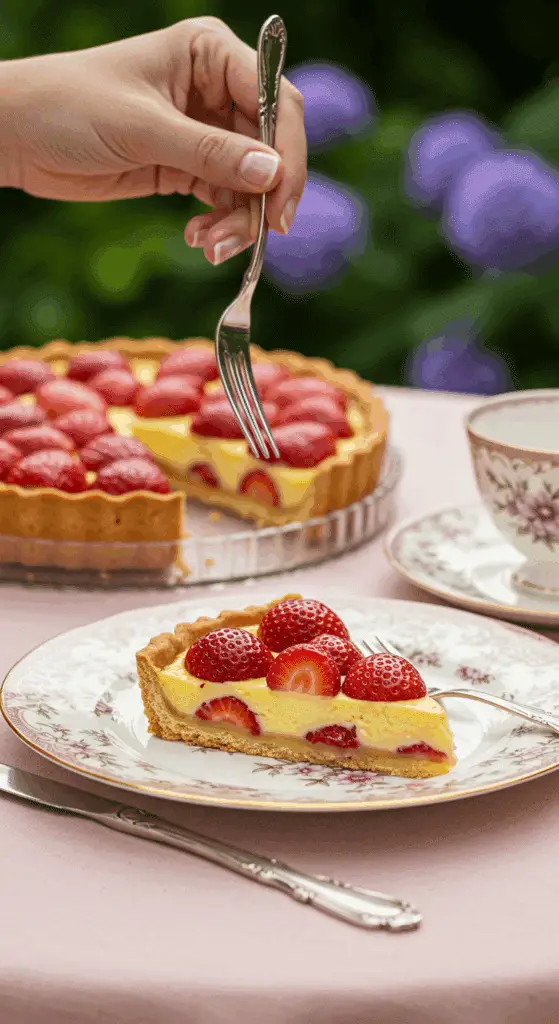
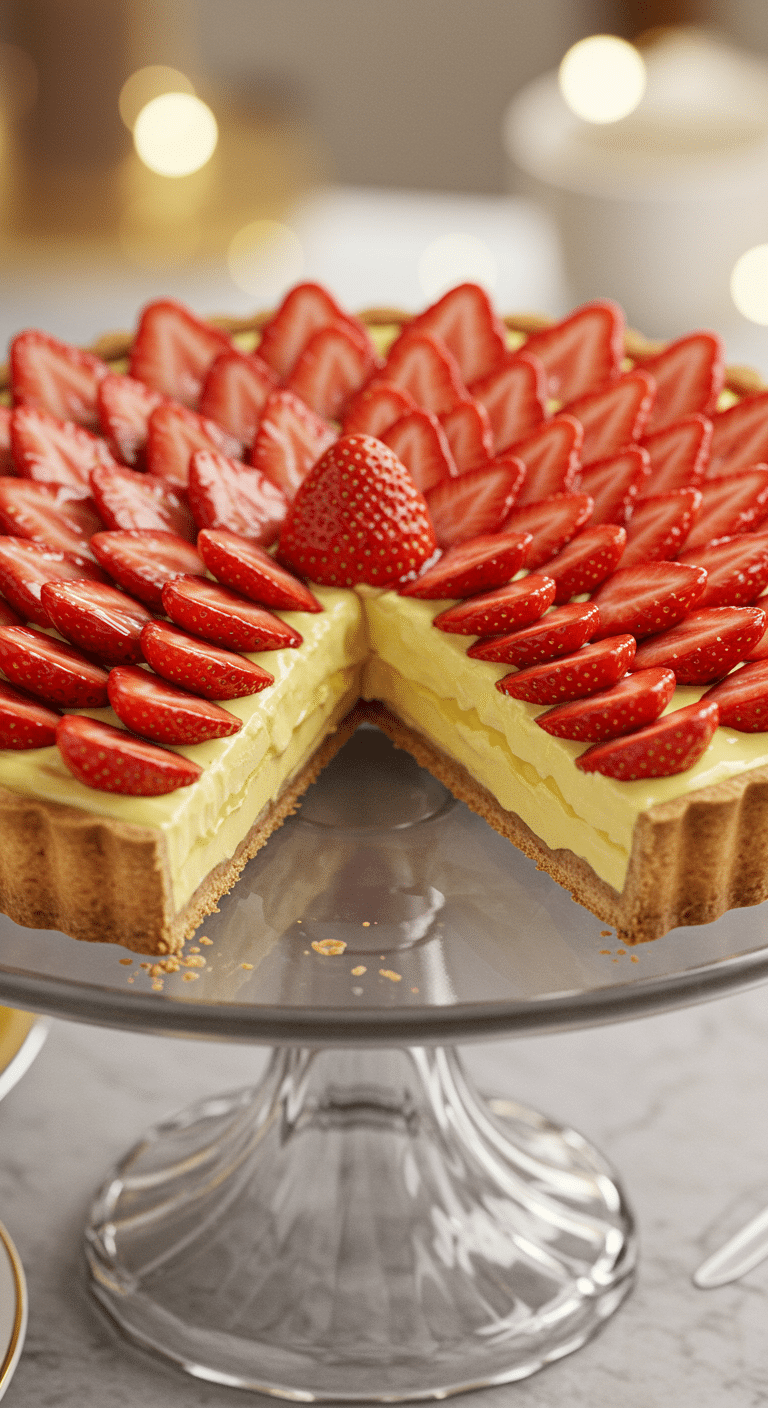
What makes this Strawberry Custard Tart a true showstopper is the perfect harmony of its three distinct, homemade elements. The crisp, cookie-like crust provides the perfect base for the rich, cool, and creamy vanilla custard. This is all topped with fresh, sweet strawberries that provide a burst of bright, fruity flavor. It is the ultimate make-ahead dessert for a special occasion, a holiday, or any time you want to create a truly memorable and elegant treat.
| Metric | Time / Level |
| Total Time | 6 hours (includes chilling time) |
| Active Prep Time | 1 hour |
| Difficulty Level | Intermediate |
| Servings | 8-10 |
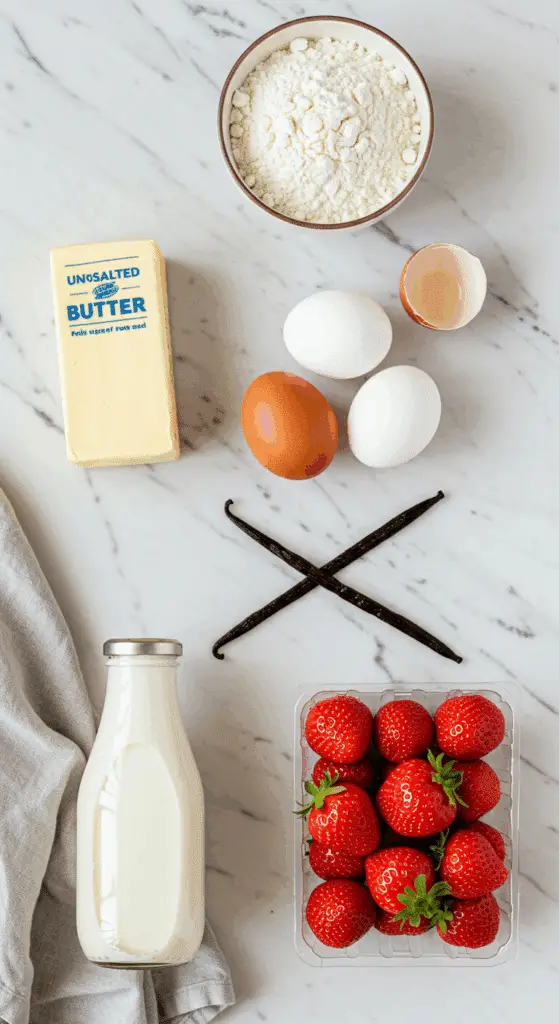
The Essential Ingredients for a Classic Tart
This recipe uses classic pastry staples to create three distinct and delicious components.
- The Tart Shell (Pâte Sucrée): This is a classic French sweet pastry.
- Butter, Powdered Sugar, and Egg: The creaming of softened butter with powdered sugar (which dissolves easily) and a room temperature egg creates a rich, tender, and cookie-like crust that is crisp and not flaky.
- The Custard Filling (Crème Pâtissière): This is a rich, versatile, and essential French pastry cream.
- Milk, Eggs, and Sugar: These form the classic custard base. Using whole milk and large eggs will provide the best rich flavor.
- Cornstarch: This is our thickener. It creates a smooth, stable custard that is thick enough to be sliced cleanly when chilled.
- Vanilla Extract & Butter: A good quality vanilla extract is essential for the flavor. The final step of whisking in softened butter off the heat makes the finished custard extra rich, smooth, and glossy.
- The Topping: The simple, beautiful crown of our tart.
- Fresh Strawberries: For the absolute best flavor and appearance, use fresh, ripe, in-season strawberries. Look for berries that are bright red, fragrant, and similar in size for a beautiful presentation.
- Whipped Cream: A simple, homemade whipped cream is used for a decorative border, adding a final touch of lightness and elegance.

Step-by-Step to a Perfect Strawberry Custard Tart
This recipe is a rewarding project with three main parts: the crust, the custard, and the assembly. Let’s break it down.
Part 1: The Perfect Sweet Tart Crust (Pâte Sucrée)
Step 1: In a large mixing bowl, use an electric hand mixer to beat the softened unsalted butter until it is smooth and creamy. Add the powdered sugar and mix on low speed until the mixture is light and fluffy. Add the room temperature egg and mix until it is smooth and fully incorporated.
Step 2: Add the all-purpose flour and the salt. Mix again on low speed just until the dough starts to come together into a shaggy mass and not too many dry, floury patches remain. Do not overmix.
Step 3: Turn the dough out onto a sheet of plastic wrap. Use your hands to gently pack the dough together into a cohesive ball. Split the dough in half, press each half into a flattened disc shape, and wrap each disc tightly in plastic wrap. Chill the dough in the refrigerator for at least 4 hours, or preferably overnight. (You can freeze the second dough disc for up to 3 months to use another time!)
Step 4: When you’re ready to bake, preheat your oven to 350°F (175°C). Let one disc of dough sit at room temperature for 15-30 minutes to soften just slightly. On a lightly floured surface, roll the dough out to about an ⅛-inch thickness.
Step 5: Carefully transfer the dough to a 9-inch fluted tart pan with a removable bottom. Gently press the dough into the bottom and up the sides of the pan. If the dough breaks, you can easily patch up any holes by pressing small pieces of extra dough on top of them. Use your rolling pin to roll across the top of the pan to cleanly cut off the excess dough from the edges.
Step 6: Use a fork to “dock” the bottom of the tart shell by poking holes all across the bottom. Place the tart pan in the freezer for about 30 minutes until it is very firm. This crucial step helps to prevent the crust from shrinking during baking.
Step 7: Gently press a sheet of foil into the frozen tart shell and fill it with pie weights or uncooked rice/dried beans. Bake the tart shell for about 15 minutes. Carefully remove the foil and pie weights, and then bake for another 15-20 minutes, until the crust is a beautiful, even golden brown. Let the tart shell cool completely on a wire rack before releasing it from the pan.
Part 2: The Luscious Vanilla Pastry Cream (Crème Pâtissière)
Step 1: While the tart shell is cooling, make the custard. In a medium saucepan, heat the 500g of milk over medium heat until it is hot and just beginning to simmer around the edges.
Step 2: While the milk is heating, in a separate medium, heatproof bowl, whisk together the 4 large eggs and the 100g of granulated sugar until they are well combined. Whisk in the 30g of cornstarch until the mixture is completely smooth and free of lumps.
Step 3: Now, you must temper the eggs. While whisking the egg mixture constantly, slowly pour about half of the hot milk in a very thin stream into the egg mixture. This gently raises the temperature of the eggs without scrambling them.
Step 4: Pour the tempered egg mixture back into the saucepan with the remaining milk. Place the saucepan over medium heat and cook, whisking constantly and scraping the bottom and corners of the pan, until the custard has thickened considerably and come to a boil. Let it bubble for one full minute while whisking.
Step 5: Remove the saucepan from the heat. Immediately stir in the 2 teaspoons of vanilla extract and the 60g of softened, cubed butter, whisking until the butter has completely melted and the custard is smooth and glossy.
Step 6: Pour the hot pastry cream into a shallow dish or a bowl. Press a piece of plastic wrap directly onto the entire surface of the custard. This prevents a thick skin from forming as it cools. Chill the pastry cream in the refrigerator for at least 2-3 hours, or until it is completely cold and thick.
Part 3: Assembling and Decorating Your Masterpiece
Step 1: Once your tart shell and your pastry cream are both completely cool, you can assemble the tart. Whisk the chilled pastry cream for a moment to loosen it up, then spoon it into the cooled tart shell, spreading it into an even, smooth layer.
Step 2: Arrange your halved fresh strawberries on top of the custard. You can create a beautiful, decorative pattern by starting from the outside edge and working your way in, overlapping the berries slightly in a circular pattern.
Step 3: For the final, elegant touch, prepare the whipped cream. In a medium, chilled bowl, whip the 200g of whipping cream, the 2 tablespoons of powdered sugar, and the 1 teaspoon of vanilla extract until stiff peaks form. Transfer this to a piping bag fitted with a decorative tip.
Step 4: Pipe a beautiful border of whipped cream rosettes around the edge of the tart. Chill the finished tart in the refrigerator until you are ready to serve.

The Best Classic French Strawberry Custard Tart
An elegant and classic Strawberry Custard Tart featuring three homemade components. The dessert starts with a buttery, sweet pastry crust (pâte sablée) that is blind-baked until golden. This crisp shell is then filled with a rich and creamy vanilla pastry cream (custard). The tart is beautifully finished with a topping of fresh, halved strawberries and swirls of homemade sweetened whipped cream.
- Prep Time: 45 minutes
- Cook Time: 42 minutes
- Total Time: 5 hours 30 minutes (includes chilling times)
- Yield: 8 servings
- Category: Dessert
- Method: Baking, Making Custard, Assembling
- Cuisine: French
- Diet: Vegetarian
Ingredients
- Tart Shell:
- 170 g (about ¾ cup) unsalted butter, softened
- 120 g (about 1 cup) powdered sugar
- 1 large egg, room temperature
- 350 g (about 2 ¾ cups) all-purpose flour
- ½ teaspoon salt
- Custard Filling:
- 500 g (about 2 cups) milk
- 4 large eggs
- 100 g (about ½ cup) granulated sugar
- 30 g (about ¼ cup) cornstarch
- 2 teaspoon vanilla extract
- 60 g (about 4 tbsp) unsalted butter, softened & cubed
- Whipped Cream & Topping:
- 200 g (about ¾ cup + 1 tbsp) whipping cream
- 2 tablespoons powdered sugar
- 1 teaspoon vanilla extract
- Fresh strawberries, halved
Instructions
- Make the Tart Shell:
- In a large bowl, beat the softened butter until creamy. Add the powdered sugar and mix on low speed. Add the egg and mix until smooth. Mix in the flour and salt until a dough just comes together.
- Divide the dough in half. Press each half into a disc, wrap in plastic wrap, and chill in the fridge for at least 4 hours or overnight. (One disc can be frozen for later use).
- Preheat the oven to 350°F. Let one dough disc sit at room temperature for 15-30 minutes to soften slightly. On a floured surface, roll the dough out to about ⅛-inch thick.
- Transfer the dough to a 9-inch fluted tart pan and press it into the edges. Roll a rolling pin over the top to trim the excess dough. Dock the bottom of the shell with a fork.
- Freeze the tart shell for 30 minutes until firm. Line the shell with foil and fill with pie weights or uncooked rice.
- Bake for 15 minutes. Carefully remove the foil and weights, then bake for another 15-20 minutes until golden brown. Let the shell cool completely.
- Make the Custard Filling (Inferred Instructions):
- In a saucepan, heat the milk until it just begins to simmer.
- In a separate bowl, whisk together the eggs, granulated sugar, and cornstarch until smooth.
- Slowly temper the egg mixture by whisking in about a cup of the hot milk in a steady stream.
- Pour the tempered egg mixture back into the saucepan with the remaining milk. Cook over medium heat, whisking constantly, until the custard has thickened, about 2-3 minutes.
- Remove from the heat and stir in the cubed butter and vanilla extract until smooth. Press plastic wrap directly onto the surface of the custard and chill until cold, about 2 hours.
- Assemble the Tart:
- Spread the chilled custard evenly into the cooled tart shell.
- Arrange the halved strawberries decoratively over the top of the custard.
- In a chilled bowl, whip the whipping cream, powdered sugar, and vanilla extract until stiff peaks form.
- Pipe or dollop the whipped cream onto the tart. Chill until ready to serve.
Notes
- Note: The instructions for the custard filling and final assembly were not provided in the original article and have been inferred based on the ingredients and standard pastry techniques.
- The tart dough recipe makes enough for two shells; one half can be frozen for future use.
- Chilling the dough before rolling and freezing the lined tart pan before baking are crucial steps to prevent the crust from shrinking.
- ‘Blind baking’ with pie weights ensures the bottom of the crust stays flat.
Storage and Make-Ahead Tips
This Strawberry Custard Tart is a fantastic dessert for entertaining because all the components can be made in advance.
- Make-Ahead: The tart dough can be made and frozen for up to 3 months. The baked tart shell can be stored in an airtight container at room temperature for up to 2 days. The pastry cream can be made up to 3 days in advance and kept, covered with plastic wrap on the surface, in the refrigerator.
- Assembly: For the best, crispiest crust, it is highly recommended to assemble the tart on the day you plan to serve it, ideally no more than 4-6 hours before.
- Storage: Store any leftover tart, covered loosely, in the refrigerator for up to 2 days. The crust will soften over time as it absorbs moisture from the custard.
For more recipe follow my Pinterest account
Creative Recipe Variations
This classic fruit tart is a perfect template for all sorts of beautiful creations.
- Classic Mixed Fruit Tart: Instead of all strawberries, you can create a stunning, colorful pattern on top using a variety of fresh fruits. Try a combination of raspberries, blueberries, kiwi slices, and mandarin orange segments. For an extra professional shine, you can brush the finished fruit with a warm, strained apricot jam.
- Decadent Chocolate Custard Tart: For a rich, chocolatey version, make a chocolate pastry cream. After you have cooked the custard in Step 4 of the pastry cream instructions, remove it from the heat and immediately whisk in 4 ounces of finely chopped, good-quality semi-sweet or dark chocolate until it is completely melted and smooth.
- Add a Surprise Layer of Jam: For an extra burst of fruity flavor, you can spread a very thin layer of high-quality strawberry or raspberry jam on the bottom of the cooled, baked tart shell before you add the pastry cream.
Enjoy Your Bakery-Worthy Creation!
You’ve just created a truly stunning, elegant, and classic dessert that is a masterpiece of both flavor and beauty. This Strawberry Custard Tart is a celebration of simple, high-quality ingredients and classic pastry techniques. It’s a rewarding and impressive dessert that proves you have what it takes to be a true pastry chef in your own kitchen.
We hope you enjoy every last, crisp, creamy, and fruity bite!
If you enjoyed making this recipe, please leave a comment below or share it with a friend who loves to bake!
Frequently Asked Questions (FAQs)
Q1: What is the difference between a tart and a pie?
The main difference lies in the crust and the pan. A pie can have a bottom crust, a top crust, or both, and is baked in a dish with sloped sides. A tart has only a bottom crust, which is usually thicker and firmer than a pie crust, and is baked in a shallow pan with straight, fluted sides and often a removable bottom.
Q2: What is crème pâtissière, or pastry cream?
Crème pâtissière is a rich, thick, and creamy custard that is a staple of French pastry. It’s made from milk, eggs, sugar, and a thickener like cornstarch or flour. It’s the classic filling for desserts like cream puffs, éclairs, and, of course, fruit tarts.
Q3: My pastry cream is lumpy. What did I do wrong?
Lumpy pastry cream is usually caused by the eggs scrambling from the heat. The two most important secrets to a smooth custard are to temper the eggs (slowly whisking in some of the hot milk to gently warm them) and to whisk constantly and vigorously while the custard is on the heat, making sure to scrape the bottom and corners of the pan.
Q4: How do I keep my tart crust from getting soggy from the creamy filling?
The best way to ensure a crisp crust is to bake it fully until it is a deep golden brown, and to let it cool completely before you add the cool custard filling. For extra insurance, you can create a moisture barrier by brushing the inside of the cooled crust with a thin layer of melted white chocolate and letting it set before you add the filling.
Q5: Why does my tart dough shrink when I bake it?
Shrinking is almost always caused by overworking the dough or not letting it rest long enough. When you mix and roll the dough, you develop the gluten in the flour. Chilling the dough for at least 4 hours (or overnight) allows the gluten to relax. Freezing the shaped tart shell for 30 minutes before baking also helps to set its shape and prevent it from shrinking away from the sides of the pan.


