Do you ever get a craving for a dessert that combines childhood nostalgia with a show-stopping presentation? Imagine the classic, beloved flavors of Neapolitan ice cream, but transformed into a stunning cake with layers of crispy, delicate cookies. You can create a dessert that looks like it came from a high-end ice cream parlor, all without ever turning on your oven.
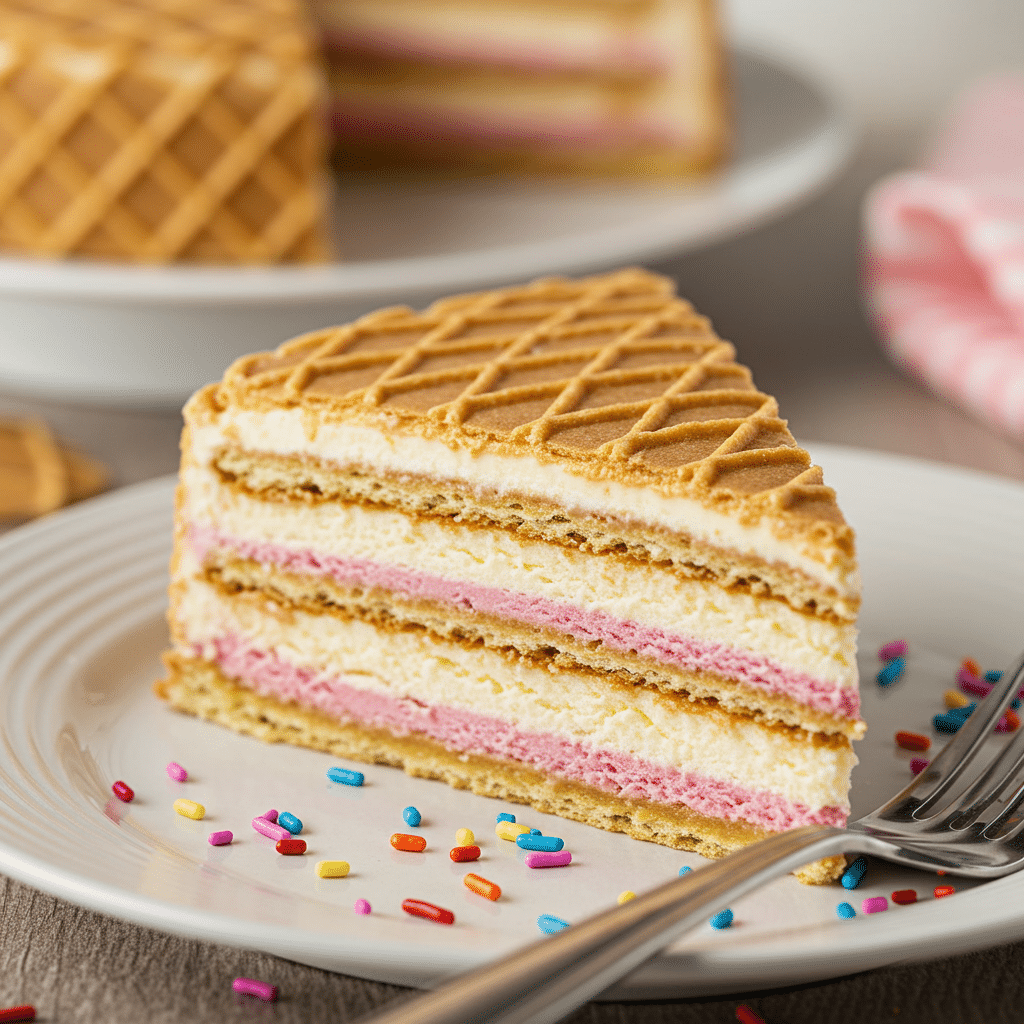
This Sugar Wafer Neapolitan Ice Cream Cake is the answer to your summertime dessert dreams. It’s a spectacular creation that cleverly uses sugar wafer cookies to build a beautiful, striped interior that reveals itself with every slice. This cake isn’t just about looks; it’s a masterpiece of textures, combining creamy, cold ice cream with the light, airy crunch of sugar wafers that soften just enough to be sliceable.
What makes this recipe truly special is its incredible “wow” factor balanced with its surprising simplicity. Although it needs time to freeze, the active preparation is minimal, taking only about 30 minutes of your time. Consequently, it’s the perfect make-ahead centerpiece for birthday parties, family gatherings, or any celebration that calls for a truly memorable treat. We rate this recipe as easy, though the assembly requires a gentle touch and a bit of patience that pays off beautifully in the end.
Table of Contents
Table of Contents
Essential Ingredients for Your Ice Cream Cake
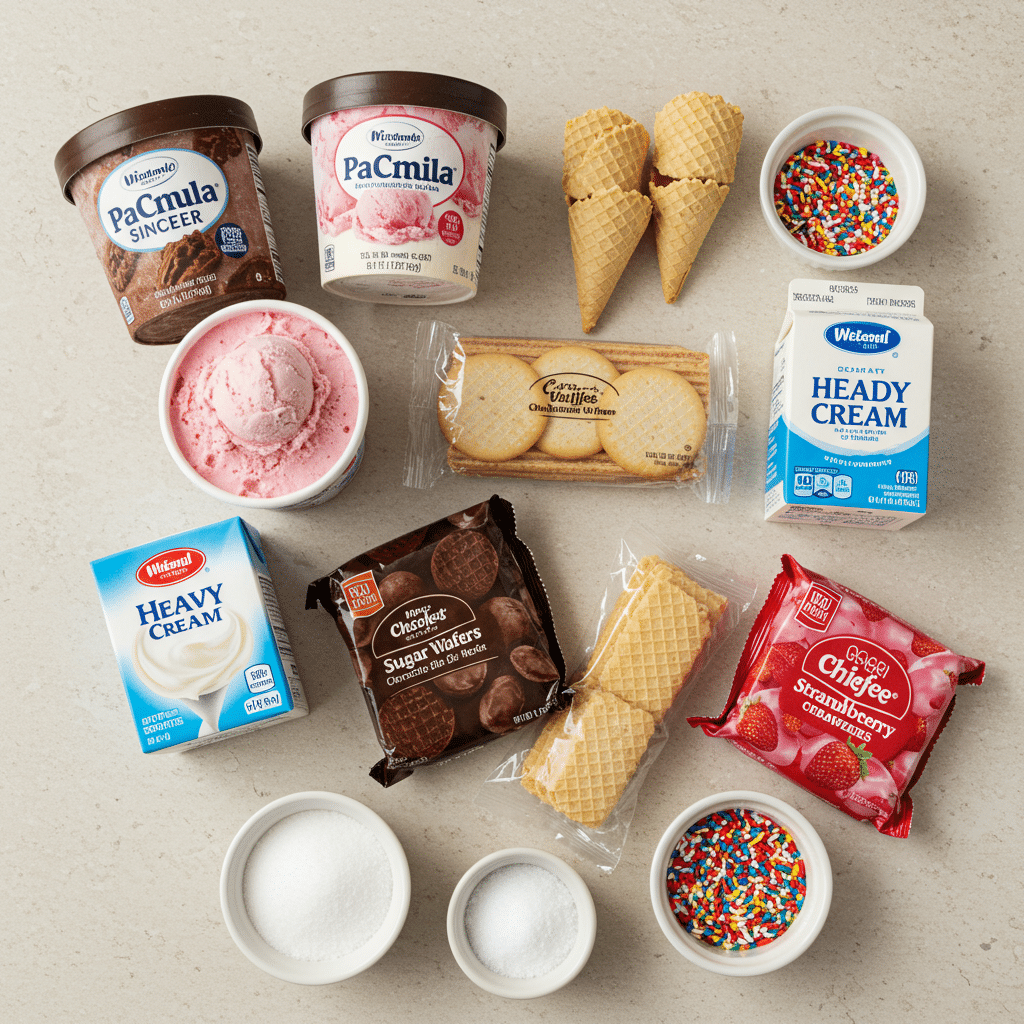
The magic of this Sugar Wafer Neapolitan Ice Cream Cake comes from a short list of simple, delightful ingredients.
- Neapolitan Ice Cream: The heart of our cake is the classic trio: vanilla, chocolate, and strawberry. You will need about 3 pints in total. Using good-quality ice cream makes a significant difference, as it provides a richer flavor and a creamier texture. You will let the ice cream soften before using it, which makes it easy to spread.
- Sugar Wafer Cookies: These light, crispy, multi-layered cookies are the structural secret to this cake. Their delicate texture absorbs a little moisture from the ice cream, becoming soft enough to slice cleanly while still retaining a pleasant texture. You will need separate packages of chocolate, vanilla, and strawberry wafers to create the signature striped pattern.
- Heavy Cream & Sugar: You will whip these together to create a fresh, stabilized whipped cream frosting. This homemade frosting is far superior to canned versions, as it holds its shape beautifully and has a clean, pure dairy flavor that complements the ice cream perfectly.
- Sprinkles: For the final festive touch! A mix of pink, white, and brown sprinkles enhances the Neapolitan theme and adds a bit of fun and crunchy texture to the exterior.
| Ingredient | Creative Substitution | Flavor Impact |
|---|---|---|
| Neapolitan Ice Cream | Cookies & Cream, Mint Chocolate Chip, or Coffee Ice Cream | Creates a whole new theme like Oreo, mint, or mocha. |
| Sugar Wafer Cookies | Chocolate sandwich cookies (Oreos), Biscoff cookies, or shortbread | Adds a deeper, richer cookie flavor and a denser texture. |
| Whipped Cream Frosting | Store-bought frozen whipped topping (like Cool Whip), thawed | Offers more stability if you are worried about melting, but with a different flavor. |
| Sprinkles | Mini chocolate chips, chopped nuts, or crushed cookies | Provides a different kind of crunch and enhances the chosen flavor theme. |

Step-by-Step Instructions for a Stunning Cake
Follow these detailed steps closely for a perfect result. We explain the “why” behind each action to ensure your success.
- Prepare Your Pan: First, take an 8-inch round baking pan (one that is at least 3 inches deep). Line the inside completely with plastic wrap. It is crucial to leave a generous 3-inch overhang of wrap all around the edges. This overhang will act as “handles,” allowing you to lift the frozen cake out of the pan effortlessly later on.
- Lay the Ice Cream Base: Next, spoon one pint of your softened ice cream into the prepared pan. Using an offset spatula or the back of a spoon, spread it evenly across the bottom. This initial layer serves as the foundation that will hold the sugar wafer cookies firmly in place. Your ice cream should be the consistency of soft-serve—spreadable but not completely liquid.
- Build the Wafer Walls: This is the most creative part of the process! Begin by standing the chocolate wafer cookies upright around the outermost edge of the pan. Press each cookie down firmly so it sits securely in the base layer of ice cream. Once you have a complete circle, create a second, inner circle of chocolate wafers nestled tightly against the first. Following that, repeat the process with two circles of vanilla wafers, and then two circles of strawberry wafers. Finally, fill the small center hole with a few more strawberry wafers.
- Add the Top Layer: Now, spoon the remaining two pints of softened ice cream over the top of the wafer cookie arrangement. Work gently to ensure the ice cream fills all the nooks and crannies between the cookies. You can tap the pan lightly on the counter a few times to help the ice cream settle. It’s perfectly okay if the ice cream is quite soft or almost melted at this stage.
- Freeze Until Solid: Take the plastic wrap overhang and fold it up and over to completely cover the top of the cake. This prevents ice crystals from forming. Carefully place the pan in the freezer on a level surface. You must freeze the cake overnight, or for at least 8-12 hours, to ensure it is completely solid and stable. This cake can be made up to two weeks ahead of time.
- Whip the Frosting: When you are ready to serve, prepare the whipped cream. In a chilled bowl, beat the heavy cream and sugar with an electric mixer on high speed. Continue beating until stiff peaks form. Stiff peaks mean that when you lift the beaters out of the cream, a peak will form and hold its shape without slumping over. Put about 1 cup of this whipped cream into a pastry bag fitted with a medium star tip for decorating.
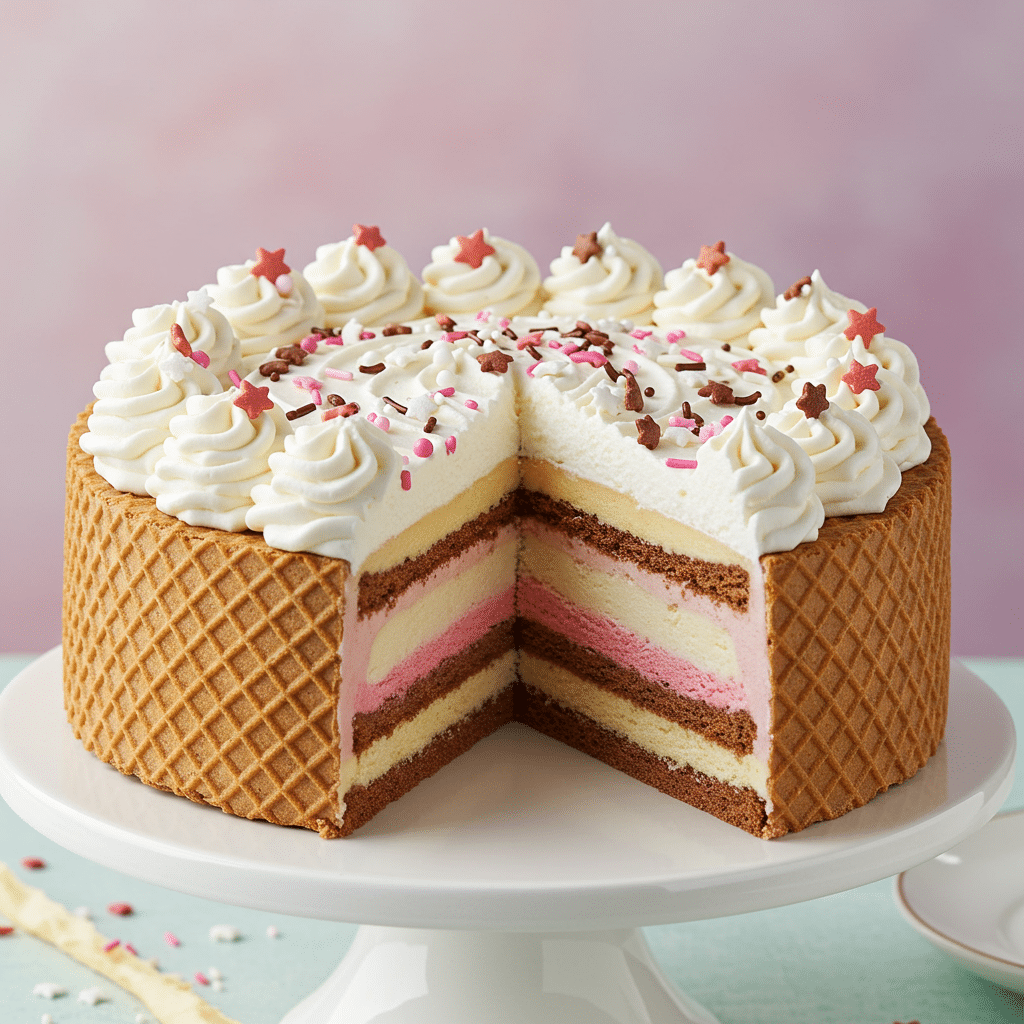
- Unmold and Decorate: Remove the cake from the freezer and let it sit at room temperature for about 10 minutes. This slight thaw makes unmolding much easier. Pull back the plastic wrap, place a serving dish or cake stand upside down on top of the pan, and then confidently flip them over together. Lift the pan off and carefully peel away the plastic wrap. Use an offset spatula to frost the top and sides of the cake smoothly with the remaining whipped cream. Then, use the pastry bag to pipe decorative stars on top and around the bottom edge. Immediately finish by decorating with a generous amount of sprinkles.

Sugar Wafer Neapolitan Ice Cream Cake: The Ultimate No-Bake Treat
This Sugar Wafer Neapolitan Ice Cream Cake is a fun, colorful, and delicious no-bake dessert layered with ice cream and wafer cookies. It’s perfect for birthdays, summer parties, or any time you want a sweet frozen treat.
- Prep Time: 30 minutes
- Cook Time: 0 minutes
- Total Time: 30 minutes + overnight freeze
- Yield: 12 servings
- Category: Dessert
- Method: No-Bake
- Cuisine: American
- Diet: Vegetarian
Ingredients
- 3 pints vanilla, chocolate or strawberry ice cream, softened
- Four 2.75-ounce packages chocolate wafer cookies
- Three 2.75-ounce packages vanilla wafer cookies
- Two 2.75-ounce packages strawberry wafer cookies
- 1 1/2 cups heavy cream
- 1/4 cup sugar
- Pink, white and brown sprinkles, for decorating
Instructions
- Line an 8-inch round (3-quart) baking pan with plastic wrap, leaving a 3-inch overhang.
- Spread 1 pint of softened ice cream in the bottom of the prepared pan.
- Line the edge with upright chocolate wafer cookies, pressing firmly into the ice cream. Add a second circle of chocolate wafers.
- Add 2 circles of vanilla wafers, followed by 2 circles of strawberry wafers. Fill the center hole with 2 to 3 strawberry wafers.
- Spread the remaining 2 pints of softened ice cream over the top, tapping the pan lightly on the counter to fill all gaps.
- Wrap the plastic over the top and freeze overnight or up to 2 weeks.
- Before serving, remove the cake from the freezer and let sit for 10 minutes.
- Beat heavy cream and sugar together until stiff peaks form. Transfer 1 cup to a pastry bag fitted with a medium star tip.
- Unwrap and invert the cake onto a serving dish. Frost with the whipped cream and pipe stars on the top and bottom edges.
- Decorate with pink, white, and brown sprinkles and serve immediately.
Notes
- Make sure ice cream is very soft before spreading to help it fill all spaces.
- You can customize the flavor layers using different ice cream combinations.
- Freeze overnight for best structure and easy unmolding.
- Use a serrated knife dipped in hot water for cleaner slices.
Assembly and Presentation Tips
The final presentation is what makes this Sugar Wafer Neapolitan Ice Cream Cake a true showstopper. After inverting the cake onto your chosen serving platter, work quickly but carefully to apply the whipped cream frosting.
For the cleanest slices, which will beautifully display the striped interior, use a long, sharp knife. Dip the knife in a tall glass of hot water, wipe it dry with a towel, and then make your cut. Repeat this process of heating and wiping the blade before every single slice. This ensures the ice cream cuts cleanly without smearing.
Storage and Make-Ahead Advice
This dessert is a fantastic make-ahead option. You can assemble the cake and store it, tightly wrapped in plastic wrap and a layer of foil, in the freezer for up to two weeks. It’s best to frost and decorate the cake just before serving for the freshest look and taste.
To store leftovers, place the sliced cake back in the freezer immediately. Once the exposed surfaces are frozen solid (about 30 minutes), you can wrap the individual slices or the remaining cake tightly in plastic wrap. This prevents freezer burn and keeps it tasting great for another week.
Creative Recipe Variations to Try
Once you master the Neapolitan version, the possibilities are endless!
- Ultimate Cookies & Cream Cake: Use cookies and cream ice cream for the base and top layers. For the walls, use only chocolate wafer cookies. After frosting, decorate the cake with crushed chocolate sandwich cookies instead of sprinkles for a monochromatic and delicious masterpiece.
- Mint Chocolate Chip Dream: Use mint chocolate chip ice cream for all the layers. Build the walls with only chocolate sugar wafers. For an extra touch of flavor and decoration, garnish the finished cake with chopped Andes mints or mini chocolate chips.
- Peanut Butter Cup Extravaganza: Use alternating pints of chocolate and vanilla ice cream. Build the walls with chocolate wafer cookies. Before serving, drizzle the frosted cake with melted peanut butter and sprinkle with chopped peanut butter cups. It’s a truly decadent and irresistible combination.
for more recipes Follow my Pinterest account
Conclusion: A Celebration in Every Slice
This Sugar Wafer Neapolitan Ice Cream Cake is more than just a dessert; it’s an experience. It’s the joy of building something beautiful, the anticipation as it freezes, and the delight on everyone’s faces when you cut into it and reveal the hidden pattern inside. It proves that you don’t need to be a professional pastry chef to create something truly spectacular.
So, embrace your inner child, get creative with your favorite flavors, and make this unforgettable no-bake treat. We promise it will become a new tradition for all your special occasions. We’d love to see your creations, so please share your experiences and photos in the comments below!
Frequently Asked Questions (FAQs)
Do the sugar wafers get soggy?
No, they don’t get soggy! They soften to the perfect cake-like consistency, absorbing just enough moisture from the ice cream. This allows you to slice through the cake easily while they still provide a lovely, delicate texture.
My ice cream is melting too fast while I assemble the cake! What should I do?
Work quickly and ensure your ice cream is the right consistency—softened but not liquid. If you feel the ice cream is becoming too soupy, you can place the pan back in the freezer for 15-20 minutes to firm up before you continue assembling.
Can I make this without a pastry bag?
Absolutely! If you don’t have a pastry bag and tip, you can simply frost the entire cake with the whipped cream and use the back of a spoon to create pretty swirls on the top and sides. It will look rustic and just as delicious.
How do I choose the right size pan?
An 8-inch round pan that is at least 3 inches deep is ideal. A springform pan of the same size also works wonderfully and can make the unmolding process even simpler.


