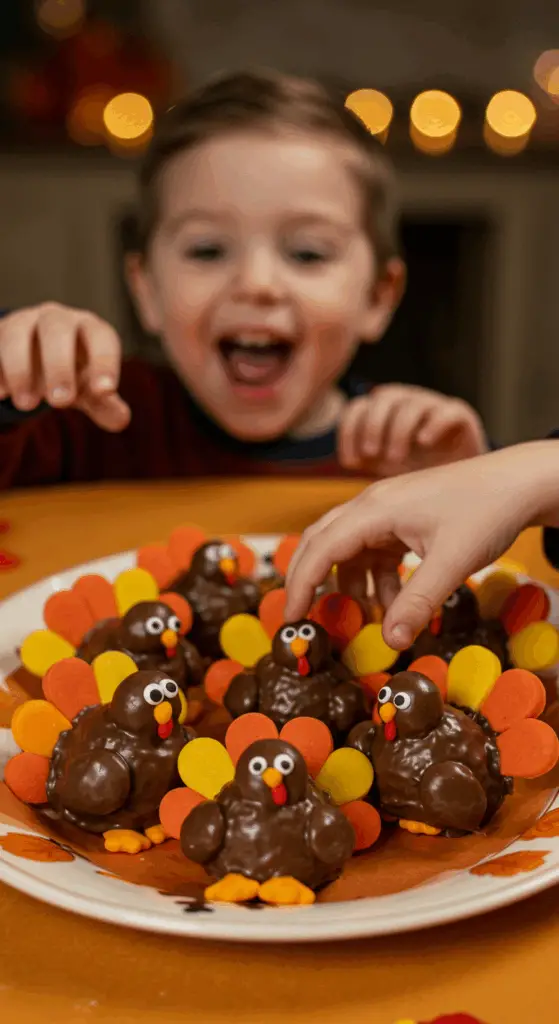
Are you looking for a super fun, completely no-bake, and absolutely adorable Thanksgiving activity to keep the kids entertained and create a delicious treat at the same time? These incredible, edible Thanksgiving Turkey Treats are the perfect answer! This is a guide to creating the cutest dessert for your holiday table, and it’s a wonderful craft project that the whole family can enjoy together.
This isn’t just a recipe; it’s a guide to a fun-filled, memory-making afternoon. We’ll show you how to take a simple collection of classic cookies and candies and, with a little bit of melted chocolate “glue,” assemble them into the most charming little turkeys you’ve ever seen. They are the perfect, whimsical decoration for your dessert table, and a treat that your kids will be so proud to say they made themselves.
Table of Contents
Table of Contents
Recipe Overview: The Ultimate Kids’ Table Activity
What makes these Thanksgiving Turkey Treats the perfect holiday project is that they require absolutely no baking and use fun, easy-to-find ingredients. It’s a low-stress, high-fun activity that relies on a few smart shortcuts, like store-bought cookies and candies, allowing all your time and creative energy to be focused on the amazing assembly process. The final result is an incredibly cute, edible decoration that is as fun to make as it is to eat.
| Metric | Time / Level |
| Total Time | 45 minutes |
| Active Prep Time | 30 minutes |
| Difficulty Level | Easy |
| Servings | 6 large turkey treats |
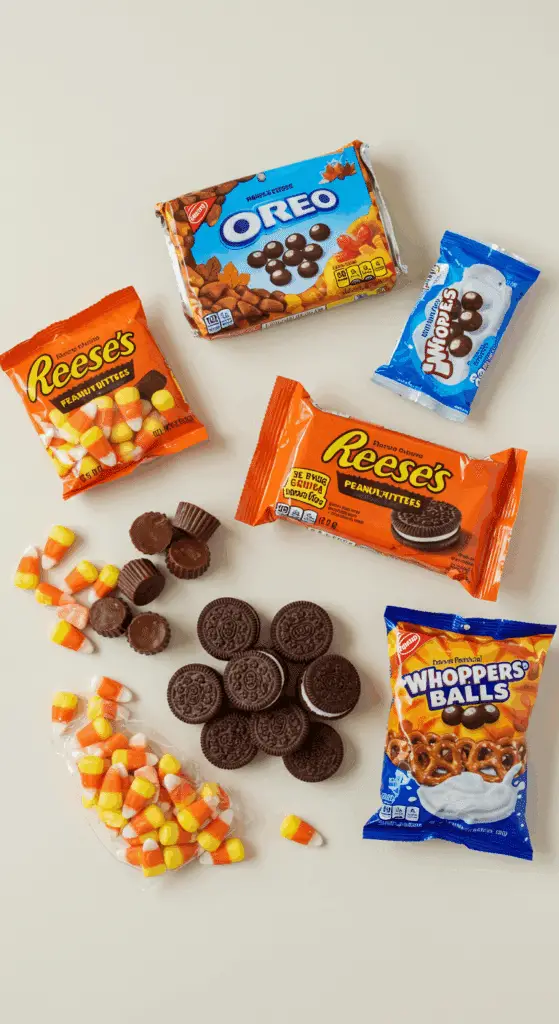
The Essential Ingredients (Your Edible Craft Kit!)
This recipe is all about a fun “shopping list” of classic, delicious treats that we will use to build our turkeys.
- The Turkey’s Body & Head:
- Mini Peanut Butter Cups: The flat, wide bottom of a mini peanut butter cup makes the perfect, sturdy base for our turkey’s body.
- Malt Balls: A classic, crunchy, chocolate-covered malt ball (like Whoppers®) is the perfect size and shape for the turkey’s head.
- The Beautiful Tail Feathers:
- Chocolate Sandwich Cookies: A classic chocolate sandwich cookie (like an Oreo®) is the sturdy, round base that will hold our beautiful fan of tail feathers.
- Candy Corn: The iconic, tri-colored candy is the key to our colorful tail. The white tip of the candy corn also makes the perfect beak!
- The Finishing Touches:
- Miniature Twist Pretzels: The unique shape of mini twist pretzels, when broken, creates two perfect, T-shaped “feet” for our turkeys.
- The “Glue” (Melted Chocolate): A cup of simple, melted semi-sweet chocolate chips is the delicious “glue” that will hold all our turkey parts together.
- The “Wattle” (Red Frosting): A small batch of simple, homemade red buttercream frosting is the perfect finishing touch for the turkey’s wattle (or beard).

Step-by-Step to the Cutest Thanksgiving Treat
This is a fun and rewarding assembly project. Let’s break it down into simple, manageable parts.
Part 1: Prepare Your “Glue” and “Paint”
Step 1: First, prepare your “glue.” Place the 1 cup of semi-sweet chocolate chips in a medium, microwave-safe bowl. Microwave the chocolate in 15-second intervals, stirring in between, until it is completely melted and smooth. Set it aside to cool slightly.
Step 2: Next, prepare your red frosting “paint.” In a medium bowl, using an electric hand mixer, beat the 1/4 cup of room temperature butter until it is smooth, about 20 seconds. Add the 1 1/2 cups of powdered sugar, the 1/2 teaspoon of pure vanilla extract, and the 2 tablespoons of whole milk. Beat on low speed until the ingredients are combined. Increase the speed to high and beat until the mixture is light and smooth.
Step 3: Color the frosting by mixing in 1 drop of red food coloring at a time, until your desired, vibrant red color is reached. Transfer the finished red frosting to a small piping bag or a small, resealable plastic bag.
Part 2: Build the Turkey’s Body and Tail
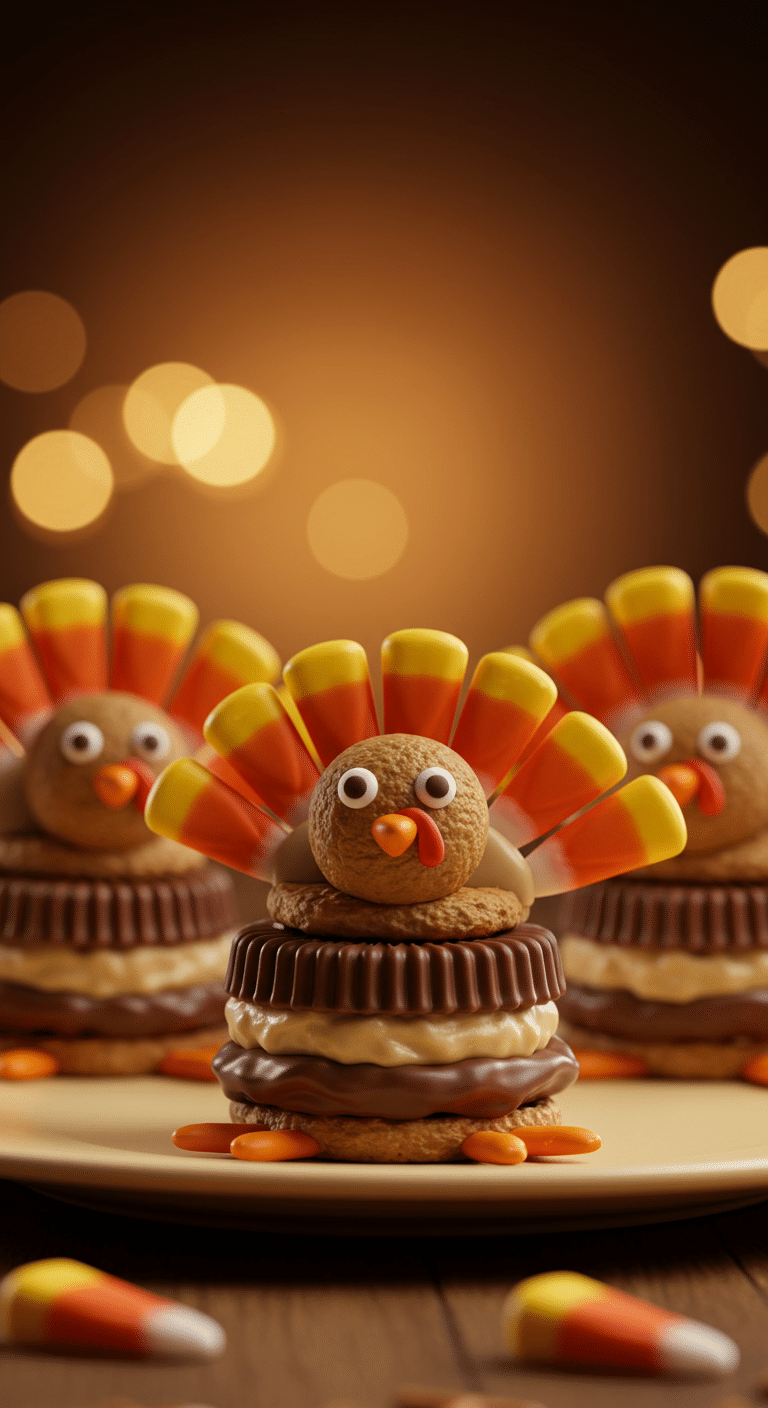
Step 1 (Make the Feathers): For each of your 6 turkeys, take one whole chocolate sandwich cookie. Carefully and firmly press 5 candy corn candies, with the pointed tip facing down, into the cream filling of the cookie to create a beautiful fan of “feathers.” Lay the finished feather cookie flat on a work surface.
Step 2 (Assemble the Body): Take one mini peanut butter cup. Dip the flat, larger end of the peanut butter cup into your bowl of melted chocolate, allowing any excess to drip back into the bowl. Place the peanut butter cup, with the chocolate-dipped end down, onto the bottom center of the sandwich cookie. This is your turkey’s body.
Step 3 (Add the Head): Now, take one malt ball. Dip the malt ball into the melted chocolate, allowing any excess to drip off. Place the chocolate-dipped malt ball directly on top of the peanut butter cup to create the turkey’s head.
Step 4 (Add the Beak): Take one of the reserved white tips of the candy corn. Dip the flat end into the melted chocolate and gently press it onto the front of the malt ball to make the turkey’s beak.
Step 5: Carefully transfer your assembled turkeys to a parchment-lined baking sheet and place them in the refrigerator for about 10 minutes to allow the chocolate “glue” to set up and harden completely.
Part 3: The Fun Finishing Touches
Step 1: Remove the chilled turkeys from the refrigerator. Snip a very small opening in the corner of your piping bag or plastic bag with the red frosting. Carefully pipe a small, dangling line of the red frosting just under the beak of each turkey to create the “wattle” or “beard.”
Step 2: Take your 6 chocolate sandwich cookies with the top cookies removed. Place one of these cookie bases on a platter or a serving dish. Carefully stand one of your finished turkeys upright, pressing the bottom of the feather cookie gently into the cream filling of the base cookie. The base will help your turkey to stand up perfectly.
Step 3: Repeat this process with the remaining ingredients to create all 6 of your adorable turkey treats!

Adorable & Easy No-Bake Thanksgiving Turkey Treats
A decadent, multi-layered dessert that combines the flavors of sweet potato pie, cheesecake, and s’mores into one showstopping dish. The recipe starts with a from-scratch chocolate graham cracker crust. The filling is a rich and creamy sweet potato cheesecake, which is baked in a water bath to ensure a smooth, crack-free texture. After being chilled overnight, the cheesecake is topped with a layer of miniature marshmallows that are toasted under the broiler, and then finished with a drizzle of homemade chocolate ganache.
- Prep Time: 35 minutes
- Cook Time: 2 hours 20 minutes
- Total Time: 12 hours (includes extensive cooling and chilling)
- Yield: 10 servings
- Category: Dessert
- Method: Baking, Broiling
- Cuisine: American
- Diet: Vegetarian
Ingredients
- For the Crust:
- 18 whole chocolate graham crackers
- 12 tablespoons (1 1/2 sticks) unsalted butter, melted
- 1/4 cup sugar
- Pinch of kosher salt
- For the Filling:
- Four 8-ounce packages (32 oz total) cream cheese, at room temperature
- 2 cups sugar
- One 15-ounce can pure sweet potato puree
- 1/4 cup sour cream
- 6 large eggs, at room temperature, lightly beaten
- 1 tablespoon vanilla extract
- 1 1/2 teaspoons ground cinnamon
- 1 teaspoon kosher salt
- For the S’more Topping:
- 3/4 cup semi-sweet chocolate chips
- 1/2 cup heavy cream
- 3 cups miniature marshmallows
- Non-stick cooking spray
Instructions
- Make the Crust: Preheat the oven to 325°F. In a food processor, pulse the graham crackers into fine crumbs. Combine the crumbs, melted butter, sugar, and salt. Press the mixture into the bottom and 1 inch up the side of a 10-inch springform pan. Bake for 15 to 20 minutes. Let cool completely.
- Wrap the outside of the cooled pan in a large sheet of foil and place it in a roasting pan.
- Make the Filling: Bring a large pot of water to a boil for the water bath. In a stand mixer, beat the cream cheese and sugar until light and fluffy. Add the sweet potato puree, sour cream, eggs, vanilla, cinnamon, and salt; beat until just combined. Pour the filling into the cooled crust.
- Bake the Cheesecake: Carefully pour the boiling water into the roasting pan to create a water bath that comes halfway up the sides of the springform pan. Bake for about 2 hours, until the edges are set but the center still jiggles.
- Turn off the oven, prop the door open for 1 minute, then close the door and let the cheesecake cool in the oven for 1 more hour. Remove from the water bath, let it cool to room temperature, then cover and refrigerate for at least 8 hours or overnight.
- Make the Topping and Finish: Once chilled, make the chocolate ganache. Place the chocolate chips in a bowl. Heat the heavy cream until it simmers, then pour it over the chocolate. Let stand for 1 minute, then stir until smooth. Let cool to room temperature.
- Preheat the broiler. Pile the miniature marshmallows on top of the chilled cheesecake. Place on a baking sheet and broil for about 1 minute, watching closely, until the marshmallows are golden brown.
- Unlock and remove the springform ring. Drizzle each slice of cheesecake with the cooled chocolate sauce and serve.
Notes
- This is a complex, multi-component recipe perfect for a special occasion.
- Baking the cheesecake in a water bath (bain-marie) is a crucial step that ensures a creamy, crack-free texture.
- The slow cooling process—in the oven, then at room temperature, then in the refrigerator—is essential for the cheesecake to set properly.
- Watch the marshmallows very carefully under the broiler as they can burn in seconds.
Storage and Make-Ahead Tips
These adorable turkey treats are the perfect make-ahead project for a stress-free Thanksgiving.
- Make-Ahead: You can fully assemble these turkeys up to 3 days in advance.
- Storage: Store the finished turkey treats in a single layer in an airtight container at room temperature. It is not recommended to refrigerate the finished treats for a long period, as the cookies and pretzels can become a bit soft from the moisture in the refrigerator.
For more recipe follow my Pinterest account
Creative Recipe Variations
This fun and festive treat is a wonderful base for your own creative and delicious twists.
- Use a Different “Body”: If you have a peanut allergy or can’t find mini peanut butter cups, a chocolate-covered caramel (like a Rolo®), a small chocolate truffle, or a mini brownie bite would also make a great and delicious turkey body.
- Try a Different Cookie for the “Feathers”: If you don’t have chocolate sandwich cookies, you could also use a large, round peanut butter cookie or a sugar cookie as the sturdy base for your candy corn feathers.
- Make “Nut-Free” Turkeys: For a completely nut-free version that is safe for school parties, you can use a chocolate truffle for the head instead of a malt ball (which can sometimes contain nuts) and a chocolate-covered caramel for the body instead of a peanut butter cup. Be sure to also use a nut-free chocolate sandwich cookie.
Enjoy Your Fun and Festive Thanksgiving Treat!
You’ve just created a wonderfully fun, creative, and delicious treat that is sure to be the star of your Thanksgiving dessert table. These Thanksgiving Turkey Treats are a perfect harmony of classic, beloved candies and cookies, all assembled into an adorable, edible craft. It’s a sweet and simple way to celebrate the holiday season and create lasting memories with your family.
We hope you and your family love making—and eating—this adorable new tradition!
If you enjoyed making this recipe, please leave a comment below or share it with a friend who is looking for a fun holiday baking project!
Frequently Asked Questions (FAQs)
Q1: Where can I find all the different kinds of candies for this project?
Most of these candies are very common and readily available at any major grocery store or a large retail store, especially during the fall and holiday season. Candy eyeballs, if your store doesn’t have them, can often be found in the baking or the party supply aisle of most major craft stores (like Michaels or Jo-Ann).
Q2: Can I make these turkey treats a few days ahead of Thanksgiving?
Yes, absolutely! This is a perfect make-ahead project. You can fully assemble the turkeys and store them in a single layer in a well-sealed, airtight container at room temperature for up to 3 days.
Q3: What is the best way to melt the chocolate so that it doesn’t seize or burn?
The microwave is a fantastic and easy tool for melting a small amount of chocolate chips. The key is to use a low power setting (or to do it in very short, 10- to 15-second intervals) and to stir the chocolate well between each interval. This ensures that the chocolate melts gently and evenly.
Q4: I don’t have a piping bag for the red frosting. What else can I use?
A small, resealable plastic bag (like a zip-top sandwich bag) is the perfect substitute! Simply spoon the red frosting into the bag, press it down into one of the bottom corners, and then use a pair of scissors to snip off a tiny, tiny piece of that corner. You can then gently squeeze the bag to pipe the frosting, just like you would with a real piping bag.
Q5: What is the best way to cut the candy corn to get the white tips?
The easiest way is to place the candy corn flat on a cutting board and use a small, sharp paring knife to carefully slice off just the white tip. Because the candy is small, this is a step that is best done by an adult.


