Introduction & Inspiration
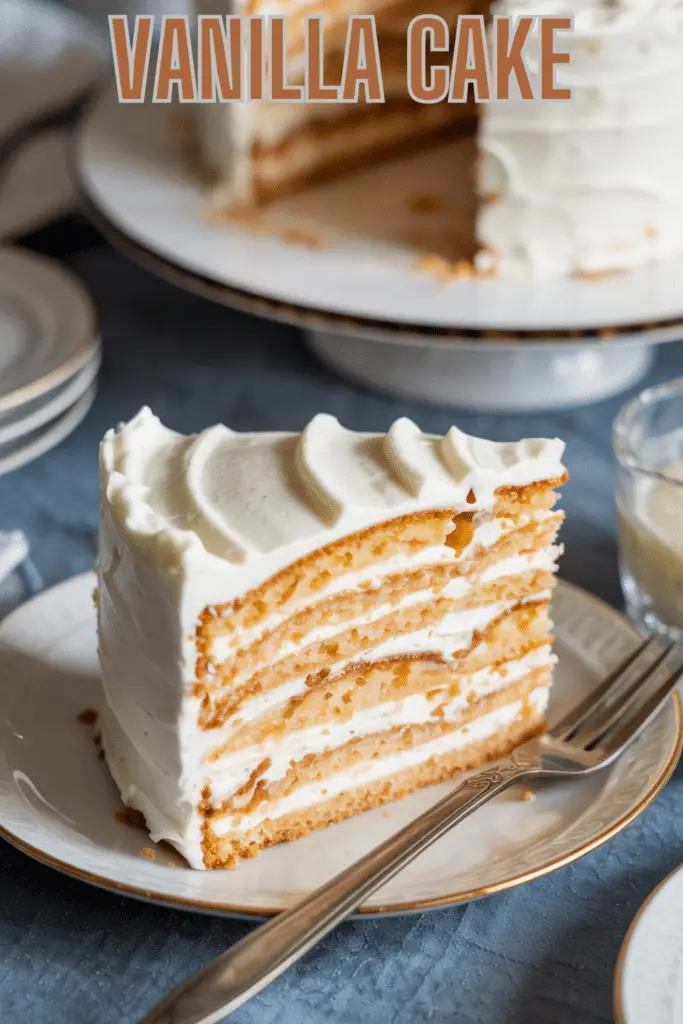
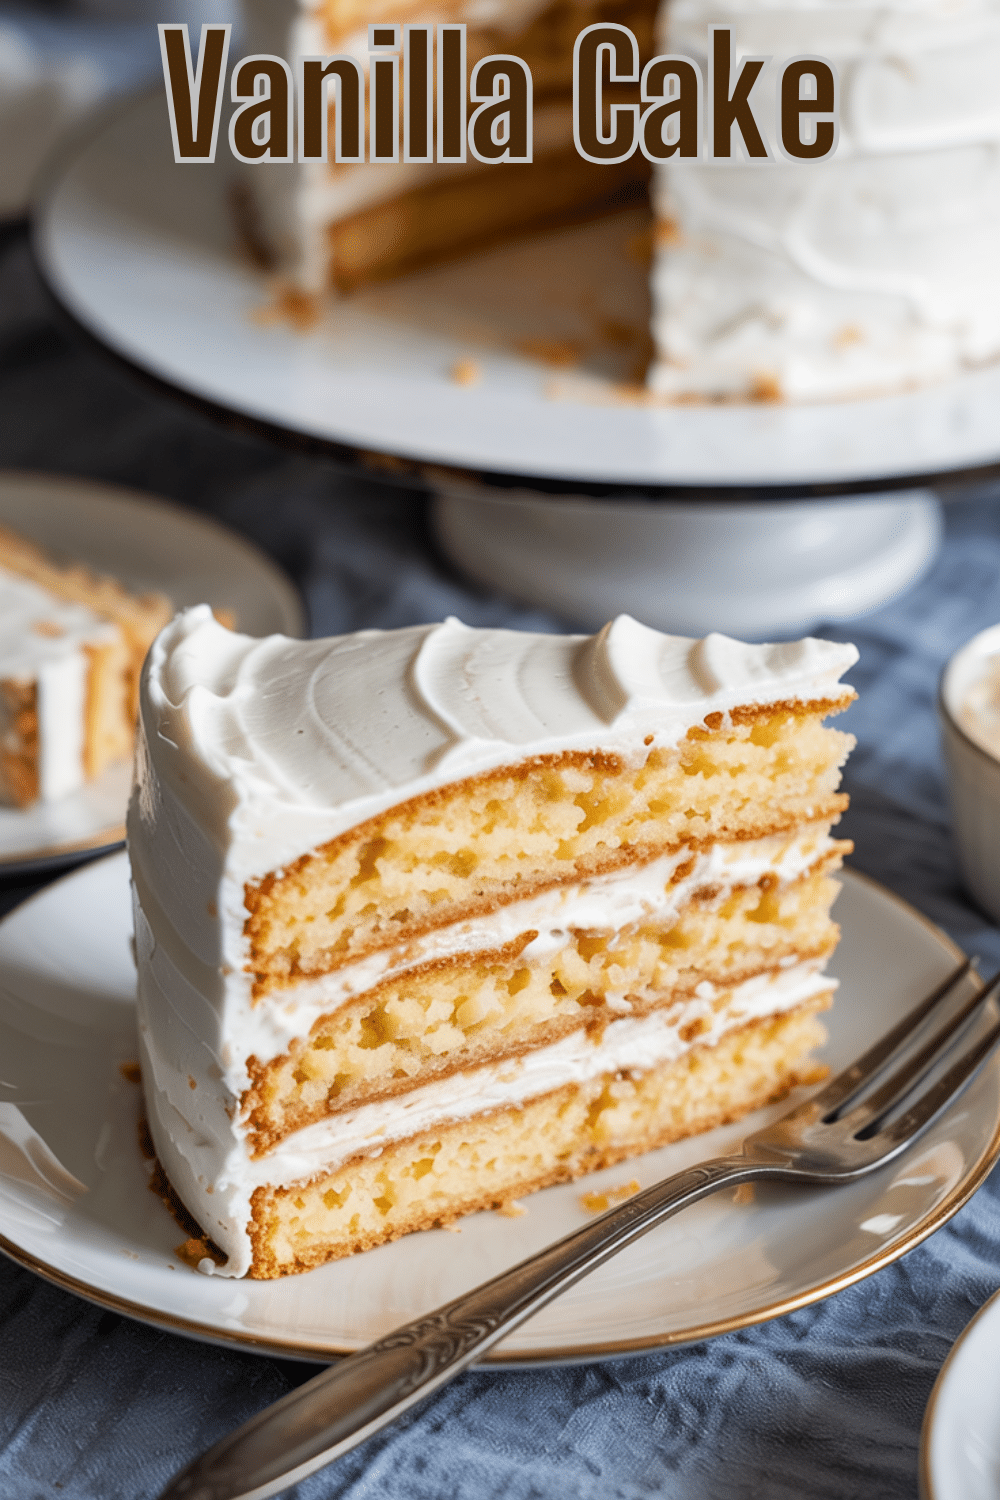
There’s something truly magical about a perfectly baked vanilla cake. It’s a timeless classic, the foundation for countless celebrations, from birthdays to weddings. This particular Vanilla Cake recipe, with its emphasis on specific techniques like extended creaming and alternating additions, plus the use of both butter and oil, promised a truly exceptional result – moist, flavorful, and with a perfect crumb. The detailed instructions for a luscious vanilla bean buttercream, including how to achieve a smooth finish and pipe beautiful rosettes, sealed the deal for me.
My inspiration came from the quest for that quintessential vanilla cake – one that’s not dry or bland, but rich, tender, and bursting with pure vanilla flavor. It needed to be sturdy enough to stack but delicate enough to melt in your mouth. I was looking for a go-to recipe that would be reliable and impressive every single time.
My goal was to find and share a recipe that explained why certain steps were important, guiding home bakers towards achieving bakery-quality results. This recipe, with its specific notes on room temperature ingredients, creaming times, and frosting techniques, felt like a masterclass in vanilla cake creation.
This isn’t just any vanilla cake; it feels like the vanilla cake recipe I’ve been searching for.
Nostalgic Appeal
Vanilla cake is the epitome of nostalgic desserts. It’s the flavor of countless childhood birthday parties, simple after-school treats, and comforting family gatherings. The aroma of vanilla baking is universally heartwarming and instantly brings back happy memories.
This recipe, while detailed, embraces classic techniques like creaming butter and sugar and alternating wet and dry ingredients, connecting us to traditional home baking methods. The use of buttermilk also adds a slightly old-fashioned touch, known for creating tender baked goods.
The simple elegance of a beautifully frosted vanilla cake, whether adorned with sprinkles or elegant rosettes as suggested here, is timeless. It’s a dessert that feels both celebratory and comforting, suitable for grand occasions and simple moments alike.
Making a vanilla cake from scratch, especially one with such attention to detail, feels like participating in a cherished culinary tradition, creating something wholesome and universally loved.
Homemade Focus
This Vanilla Cake recipe is a wonderful example of the rewards of dedicated homemade baking. It moves beyond basic mixing, emphasizing techniques like extended creaming, using room temperature ingredients, and alternating additions to achieve a superior texture and crumb. This attention to detail is what sets exceptional homemade cakes apart.
I truly appreciate recipes that explain the “why” behind the steps. Knowing that creaming the butter and sugar until “very fluffy” incorporates air for lightness, or that room temperature ingredients emulsify better for a smoother batter, empowers the home baker. This recipe provides that insight.
Furthermore, making the vanilla bean buttercream from scratch is crucial. Using real vanilla bean paste (or seeds) elevates the flavor far beyond standard vanilla extract, creating a frosting that’s rich, aromatic, and visually appealing with those tiny black specks. The detailed instructions for achieving a smooth, spreadable consistency ensure a professional finish.
From carefully preparing the pans to piping the final rosette, every step contributes to a final product that is undeniably homemade and crafted with care – a true labor of love that tastes exponentially better for it.
Flavor Goal
The primary flavor goal of this Vanilla Cake is a rich, pure, and prominent vanilla flavor, supported by a moist, tender, and slightly dense (in a good way!) crumb. It aims for a perfect balance of sweetness, richness, and vanilla aroma, complemented by a similarly flavorful buttercream.
The cake batter achieves this through a combination of unsalted butter (for flavor) and vegetable oil (for moisture), ensuring the cake is tender and stays moist for days. The extra egg yolks add richness and color. Buttermilk contributes a subtle tang that balances the sweetness and tenderizes the crumb. Using vanilla bean paste (or seeds) provides a deep, authentic vanilla flavor.
The frosting echoes this commitment to vanilla, using vanilla bean paste again for intense flavor. The base of butter provides richness, while the sifted powdered sugar ensures smoothness. Heavy cream adjusts the consistency to perfectly spreadable or pipeable.
The overall effect is a sophisticated yet comforting vanilla cake experience – intensely vanilla, incredibly moist, and luxuriously frosted. It’s the quintessential vanilla cake, perfected.
Ingredient Insights
Let’s delve into the ingredients for this exquisite cake:
For the Cake:
- Butter and Flour: For properly preparing the cake tins, ensuring easy release.
- Unsalted Butter, softened: Provides flavor and richness, and aids in creaming for a light texture. Room temperature is key.
- Granulated Sugar: Sweetens the cake and helps create a tender crumb through the creaming process.
- Eggs and Egg Yolks, room temperature: Add structure, richness, moisture, and color. Room temperature helps them incorporate smoothly.
- Buttermilk, room temperature: Adds moisture and a slight tang, and reacts with the baking soda for leavening. Room temperature is important for emulsion.
- Vegetable Oil: Contributes significant moisture, ensuring a tender cake that doesn’t dry out quickly.
- Vanilla Bean Paste (or seeds from 1 vanilla bean): Provides intense, authentic vanilla flavor and visual appeal.
- All-Purpose Flour: The main structural component.
- Baking Powder and Baking Soda: Chemical leaveners that give the cake its rise.
- Salt: Balances sweetness and enhances overall flavor.
For the Frosting:
- Unsalted Butter, softened: The rich base of the buttercream.
- Powdered Sugar, sifted: Sweetens and provides the bulk/structure. Sifting removes lumps for a smooth finish.
- Pinch of Salt: Balances the sweetness.
- Vanilla Bean Paste (or seeds from 1 vanilla bean): Reinforces the vanilla theme with intense flavor.
- Heavy Cream: Adjusts consistency and adds richness.
Using high-quality ingredients, especially the butter and vanilla bean paste, will make a noticeable difference.
Essential Equipment
You’ll need standard cake-baking equipment:
- Two 9-inch round cake pans (with high sides) or three 8-inch round cake pans (with high sides): The recipe offers flexibility.
- Parchment paper rounds: Essential for preventing sticking on the bottom.
- Stand mixer (highly recommended) with paddle attachment (or a large bowl and a powerful hand mixer): Crucial for the extended creaming and beating required for both cake and frosting.
- Large bowls: For mixing components.
- Wire whisk: For combining dry ingredients.
- Rubber spatula: For scraping the bowl.
- Liquid measuring cup:
- Serrated knife: For leveling the cake layers.
- Plate or cake board: For assembly.
- Offset spatula (optional but helpful): For applying the crumb coat and final frosting smoothly.
- Piping bag fitted with a star tip (optional): For decorative rosettes as described.
- Cooling racks: Essential for cooling the cakes properly.
- Measuring cups and spoons.
A stand mixer is particularly helpful for achieving the light and fluffy textures required.
List of Ingredients with Measurements
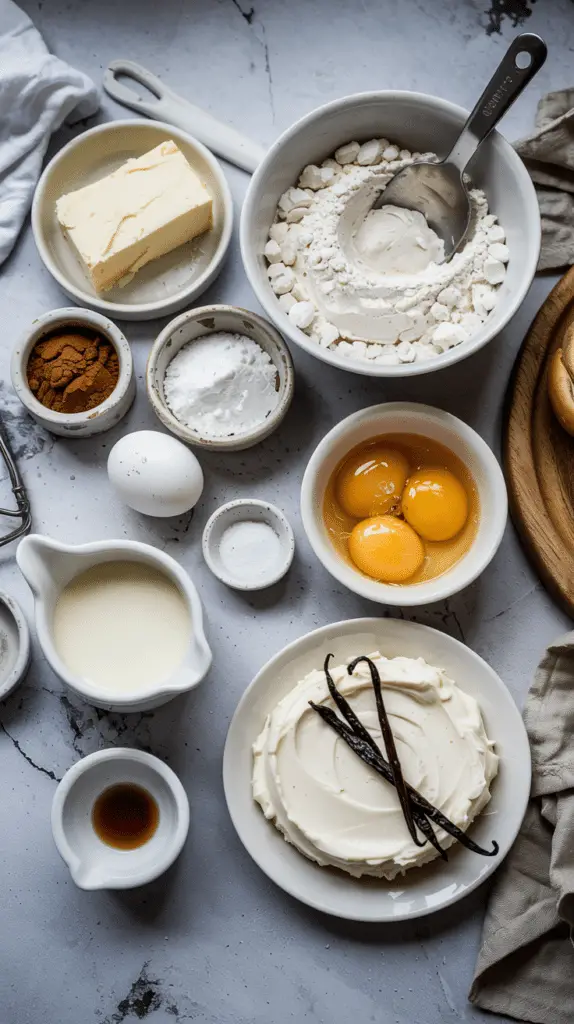
Here’s the complete list of ingredients, with precise measurements:
For the cake:
- 1-2 tablespoons each, butter and flour for preparing the cake tins
- 1 cup unsalted butter, softened to room temperature
- 2 cups granulated sugar
- 3 large eggs, at room temperature
- 3 large egg yolks, at room temperature
- 1 1/4 cups buttermilk, at room temperature
- 3 tablespoons vegetable oil
- 1 teaspoon vanilla bean paste (or use the seeds from 1 vanilla bean)
- 3 1/4 cups all-purpose flour
- 1 tablespoon baking powder
- 1 1/2 teaspoons baking soda
- 1 teaspoon salt
For the frosting:
- 2 cups unsalted butter, softened
- 6 to 7 cups powdered sugar, sifted to remove lumps
- a pinch of salt
- 2 teaspoons vanilla bean paste (or the seeds from one whole vanilla bean)
- 4 tablespoons heavy cream
These quantities create a generous two or three-layer cake with ample frosting.
Ensure all temperature-sensitive ingredients (butter, eggs, buttermilk) are truly at room temperature before starting.

Step-by-Step Instructions
Let’s break down this detailed process:
Make the Cake:
- Prepare Pans and Preheat Oven: Grease and flour two 9-inch round cake pans (with high sides) or three 8-inch round cake pans (with high sides). Line the bottoms with parchment paper rounds and grease/flour the parchment too. Preheat your oven to 325°F (165°C).
- Cream Butter and Sugar: In the bowl of your stand mixer (or large bowl with hand mixer), whip the softened butter and granulated sugar together on medium-high speed until very fluffy and creamy. (The recipe implies this takes time, aiming for dissolved sugar – likely 5-7 minutes).
- Add Eggs and Yolks: Add the eggs and egg yolks one at a time, mixing well after each addition. Scrape down the sides of the bowl regularly.
- Add Oil and Vanilla: Mix in the oil and vanilla bean paste on low speed until just combined.
- Prepare Dry and Wet: Measure the buttermilk into a liquid measuring cup and set aside. Sift the flour, baking powder, baking soda, and salt into a separate bowl and combine with a wire whisk.
- Alternate Additions: With the mixer running on low speed, add the dry ingredients and the buttermilk alternately to the butter mixture. Start with 1/3 of the dry ingredients, then half the buttermilk, another 1/3 dry, the remaining buttermilk, and finally the last 1/3 dry ingredients. Mix only until just combined after each addition.
- Final Mix: Turn the speed to medium-low and mix until the batter is smooth, about one minute. Do not overmix.
- Bake: Pour the batter evenly into the prepared cake pans. Bake at 325°F (165°C) for about 29-34 minutes, or until a toothpick inserted into the middle comes out clean.
- Cool: Cool the cakes in the pans on cooling racks for 5-7 minutes, then turn them out onto the racks to cool completely.
- Chill Layers: Once cool, wrap the cake layers individually in plastic wrap and refrigerate for at least 1 hour (or longer) before frosting. Chilled cakes are much easier to frost.
Make the Frosting:
- Beat Butter: Beat the softened butter in the mixer bowl on high speed until light, fluffy, and smooth.
- Add Powdered Sugar: Sift the powdered sugar. With the mixer on low, add it slowly, one cup at a time, mixing after each addition until incorporated.
- Add Flavor and Cream: Add the vanilla bean paste and salt. Slowly add the heavy cream one tablespoon at a time, mixing until incorporated and the frosting reaches a spreadable consistency.
- Final Whip: Mix the frosting on medium-high speed for 1-2 minutes until very smooth and spreadable.
Assemble and Decorate:
- Prepare Frosting: Reserve about 1 1/2 cups of frosting for the crumb coat. Place the rest in a piping bag fitted with a star tip (if making rosettes). Set aside.
- Level Cakes: Trim the cooled cake layers (if necessary) to level them using a serrated knife.
- First Layer: Place one cake layer, right side up, on a plate or cake board. Add a large dollop of frosting (from the main batch, not the crumb coat reserve) on top and spread it out evenly to the edges.
- Second Layer: Place the next cake layer on top (upside down for a flat top surface). If making a three-layer cake, repeat the frosting step. Place the final layer upside down.
- Crumb Coat: Add the reserved 1 1/2 cups of frosting to the top of the cake. Spread it thinly over the top and down the sides, smoothing it out to fill any gaps and create a smooth, thin layer. It’s okay if cake shows through.
- Chill Crumb Coat: Place the cake in the fridge to chill for about 45 minutes until the crumb coat is firm.
- Final Frosting (Rosettes): Remove the cake from the fridge. Using the piping bag with the star tip:
- Start piping rosettes on the side of the cake, beginning at the very bottom. Pipe a full row.
- Offset the second row so the rosettes fill the gaps above the first row. Continue up the sides.
- On top, pipe rosettes around the outside edge first, then work your way inward, offsetting rows to fill gaps. Pipe rosettes close together, ending the swirl of each rosette in a gap where the next one will start to hide the tail.
- (Alternative): If not piping rosettes, simply apply the remaining frosting smoothly over the chilled crumb coat using an offset spatula.
- Final Chill: Chill the finished cake for another 30 minutes to an hour to set the frosting.
- Serve: Let the cake sit at room temperature for about 15 minutes before slicing and serving (this allows the buttercream to soften slightly).
This detailed process ensures a beautiful and delicious cake!

Troubleshooting
Layer cakes and buttercream can sometimes be tricky. Here are potential issues:
- Problem: Cake is dry.
- Solution: Ensure accurate flour measurement (weighing is best). Don’t overbake – check with a toothpick starting at the minimum time. The oil and buttermilk should promote moisture.
- Problem: Cake layers domed significantly.
- Solution: This can happen. Use a serrated knife to level them before frosting. Using cake strips around the pans during baking can sometimes help promote even rising.
- Problem: Buttercream is too soft/melty.
- Solution: The butter might have been too warm, or the kitchen is hot. Chill the frosting bowl in the refrigerator for 10-15 minute intervals, beating briefly between chills, until it reaches a good consistency.
- Problem: Buttercream is grainy.
- Solution: Ensure the powdered sugar was sifted. Make sure the butter was properly softened and creamed initially. Beat thoroughly after adding the sugar.
- Problem: Crumb coat is mixing with the final frosting layer.
- Solution: Ensure the crumb coat was chilled until completely firm before applying the final layer of frosting.
Patience and proper temperatures are often key!
Tips and Variations
Let’s add some extra flair or adjust to preferences:
- Tip: Using vanilla bean paste provides superior flavor and beautiful specks in both cake and frosting. If substituting extract, use a high-quality pure vanilla extract.
- Variation: Add 1-2 teaspoons of lemon or orange zest to the cake batter for a subtle citrus note.
- Tip: If piping rosettes feels daunting, a smooth frosting finish decorated with sprinkles or chocolate shavings is also beautiful.
- Variation: Fold 1/2 cup of colorful sprinkles into the cake batter after mixing for a Funfetti vanilla cake.
- Tip: Ensure all dairy ingredients (butter, eggs, buttermilk, heavy cream) are at the specified temperature (room temp for cake, softened for frosting butter, cold for whipping cream if whipping separately) for best results.
- Variation: Fill between the layers with lemon curd or fruit preserves along with the buttercream for added flavor.
Make this classic cake your own!
Serving and Pairing Suggestions
This versatile Vanilla Cake is perfect for celebrating or just because.
Serving: Allow the cake to sit at room temperature for 15-30 minutes before slicing and serving for the best frosting texture. Use a sharp, thin knife, wiping it clean between slices.
Pairing:
- Ideal for birthdays, weddings, anniversaries, or any special occasion.
- Serve with a scoop of high-quality vanilla bean or strawberry ice cream.
- Fresh berries (strawberries, raspberries) provide a lovely contrast.
- Perfect with coffee, tea, milk, or even a glass of champagne for a celebration.
It’s a universally loved flavor profile.
Nutritional Information
This is a rich, buttery cake with a generous amount of frosting. Nutritional information is approximate and depends on slice size and whether 2 or 3 layers are used. A slice (assuming 12-16 slices from the full recipe) might contain:
- Calories: 500-700+
- Fat: 30-45+ grams
- Saturated Fat: 18-28+ grams
- Cholesterol: 100-150+ mg
- Sodium: 250-400 mg
- Total Carbs.: 60-80+ grams
- Dietary Fiber: 1-2 grams
- Sugars: 45-60+ grams
- Protein: 5-8 grams
This is a decadent cake, designed for indulgence and special occasions. Enjoy in moderation!
PrintVanilla Cake
Bake the perfect Vanilla Cake with this detailed recipe! Features a moist, rich crumb using butter and oil, extra yolks, and a luscious Vanilla Bean Buttercream.
Ingredients
Here’s the complete list of ingredients, with precise measurements:
For the cake:
- 1-2 tablespoons each, butter and flour for preparing the cake tins
- 1 cup unsalted butter, softened to room temperature
- 2 cups granulated sugar
- 3 large eggs, at room temperature
- 3 large egg yolks, at room temperature
- 1 1/4 cups buttermilk, at room temperature
- 3 tablespoons vegetable oil
- 1 teaspoon vanilla bean paste (or use the seeds from 1 vanilla bean)
- 3 1/4 cups all-purpose flour
- 1 tablespoon baking powder
- 1 1/2 teaspoons baking soda
- 1 teaspoon salt
For the frosting:
- 2 cups unsalted butter, softened
- 6 to 7 cups powdered sugar, sifted to remove lumps
- a pinch of salt
- 2 teaspoons vanilla bean paste (or the seeds from one whole vanilla bean)
- 4 tablespoons heavy cream
These quantities create a generous two or three-layer cake with ample frosting.
Ensure all temperature-sensitive ingredients (butter, eggs, buttermilk) are truly at room temperature before starting.
Instructions
Let’s break down this detailed process:
Make the Cake:
- Prepare Pans and Preheat Oven: Grease and flour two 9-inch round cake pans (with high sides) or three 8-inch round cake pans (with high sides). Line the bottoms with parchment paper rounds and grease/flour the parchment too. Preheat your oven to 325°F (165°C).
- Cream Butter and Sugar: In the bowl of your stand mixer (or large bowl with hand mixer), whip the softened butter and granulated sugar together on medium-high speed until very fluffy and creamy. (The recipe implies this takes time, aiming for dissolved sugar – likely 5-7 minutes).
- Add Eggs and Yolks: Add the eggs and egg yolks one at a time, mixing well after each addition. Scrape down the sides of the bowl regularly.
- Add Oil and Vanilla: Mix in the oil and vanilla bean paste on low speed until just combined.
- Prepare Dry and Wet: Measure the buttermilk into a liquid measuring cup and set aside. Sift the flour, baking powder, baking soda, and salt into a separate bowl and combine with a wire whisk.
- Alternate Additions: With the mixer running on low speed, add the dry ingredients and the buttermilk alternately to the butter mixture. Start with 1/3 of the dry ingredients, then half the buttermilk, another 1/3 dry, the remaining buttermilk, and finally the last 1/3 dry ingredients. Mix only until just combined after each addition.
- Final Mix: Turn the speed to medium-low and mix until the batter is smooth, about one minute. Do not overmix.
- Bake: Pour the batter evenly into the prepared cake pans. Bake at 325°F (165°C) for about 29-34 minutes, or until a toothpick inserted into the middle comes out clean.
- Cool: Cool the cakes in the pans on cooling racks for 5-7 minutes, then turn them out onto the racks to cool completely.
- Chill Layers: Once cool, wrap the cake layers individually in plastic wrap and refrigerate for at least 1 hour (or longer) before frosting. Chilled cakes are much easier to frost.
Make the Frosting:
- Beat Butter: Beat the softened butter in the mixer bowl on high speed until light, fluffy, and smooth.
- Add Powdered Sugar: Sift the powdered sugar. With the mixer on low, add it slowly, one cup at a time, mixing after each addition until incorporated.
- Add Flavor and Cream: Add the vanilla bean paste and salt. Slowly add the heavy cream one tablespoon at a time, mixing until incorporated and the frosting reaches a spreadable consistency.
- Final Whip: Mix the frosting on medium-high speed for 1-2 minutes until very smooth and spreadable.
Assemble and Decorate:
- Prepare Frosting: Reserve about 1 1/2 cups of frosting for the crumb coat. Place the rest in a piping bag fitted with a star tip (if making rosettes). Set aside.
- Level Cakes: Trim the cooled cake layers (if necessary) to level them using a serrated knife.
- First Layer: Place one cake layer, right side up, on a plate or cake board. Add a large dollop of frosting (from the main batch, not the crumb coat reserve) on top and spread it out evenly to the edges.
- Second Layer: Place the next cake layer on top (upside down for a flat top surface). If making a three-layer cake, repeat the frosting step. Place the final layer upside down.
- Crumb Coat: Add the reserved 1 1/2 cups of frosting to the top of the cake. Spread it thinly over the top and down the sides, smoothing it out to fill any gaps and create a smooth, thin layer. It’s okay if cake shows through.
- Chill Crumb Coat: Place the cake in the fridge to chill for about 45 minutes until the crumb coat is firm.
- Final Frosting (Rosettes): Remove the cake from the fridge. Using the piping bag with the star tip:
- Start piping rosettes on the side of the cake, beginning at the very bottom. Pipe a full row.
- Offset the second row so the rosettes fill the gaps above the first row. Continue up the sides.
- On top, pipe rosettes around the outside edge first, then work your way inward, offsetting rows to fill gaps. Pipe rosettes close together, ending the swirl of each rosette in a gap where the next one will start to hide the tail.
- (Alternative): If not piping rosettes, simply apply the remaining frosting smoothly over the chilled crumb coat using an offset spatula.
- Final Chill: Chill the finished cake for another 30 minutes to an hour to set the frosting.
- Serve: Let the cake sit at room temperature for about 15 minutes before slicing and serving (this allows the buttercream to soften slightly).
This detailed process ensures a beautiful and delicious cake!
Recipe Summary and Q&A
Let’s conclude with a quick recap and common questions:
Recipe Summary:
This Vanilla Cake recipe yields a moist, tender, and richly flavored vanilla layer cake using both butter and oil, extra egg yolks, and buttermilk. It’s paired with a luscious vanilla bean buttercream frosting. Detailed instructions are provided for assembly, including a crumb coat and optional rosette piping.
Q&A:
Q: Can I make this cake ahead of time? A: Yes. Bake layers up to 2 days ahead (refrigerate wrapped) or freeze up to 3 months. Make frosting up to 1 week ahead (refrigerate, bring to room temp and re-whip). Assemble the cake up to 24 hours before serving (store in fridge).
Q: How should I store the finished cake? A: Store covered in the refrigerator. Let it sit at room temperature for 15-30 minutes before serving for the best frosting texture.
Q: Can I use all butter instead of butter and oil in the cake? A: You can, but substituting the oil with more butter might result in a slightly less moist cake. The oil contributes significantly to the moistness.
Q: I don’t have vanilla bean paste. How much extract should I use? A: Use the same amount of high-quality pure vanilla extract (1 tsp for cake, 2 tsp for frosting). The flavor won’t be quite as intense or visually speckled.
Q: Can I make this gluten-free? A: Yes, substitute the all-purpose flour with a good quality measure-for-measure gluten-free baking blend that includes xanthan gum.
I hope this detailed guide helps you create an absolutely perfect Vanilla Cake! It’s a fantastic recipe that, while requiring attention to detail, delivers truly delicious results. Happy baking!
Did Our Recipe Hit The Spot?
There are no reviews yet. Be the first one to write one.


