Are you ready to bake a truly stunning, European-style tart that looks like it came from the window of a high-end patisserie? A sophisticated dessert that is guaranteed to be the show-stopping finale of your next holiday meal or special dinner party? This incredible, from-scratch Pear-Walnut Chocolate Tart is a masterpiece of textures and flavors that is sure to impress.
This isn’t just a recipe; it’s your guide to creating an unforgettable gourmet dessert. This tart is a symphony of four perfect components: a flaky, buttery crust, a rich and creamy toasted walnut filling, tender and sweet poached pears, and decadent pockets of rich, melted chocolate. While it has several components, our simple make-ahead plan makes this impressive project completely stress-free and achievable for any home baker.
Table of Contents
Table of Contents
Recipe Overview: A Sophisticated Holiday Showstopper
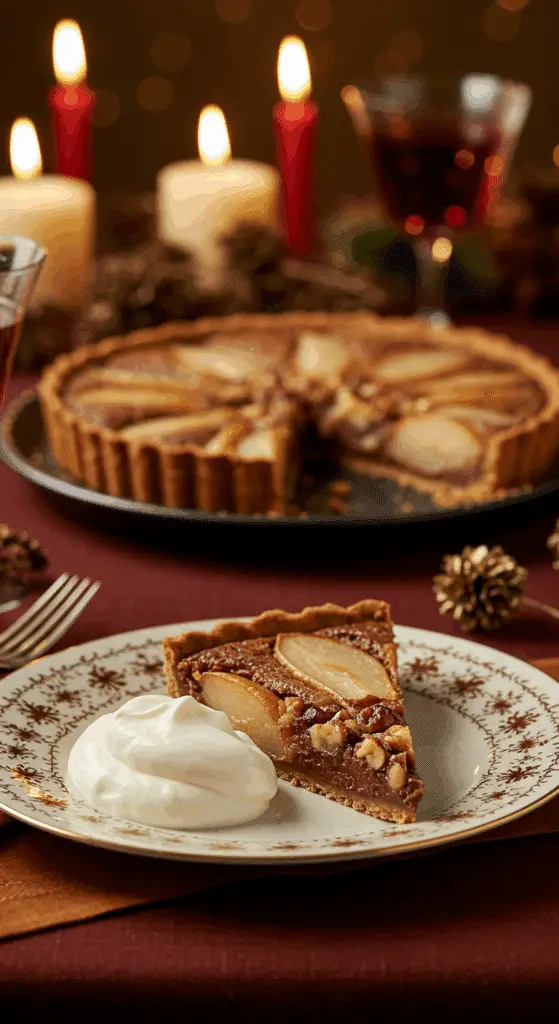
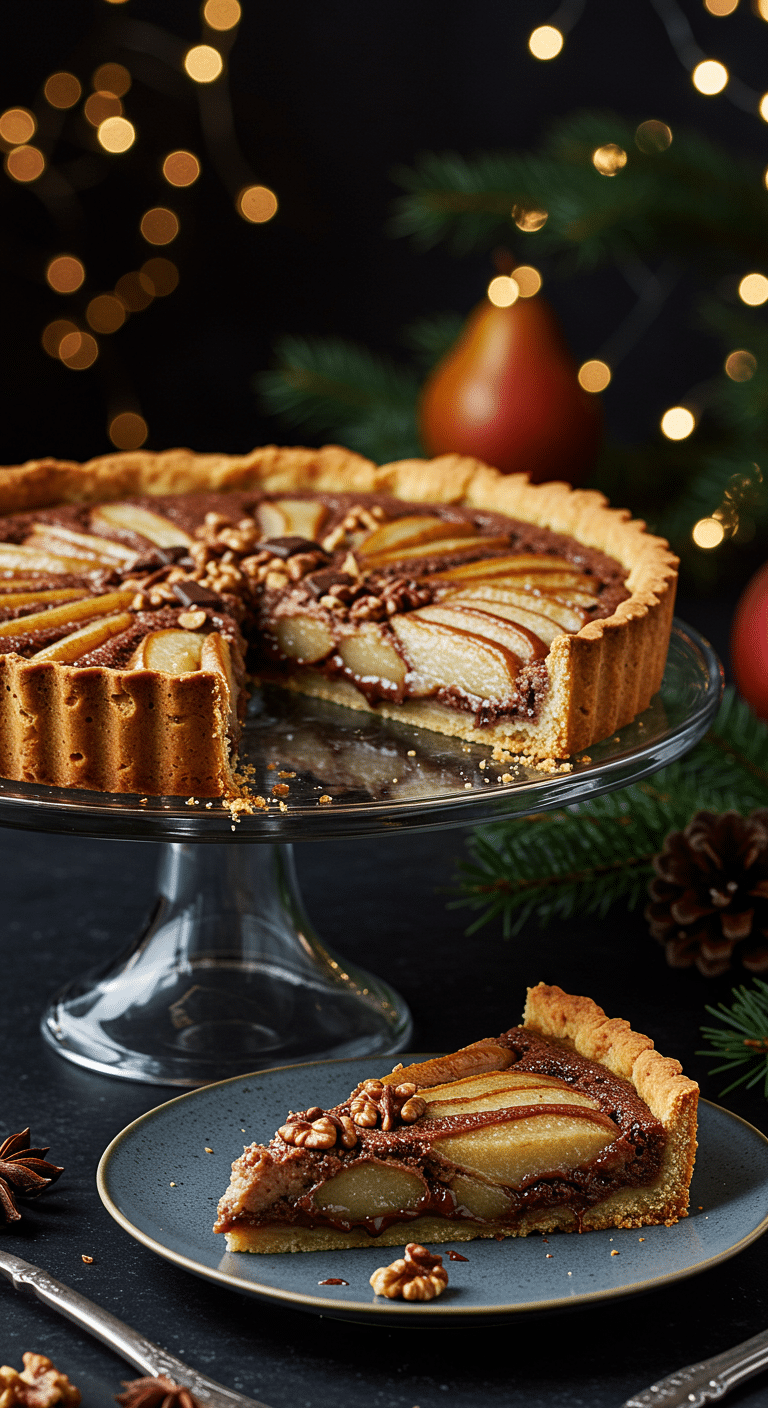
What makes this Pear-Walnut Chocolate Tart so spectacular is its incredible, multi-layered combination of sophisticated flavors and textures. The foundation is a crisp, fully blind-baked, from-scratch pie crust. This is filled with a unique and delicious creamy filling made from toasted walnuts—a wonderful twist on a classic almond frangipane. The filling is then studded with tender, sweet, poached pear chunks and rich, semi-sweet chocolate. It’s the ultimate make-ahead centerpiece for a truly special occasion.
| Metric | Time / Level |
| Total Time | 4 hours (includes chilling and cooling) |
| Active Prep Time | 1 hour |
| Difficulty Level | Intermediate |
| Servings | 8-10 |
Your Holiday Baking Game Plan (Make-Ahead Schedule)
The secret to this seemingly complex dessert is to make it in easy, manageable stages. This is the perfect timeline for a stress-free holiday.
- Up to 3 Days Ahead: Make the pie dough, wrap it tightly, and store it in the refrigerator. You can also toast the walnuts.
- Up to 2 Days Ahead: Prepare the creamy walnut filling and store it in an airtight container in the refrigerator. You can also prepare the poached pears and store them in their syrup in the refrigerator.
- 1 Day Before Serving: Blind-bake your pie crust. Let it cool completely.
- On Serving Day: Assemble the tart with your pre-made components, give it its final bake, and serve fresh and warm!
The Essential Ingredients for This Gourmet Tart
This recipe is built from three delicious, from-scratch components.
- The Flaky Pie Crust: The rich and tender foundation.
- The Fats (Butter & Shortening): This recipe uses a classic, foolproof blend for the best of both worlds. Cold unsalted butter provides a rich, delicious flavor, while cold vegetable shortening creates an incredibly tender and extra-flaky texture.
- The Creamy Toasted Walnut Filling: This is the unique, nutty, and sophisticated heart of our tart.
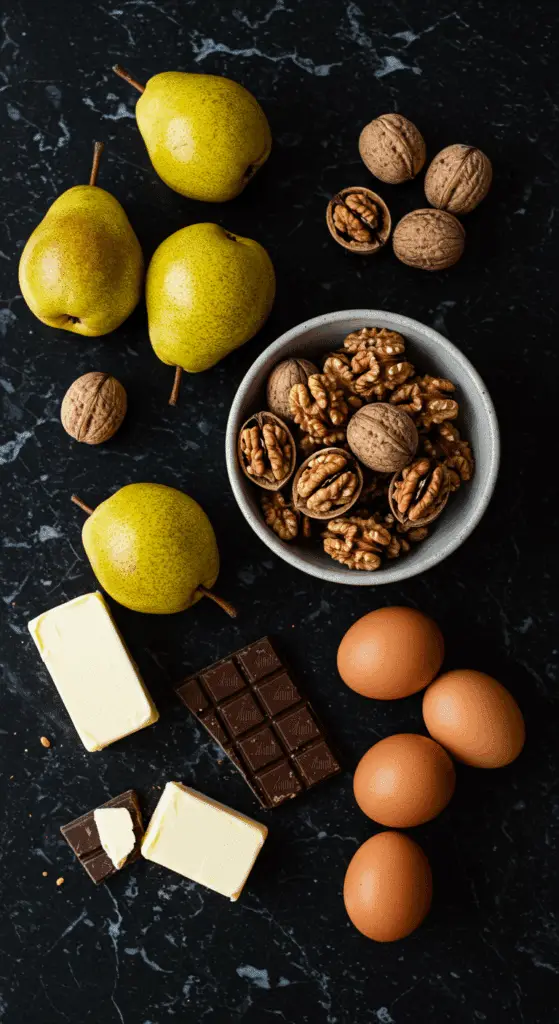
- Toasted Walnuts: This is the secret to the incredible, deep flavor of the filling. Toasting the walnuts in the oven for a few minutes before you grind them brings out their natural oils, making them much more fragrant, flavorful, and less bitter. It creates a wonderful, rich alternative to a classic almond frangipane.
- The Poached Pears & Chocolate:
- Firm Pears: It is essential to use a firm baking pear that will hold its shape during poaching and baking and not turn to mush. A firm, sweet, and fragrant pear like a Bosc, Bartlett, or Anjou is a perfect choice.
- Chocolate Chunks: Using good-quality semisweet or milk chocolate chunks (or coarsely chopping a chocolate bar) will create beautiful, decadent, molten pockets of chocolate throughout the creamy filling.

Step-by-Step to a Show-Stopping Tart
Let’s break this incredible project down into simple, manageable parts.
Part 1: The Flaky Pie Crust & Blind-Baking
Step 1: In the bowl of a food processor, pulse the 1 1/4 cups of all-purpose flour, the 3 tablespoons of cold shortening, the 1 tablespoon of granulated sugar, and the 1/2 teaspoon of salt to combine. Add the 5 tablespoons of cold, cubed butter and pulse until you have pea-sized pieces.
Step 2: Drizzle in 2 tablespoons of cold water and pulse until the dough just comes together. Turn the dough out onto a piece of plastic wrap, shape it into a flat disc, and wrap it tightly. Refrigerate for at least 1 hour.
Step 3: Preheat your oven to 350°F (175°C). Roll out your chilled dough into a 12-inch round. Ease the dough into a 9-inch springform pan, pressing it into the bottom and 2 inches up the sides. Chill for 30 minutes.
Step 4 (Blind Bake the Crust): Line the chilled crust with foil and fill it with pie weights or dried beans. Bake for 20 minutes. Carefully remove the foil and weights and continue to bake for another 10 to 15 minutes, until the crust is a deep golden brown all over. Let the crust cool completely on a wire rack.
Part 2: The Creamy Toasted Walnut Filling & Poached Pears
Step 1: Spread the 1 1/2 cups of walnuts on a baking sheet and toast in the 350°F oven for 8 to 10 minutes, until they are golden and fragrant. Let them cool completely.
Step 2: In a clean food processor, add the cooled, toasted walnuts, the 6 tablespoons of room temperature butter, the 1 cup of confectioners’ sugar, the 1 large egg, the 1/4 teaspoon of ground cinnamon, and the pinch of salt. Process until the mixture forms a creamy, smooth paste.
Step 3: To poach the pears, combine 2 cups of water and the 1/2 cup of granulated sugar in a medium saucepan and bring it to a simmer over medium-high heat.
Step 4: Peel the pear and cut it into 3/4-inch chunks. Add the pear chunks to the simmering syrup and cook for 8 to 10 minutes, until they are just tender. Drain the pears and spread them on paper towels to cool completely.
Part 3: Assembling and Baking Your Masterpiece Tart
Step 1: Spread the prepared walnut filling evenly in your completely cooled, blind-baked crust.
Step 2: Gently press the cooled, poached pear chunks and the 1/3 cup of chocolate chunks into the surface of the walnut filling.
Step 3: Bake at 350°F until the walnut filling is puffed up, golden brown, and a toothpick inserted into the center of the filling comes out clean. This will take about 30 to 40 minutes.
Step 4: Transfer the finished tart to a wire rack and let it cool completely before releasing it from the springform pan and slicing.

The Best Elegant Pear-Walnut Chocolate Tart
A sophisticated, from-scratch tart featuring a homemade pie crust, a creamy walnut filling, and chunks of poached pear and chocolate. The flaky crust, made with both butter and shortening, is fully blind-baked in a springform pan. The filling is a rich, frangipane-style paste made from toasted walnuts, butter, and sugar. Chunks of fresh pear, which have been poached in a simple syrup until tender, are pressed into the walnut filling along with pieces of chocolate. The entire tart is then baked until puffed and golden.
- Prep Time: 35 minutes
- Cook Time: 1 hour 25 minutes
- Total Time: 4 hours 30 minutes (includes chilling and cooling time)
- Yield: 8-10 servings
- Category: Dessert
- Method: Baking
- Cuisine: French
- Diet: Vegetarian
Ingredients
- For the Crust:
- 1 1/4 cups all-purpose flour, plus more for dusting
- 3 tablespoons cold vegetable shortening
- 1 tablespoon granulated sugar
- 1/2 teaspoon salt
- 5 tablespoons cold unsalted butter, cut into small pieces
- 2 to 3 tablespoons cold water
- For the Filling:
- 1 1/2 cups walnuts
- 6 tablespoons unsalted butter, at room temperature
- 1 cup confectioners’ sugar
- 1 large egg
- 1/4 teaspoon ground cinnamon
- Pinch of salt
- 1/2 cup granulated sugar
- 1 large firm pear (such as Bosc, Bartlett or Anjou)
- 1/3 cup semisweet or milk chocolate chunks
Instructions
- Make the Crust: In a food processor, pulse the flour, shortening, granulated sugar, and salt. Add the cold butter and pulse until pea-sized pieces form. Drizzle in 2 tablespoons of cold water and pulse until the dough just comes together.
- Form the dough into a disk, wrap tightly in plastic, and refrigerate for at least 1 hour.
- Preheat the oven to 350°F. Roll the chilled dough into a 12-inch round and ease it into a 9-inch springform pan, pressing it 2 inches up the sides. Chill for 30 minutes.
- Line the crust with foil and fill with pie weights or dried beans. Bake for 20 minutes. Remove the foil and weights and bake for another 10 to 15 minutes, until golden. Let the crust cool completely.
- Make the Filling: While the crust cools, toast the walnuts on a baking sheet at 350°F for 8 to 10 minutes; let them cool.
- In a food processor, pulse the toasted walnuts, room-temperature butter, confectioners’ sugar, egg, cinnamon, and a pinch of salt to form a creamy paste.
- In a medium saucepan, bring 2 cups of water and the granulated sugar to a simmer. Peel, core, and cut the pear into 3/4-inch chunks. Add the pear to the saucepan and simmer for 8 to 10 minutes, until tender. Drain the pears and let them cool completely.
- Assemble and Bake: Spread the walnut filling evenly in the cooled crust. Press the cooled pear chunks and the chocolate chunks into the filling.
- Bake at 350°F for 30 to 40 minutes, until the filling is puffed and golden and a toothpick inserted into the center comes out clean.
- Let the tart cool completely on a wire rack before serving.
Notes
- This pie requires multiple chilling and cooling steps for the dough, filling, and final tart, so it’s a great make-ahead project for a special occasion.
- Fully blind-baking the crust is a crucial step to ensure it stays crisp beneath the moist filling.
- Toasting the walnuts before making the filling deepens their nutty flavor.
Storage and Make-Ahead Tips
This elegant tart is a fantastic dessert to prepare for a dinner party.
- Make-Ahead: As outlined in our “Game Plan” above, this is the perfect dessert to make in stages over a few days to make your holiday baking completely stress-free.
- Storage: The finished tart is at its best on the day it is made, but it will keep, covered, at room temperature for up to 2 days, or in the refrigerator for up to 4 days.
For more recipe follow my Pinterest account
Creative Recipe Variations
- Classic Almond Frangipane: For a more traditional, classic flavor, you can substitute the 1 1/2 cups of walnuts in the filling with an equal amount of blanched, sliced almonds.
- Add a Sophisticated Liqueur: For an extra layer of delicious, grown-up flavor, you can add 1 tablespoon of a pear liqueur (like Poire Williams), an almond liqueur (like Amaretto), or a dark rum to the walnut filling.
- Use a Different Fall Fruit: This beautiful tart is also absolutely stunning when made with tender, poached apples or even fresh figs instead of the pears.
Enjoy Your Elegant, European-Style Dessert!
You’ve just created a truly special, show-stopping dessert that is the very definition of rustic elegance. This Pear-Walnut Chocolate Tart is a perfect symphony of flaky pastry, creamy nutty filling, and sweet, tender fruit with a hint of rich chocolate. It’s a rewarding and impressive project that proves that you can create a truly spectacular, patisserie-quality dessert right in your own kitchen.
We hope you enjoy every last, perfect, and delicious bite!
If you enjoyed making this recipe, please leave a comment below or share it with a friend who loves an easy, impressive dessert!
Frequently Asked Questions (FAQs)
Q1: What is a frangipane, and how is this walnut filling similar?
Frangipane is a classic, rich, and creamy pastry filling that is used in many French and Italian pastries. It is traditionally made from a simple blend of almond flour, butter, sugar, and eggs. This recipe’s creamy walnut filling is a wonderful and unique twist on that classic, using the same technique but substituting the almonds with toasted walnuts for a deeper, earthier, and more robustly nutty flavor.
Q2: Do I absolutely have to blind-bake the crust first?
Yes, for this style of tart, it is absolutely essential. The walnut filling is very rich and moist. By fully pre-baking the crust until it is a deep golden brown and completely crisp, you are creating a sealed, sturdy vessel that will stay perfectly crisp and will not become soggy after the tart has been filled and baked for a second time.
Q3: Can I make this tart ahead of time for a party?
Yes, this is a perfect make-ahead dessert! The absolute best method is to prepare all the components separately and store them as directed in the “Make-Ahead Game Plan” above. This allows you to do a quick, fresh assembly on the day of your event, which will give you the best final texture with the crispiest crust.
Q4: What are the best pears to use for poaching and baking?
For any baked or poached pear recipe, you want to use a firm pear that will hold its shape beautifully and not turn into a mushy mess. A firm, sweet, and fragrant pear like a Bosc, a firm Bartlett, or an Anjou, as the recipe suggests, are all perfect choices.
Q5: Can I use a regular pie pan instead of a springform pan?
You can, but a 9-inch springform pan or a 9-inch tart pan with a removable bottom is highly recommended. It will be much, much easier to cleanly release and present your beautiful, finished tart.


